
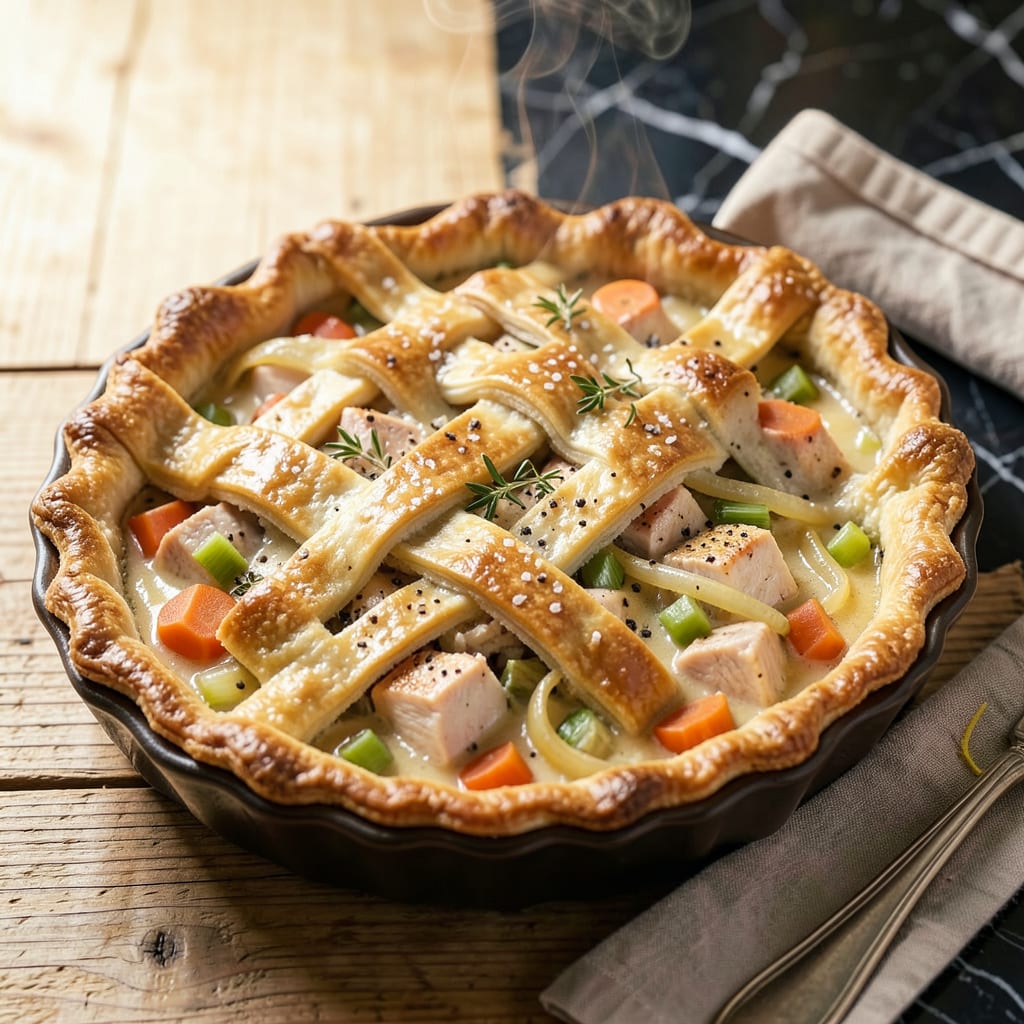
Few dishes deliver comfort like a perfectly baked chicken pot pie, where tender chicken and vegetables swim in a velvety sauce beneath a golden, flaky crust. This recipe transforms simple ingredients into a meal that feels like a warm embrace—ideal for family dinners or cozy weekends. The balance of creamy filling and crisp pastry makes every bite satisfying.
What sets this version apart is the attention to detail: a rich roux-based sauce that clings to the filling and a foolproof method for achieving that coveted crispy top crust without a soggy bottom. Whether using homemade or store-bought dough, the result is a dish that’s both impressive and deeply comforting. Ready to bring this classic to your table?
Ingredients for Chicken Pot Pie
This comforting classic relies on quality ingredients: tender chicken, seasonal vegetables, and a rich, velvety sauce encased in flaky pastry.
| Ingredient | Amount | Notes |
|---|---|---|
| Boneless, Skinless Chicken Breasts 🍗 | 1 ½ lb | Cut into 1-inch cubes |
| Unsalted Butter 🧈 | ½ cup | For roux and filling |
| All-Purpose Flour 🌾 | ½ cup | Divided for roux and thickening |
| Yellow Onion 🧅 | 1 whole | Finely diced for base flavor |
| Carrots 🥕 | 2 whole | Peeled and sliced 1/4-inch thick |
| Celery Stalks 🍃 | 2 whole | Diced for aromatic base |
| Frozen Peas 🌱 | 1 cup | No need to thaw |
| Chicken Broth 💧 | 2 ½ cups | Low-sodium preferred for control |
| Whole Milk 🥛 | ¾ cup | Full-fat for creamiest sauce |
| Heavy Cream 🥛 | ½ cup | For velvety sauce texture |
| Fresh Thyme Leaves 🌿 | 1 tbsp | Stripped from stems for freshness |
| Fresh Flat-Leaf Parsley 🌿 | 2 tbsp | Chopped for finishing garnish |
| Pie Crust Dough 🥧 | 2 sheets | Homemade or store-bought |
| Kosher Salt 🧂 | 1 ½ tsp | Divided for seasoning layers |
| Black Pepper 🌶️ | ½ tsp | Freshly ground for best flavor |
[recipeingredientscaler]
The chicken quality directly impacts texture—opt for air-chilled breasts from brands like Bell & Evans or Smart Chicken for superior moisture retention. For the crust, Pillsbury pie dough offers consistent flakiness, while homemade allows for customization. Use European-style butter (like Plugrá) for the roux; its higher fat content yields a richer sauce. Fresh thyme is non-negotiable for depth, though dried can substitute at one-third the volume (use Penzeys for potency).
Dairy substitutions require careful balance. Whole milk and heavy cream create the signature velvety texture, but half-and-half plus a splash of cream works in a pinch. For a lighter version, 2% milk with 2 tbsp cornstarch mimics thickness. Vegetable broth can replace chicken broth, though the flavor profile shifts slightly. Frozen mixed vegetables (peas/carrots/corn) streamline prep, but fresh carrots and celery deliver superior texture. Always use low-sodium broth to control seasoning.
Prepare components ahead for efficiency. The filling can be made 1 day in advance and refrigerated; the sauce may thicken slightly—adjust with broth when reheating. Unbaked pie assemblies freeze beautifully for up to 3 months (wrap tightly in foil). Baked pies keep 3-4 days refrigerated, though the crust loses crispness. Reheat individual portions in a 350°F oven for 15 minutes to restore texture.
Why You’ll Love This Recipe
- One-Pan Magic: I love that this comes together in a single skillet—no juggling pots or extra dishes. Sauté the chicken and onions, toss in the carrots, then let the butter-flour roux work its magic right there.
- That Golden Crust Moment: The buttery, flaky top layer cracking into the creamy chicken filling? Worth every minute. Honestly, the way the carrots soften just enough while the onions melt into the sauce—it’s the kind of comfort food that sticks with you.
- Weeknight Rescue: Between us, this is my “I-forgot-to-plan-dinner” lifesaver. Rotisserie chicken works in a pinch, and the whole thing bakes while I fold laundry (yes, even on a Tuesday night).
- Leftovers That Improve: The flavors deepen overnight, so lunch the next day tastes even better. My kids fight over the last slice, and I’ll be real: I’ve been known to hide a piece for myself.
Step-by-Step Instructions for Chicken Pot Pie
This method ensures a velvety filling encased in perfectly golden crust every time.
Step 1: Prepare the Chicken and Vegetables
Cut the 1.5 lb boneless, skinless chicken breasts into 1-inch cubes and season with ½ tsp kosher salt and ¼ tsp black pepper. Heat 2 tbsp unsalted butter in a large skillet over medium-high heat. Add the chicken and cook for 5-6 minutes, stirring occasionally, until the pieces are opaque throughout and lightly browned. Transfer to a plate and set aside.
In the same skillet, add the finely diced yellow onion, peeled and sliced carrots, and diced celery stalks. Cook over medium heat for 6-8 minutes, stirring occasionally, until the vegetables soften and the onion becomes translucent. Add the 1 tbsp fresh thyme leaves and cook for an additional 1 minute to release the herb’s aroma.
Step 2: Create the Creamy Filling
Melt the remaining 6 tbsp unsalted butter in the skillet over medium heat. Whisk in ¼ cup all-purpose flour to form a smooth paste, then cook for 2 minutes, stirring constantly, until the mixture turns a light golden color. This creates the roux base for your filling.
Gradually pour in the 2.5 cups chicken broth, whisking continuously to prevent lumps. Bring the mixture to a gentle simmer and cook for 3-4 minutes until it thickens enough to coat the back of a spoon. Stir in the 0.75 cup whole milk and 0.5 cup heavy cream, then return to a simmer. Add the cooked chicken, 1 cup frozen peas, and remaining 1 tsp kosher salt and ¼ tsp black pepper. Simmer for 3-4 minutes until the filling reaches a creamy, velvety consistency.
Step 3: Assemble and Bake the Pot Pie
Preheat your oven to 375°F. Unroll one pie crust dough sheet and press it into a 9-inch pie dish, allowing the edges to overhang slightly. Pour the warm chicken filling into the crust, spreading it evenly. Brush the overhanging edges with a bit of water to help seal the top crust.
Unroll the second pie crust dough sheet and place it over the filling. Trim any excess dough, then crimp the edges together with your fingers or a fork to create a tight seal. Cut 4-5 small slits in the top crust to allow steam to escape during baking. For extra flakiness, brush the top crust lightly with 1 tbsp whole milk (reserved from your measured amount).
Step 4: Bake to Golden Perfection
Place the pot pie on a baking sheet to catch any potential spills and bake at 375°F for 35-40 minutes. You’ll know it’s done when the crust turns a deep golden brown and the filling bubbles visibly through the slits. If the edges begin to brown too quickly, cover them loosely with aluminum foil after the first 20 minutes of baking.
Remove the pot pie from the oven and let it rest for 10-15 minutes before serving. This resting period allows the filling to set slightly, making it easier to slice. Garnish with the 2 tbsp chopped fresh flat-leaf parsley just before serving to add a bright, fresh contrast to the rich, creamy filling.
Dietary Considerations for This chicken pot pie
Gluten-Free Adaptation
For a gluten-free version, swap the all-purpose flour in the roux for 1:1 gluten-free baking flour (I recommend Bob’s Red Mill or King Arthur Measure for Measure). Use a gluten-free pie crust—Wholly Gluten-Free makes excellent pre-made options. The sauce will thicken slightly faster, so reduce the cooking time by 1-2 minutes to avoid over-thickening. 💪
Dairy-Free Modifications
Replace the whole milk and heavy cream with full-fat coconut milk (I prefer Thai Kitchen for its rich texture). Use vegan butter (like Miyoko’s) for the roux. The filling will have a subtle coconut note, which pairs beautifully with the thyme. For extra creaminess, add 2 tbsp nutritional yeast to mimic the depth of dairy.
Lower-Carb Option
Skip the traditional crust and create a cauliflower crust by mixing 2 cups riced cauliflower with 1 egg and ¼ cup almond flour. Press this mixture into the pie dish and bake at 400°F for 15 minutes before adding the filling. The texture won’t be flaky, but it holds up well and cuts carbs significantly.
Vegetarian Swap
Replace the chicken with 1.5 cups diced mushrooms (cremini or shiitake) and 1 cup cooked chickpeas for protein. Sauté the mushrooms until deeply browned to develop umami flavor. Use vegetable broth instead of chicken broth—I like Imagine No-Chicken Broth for its rich, savory taste.
Lighter Version Tips
Use low-fat milk instead of whole milk and replace the heavy cream with evaporated skim milk. Reduce the butter in the roux to 4 tbsp and add 1 tbsp olive oil for richness. The sauce will be slightly less decadent but still creamy. I often add extra thyme to compensate for the reduced fat’s flavor impact. 🌿
Allergy-Friendly Notes
For nut allergies, ensure your gluten-free flour blend is nut-free (check Cup4Cup for safe options). If avoiding soy, use coconut aminos instead of soy-based broths. Always verify that store-bought crusts are made in allergen-free facilities—Simple Mills offers nut-free, gluten-free pie crusts that work beautifully here.
Nutrition Facts
Frequently Asked Questions
Can I use rotisserie chicken instead of raw?
Shred 2 cups cooked rotisserie chicken to replace the raw chicken. Skip the initial cooking step—just add it to the sauce at the end to warm through. This shortcut saves 15-20 minutes of prep time.
Why is my filling too runny?
This usually happens if the roux didn’t cook long enough. Simmer the sauce for an extra 3-5 minutes after adding broth. If still thin, mix 1 tbsp cornstarch with cold water and stir in before baking. The oven heat will finish thickening it.
How do I prevent a soggy bottom crust?
Blind-bake the bottom crust for 8 minutes at 375°F before adding filling. Brush it with a beaten egg white to create a moisture barrier. Also, let the filling cool slightly before assembling to avoid steaming the crust.
Can I make this ahead of time?
Assemble the pie completely, then refrigerate for up to 12 hours before baking. For longer storage, freeze unbaked pies for 3 months. Bake directly from frozen, adding 10-15 minutes to the baking time.

- 6 Bean Chili Recipe: Hearty, Smoky Depth That Gets Richer Over Time - September 26, 2026
- 2 Gallon Red Sangria Recipe: Bold Spice and Fruit Fusion for Crowds - September 26, 2026
- 5 Star Apple Bread Recipe: Spiced Apple Swirl With Buttery Crust - September 26, 2026