
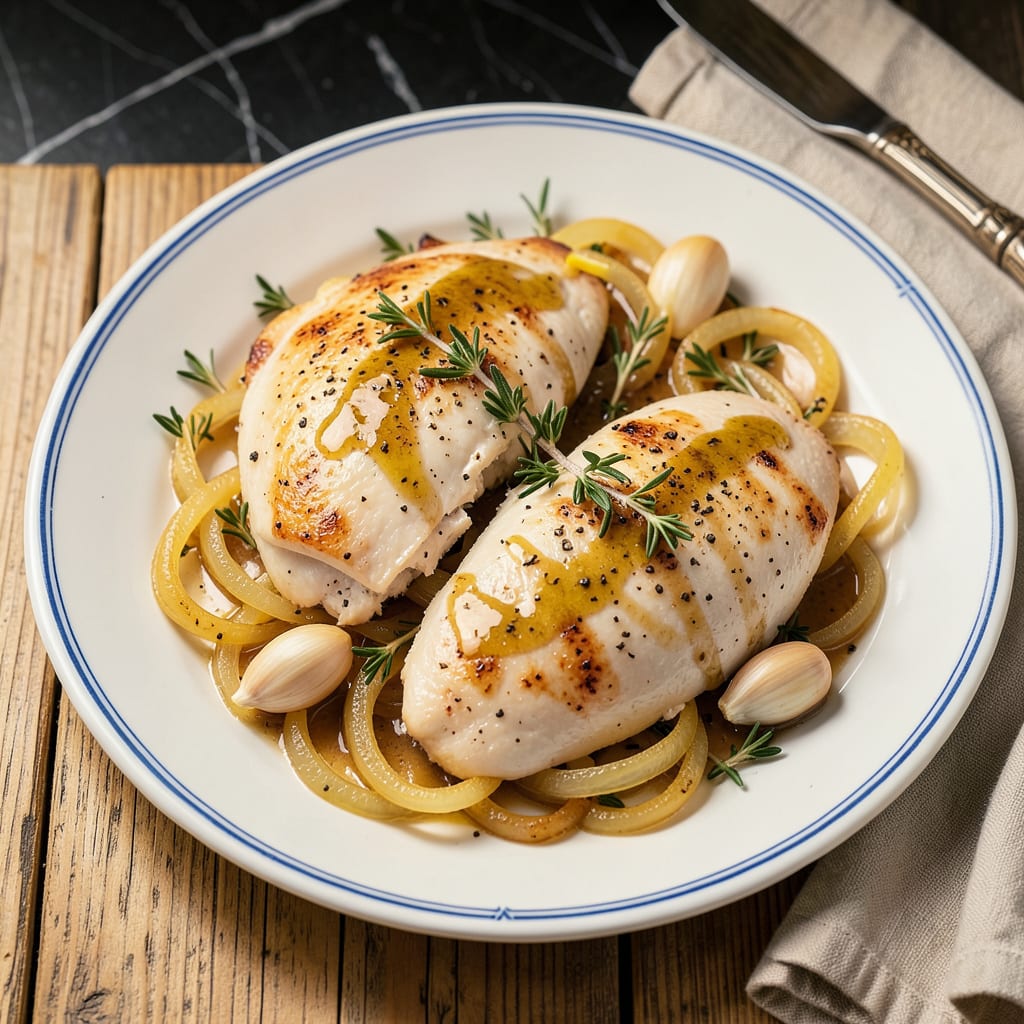
The crockpot transforms simple chicken breast into fall-apart tender meat with minimal effort—no dry, rubbery results here. This method guarantees juicy chicken every time by using a precise balance of moisture, seasoning, and low-and-slow cooking. Perfect for busy weeknights or meal prep, it delivers restaurant-quality texture without the fuss.
With just 10 minutes of prep, you’ll layer chicken with aromatic broth and seasonings, then let the crockpot work its magic. The result is tender, flavorful chicken that shreds effortlessly for tacos, salads, or sandwiches. No special skills required—just set it and forget it until dinner is ready.
Ingredients for Crockpot Chicken Breast
These twelve ingredients deliver restaurant-quality tenderness with minimal prep—juicy results guaranteed every time.
| Ingredient | Amount | Notes |
|---|---|---|
| Boneless, Skinless Chicken Breasts 🍗 | 2 lb | Uniform thickness for even cooking |
| Low-Sodium Chicken Broth 🍲 | 1 cup | Or substitute vegetable broth |
| Extra-Virgin Olive Oil 🫒 | 2 tbsp | Cold-pressed for optimal flavor |
| Garlic Cloves 🧄 | 6 cloves | Minced for even distribution |
| Yellow Onion 🧅 | 1 whole | Medium dice, approximately 1 cup |
| Dried Thyme 🌿 | 1 tsp | Or 1 tbsp fresh thyme leaves |
| Dried Rosemary 🌿 | 1 tsp | Crushed to release essential oils |
| Smoked Paprika 🌶️ | 1 tsp | Adds depth without heat |
| Kosher Salt 🧂 | 1 ½ tsp | Diamond Crystal preferred for precision |
| Freshly Ground Black Pepper 🌶️ | 1 tsp | Coarse grind for texture |
| Fresh Lemon Juice 🍋 | 2 tbsp | Brightens flavors at the end |
| Unsalted Butter 🧈 | 2 tbsp | Optional for finishing richness |
The chicken quality determines final texture. Opt for air-chilled breasts from reputable brands like Bell & Evans or Mary’s Free-Range—they retain moisture better than conventional. Uniform thickness is critical; pound thicker ends to 1-inch evenness. For the broth, low-sodium varieties (such as Pacific Foods or Swanson) allow precise seasoning control. Fresh garlic and onions should be firm with no sprouting—indicators of optimal flavor development during slow cooking.
Substitutions maintain integrity when executed properly. Vegetable broth replaces chicken broth at 1:1 ratio for dietary needs. Fresh herbs require triple the quantity of dried (3 tbsp fresh thyme = 1 tsp dried). Sweet paprika may substitute smoked, though depth diminishes. For acidity without lemon, apple cider vinegar works at half the volume. The finishing butter can be omitted or replaced with extra-virgin olive oil for dairy-free applications—though richness will differ slightly.
Storage preserves both safety and quality. Cooked chicken keeps 3-4 days refrigerated in airtight containers or 3 months frozen. Broth components (onions, garlic, herbs) should be prepped just before use to prevent oxidation. For make-ahead convenience, assemble all ingredients except chicken in the crockpot insert, refrigerate overnight, then add chicken and cook as directed. This maintains optimal moisture retention while streamlining morning preparation.
Why You’ll Love This Recipe
- Dump & Go: I love that this recipe is literally just tossing chicken breasts, broth, and a handful of garlic cloves into the crockpot—no pre-browning, no fancy prep. The onion slices? Just halve and throw them in whole (peeling is the hardest part).
- Garlic-Butter Vibes: Here’s what sold me—the slow cooker turns those simple garlic cloves and olive oil into this rich, golden broth that soaks into the chicken. It’s not fancy, but that first bite? Ridiculously good with just salt, pepper, and time doing the work.
- Meal Prep MVP: I make a double batch every Sunday—shred half for tacos, slice some for salads, and keep the rest whole for quick dinners. Honestly, it’s the only protein that stays moist enough to reheat without drying out.
- $5 Feeds Four: Between us, this is my “forgot to grocery shop” lifesaver. Four chicken breasts, a $1 onion, and pantry staples stretch into multiple meals—way cheaper than takeout, and the broth left behind? Free soup starter.
Step-by-Step Instructions for Crockpot Chicken Breast
This method guarantees perfectly tender chicken with minimal effort and maximum flavor.
Step 1: Prepare and Season the Chicken Breasts
Begin by patting the 2 lb boneless, skinless chicken breasts completely dry with paper towels. This ensures optimal browning and flavor absorption. Trim any excess fat and cut the breasts into uniform 1-inch thick pieces if they vary significantly in size. This promotes even cooking throughout the process.
In a small bowl, combine the 1.5 tsp kosher salt, 1 tsp freshly ground black pepper, 1 tsp dried thyme, 1 tsp dried rosemary, and 1 tsp smoked paprika. Rub this seasoning mixture evenly over all surfaces of the chicken, pressing gently to adhere. The smoked paprika adds depth without heat, while the herbs create a fragrant crust during cooking.
Step 2: Sear the Chicken for Enhanced Flavor
Heat the 2 tbsp extra-virgin olive oil in a large skillet over medium-high heat until shimmering but not smoking. Working in batches if necessary, add the seasoned chicken and sear for 2-3 minutes per side until golden brown. You’re not cooking the chicken through at this stage—just developing a flavorful crust that will enhance the final dish.
The chicken should release easily from the pan when properly seared. If it sticks, allow it to cook for another 30 seconds before attempting to flip. Transfer the seared chicken to your crockpot insert, arranging it in a single layer if possible. This initial searing step is crucial for building complex flavors in what would otherwise be a one-note dish.
Step 3: Build the Cooking Liquid and Slow Cook
To the same skillet, add the medium-diced yellow onion and cook over medium heat for 4-5 minutes, stirring occasionally, until softened and just beginning to caramelize. Add the minced garlic cloves and cook for an additional 1 minute until fragrant but not browned. Immediately pour in the 1 cup low-sodium chicken broth to deglaze the pan, scraping up all the browned bits from the bottom.
Transfer this aromatic liquid mixture to the crockpot, pouring it over and around the chicken. Cover with the lid and cook on LOW for 4-5 hours or HIGH for 2-3 hours. The chicken is done when it reaches an internal temperature of 165°F and easily pulls apart with a fork. Avoid overcooking, as this can lead to dry, stringy chicken despite the slow cooking method.
Step 4: Finish and Serve for Optimal Texture
Once the chicken is perfectly tender, carefully transfer it to a serving platter using tongs. Cover loosely with foil to keep warm. Pour the cooking liquid from the crockpot into a fat separator or use a spoon to skim off any excess fat that has risen to the surface. This step ensures your final dish isn’t greasy.
Return the defatted liquid to the crockpot and whisk in the 2 tbsp unsalted butter until fully incorporated and the sauce has a velvety texture. Stir in the 2 tbsp fresh lemon juice to brighten the flavors. Pour this enriched sauce over the chicken and let it rest for 5 minutes before serving to allow the flavors to meld. The lemon juice cuts through the richness while the butter adds a luxurious finish.
Essential Equipment for This Dish
Crockpot Selection
Not all slow cookers perform equally—I recommend a 6-quart programmable model like the Crock-Pot SCCPVL610-S for consistent results. The oval shape accommodates whole chicken breasts better than round models, and programmable settings prevent overcooking. Look for one with a removable stoneware insert for easy cleanup. 🔥
Essential Skillet
A heavy 12-inch stainless steel skillet is crucial for proper searing. I use the All-Clad D3 because it distributes heat evenly and develops a perfect crust on the chicken. Avoid nonstick for this step—you want those flavorful browned bits to form for deglazing. The skillet should feel substantial in your hand.
Instant-Read Thermometer
Don’t guess when your chicken is done—a ThermoWorks Thermapen ONE gives instant, accurate readings. Insert the probe into the thickest part of the breast, avoiding bones. Chicken is safe at 165°F, but I pull it at 160°F since it continues cooking while resting. This $100 tool prevents dry, overcooked results every time.
Fat Separator
For velvety sauce, a 2-cup fat separator like the OXO Good Grips is worth its weight in gold. After cooking, pour the juices in and let it sit for 2-3 minutes—the fat rises to the top for easy removal. This step transforms watery broth into rich, restaurant-quality sauce that clings beautifully to the chicken.
Quality Cutting Board
A large wooden cutting board (I prefer John Boos Maple) gives you ample space to prep ingredients and later shred the cooked chicken. Wood is gentler on knives than plastic and naturally antimicrobial. The 18×12-inch size handles all prep tasks without crowding, and the built-in juice groove catches any drips.
Sharp Chef’s Knife
Invest in an 8-inch chef’s knife like the Wüsthof Ikon for effortless prep. A sharp blade makes quick work of dicing onions, mincing garlic, and later shredding the tender chicken. Test sharpness by slicing a tomato—if it cuts cleanly with no pressure, you’re good to go. Dull knives slip more often, so keep yours honed. ✨
Nutrition Facts
Frequently Asked Questions
Can I skip searing the chicken first?
You can, but searing adds significant flavor. The browning creates a fond (flavorful crust) that deglazing incorporates into the sauce. Without it, your dish may taste flat despite the herbs and broth.
Why is my chicken dry after cooking?
Overcooking is the main culprit. Chicken breasts are lean and cook quickly—pull them at 160°F (they’ll reach 165°F while resting). Also, ensure you’re using enough liquid (at least 1 cup broth) and not lifting the lid during cooking.
Can I use frozen chicken breasts?
Yes, but thaw them first for even cooking. Place frozen breasts in cold water (in a sealed bag) for 1-2 hours, or thaw overnight in the fridge. Cooking from frozen risks uneven doneness and potential food safety issues.
What’s the best way to shred the cooked chicken?
Use two forks to pull the meat apart in opposite directions. For easier shredding, let it rest for 10 minutes after cooking. The fibers will relax, making the process smoother and preventing stringiness.
How long can I store leftovers?
Store in an airtight container for up to 3-4 days in the fridge, or freeze for 3 months. Reheat gently with a splash of broth to maintain moisture. Avoid microwaving at full power—use 50% power in 30-second intervals.

- 6 Bean Chili Recipe: Hearty, Smoky Depth That Gets Richer Over Time - September 26, 2026
- 2 Gallon Red Sangria Recipe: Bold Spice and Fruit Fusion for Crowds - September 26, 2026
- 5 Star Apple Bread Recipe: Spiced Apple Swirl With Buttery Crust - September 26, 2026