
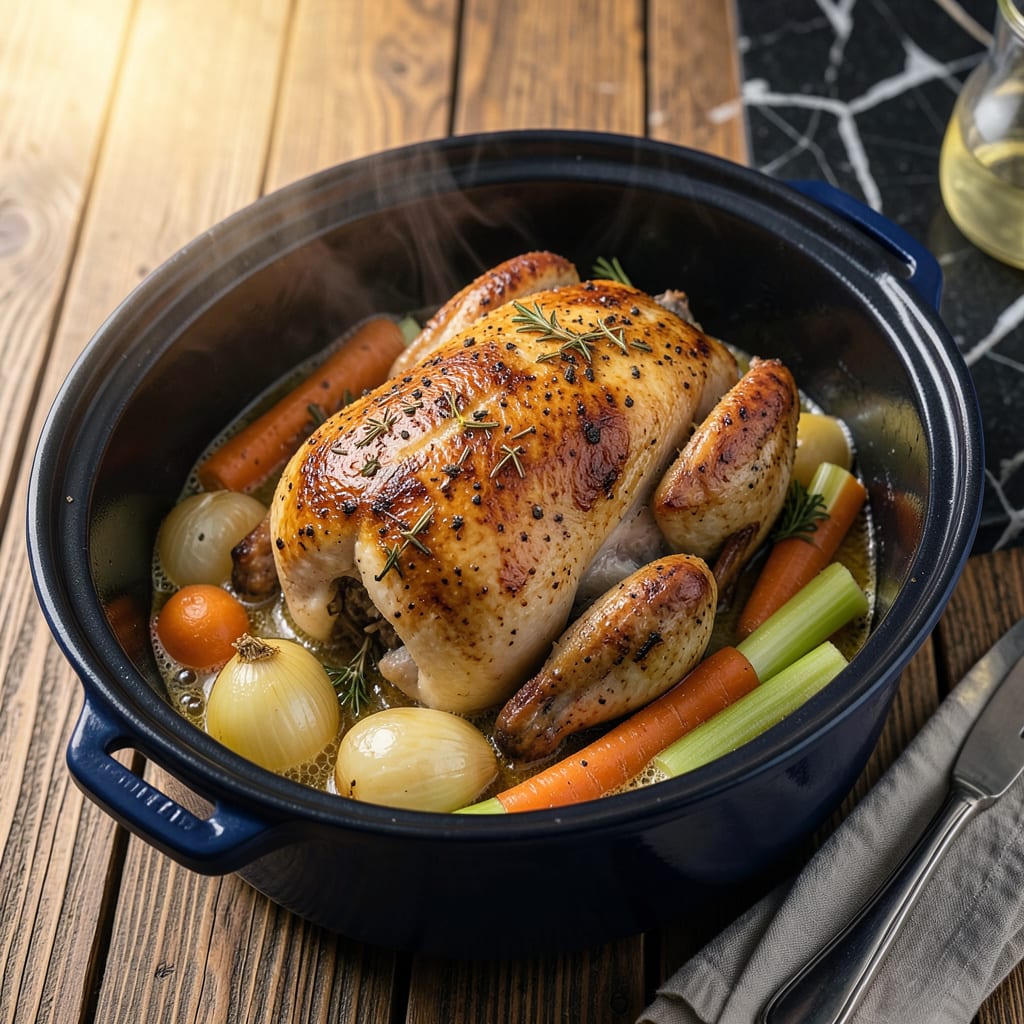
There’s something deeply satisfying about a whole chicken cooked to fall-off-the-bone tenderness—especially when your crockpot does all the work. This method delivers juicy, flavorful meat with minimal effort, making it perfect for busy weeknights or stress-free meal prep. No complicated techniques, no constant monitoring—just set it and forget it.
The secret lies in simple seasoning and the slow, even heat of the crockpot, which breaks down the meat while keeping it moist. You’ll end up with a perfectly cooked chicken that’s ready to serve as-is or shred for tacos, salads, or sandwiches. It’s the kind of hands-off cooking that makes dinner feel effortless.
Ingredients for Crockpot Whole Chicken
Just 13 ingredients for the juiciest crockpot chicken you’ve ever made—no fancy techniques required.
| Ingredient | Amount | Notes |
|---|---|---|
| Whole Chicken 🍗 | 4 lb | Pat dry, remove giblets |
| Olive Oil 🫒 | 1 tbsp | Extra-virgin preferred |
| Kosher Salt 🧂 | 1 ½ tsp | Diamond Crystal recommended |
| Freshly Ground Black Pepper 🌶️ | 1 tsp | Coarse grind preferred |
| Garlic Powder 🧄 | 1 tsp | Not garlic salt |
| Dried Thyme 🌿 | 1 tsp | Or 1 tbsp fresh |
| Dried Rosemary 🌿 | 1 tsp | Crush between fingers |
| Paprika 🌶️ | 1 tsp | Sweet or smoked variety |
| Onion Powder 🧅 | 1 tsp | Or 1/2 cup chopped fresh |
| Lemon 🍋 | 1 whole | Sliced for cavity |
| Yellow Onion 🧅 | 1 whole | Quartered for base |
| Carrots 🥕 | 3 whole | Cut into 2-inch pieces |
| Celery Stalks 🌿 | 3 whole | Cut into 2-inch pieces |
| Chicken Broth 🍲 | ½ cup | Low-sodium preferred |
The chicken is the star here. Look for a 4-pound bird—that’s the sweet spot for even cooking in a standard crockpot. I grab mine from Whole Foods when they’re on sale, but any grocery store will do (just check the sell-by date). Pat it dry before seasoning—that’s non-negotiable for crispy skin later. The Diamond Crystal kosher salt is worth hunting down—it sticks better and seasons more evenly than table salt (trust me on this).
No fresh herbs? Dried work at one-third the amount. Out of lemon? A splash of white wine or apple cider vinegar in the broth adds that brightness. The veggies are flexible—swap celery for fennel or add potatoes if you want a full meal. For the broth, Better Than Bouillon is my go-to, but any low-sodium brand keeps things from getting too salty. And if you’re missing paprika, a pinch of smoked salt gives that depth.
Leftovers keep for 4 days in the fridge—perfect for shredding into tacos or soups. The cooked chicken freezes beautifully for 3 months (portion it first). Pro tip: Save the juices! Strain and reduce them on the stovetop for an instant gravy. I always make extra veggies—they soak up the flavor and reheat like a dream.
Why You’ll Love This Recipe
- One chicken, three meals: shred for tacos Tuesday, slice for salads Wednesday, bones for broth Thursday. I’ve stretched this into a week’s worth of dinners without anyone complaining (yes, even my picky nephew).
- Dump-and-Go Magic: Honestly, this might be the laziest “cooking” I’ve ever done. Rub the chicken with olive oil, sprinkle salt, pepper, and garlic powder—then let the crockpot do the rest. No babysitting, no flipping, just walk away.
- That Garlicky Crisp: Here’s what sold me—the skin gets this perfect salty crunch while the meat stays juicy enough to make you question how five ingredients could taste this good. The garlic powder caramelizes just right against the olive oil.
- Meal Prep Overachiever: One chicken, three meals: shred for tacos Tuesday, slice for salads Wednesday, bones for broth Thursday. I’ve stretched this into a week’s worth of dinners without anyone complaining (yes, even my picky nephew).
Step-by-Step Instructions for Crockpot Whole Chicken
Here’s how to get that perfect tender chicken with almost no hands-on time.
Step 1: Prepare the Chicken and Vegetable Base
Start by patting the 4 lb whole chicken completely dry with paper towels. This helps the seasoning adhere better and promotes even cooking. Remove any giblets from the cavity if present. Place the yellow onion, carrots, and celery stalks in the bottom of your crockpot – these will create a flavorful bed that elevates the chicken while it cooks.
Cut the lemon in half and squeeze one half over the vegetables, then place both halves inside the chicken cavity. This adds bright citrus notes that balance the rich chicken flavor. The vegetables should cover the bottom completely to prevent the chicken from sitting directly on the hot surface.
Step 2: Season Generously for Maximum Flavor
In a small bowl, combine the kosher salt, freshly ground black pepper, garlic powder, dried thyme, dried rosemary, paprika, and onion powder. Rub this mixture all over the chicken, making sure to coat every surface including under the skin. I like to gently lift the skin and rub some seasoning directly onto the meat for extra flavor penetration.
The 1.5 tsp kosher salt might seem like a lot, but remember you’re seasoning a whole bird. Don’t be shy – this is what gives you that perfectly seasoned meat throughout. The paprika will give the skin a beautiful golden color as it cooks.
Step 3: Arrange in Crockpot and Add Liquid
Place the seasoned chicken breast-side up on top of the vegetable bed in the crockpot. Drizzle the olive oil over the chicken, then pour the 0.5 cup chicken broth into the bottom of the crockpot. The liquid creates steam that keeps the chicken moist while the oil helps crisp the skin slightly.
Cover the crockpot with the lid. Here’s the thing – don’t add any extra liquid. The chicken will release juices as it cooks, and the vegetables will give off moisture. Too much liquid will steam the chicken instead of giving you that perfect tender texture we’re after.
Step 4: Cook on Low for Perfect Tenderness
Set your crockpot to low heat and cook for 6-8 hours. This slow, gentle cooking is what transforms tough connective tissue into gelatin, giving you that fall-off-the-bone tenderness. Don’t be tempted to cook on high – the chicken will cook too quickly and won’t develop that melt-in-your-mouth texture.
You’ll know it’s done when the internal temperature reaches 165°F at the thickest part of the thigh (not touching bone). The skin should be golden and the meat should pull away easily from the bones. If you wiggle a leg, it should move freely in its socket.
Step 5: Rest and Serve with Pan Juices
Carefully transfer the chicken to a cutting board and let it rest for 10-15 minutes before carving. This allows the juices to redistribute throughout the meat. While it rests, strain the vegetables and cooking liquid through a fine-mesh sieve into a bowl – this flavorful liquid is pure gold.
Carve the chicken and arrange on a platter. Spoon some of the strained juices over the top for extra moisture and flavor. The vegetables will be incredibly tender – I like to mash them slightly and serve as a rustic side. The meat should be so tender it practically falls apart with just a fork.
Common Mistakes When Making Perfect Results
Overcrowding the Crockpot
One of the biggest mistakes I see is trying to fit too much in the pot. Your 4 lb chicken needs room for heat to circulate evenly. If you stuff it in with extra veggies or potatoes, the chicken steams instead of roasting gently. Stick to the onion, carrots, and celery base—it’s enough for flavor without crowding. 🔥
Skipping the Drying Step
I know it’s tempting to rush, but patting the chicken dry is non-negotiable. Wet skin means the seasoning won’t stick properly, and you’ll end up with soggy results instead of that golden, flavorful exterior. Grab some paper towels and spend the extra minute—it makes all the difference in texture and taste.
Using Too Much Liquid
The recipe calls for just 0.5 cup chicken broth for a reason. Adding extra liquid turns your crockpot into a soup pot, and the chicken will boil instead of slow-cook to tenderness. Trust the process—the chicken and veggies release plenty of moisture as they cook. Too much liquid = bland, waterlogged meat.
Peeking Too Often
Every time you lift the lid, you lose heat and add 20-30 minutes to your cooking time. I get it—it’s exciting to check on dinner! But resist the urge until the last hour. If you’re worried about doneness, use a meat thermometer through the lid’s vent instead of opening it. Patience pays off with juicier results. 💡
Cooking on High Heat
Low and slow is the golden rule here. Cooking on high heat might save time, but you’ll sacrifice tenderness. The connective tissue needs those 6-8 hours on low to break down properly. High heat dries out the breast meat before the dark meat is fully cooked—nobody wants that.
Forgetting to Rest
I’ve been guilty of this one—carving right away lets all those delicious juices escape onto the cutting board. Give your chicken 10-15 minutes to rest after cooking. This lets the juices redistribute, so every bite stays moist. Use that time to strain the pan juices for serving—double win for flavor!
Nutrition Facts
Frequently Asked Questions
Can I use a frozen chicken?
It’s not recommended. A frozen chicken won’t cook evenly, and the outer layers may reach unsafe temperatures while the inside remains raw. Always thaw your 4 lb chicken completely in the fridge overnight before cooking for best results and food safety.
How do I get crispy skin in a crockpot?
The crockpot excels at tenderness, not crispiness. For crispy skin, transfer the cooked chicken to a baking sheet and broil for 3-5 minutes at 425°F after crockpot cooking. Watch closely to avoid burning!
What size crockpot works best?
A 6-quart crockpot is ideal for a 4 lb chicken. Smaller models may crowd the bird, while larger ones can dry out the meat. Ensure the chicken fits snugly with 1-2 inches of space around it for even cooking.
Can I add potatoes to cook with the chicken?
Add 1-inch cubed potatoes during the last 2-3 hours to prevent mushiness. Place them around the chicken, not underneath, so they absorb flavorful juices without overcooking. Baby potatoes work best!
Why is my chicken dry?
Overcooking is the usual culprit. Stick to 6-8 hours on low and check internal temp at 165°F. Also, avoid lifting the lid during cooking—each peek adds 20-30 minutes to the cook time!

- 6 Bean Chili Recipe: Hearty, Smoky Depth That Gets Richer Over Time - September 26, 2026
- 2 Gallon Red Sangria Recipe: Bold Spice and Fruit Fusion for Crowds - September 26, 2026
- 5 Star Apple Bread Recipe: Spiced Apple Swirl With Buttery Crust - September 26, 2026