
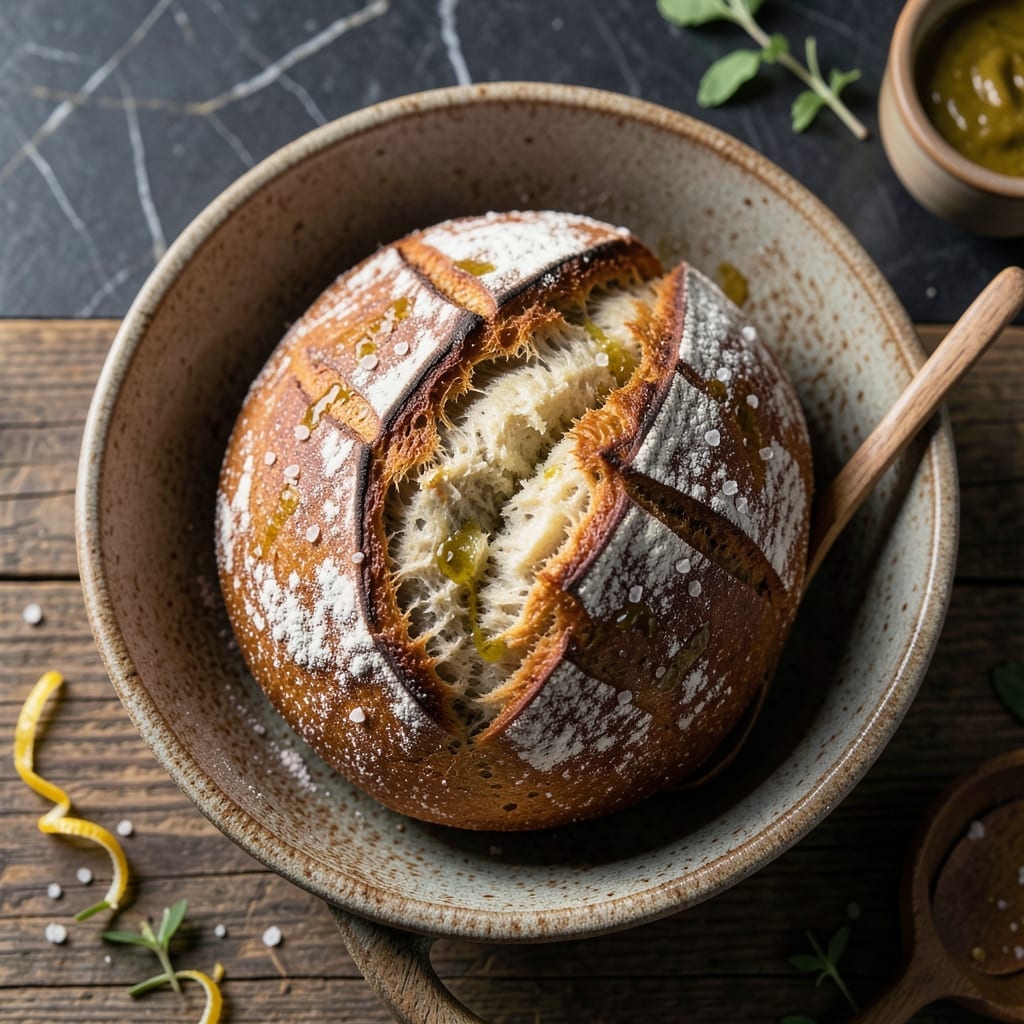
There’s a timelessness to baking bread in a Dutch oven—this method delivers a crust that’s both crispy and thick, with a soft, airy interior. The technique, passed down through generations, requires just a few simple ingredients and patience.
What sets this loaf apart is the Dutch oven’s ability to trap steam, creating that signature artisanal crust without fancy equipment. The dough rests overnight, developing deep, complex flavors that make every bite worth the wait.
You’ll end up with a rustic loaf that looks and tastes like it came from a professional bakery. The crust crackles when sliced, revealing a tender crumb that’s perfect for sandwiches or served warm with butter.
The process is straightforward, but the results are anything but ordinary. This is bread-making at its most rewarding.
Ingredients for Men with the Pot Bread
Simple flour, water, yeast, and patience create this artisanal Dutch oven masterpiece.
| Ingredient | Amount | Notes |
|---|---|---|
| Bread Flour 🌾 | 4 cups | Plus extra for dusting work surface |
| Active Dry Yeast 🍞 | 2 ¼ tsp | One 0.25 oz packet equivalent |
| Kosher Salt 🧂 | 2 tsp | Diamond Crystal preferred for consistency |
| Granulated Sugar 🥄 | 1 tsp | Feeds the yeast activation |
| Lukewarm Water 💧 | 1 ½ cups | 105-110°F for optimal yeast proofing |
| Olive Oil 🫒 | 1 tbsp | For greasing bowl and dough |
| Cornmeal 🌽 | ¼ cup | For preventing sticking in Dutch oven |
| All-Purpose Flour 🌾 | 1 cup | Optional for lighter texture mix |
| Honey 🍯 | 1 tbsp | Optional for slightly sweeter crust |
| Unsalted Butter 🧈 | 1 tbsp | Melted, for brushing finished loaf |
The flour choice is critical for this rustic loaf. King Arthur Bread Flour delivers consistently superior results due to its higher protein content, which creates that perfect chewy interior. Bob’s Red Mill is a solid alternative. For the yeast, SAF Instant Yeast is my professional preference, but active dry works fine with the proper activation. Always check your yeast’s expiration date—old yeast is the most common reason for dense bread.
No bread flour on hand? All-purpose flour works at a 1:1 ratio, though the crumb will be slightly less chewy. For a whole grain version, substitute up to 2 cups whole wheat flour while keeping the rest bread flour. The honey can be swapped with maple syrup or agave without affecting texture. If your kitchen is cold, use slightly warmer water (up to 115°F) to help the dough rise properly.
Store flour in airtight containers in a cool, dark place for up to 6 months. Yeast keeps in the freezer for 2 years unopened. The dough can rest in the fridge for up to 3 days, developing more complex flavors with time. Baked loaves stay fresh for 2-3 days at room temperature.
Why You’ll Love This Recipe
- Five Ingredients Only: I just dump bread flour, yeast, salt, sugar, and lukewarm water—no fancy additions, no hunting for special items.
- Crispy Outside, Soft Inside: That golden crust gives way to the fluffiest center, thanks to the yeast and sugar working their magic in the pot.
- Feeds a Hungry Table: I pull this out when the whole crew’s over—it pairs with soups, stews, or just butter and jam.
- Pennies Per Loaf: Flour and yeast cost next to nothing, and one batch makes enough for leftovers that disappear by morning.
Step-by-Step Instructions for Men With the Pot Bread
This traditional method delivers a rustic loaf with a crisp crust and tender crumb.
Step 1: Activate the Yeast and Prepare the Dough
In a large mixing bowl, combine the 2.25 tsp Active Dry Yeast, 1 tsp Granulated Sugar, and 1.5 cups Lukewarm Water. Stir gently and let sit for 5-10 minutes until the mixture becomes frothy and cloudy. This confirms the yeast is active and ready to proof.
Add the 4 cups Bread Flour, 1 cup All-Purpose Flour, 2 tsp Kosher Salt, 1 tbsp Olive Oil, and 1 tbsp Honey to the yeast mixture. Stir with a wooden spoon until a shaggy dough forms. The dough will be sticky at this stage, which is normal for high-hydration bread.
Step 2: Knead and First Rise
Turn the dough onto a lightly floured surface dusted with Bread Flour. Knead for 8-10 minutes until smooth and elastic. The dough should spring back when poked lightly with a finger. This develops the gluten structure needed for a good rise.
Lightly grease a clean bowl with Olive Oil, place the dough inside, and cover with a damp towel. Let it rise in a warm place for 1-2 hours or until doubled in volume. I place mine near a warm oven (turned off) for consistent results.
Step 3: Shape and Second Rise
Punch down the risen dough to release air, then shape it into a round loaf. Dust the bottom of a Dutch oven with 0.25 cup Cornmeal to prevent sticking during baking. Place the dough seam-side down in the prepared Dutch oven.
Cover and let the dough rise again for 30-45 minutes until it has expanded noticeably but not quite doubled. The dough should jiggle slightly when shaken gently—this indicates it’s properly proofed and ready for baking.
Step 4: Bake to Perfection
Preheat your oven to 450°F. Once hot, place the Dutch oven (with lid) in the oven and bake for 30 minutes. After this time, remove the lid and bake for another 15-20 minutes until the crust is deep golden brown and the internal temperature reaches 200-210°F.
The loaf should sound hollow when tapped on the bottom. If the crust is browning too quickly, tent with foil for the remaining baking time.
Step 5: Finish and Cool
Remove the bread from the Dutch oven and brush the top with 1 tbsp Unsalted Butter melted. This adds a subtle richness and gives the crust a beautiful sheen. Transfer to a wire rack and let cool for at least 1 hour before slicing.
Resist the urge to cut into it immediately—this resting period allows the interior structure to set, ensuring each slice holds its shape and texture. The crust should be crisp, and the interior should have an open, airy crumb with a slightly sweet, nutty flavor.
Pro Tips For Making Men With The Pot Bread
- Test Your Yeast: Always proof your active dry yeast in the lukewarm water with sugar first—if it doesn’t foam within 5-10 minutes, your bread won’t rise. I learned this the hard way after wasting a whole batch of flour.
- Measure Flour Right: Spoon your bread flour into the measuring cup and level it off—don’t scoop directly from the bag, or you’ll end up with dense, heavy bread.
- Skip Cold Water: Use water that’s warm to the touch (around 110°F) but not hot, or you’ll kill the yeast. After burning three batches, I finally figured out the sweet spot.
- Let It Rest: Give the dough a solid 1-2 hour rise in a warm spot—rushing this step means flat, sad bread. My grandmother swore by this, and she was right.
Essential Equipment for men with the pot bread
Dutch Oven Essentials
Invest in a quality enamel-coated cast iron Dutch oven—I swear by my Le Creuset 5.5-quart. It retains heat beautifully and the enameled surface prevents sticking. A deeper pot gives your loaf room to rise without touching the lid. 🔥
Proofing Tools
A digital kitchen scale ensures precise measurements for consistent results. I use my OXO Good Grips 11lb scale for all baking. A damp linen towel creates the perfect proofing environment—breathable yet moisture-retentive.
Dough Handling
A wooden dough scraper helps divide and handle sticky dough without tearing. The Ateco 5-inch bench scraper is my go-to. Keep a small bowl of extra flour nearby for dusting your work surface as needed.
Temperature Control
An instant-read thermometer removes guesswork from baking. I check my loaf’s internal temp with a ThermoWorks Thermapen—200-210°F means it’s done. For water temp, a candy thermometer ensures your yeast water stays between 105-110°F. 🌡️
Finishing Touches
A pastry brush applies melted butter evenly to your finished loaf. I prefer silicone pastry brushes—they’re heat-resistant and easy to clean. A wire cooling rack allows air circulation to prevent soggy bottoms.
Nutrition Facts
Frequently Asked Questions
What if my dough doesn’t rise?
Check your yeast expiration date first. Old yeast is the most common culprit. Ensure your water is between 105-110°F—too hot kills yeast, too cold slows activation. Place dough in a warmer spot, like near a turned-off oven with the light on.
Can I use a regular pot instead of a Dutch oven?
A heavy pot with a tight lid works, but results may vary. Dutch ovens retain heat perfectly and create the ideal steam environment. For best results, use a pot that’s oven-safe to 450°F and has a flat bottom.
Why is my crust too thick or hard?
This usually happens from overbaking or not removing the lid soon enough. Bake covered for exactly 30 minutes, then uncovered for 15-20 minutes. Tent with foil if browning too quickly.
How do I store leftover bread?
Keep at room temperature in a paper bag for 2-3 days. For longer storage, slice and freeze in an airtight container for up to 3 months. Reheat slices in a toaster or oven.

- 6 Oz Chocolate Chip Cookie Recipe: Perfectly Balanced Crispy Edges and Chewy Hearts - September 25, 2026
- 6-Inch Coffee Cake Recipe: Vanilla Bean Swirls and Buttery Streusel Topping - September 25, 2026
- 1 Hour Soup Recipe: Velvety Richness Without the Wait - September 25, 2026