
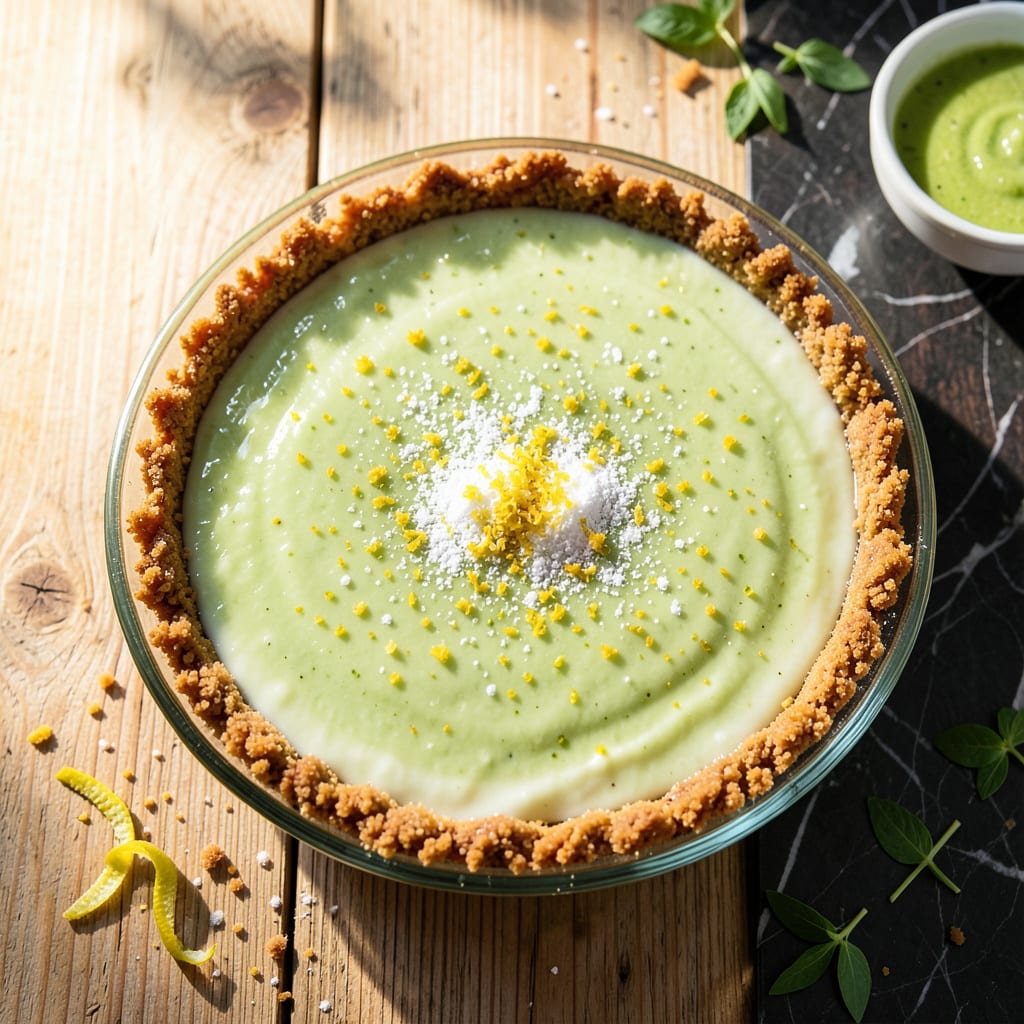
This lightened version delivers all the bright citrus flavor of classic key lime pie with a fraction of the fat. The secret lies in using reduced-fat graham cracker crust and a creamy, tangy filling made with low-fat sweetened condensed milk.
You’ll achieve that perfect balance of sweet and tart without sacrificing texture. The result is a smooth, zesty pie that’s as satisfying as it is guilt-free.
Ingredients for Easy Low Fat Key Lime Pie
Lightened crust, creamy filling, and bright citrus make this guilt-free pie sing.
| Ingredient | Amount | Notes |
|---|---|---|
| Reduced-Fat Graham Cracker Crumbs 🍪 | 1 ½ cups | For crust base |
| Low-Fat Sweetened Condensed Milk 🥛 | 14 oz | 1 can, light version |
| Key Lime Juice 🍈 | ½ cup | Freshly squeezed preferred |
| Lime Zest 🍈 | 1 tbsp | From fresh key limes |
| Large Egg Yolks 🥚 | 3 whole | For custard filling |
| Granulated Sugar 🍚 | ¼ cup | Adjust to taste preference |
| Unsalted Butter 🧈 | 3 tbsp | Melted for crust binding |
| Vanilla Extract 🌿 | 1 tsp | Pure for best flavor |
| Salt 🧂 | 0.125 tsp | Fine grain for balance |
| Whole Milk Greek Yogurt 🥛 | ½ cup | For creamier texture |
| Key Limes 🍈 | 12 whole | For juice and zest |
[recipeingredientscaler]
The graham cracker crust is key here. Anna’s or Keebler make reduced-fat versions that work great—just check the label for under 2g fat per serving. For the condensed milk, Eagle Brand’s low-fat is widely available and does the trick. Key limes can be tricky to find fresh (look at Latin markets or Whole Foods), but bottled Nellie & Joe’s key lime juice is a solid backup (just avoid the green food coloring).
No fresh key limes? Regular lime juice works in a pinch, though the flavor won’t be quite as floral. For a dairy-free swap, coconut condensed milk (like Nature’s Charm) keeps it light. The Greek yogurt can be 2% or full-fat if you want extra creaminess, but stick to plain—vanilla will compete with the lime. Skip the butter entirely if you’re avoiding dairy; the crust might be slightly crumblier but still delicious.
The pie keeps 4-5 days in the fridge (cover tightly with plastic wrap). It doesn’t freeze well—the texture gets grainy. Prep the crust a day ahead if you’re short on time—just store the crumb mixture in a bag at room temp. Always zest the limes before juicing (way easier).
Why You’ll Love This Recipe
- No-Fuss Mix: I just dump the graham crumbs, condensed milk, lime juice, and yolks together—no fancy steps, just stir and bake.
- Tangy Bliss: That zing from the key lime juice and zest hits just right, and the low-fat condensed milk keeps it creamy without guilt.
- Make-Ahead Magic: I prep it the night before potlucks or barbecues—it tastes even better chilled overnight.
- Budget-Friendly Treat: Honestly, a can of condensed milk and a bottle of key lime juice make two pies, so it’s kind on the wallet.
Step-by-Step Instructions for a Zesty Citrus Delight Without the Guilt
Here’s the method. Straightforward, tested, works every time.
Step 1: Prepare the Graham Cracker Crust Base
Preheat your oven to 350°F to get it nice and hot. In a medium bowl, combine the 1.5 cups Reduced-Fat Graham Cracker Crumbs with the 3 tbsp Unsalted Butter that you’ve melted. I like to use a fork for this—it helps distribute the butter evenly.
Press the mixture firmly into a 9-inch pie dish, making sure to get an even layer across the bottom and up the sides. The crust should look compact and hold together when you press it. Bake for 8-10 minutes until the edges are light golden brown. Then, let it cool completely on a wire rack.
Step 2: Create the Creamy Key Lime Filling
In a large bowl, whisk together the 14 oz Low-Fat Sweetened Condensed Milk, 3 whole Large Egg Yolks, 0.5 cup Key Lime Juice, and 1 tbsp Lime Zest. I always use freshly squeezed key lime juice for the brightest flavor.
Add the 0.25 cup Granulated Sugar, 1 tsp Vanilla Extract, and 0.125 tsp Salt. Whisk vigorously for 2-3 minutes until the mixture is smooth and slightly thickened. Then, fold in the 0.5 cup Whole Milk Greek Yogurt for extra creaminess. This step ensures a rich, velvety texture without the extra fat.
Step 3: Bake the Pie to Perfection
Pour the filling into the cooled graham cracker crust. Smooth the top with a spatula so it’s even. Bake at 350°F for 15-18 minutes until the filling is just set—it should have a slight jiggle in the center when you gently shake the dish.
Don’t overbake it. The pie will continue to set as it cools, and you want that perfect creamy consistency. Remove it from the oven and let it cool to room temperature on a wire rack.
Step 4: Chill and Serve for the Best Texture
Once the pie has cooled to room temperature, cover it loosely with plastic wrap and refrigerate for at least 4 hours (I prefer overnight). This chilling time is crucial—it allows the filling to fully set and develop that signature key lime pie texture.
When ready to serve, slice into 8 equal pieces for the 4 servings. Each slice should have a firm but creamy filling and a crisp, buttery crust. Garnish with a dollop of whipped cream or extra lime zest if desired, but honestly, this pie stands perfectly on its own.
Pro Tips For Making Easy Low Fat Key Lime Pie
- Chill the Crust: Press the reduced-fat graham cracker crumbs into the pie dish and let it chill in the fridge for at least 15 minutes before filling—this keeps it from turning soggy when the lime mixture goes in.
- Zest First: Always zest your limes before juicing them; it’s nearly impossible to do after they’re halved, and fresh zest makes a real difference with the low-fat condensed milk base.
- Temper the Yolks: Slowly whisk a bit of the warm lime mixture into the egg yolks before combining everything to avoid scrambled eggs in your pie—I learned this the hard way.
- Skip the Overmix: Stir the filling just until smooth; overmixing introduces air bubbles that can make the texture uneven after baking.
Essential Equipment for This Recipe
Pie Dish Essentials
A 9-inch glass pie dish is ideal for even baking and easy slicing. I prefer Pyrex because it’s durable and won’t warp in the oven. Avoid dark metal pans—they can cause the crust to over-brown before the filling sets properly. 💡
Mixing Tools
Use a large mixing bowl and a whisk for the filling. A balloon whisk works best to incorporate air for that light, creamy texture. I also keep a rubber spatula nearby to scrape every bit of the mixture into the crust.
Zesting and Juicing
A microplane grater is perfect for lime zest—it extracts the oils without the bitter pith. For juicing, a handheld reamer works great, but a fork in a pinch gets the job done. Roll the limes on the counter first to maximize juice yield.
Baking Precision
An oven thermometer ensures your 350°F is accurate—home ovens often run hot or cold. A cooling rack is essential to prevent the crust from getting soggy as the pie cools. I never skip this step.
Chilling Setup
Use plastic wrap directly on the pie surface to prevent a skin from forming. For overnight chilling, a refrigerator thermometer helps maintain the ideal 35-40°F. This keeps the texture perfect until serving. ❄️
Serving Tools
A sharp pie server or thin knife makes clean slices. I run the blade under hot water between cuts for smooth edges. A citrus squeezer can also double as a garnish tool for extra lime juice on top.
Nutrition Facts
Frequently Asked Questions
Can I use regular lime juice instead of key lime?
Yes, but the flavor will be slightly different. Key limes have a unique floral aroma, while regular limes are more tart. Use the same 0.5 cup measurement, but add a touch more zest to boost the citrus notes.
How do I prevent the crust from getting soggy?
Blind-bake the crust for 8-10 minutes until golden, then let it cool completely before adding the filling. Press the crumbs firmly into the dish to create a tight seal. This barrier keeps the filling from making the crust soft.
Can I make this pie dairy-free?
Swap the low-fat condensed milk for coconut condensed milk and use dairy-free butter for the crust. The texture remains creamy, and the tropical flavor pairs beautifully with the lime.
How long can I store the pie?
It keeps 4-5 days in the fridge, covered tightly. For best texture, slice just before serving. Avoid freezing, as it can make the filling grainy.

- 8 Bean Soup Recipe Crock Pot: Hearty Vegetable Medley in One Pot - September 25, 2026
- 4C Bread Crumbs Meatballs Recipe: Crispy Crust and Juicy Centers - September 25, 2026
- 6 Oz Chocolate Chip Cookie Recipe: Perfectly Balanced Crispy Edges and Chewy Hearts - September 25, 2026