
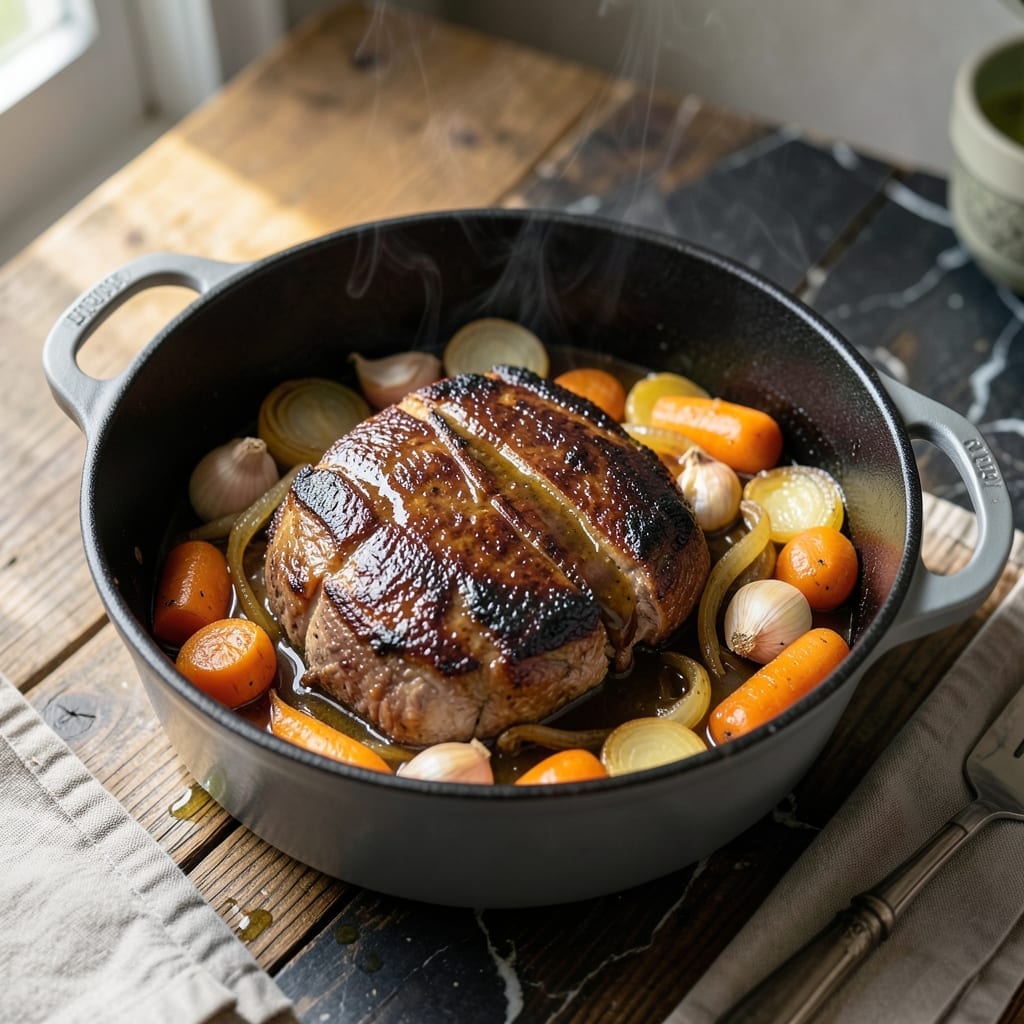
This oven-braised pot roast delivers tender beef and root vegetables without any gluten-containing ingredients. The slow cooking process transforms tough cuts into fall-apart tender meat swimming in a rich, flavorful broth.
I developed this method to ensure restaurant-quality results at home, using simple pantry staples and a Dutch oven. The key is searing the beef first to build deep flavor, then braising at low heat for maximum tenderness.
The natural juices from the beef and vegetables create a savory gravy that thickens perfectly without flour. Each bite offers melt-in-your-mouth beef with carrots, potatoes, and onions that soak up the rich broth.
This dish proves that gluten-free cooking can be just as hearty and satisfying as traditional versions. Serve with the cooking liquid spooned over the top.
Ingredients for Gluten Free Pot Roast Recipe Oven
Simple pantry staples and fresh root vegetables create this hearty oven-braised dish with deep, rich flavors.
| Ingredient | Amount | Notes |
|---|---|---|
| Chuck Roast 🥩 | 3 lb | Well-marbled, trimmed of excess fat |
| Kosher Salt 🧂 | 2 tsp | Diamond Crystal preferred for texture |
| Black Pepper 🌶️ | 1 tsp | Freshly ground for best flavor |
| Garlic Cloves 🧄 | 6 cloves | Smashed to release aroma |
| Yellow Onions 🧅 | 2 whole | Large, quartered with skin on |
| Carrots 🥕 | 4 whole | Cut into 3-inch chunks |
| Yukon Gold Potatoes 🥔 | 1 ½ lb | Peeled, quartered into even pieces |
| Beef Stock 💧 | 2 cups | Gluten-free certified brand recommended |
| Tomato Paste 🍅 | 2 tbsp | San Marzano preferred for depth |
| Dried Thyme 🌿 | 1 tsp | Rubbed between fingers to release oils |
| Bay Leaves 🍃 | 2 pieces | Fresh or dried, removed before serving |
| Olive Oil 🫒 | 2 tbsp | Divided for searing and finishing |
| Red Wine Vinegar 🍷 | 1 tbsp | For brightness in the gravy |
| Fresh Rosemary Sprigs 🌿 | 2 pieces | Tied with kitchen twine if desired |
Selecting the right chuck roast is critical. Look for well-marbled cuts with visible fat streaks—this renders down for maximum flavor and tenderness. Whole Foods or Costco typically carry high-quality options. For the beef stock, ensure it’s labeled gluten-free; Better Than Bouillon is a reliable brand. The potatoes should be waxy varieties like Yukon Gold to hold their shape during the long braise.
No red wine vinegar? Apple cider vinegar works at a 1:1 ratio. Out of fresh rosemary? Dried rosemary at half the quantity (1 tsp) is a fine substitute. If tomato paste isn’t on hand, a can of tomato sauce reduced by half can work in a pinch. For a deeper umami boost, add a splash of gluten-free tamari or a few dried porcini mushrooms to the braising liquid.
Leftovers keep beautifully. Refrigerate in an airtight container for up to 5 days—the flavors intensify overnight. Freeze for 3 months with minimal quality loss. Reheat gently on the stovetop with a splash of stock to restore the gravy’s consistency.
Why You’ll Love This Recipe
- Set It and Forget It: I toss the chuck roast with salt, pepper, garlic, and onions, then let the oven do all the work.
- Melt-in-Your-Mouth Tender: The slow roast turns the beef so tender it falls apart with just a fork—no fancy tricks, just time and those bold garlic-onion flavors.
- Feeds the Whole Crew: One pot, one meal, and everyone from picky kids to my gluten-sensitive sister is happy.
- Leftovers for Days: Honestly, it tastes even better the next day—sandwiches, tacos, or straight from the fridge.
Step-by-Step Instructions for Slow-Braised Beef with Root Vegetables
This method ensures tender beef and perfectly cooked vegetables with minimal hands-on time.
Step 1: Sear the Chuck Roast
Pat the 3 lb Chuck Roast dry with paper towels, then season generously with the 2 tsp Kosher Salt and 1 tsp Black Pepper on all sides. This drying step is crucial for achieving a proper sear rather than steaming the meat.
Heat 1 tbsp of the 2 tbsp Olive Oil in a large Dutch oven over medium-high heat until shimmering. Sear the chuck roast for 4-5 minutes per side until deeply browned. You’re looking for a dark, caramelized crust—this builds the flavor foundation for your entire dish. Transfer the roast to a plate and set aside.
Step 2: Build the Aromatic Base
In the same Dutch oven, add the remaining 1 tbsp Olive Oil. Add the 2 whole Yellow Onions, 4 whole Carrots, and 6 cloves Garlic Cloves. Cook for 5-7 minutes until the onions begin to soften and develop light golden color.
Stir in the 2 tbsp Tomato Paste and cook for 1-2 minutes until it darkens slightly. This step removes the raw tomato flavor and deepens the umami. Add the 1 tsp Dried Thyme, 2 pieces Bay Leaves, and 2 pieces Fresh Rosemary Sprigs, stirring to combine.
Step 3: Deglaze and Add Liquids
Pour in the 2 cups Beef Stock and 1 tbsp Red Wine Vinegar, using a wooden spoon to scrape up all the browned bits from the bottom of the pot. These fond particles dissolve into the liquid, creating a rich, flavorful braising base.
Return the seared chuck roast to the Dutch oven along with any accumulated juices. The liquid should come about halfway up the sides of the meat. This is the perfect ratio for slow braising without diluting the flavors.
Step 4: Add Vegetables and Braise
Arrange the 1.5 lb Yukon Gold Potatoes around the chuck roast in the Dutch oven. The potatoes should be nestled into the liquid. Bring the mixture to a gentle simmer, then cover tightly with a lid.
Transfer to a preheated 325°F oven and braise for 3 to 3.5 hours. The dish is done when the beef is fork-tender and easily pulls apart, and the potatoes are soft when pierced with a knife. Check at the 3-hour mark to prevent overcooking.
Step 5: Rest and Serve
Carefully remove the 2 pieces Bay Leaves and 2 pieces Fresh Rosemary Sprigs from the pot. Let the pot roast rest for 10-15 minutes before serving. This allows the juices to redistribute throughout the meat for maximum tenderness.
Serve the chuck roast with the braised vegetables and some of the cooking liquid spooned over the top. The gravy should be rich and glossy, with the vegetables having absorbed much of the flavor from the braising liquid.
Pro Tips For Making Gluten Free Pot Roast Recipe Oven
- Sear the Chuck: I learned this the hard way—skipping the sear leaves your pot roast tasting bland. Use high heat and 2 tablespoons of oil to get a deep brown crust on all sides of the chuck roast before adding liquid.
- Double the Garlic: Sounds like overkill, but trust me: smash 6-8 garlic cloves instead of the usual 3-4. The long oven braise mellows them into sweet, rich flavor that infuses the meat.
- Don’t Rush the Oven: Low and slow is non-negotiable here—3-4 hours at 300°F turns tough chuck into fall-apart tender. I tried speeding it up once and ended up with chewy, sad meat.
- Deglaze with GF Broth: After searing, pour in 1 cup of gluten-free beef broth and scrape the browned bits from the bottom. That’s where all the flavor hides, and it keeps the dish safely gluten-free.
Essential Equipment for Great gluten free pot roast recipe oven
Dutch Oven Essentials
For this dish, a heavy enamel-coated Dutch oven is non-negotiable. I use my Le Creuset 7.25-quart—it distributes heat evenly and retains it perfectly for the long braise. The tight-fitting lid traps moisture, creating that ideal self-basting environment. 🔥
Thermometer Accuracy
Don’t trust your oven’s built-in thermometer. I recommend a ThermoWorks Oven Thermometer for $15—it hangs from the rack and gives precise readings. This ensures your 325°F braise stays accurate, preventing tough meat or mushy veggies.
Wooden Spoon Magic
A flat-edged wooden spoon is my secret weapon for deglazing. It scrapes up every browned bit from the Dutch oven bottom without scratching. Look for one-piece beechwood models—they’re sturdy enough to handle the fond without breaking.
Prep Tools
Invest in a sharp chef’s knife for clean veggie cuts—I swear by my Wüsthof 8-inch. Uniform 3-inch chunks ensure even cooking. Also, keep kitchen twine handy for tying herbs if you prefer that presentation.
Searing Upgrade
For the best sear, I use tongs (not a fork) to turn the roast. OXO’s 12-inch version gives perfect control. The long handle keeps your hands safe from splatters while letting you flip the 3 lb chuck roast with precision.
Serving Style
A slotted spoon helps serve the meat and veggies while leaving the gravy behind for drizzling. I love my stainless steel version—it’s heat-resistant and won’t warp. The 1.5 lb potatoes will need this gentle handling to stay intact. ✨
Nutrition Facts
Frequently Asked Questions
Can I use a slow cooker instead of the oven?
Yes, transfer everything to a slow cooker after searing. Cook on low for 8-10 hours or high for 5-6 hours. The texture will be slightly different but still delicious.
How do I thicken the gravy without flour?
Simmer the cooking liquid uncovered for 10-15 minutes to reduce naturally. For faster results, mix 1 tbsp cornstarch with 2 tbsp cold water and stir in.
What if my roast is tough after cooking?
It likely needs more time. Return to the 325°F oven with extra liquid for 30-60 minutes until fork-tender. Check liquid levels to prevent drying out.
Can I add other vegetables?
Try parsnips, celery, or mushrooms. Add heartier veggies at the start and delicate ones like peas in the last 30 minutes.

- 8-Inch Chocolate Cake Recipe: Fudgy Crust and Decadent Ganache Swirls - September 25, 2026
- 5 Star Lasagna Recipe with Ricotta Cheese: Layers of Creamy Cheese and Tender Meat - September 25, 2026
- 2lb Fruit Cake Recipe: Boozy Spice Infusion for Holiday Crowds - September 25, 2026