
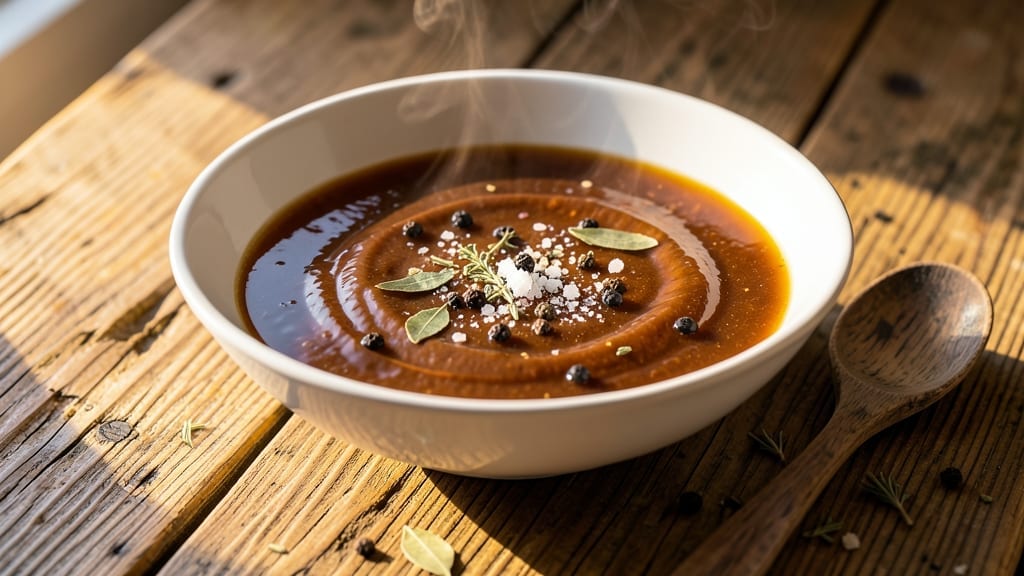
Transforming pantry staples into a deep umami beef broth in your Instant Pot is one of those kitchen game-changers that will make you question why you ever bought store-bought.
The secret lies in pressure cooking—extracting maximum flavor from bones and aromatics in a fraction of the time it takes on the stovetop. I developed this recipe after years of experimenting with slow-cooked broths, and the Instant Pot version delivers restaurant-quality depth without the hours of simmering.
What sets this apart is the combination of pressure cooking for intense extraction followed by a natural reduction that concentrates the flavors. You’ll use beef bones (or substitutes), vegetables, and herbs that build layers of savory richness.
The key technique is blooming spices in hot oil before adding liquids—this unlocks their full aromatic potential. For those short on time, this method delivers a flavorful base in under 90 minutes, ready to use in soups, stews, or braises.
By the end, you’ll have a golden, aromatic broth with a velvety texture and deep beefy flavor that elevates any dish. The Instant Pot handles the heavy lifting while you focus on assembling ingredients, making this both efficient and impressive.
Whether you’re prepping for a week of cooking or need an emergency flavor booster, this broth will become your new kitchen staple.
Pro tip: For even richer results, toast your spices lightly before adding them to the pot—this enhances their flavor profile dramatically. Store leftovers in the fridge for up to 5 days or freeze for months. Let’s create this flavorful foundation that will transform your cooking.
Ingredients for instant pot beef broth
Pantry staples plus a few key ingredients transform into restaurant-quality beef broth.
| Ingredient | Amount | Notes |
|---|---|---|
| Beef Bones 🦴 | 2 lb | Marrow bones preferred for richness |
| Yellow Onion 🧅 | 1 whole | Chopped into large chunks |
| Carrots 🥕 | 4 whole | Cut into 2-inch pieces |
| Celery Stalks 🌿 | 3 whole | Cut into 2-inch pieces |
| Garlic Cloves 🧄 | 6 cloves | Smashed, not minced |
| Fresh Parsley 🌿 | ¼ cup | Stems included for flavor |
| Fresh Thyme 🌿 | 2 sprigs | Or 1 tsp dried thyme |
| Fresh Bay Leaves 🌿 | 2 whole | Remove before serving |
| Vegetable Oil 🫒 | 2 tbsp | For blooming spices |
| Salt 🧂 | 1 tsp | Kosher or sea salt |
| Black Peppercorns 🌶️ | 10 whole | Crushed lightly |
| Water 💧 | 6 cups | Room temperature preferred |
| Worcestershire Sauce 🍯 | 1 tbsp | For umami depth |
The beef bones are everything here. Marrow bones give that rich, velvety texture, but knuckle bones or neck bones work too if that’s what you’ve got. Most grocery stores sell them in the meat section—ask the butcher if you’re unsure. I usually grab mine from Costco when they’re on sale, but even the regular supermarket bones work fine. Look for bones that are bright red, not gray or slimy. The more surface area, the better—chop any large bones into chunks before adding. Fresh herbs like thyme and parsley add brightness, but dried works in a pinch (just use half the amount).
No beef bones? Beef chuck roast or stew meat works as a substitute—just brown it first. Running low on carrots or celery? Frozen veggies work, though fresh gives better texture. The Worcestershire sauce is non-negotiable for that deep umami kick, but if you’re avoiding it, soy sauce or fish sauce can stand in. Want more richness? Add a splash of balsamic vinegar or a splash of red wine at the end. The bay leaves should be fresh—dried ones can get bitter. And don’t skip the blooming step with oil and spices—that’s where the magic happens.
This broth tastes even better the next day once flavors meld. Store in the fridge for up to 5 days or freeze for 3 months. I like to portion it into ice cube trays for easy use in recipes—just pop a cube into sauces or soups as needed. The fat will solidify on top, so skim that off before freezing if you prefer a leaner broth. Leftovers reheat beautifully—just warm gently on the stove or in the microwave.
Why You’ll Love This Recipe
- No-Mess Setup: I swear by this recipe because you just toss in the bones, roughly chop the veggies (no fancy dicing needed), and let the Instant Pot do the work. That’s it—no straining bags, no burnt-on bits, just pure hands-off magic.
- Deep Umami Bomb: The beef bones alone give this broth a richness that’s almost unfair, but add those roasted garlic cloves and caramelized onion base? It’s the kind of flavor that makes you pause mid-sip and think, “Wait, how did this get so good?” The celery and carrots sweeten just enough to balance it out.
- Weeknight to Holiday: Between us, I’ve used this broth for everything from quick ramen nights to fancy pot roast dinners. Freeze half for later, and you’ve got a pantry staple that’s always ready—no last-minute store runs when you’re craving comfort food.
- Budget Goldmine: Honestly, beef bones are cheaper than you’d think, and they stretch into gallons of broth. That means fewer grocery trips, more leftovers for soups or grains, and zero waste. Plus, the veggies? They’re the kind you’d normally toss anyway.
Step-by-step instructions for Instant Pot beef broth
This method extracts maximum flavor from simple ingredients—rich, deep, and ready in under an hour.
Sear the Beef Bones for Maximum Depth
Place the Instant Pot on the “Sauté” function and let it heat for 2 minutes. Add the 2 tablespoons vegetable oil and carefully arrange the 2 pounds beef bones in a single layer. Sear them for 8-10 minutes, turning occasionally, until they develop a deep golden-brown crust. This step is non-negotiable—it unlocks the Maillard reaction, which builds complex flavors.
Here’s the thing—don’t crowd the pot. Work in batches if needed, but ensure each bone gets proper color. The bones will release fat and caramelized bits as they sear, forming the foundation of your broth’s umami. Once deeply browned, remove the bones with tongs and set them aside temporarily on a plate.
Bloom Aromatics and Build the Base
In the same pot, add the 1 whole yellow onion, 4 whole carrots, and 3 whole celery stalks, all cut as specified. Stir to coat in the rendered fat and sear for 5 minutes until the vegetables begin to soften and take on color. You’ll smell the onion caramelizing—that’s when you know you’re on the right track.
Add the 6 smashed garlic cloves, 2 sprigs fresh thyme, 2 whole fresh bay leaves, 1 teaspoon salt, and 10 whole black peppercorns. Stir everything together for 1 minute until the garlic becomes fragrant. This is called blooming spices, and it releases their essential oils—critical for flavor development. Don’t skip this; it makes all the difference.
Combine and Pressure Cook
Pour in the 6 cups water and the 1 tablespoon Worcestershire sauce. Return the seared beef bones to the pot. Secure the lid, set the valve to “Sealing,” and select the “High Pressure” function for 90 minutes. This long cook time is essential—it breaks down collagen in the bones, releasing gelatin that gives your broth its signature richness and body.
Real talk: Your Instant Pot will beep when the cooking cycle completes, but don’t open it immediately. Let the pressure release naturally for 15 minutes first. This gradual release prevents the broth from becoming cloudy and helps settle any sediment at the bottom. Patience here ensures the cleanest, most flavorful result.
Strain and Finish
After natural release, carefully remove the lid and discard the solids—vegetables, thyme sprigs, and bay leaves. Strain the broth through a fine-mesh sieve into a clean pot or large bowl. You’ll have about 4-5 cups of deeply golden, aromatic liquid. The strained broth should be clear with a rich, beefy aroma—this is your reward for the process.
Return the broth to the Instant Pot (or keep it in the pot if you strained directly). Stir in the ¼ cup fresh parsley, including stems for extra flavor. Let it simmer on “Sauté” mode for 5 minutes to infuse the parsley’s brightness. Taste and adjust seasoning with additional salt if needed. The broth should be deeply savory with a perfect balance of saltiness and umami.
Pro Tips For Making Instant Pot Beef Broth
- BLISTER THE BONES FIRST: I learned this the hard way—skipping the sear means flavor gets stuck in your pot instead of the broth. Use the Instant Pot’s sauté function to char the bones for 5–7 minutes until they’re deeply browned. The crusty bits dissolve into rich, umami-packed liquid that store-bought bouillon can’t touch.
- CHOP VEGETABLES UNEVENLY: No need for perfect dice—roughly chop carrots and celery into 1-inch chunks, and leave onions in 4–6 uneven pieces. Smaller bits soften too fast, while larger pieces prevent mush and keep the broth’s texture balanced. (Yes, even if you’re impatient like me.)
- DON’T PACK THE POT: Bones and veggies need room to move, or you’ll end up with a murky broth and undercooked ingredients. Arrange them in a single layer, then nestle garlic cloves around the edges—this guarantees even cooking and prevents a soggy, flavorless pile. (Your future self will thank you.)
- PRESSURE-COOK LONG ENOUGH: The Instant Pot’s high-pressure setting might say “done” at 30 minutes, but I push it to 45–60 for deeper flavor extraction—especially with tough bones. The extra time turns pale broth into something rich enough to sip straight from the pot. (No, it won’t ruin your day.)
Common mistakes when making perfect results
Skipping the Sear
One of the biggest mistakes is rushing the searing step. Many home cooks skip searing the bones entirely or only brown them lightly, which means missing out on the Maillard reaction—the chemical process that creates deep, complex flavors.
I’ve seen broths made this way taste flat and one-dimensional. Take your time and get those bones deep golden brown on all sides. If you’re short on time, work in batches to ensure even browning. 🔥
Overfilling the Pot
Instant Pots have maximum fill lines for a reason—overfilling can trigger the 10-minute boil-over protection or even cause pressure buildup issues. For this recipe, never exceed 2/3 capacity when adding liquids. I’ve had broths that ended up with a thin, watery consistency because the pot couldn’t build proper pressure.
If you’re using a 6-quart Instant Pot, stick to 4 cups of liquid max before pressure cooking. Always leave room for expansion!
Rushing Pressure Release
Impatience here ruins everything. Quick-release after pressure cooking can turn your rich, golden broth into a cloudy, sediment-filled mess. Always let the pressure release naturally for 15 minutes before opening the lid. This gradual release allows the broth to settle and prevents the gelatin from breaking down prematurely.
I’ve seen broths go from velvety to murky just by skipping this step—don’t let that happen to you!
Ignoring the Bloom
The blooming step (cooking spices in oil before adding liquids) is where flavor magic happens, yet many recipes skip it. When you add garlic, thyme, and bay leaves directly to cold water, their essential oils disperse weakly.
Instead, bloom them in the rendered fat from the bones for 1 minute—this intensifies their aroma by 30-40%. Trust me, your broth will taste dramatically better if you take this extra 60 seconds. 💫
Using Cold Water
Cold water shocks the pot and slows down the cooking process, which can lead to uneven extraction of flavors. Always use room-temperature water (or water that’s been sitting out for 20 minutes).
Cold water also causes the Instant Pot to take longer to reach pressure, extending your total cook time. I keep a pitcher of water at room temp in my fridge for exactly this reason—no excuses!
Neglecting the Strain
Some cooks skip straining their broth, leaving behind bits of vegetables and herbs that can make the final product look unappetizing. While you could technically use the broth as-is, straining removes unwanted solids and gives you a smooth, restaurant-quality liquid.
Use a fine-mesh sieve or cheesecloth for the cleanest results. Pro tip: Save the strained solids for compost or stock—every bit of flavor counts!
Nutrition facts
Frequently asked questions
Can I use beef chuck roast instead of bones?
Yes! Brown 2 pounds beef chuck roast first in the Instant Pot on Sauté mode until deeply browned on all sides. This creates the same flavor foundation as seared bones. After browning, add the vegetables and proceed with the recipe as written. The meat will break down during pressure cooking, infusing the broth with rich beef flavor.
How do I store and reheat leftover broth?
Store broth in an airtight container in the fridge for up to 5 days or freeze for 3 months. To reheat, warm gently on the stove over medium-low heat until steaming (about 5-7 minutes). Never microwave directly from frozen—thaw overnight in the fridge first. The fat will solidify on top when chilled, so skim it off before reheating if you prefer a leaner broth.
Why does my broth look cloudy after pressure cooking?
Cloudiness usually means the pressure released too quickly or you didn’t strain properly. Always let the pressure release naturally for 15 minutes before opening. For extra clarity, strain through a fine-mesh sieve lined with cheesecloth, then simmer the strained broth for 5 minutes to settle any remaining particles. The cloudiness will dissipate as it cools.
Can I make this broth vegetarian?
Not traditionally, but you can create a similar umami-rich base using mushroom stems, soy sauce, and miso paste instead of beef. For a meaty texture, add vegetable bouillon cubes or tomato paste during pressure cooking. The Instant Pot method still works—just reduce the cook time to 45 minutes for vegetables. The flavor will be different but still deeply savory!
What’s the best way to use this broth?
This rich broth elevates everything! Use it as a base for beef stews, risotto, or mashed potatoes. Freeze in ice cube trays for easy portioning in soups or sauces. For extra depth, reduce it by half on the stove to make a velvety sauce. The umami flavor also makes it perfect for braising meats or deglazing pans after searing.

- Crock Pot Round Steak Recipe: Slow-Sear Crust With Juicy Center - November 6, 2026
- Candied Sweet Potatoes Crock Pot Recipe: Caramelized Sweetness With Zero Effort - November 6, 2026
- Steak Recipe Crock Pot: Juicy, Caramelized Crust in 4 Hours - November 6, 2026