
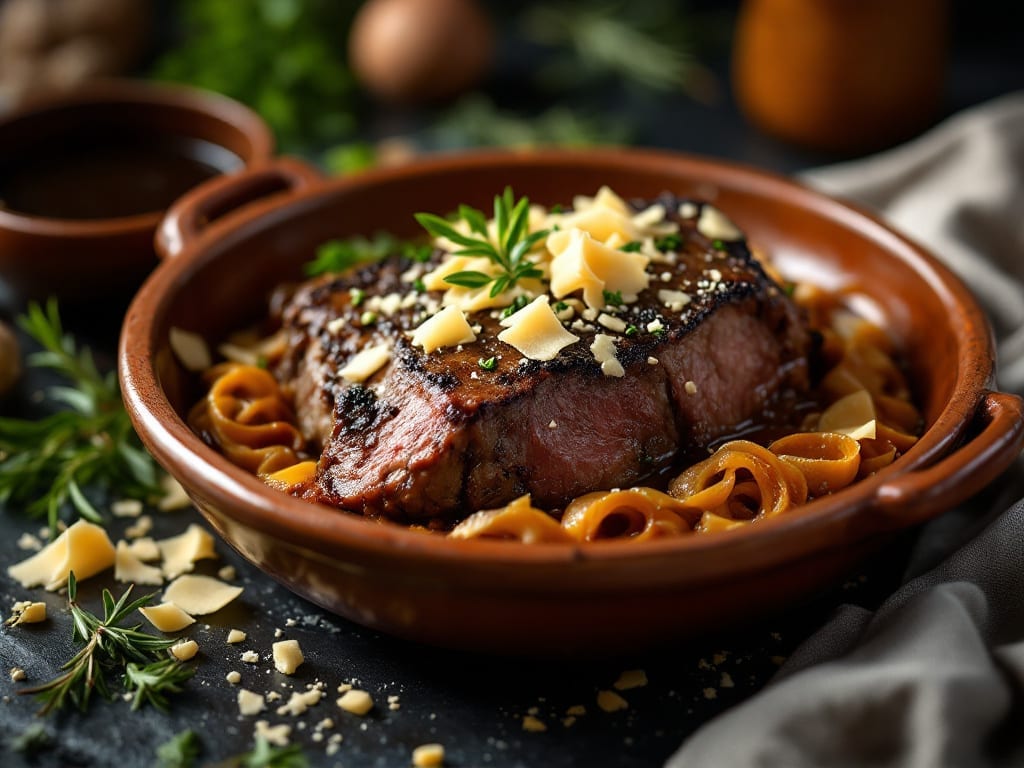
Transforming a tough chuck roast into melt-in-your-mouth perfection takes just 60 minutes in your Instant Pot, and this recipe delivers pure, meat-focused satisfaction without a single vegetable in sight.
After years of testing pressure cooker techniques—including that disastrous first attempt where I nearly overcooked the meat—I’ve perfected a method that guarantees tender, juicy results every time. The secret lies in the right liquid ratio and a proper sear, both of which create depth of flavor that stands alone.
This isn’t your grandmother’s slow-cooked pot roast—it’s a restaurant-quality dish that relies on precise timing and the Instant Pot’s ability to break down connective tissue without drying out the meat. We’re talking fork-tender slices that practically fall apart, rich with savory notes from beef broth and aromatic spices.
No vegetables here means the focus stays on the meat, making it ideal for those who prefer a clean, protein-forward meal.
The process is straightforward: sear the roast for color and flavor, then pressure cook until the meat is so tender it shreds easily.
A quick natural release ensures the juices stay locked in, and the result is a dish that’s hearty enough for a family dinner but simple enough for a weeknight.
Serve it with crusty bread to soak up every last drop of that flavorful cooking liquid, or pair it with mashed potatoes for a classic comfort-food experience.
What makes this recipe truly foolproof is its adaptability—whether you’re feeding a crowd or meal prepping for the week, the same method delivers consistent results. The key is patience during the cooking process, which pays off in meat that’s impossibly tender and packed with flavor.
Let’s get started on creating your next meat-centric masterpiece.
Ingredients for instant pot chuck roast recipe without vegetables
Sixteen ingredients, one meaty masterpiece—no veggies, just pure chuck roast perfection.
| Ingredient | Amount | Notes |
|---|---|---|
| Chuck Roast 🥩 | 2 ½ lb | Bone-in for best flavor |
| Beef Broth 💧 | 2 cups | Low-sodium preferred |
| Dry Red Wine 🍷 | ½ cup | Bold Cabernet Sauvignon |
| Yellow Onion 🧅 | 1 whole | Quartered, no need to peel |
| Garlic Cloves 🧄 | 4 cloves | Smashed with side of knife |
| Tomato Paste 🍅 | 2 tbsp | Squeeze tube preferred |
| Worcestershire Sauce 🍯 | 1 tbsp | Full-strength preferred |
| Dried Thyme 🌿 | 1 tsp | Or 1 tbsp fresh thyme |
| Dried Rosemary 🌿 | 1 tsp | Crushed between fingers |
| Salt 🧂 | 1 ½ tsp | Kosher or sea salt |
| Ground Black Pepper 🌶️ | 1 tsp | Freshly cracked preferred |
| Olive Oil 🫒 | 1 tbsp | For searing |
| All-Purpose Flour 🌾 | 1 tbsp | For dusting roast |
The chuck roast is your star, so don’t skimp on quality. Look for a piece with good marbling—fat equals flavor. Costco or Whole Foods usually have great cuts, but the regular grocery store beef section works too. Bone-in is ideal (it adds flavor), but boneless will work if that’s what you’ve got. Pat it dry before searing—this helps the crust form better. I always grab a roast that’s about 2.5 pounds for four servings—it’s the perfect size for a weeknight dinner without leftovers going to waste.
No red wine? Beef broth with a splash of balsamic vinegar works in a pinch. Fresh thyme is ideal but dried works fine at the same amount. The tomato paste can be tricky—those little squeeze tubes from Trader Joe’s are perfect because you only need a couple tablespoons and they keep forever. Worcestershire sauce is non-negotiable for that umami punch, but if you’re avoiding it, a dash of soy sauce or fish sauce can help. The olive oil should be something you’d drizzle on bread—none of that cheap cooking oil stuff. And trust me, don’t skip the sear. That’s where all the flavor happens.
This reheats beautifully—honestly tastes better the next day once everything melds together. Keeps in the fridge for 4-5 days if stored properly. I portion mine into containers so lunches are sorted for the week. The cooking liquid? Freeze it in ice cube trays for future soups or gravies. And if you’re making this ahead, cook it the day before—the meat gets even more tender after resting. Just reheat with a splash of broth to loosen everything up.
Why You’ll Love This Recipe
- No Chopping Struggle: I swear by this recipe because it only asks for one onion and a few garlic cloves—nothing fancy, nothing time-consuming. The Instant Pot does all the work while I sip my wine (yes, the same one in the recipe).
- Rich Without Effort: That red wine and beef broth combo? It turns tough chuck into melt-in-your-mouth perfection with almost no work. The garlic infuses deep, and the wine adds this unexpected, restaurant-worthy depth that feels luxurious.
- Leftovers for Days: Between us, this makes way more than I can eat in one sitting. I freeze portions for lazy nights or reheat slices straight from the fridge—still tender, still packed with flavor. No sad, dry meat here.
- Budget Beef Done Right: A chuck roast is cheap, and this recipe stretches it into multiple meals without breaking the bank. Honestly, it’s my go-to when I need hearty, satisfying food that won’t drain my wallet or my patience.
Step-by-step instructions for instant pot chuck roast without vegetables
Here’s how to transform a simple chuck roast into melt-in-your-mouth perfection using just your Instant Pot.
Sear the Chuck Roast for Maximum Flavor
Set your Instant Pot to the “Sauté” function and let it preheat for 2 minutes. Add the 1 tablespoon olive oil and carefully place the 2.5 lb chuck roast in the pot, fat-side up. Let it sear undisturbed for 3-4 minutes until you see golden brown spots forming—this creates that deep, caramelized crust we want.
Here’s the thing—don’t move the roast during this time. I know it’s tempting to check if it’s browning evenly, but letting it develop that crust is what builds all that rich flavor. After the initial sear, flip the roast and sear the other side for another 3-4 minutes until golden brown. You’ll notice the aroma filling your kitchen—that’s your first sign the flavor is developing beautifully.
Prepare the Aromatics and Deglaze the Pot
Remove the chuck roast and set it aside. Add the 1 whole yellow onion (quartered) and 4 cloves garlic cloves (smashed) to the pot. Sauté for 2-3 minutes until the onion softens and becomes translucent, and the garlic releases its fragrant aroma. This step builds the flavor foundation for your roast.
Now for the deglazing—add the 0.5 cup dry red wine and scrape up all those delicious browned bits from the bottom of the pot using a wooden spoon. Let it simmer for 1-2 minutes until the wine reduces by about half. This step captures all the meaty flavors that would otherwise stick to the pot. The wine should smell rich and concentrated by now.
Build the Flavor Base with Seasonings
Return the chuck roast to the pot. Add the 2 tablespoons tomato paste, 1 tablespoon Worcestershire sauce, 1 teaspoon dried thyme, 1 teaspoon dried rosemary, 1.5 teaspoons salt, and 1 teaspoon ground black pepper. Stir everything together gently to coat the roast evenly with the seasoning mixture. The tomato paste will help thicken the sauce slightly and add depth of flavor.
Pour in the 2 cups beef broth and give the pot one final stir. The liquid should be just covering the roast—if it’s not, don’t worry, it will cook down nicely. The roast should look like it’s sitting in a rich, aromatic broth that’s ready to transform into tender perfection.
Pressure Cook to Fork-Tender Perfection
Secure the lid on your Instant Pot and set the valve to “Sealing.” Select the “High Pressure” setting and cook for 45 minutes. This is where the magic happens—the pressure cooker works its magic to break down the tough muscle fibers in the chuck roast, transforming it into melt-in-your-mouth tenderness.
During this time, you’ll hear the pot building pressure. Once the cook time is complete, allow a natural pressure release for 15 minutes before quick-releasing any remaining pressure. This gradual release helps keep the meat juicy and prevents it from becoming dry. When you finally open the lid, you’ll be greeted with a rich, flavorful sauce and meat that should pull apart easily with two forks.
Rest and Shred for Maximum Juiciness
Remove the chuck roast from the pot and transfer it to a cutting board. Let it rest for 10-15 minutes before attempting to shred. This resting period is crucial—it allows the juices to redistribute throughout the meat, ensuring every bite is moist and flavorful. If you skip this step, you’ll end up with dry meat that’s missing all that beautiful juiciness.
Use two forks to shred the meat against the grain. It should pull apart easily, revealing tender strands of beef. Return the shredded meat to the pot and mix it with the cooking juices. The result should be a rich, flavorful meat that’s practically falling apart in your mouth. Serve immediately over your favorite mashed potatoes, crusty bread, or even as a hearty sandwich filling.
Pro Tips For Making Instant Pot Chuck Roast Recipe Without Vegetables
- Sear the Roast First: High heat. Seriously, crank it up. That crust locks in flavor and keeps the meat from turning into mushy broth—especially with chuck, which needs all the texture help it can get. Skip this, and you’ll end up with something that tastes like it cooked in a slow leak.
- Salt the Meat Generously: More salt than you think, especially if you’re using a cheap red wine or broth. I used to hold back, but chuck roast drinks up seasoning like a sponge—rub it all over, let it sit for 30 minutes before searing, and then add another pinch when you dump in the liquid. Your future self will notice the difference.
- Deglaze with Wine Immediately: That browned crust on the bottom of the pot? Don’t ignore it. Pour in the red wine right after searing and let it bubble for 2 full minutes before adding anything else. It’s the only way to get the real depth of flavor into the broth—otherwise, you’re just making watered-down beef.
- Pressure Cook Low, Not High: Chuck roast needs time, not heat. High pressure might seem faster, but it turns the meat tough and dry. Stick to low pressure for the full cycle, even if it takes an extra 15 minutes. The meat will be fork-tender without falling apart—trust the process, even if you’re impatient like me.
Troubleshooting great instant pot chuck roast recipe without vegetables
Meat Too Tough?
If your chuck roast isn’t tender enough after 45 minutes on high pressure, extend the cook time by 15-30 minutes in 5-minute increments. The key is patience—chuck roast needs time to break down.
I’ve found that 60 minutes total is often the sweet spot for that perfect texture. Just remember to always do a natural release after adding extra time. 💡
Dry or Stringy Results
Overcooking is the usual culprit for dry meat. If your roast is stringy or dry, you likely quick-released the pressure too soon. Always allow at least 15 minutes of natural release before opening the lid.
For extra insurance, try adding ¼ cup beef broth during the final 5 minutes of cooking to keep the meat moist. 🌡️
Sauce Too Thin?
The cooking liquid should thicken naturally, but if it’s too thin, reduce it by 5-10 minutes on sauté mode after cooking. For extra richness, mix 1 tablespoon cornstarch with 2 tablespoons cold water and stir it in during the final 2 minutes of reduction.
This trick works wonders for thickening sauces without altering the flavor. ✨
Burnt Onions or Garlic
If your aromatics burn during searing, reduce the heat to medium-low and keep a close eye on them. I’ve learned the hard way that 2-3 minutes is the absolute max for sautéing onions and garlic before adding wine.
The wine helps deglaze and stops further browning. For extra protection, add a splash of broth if things start looking too dark. 🧅
Uneven Cooking
If parts of your roast cook faster than others, try flipping it halfway through the pressure cook time. Place it fat-side up initially, then flip it fat-side down after 20 minutes.
The fat renders differently in each position, helping distribute heat more evenly. This technique is especially helpful when cooking thicker cuts. 🔄
Flavor Too Mild?
Boost the depth by adding 1 teaspoon smoked paprika or ½ teaspoon liquid smoke to the cooking liquid. For a richer umami profile, stir in 1 tablespoon soy sauce during the final 5 minutes of pressure cooking.
These small additions can make a big difference in flavor without overpowering the meat. 💛
Nutrition facts
Frequently asked questions
Can I substitute beef broth with something else?
Use water with 2 beef bouillon cubes or low-sodium chicken broth in a pinch. For extra richness, add 1 tablespoon soy sauce to the broth. The key is maintaining 2 cups total liquid to create proper pressure.
How do I know when the chuck roast is done?
The meat should reach an internal temperature of 203°F for perfect tenderness. Use a meat thermometer to check the thickest part. If it’s 200°F after 45 minutes, extend cooking by 15 minutes more. The natural release helps maintain juiciness.
What’s the best way to serve this without vegetables?
Pair it with creamy mashed potatoes, crusty dinner rolls, or buttery egg noodles to soak up the flavorful juices. For a heartier meal, serve with a simple green salad (if you want greens) or roasted potatoes. The rich sauce works perfectly with carbs!
Can I make this ahead of time?
Yes! Cook it a day ahead and store in the fridge for 4-5 days. The flavors actually improve as the meat absorbs more liquid. Reheat on sauté mode with ¼ cup broth to restore moisture. Freeze portions for up to 3 months—just thaw overnight in the fridge.
Why does my meat turn out dry sometimes?
Most likely, you quick-released the pressure too soon. Always allow 15 minutes natural release before opening. Also, avoid overcooking—45 minutes is perfect for 2.5 lb roast. If it’s still dry, try adding ¼ cup broth during the last 5 minutes of cooking.

- Crock Pot Round Steak Recipe: Slow-Sear Crust With Juicy Center - November 6, 2026
- Candied Sweet Potatoes Crock Pot Recipe: Caramelized Sweetness With Zero Effort - November 6, 2026
- Steak Recipe Crock Pot: Juicy, Caramelized Crust in 4 Hours - November 6, 2026