
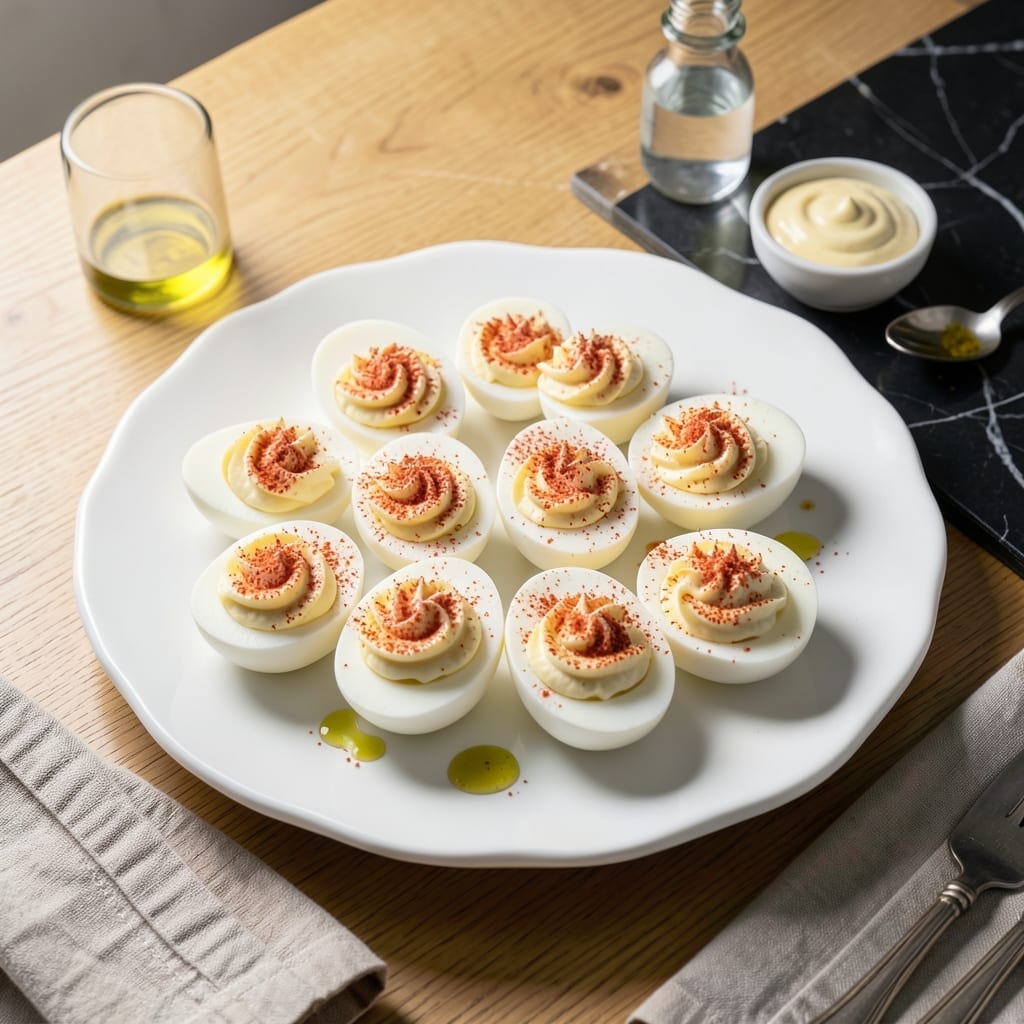
This Instant Pot method transforms deviled eggs from a tedious process to a streamlined, foolproof approach. No more worrying about cracked shells or overcooked yolks—just perfect eggs every time.
The pressure cooker hard-boils the eggs in 5 minutes, ensuring the whites stay tender while the yolks become rich and creamy. The rapid release prevents that unsightly green ring around the yolk, giving you beautiful, restaurant-quality results.
Once cooled, the eggs peel easily, and the yolks blend into a velvety filling with just the right amount of tang. A touch of mustard and a pinch of paprika add the classic kick that makes these eggs irresistible.
Serve these at your next gathering and watch them disappear. This technique is a game-changer for anyone who loves deviled eggs but hates the fuss.
Ingredients for Instant Pot Deviled Eggs
A dozen eggs and a few pantry staples create these creamy, tangy deviled eggs.
| Ingredient | Amount | Notes |
|---|---|---|
| Large Eggs 🥚 | 12 whole | Room temperature for even cooking |
| Water 💧 | 1 cup | For pressure cooking |
| Mayonnaise 🥫 | ¾ cup | Full-fat for creaminess |
| Dijon Mustard 🟡 | 2 tbsp | Smooth, no seeds |
| White Vinegar 🍶 | 1 tbsp | Or apple cider vinegar |
| Sweet Paprika 🌶️ | 1 tsp | For garnish and color |
| Salt 🧂 | ½ tsp | Fine grain for even distribution |
| Black Pepper 🌶️ | ¼ tsp | Freshly ground preferred |
| Granulated Sugar 🍚 | ½ tsp | Balances tanginess |
| Fresh Dill 🌿 | 1 tbsp | Finely chopped, optional |
| Fresh Chives 🌱 | 1 tbsp | Finely chopped, optional |
The eggs are the foundation here—fresh, large eggs yield the best texture and peel most easily. I always use organic, free-range from Whole Foods or my local farmers market (the shells are tougher, which helps prevent cracking). Room temperature is key for even cooking; cold eggs straight from the fridge can crack under pressure. For the mayonnaise, Duke’s or Hellmann’s deliver that perfect creamy base.
No Dijon? Yellow mustard at half the amount works in a pinch, though the flavor will be milder. Fresh out of paprika? Smoked paprika or cayenne adds a different kind of kick. The vinegar can be swapped for lemon juice if you prefer a brighter tang. For a richer filling, some cooks add a spoonful of sour cream or Greek yogurt—both work beautifully.
Assembled deviled eggs keep covered in the fridge for up to 3 days, though they’re best the day they’re made. The filling can be prepared a day ahead—store it in a sealed container with plastic wrap pressed directly on the surface to prevent browning. Hard-boiled eggs (unpeeled) stay fresh for 1 week in the refrigerator.
Why You’ll Love This Recipe
- Set and Forget: The Instant Pot does all the hard work—just add eggs and water, then let it cook while I prep the filling.
- Tangy Kick: The Dijon and vinegar mix gives that sharp, zesty bite that makes these irresistible.
- Party Ready: I bring these to potlucks, and they’re always the first to disappear.
- Budget Friendly: A dozen eggs and a few pantry staples make a dish that feeds a crowd without breaking the bank.
Step-by-Step Instructions for Instant Pot Deviled Eggs
Master this method for perfectly cooked eggs and a velvety filling that delivers on the creamy promise.
Step 1: Pressure Cook the Eggs to Perfect Hard-Boiled Consistency
Place the trivet in the Instant Pot and add the 1 cup water. Arrange the 12 whole Large Eggs on the trivet in a single layer, stacking if necessary but ensuring no eggs touch the water directly. Secure the lid, set the valve to sealing, and cook on high pressure for 5 minutes.
Once the cooking cycle completes, allow for a natural pressure release for 5 minutes, then quick-release any remaining pressure. The eggs should be fully set with no grayish ring around the yolks—indicating perfect doneness. Immediately transfer the eggs to an ice bath to halt the cooking process.
Step 2: Peel and Halve the Eggs for Filling Preparation
After 10 minutes in the ice bath, peel the eggs under a thin stream of running water. The cold water helps separate the membrane from the shell, making peeling effortless. Gently tap each egg on a hard surface, then roll between your palms to loosen the shell before peeling.
Once peeled, slice each egg in half lengthwise using a sharp knife. Carefully remove the yolks and transfer them to a mixing bowl, ensuring no yolk remains in the whites. Arrange the egg white halves on a serving platter, cover with a damp paper towel, and refrigerate until ready to fill.
Step 3: Create the Creamy Yolk Filling with Balanced Flavors
Mash the yolks with a fork until no large lumps remain. Add the 0.75 cup mayonnaise, 2 tbsp Dijon mustard, 1 tbsp white vinegar, 0.5 tsp salt, 0.25 tsp black pepper, and 0.5 tsp granulated sugar. Stir vigorously until the mixture is completely smooth and creamy.
The filling should have a pipable consistency—thick enough to hold its shape but soft enough to squeeze through a pastry bag. Taste and adjust seasoning if needed; the vinegar should provide a subtle tang without overpowering the richness of the mayonnaise and yolks.
Step 4: Fill the Egg Whites and Garnish for Presentation
Transfer the yolk mixture to a piping bag fitted with a star tip or simply spoon it into the egg white halves. For a professional touch, pipe the filling in a swirl motion, slightly overfilling each half for an abundant, bakery-style appearance.
Garnish each deviled egg with a sprinkle of sweet paprika for color and a hint of smokiness. For added freshness and visual appeal, finely chop the 1 tbsp fresh dill and 1 tbsp fresh chives, then sprinkle a pinch of each over the filling. Serve immediately or refrigerate for up to 24 hours before serving.
Pro Tips For Making Instant Pot Deviled Eggs
- Use Cold Eggs: Start with eggs straight from the fridge—it prevents cracking when pressure cooking and makes peeling easier later.
- Quick Release Carefully: After cooking, release the pressure immediately, then transfer eggs to an ice bath for 5 minutes to stop the cooking process and ensure tender yolks.
- Older Eggs Peel Better: Use eggs that are at least a week old; I learned this the hard way—fresh eggs stick to their shells like glue.
- Chill Before Halving: Let the eggs cool completely before slicing—warm yolks smear and make filling the whites messy.
Essential Equipment for instant pot deviled eggs
Instant Pot Selection
The 6-quart Instant Pot Duo is my go-to for this recipe—it fits 12 eggs perfectly on the included trivet. The 8-quart works too but may require stacking eggs. I avoid the 3-quart as it’s too small for a full dozen. 💡
Trivet and Rack
Use the metal trivet that came with your Instant Pot to keep eggs above the 1 cup water. For easier handling, I recommend a silicone steamer basket with handles—OXO’s version fits perfectly and prevents eggs from rolling around.
Mixing Tools
A simple fork works for mashing yolks, but a pastry blender creates an ultra-smooth texture. For the filling, a piping bag with star tip gives that professional swirl. I use Wilton 1M tip for consistent results.
Cooling Setup
Prepare an ice bath in a large bowl with 4 cups ice and 4 cups water. A slotted spoon helps transfer hot eggs to the bath quickly. I keep a kitchen timer handy for the 10-minute cooling period.
Peeling Assist
Peel eggs under running water using a small mesh strainer to catch shells. The running water helps separate membrane from shell. I find a soft-bristle brush removes any stubborn bits without damaging the whites.
Serving Essentials
A deviled egg plate with individual wells keeps them stable. I use a white ceramic platter to show off the vibrant filling. For garnishing, keep small prep bowls ready for paprika and herbs. ✨
Nutrition Facts
Frequently Asked Questions
How long do I pressure cook the eggs?
Cook on high pressure for 5 minutes, then allow a 5-minute natural release. This ensures perfectly set whites and creamy yolks every time.
Can I use cold eggs straight from the fridge?
Room temperature eggs are ideal for even cooking. Cold eggs may crack under pressure. If using refrigerated eggs, let them sit out for 15-20 minutes first.
What if my eggs are hard to peel?
Peel under running water to help separate the membrane. If still stubborn, try slightly older eggs (1-2 weeks old) as they peel more easily than ultra-fresh ones.
How far in advance can I make these?
Assembled eggs keep covered in the fridge for up to 3 days. For best texture, prepare the filling a day ahead and fill the whites just before serving.

- 6 Oz Chocolate Chip Cookie Recipe: Perfectly Balanced Crispy Edges and Chewy Hearts - September 25, 2026
- 6-Inch Coffee Cake Recipe: Vanilla Bean Swirls and Buttery Streusel Topping - September 25, 2026
- 1 Hour Soup Recipe: Velvety Richness Without the Wait - September 25, 2026