
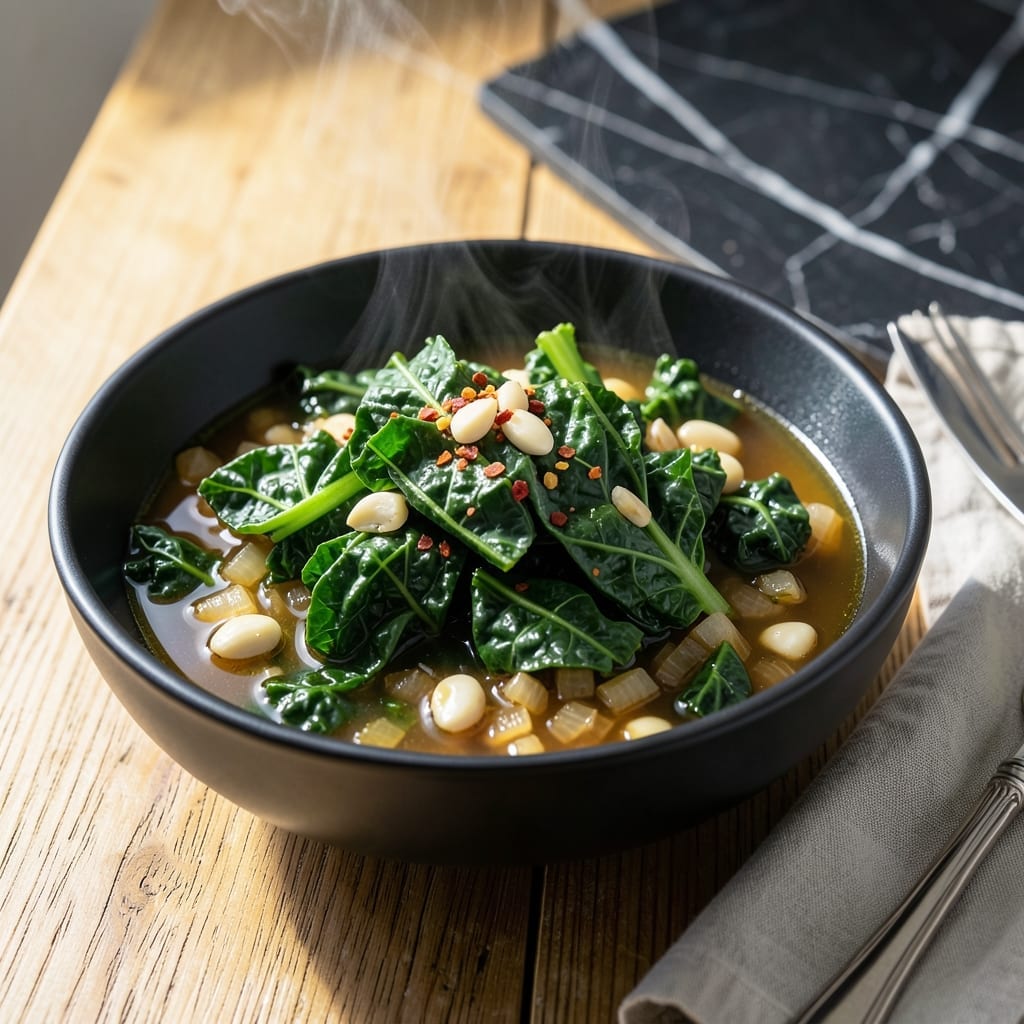
This Instant Pot method transforms kale from tough and bitter to tender and flavorful in just minutes. No more chewy leaves or long stovetop simmering required.
The pressure cooker works magic on this hearty green, breaking down fibers while preserving vibrant color and nutrients. A simple combination of broth, garlic, and seasonings enhances the natural earthiness without overpowering it.
What emerges is perfectly cooked kale that retains its bright green hue and offers a pleasant bite. The dish comes together with minimal effort and almost no cleanup, making it ideal for busy weeknights.
Serve as a side or incorporate into grain bowls for a nutritious boost. This technique delivers consistent results every time.
Ingredients for Instant Pot Kale
Fresh kale, bold flavors, and pantry staples deliver vibrant greens with minimal effort.
| Ingredient | Amount | Notes |
|---|---|---|
| Fresh Kale Leaves 🥬 | 1 lb | Stems removed, chopped |
| Vegetable Broth 🥣 | 1 cup | Low-sodium preferred |
| Garlic Cloves 🧄 | 4 cloves | Minced for maximum flavor |
| Olive Oil 🫒 | 1 tbsp | Extra-virgin for quality |
| Onion 🧅 | ½ whole | Yellow or white, finely diced |
| Red Pepper Flakes 🌶️ | ½ tsp | Adjust for heat preference |
| Salt 🧂 | ½ tsp | Diamond Crystal kosher preferred |
| Black Pepper 🌶️ | ¼ tsp | Freshly ground for best results |
| Lemon Juice 🍋 | 1 tbsp | Freshly squeezed for brightness |
| Apple Cider Vinegar 🍏 | 1 tsp | Balances the earthy kale |
| Nutritional Yeast 🧀 | 2 tbsp | For umami depth (vegan) |
| Smoked Paprika 🌶️ | ½ tsp | Adds subtle smokiness |
The kale quality is paramount. Opt for bunches with firm, dark leaves—avoid wilted or yellowing greens, which indicate age. Whole Foods or farmers markets often have the freshest selection. For the broth, Imagine or Pacific Foods offer reliable low-sodium options. Nutritional yeast, found in the bulk section at natural food stores, adds the cheesy depth that makes this dish satisfying without dairy.
No vegetable broth? Water with a bouillon cube works in a pinch. Short on fresh garlic? Garlic powder at half the quantity is acceptable, though less vibrant. If you dislike heat, omit the red pepper flakes—the dish remains flavorful. The apple cider vinegar can be swapped for white wine vinegar or more lemon juice, depending on what you have on hand.
Store fresh kale unwashed in the fridge for up to 5 days. Once cooked, it keeps for 3-4 days in an airtight container. The dish freezes well for 2 months, though the texture softens slightly upon thawing. Reheat gently to preserve color and nutrients.
Why You’ll Love This Recipe
- One Pot Wonder: I just dump in kale, broth, garlic, and onion—set the Instant Pot and walk away.
- Garlic Kissed Greens: The olive oil and garlic transform the kale into something rich and savory, not bitter at all.
- Meal Prep Magic: Honestly, it keeps perfectly in the fridge for days, so I make a big batch for lunches.
- Budget Friendly: A bunch of kale and pantry staples stretch into multiple meals without breaking the bank.
Step-by-Step Instructions for Instant Pot Kale
This method delivers tender, flavorful kale with minimal effort and maximum nutrient retention.
Step 1: Prepare the Aromatics and Kale
Begin by finely dicing the 0.5 whole Onion and mincing the 4 cloves Garlic Cloves. I prefer a sharp chef’s knife for precision, ensuring uniform pieces that cook evenly. Heat the 1 tbsp Olive Oil in the Instant Pot using the sauté function on medium heat.
Add the diced onion and cook for 3-4 minutes until translucent and just beginning to caramelize at the edges. Stir in the minced garlic, 0.5 tsp Red Pepper Flakes, 0.5 tsp Salt, and 0.25 tsp Black Pepper, cooking for an additional 30 seconds until the garlic is fragrant. This builds a flavor foundation for the kale.
Step 2: Deglaze and Add Liquid
Pour in the 1 cup Vegetable Broth to deglaze the pot, scraping the bottom with a wooden spoon to release any browned bits. These fond bits add depth to the dish, so be thorough. Add the 0.5 tsp Smoked Paprika and stir to combine, allowing the spices to bloom in the warm liquid for 1 minute.
While the broth heats, ensure the 1 lb Fresh Kale Leaves are washed, stems removed, and chopped into bite-sized pieces. Kale can be sandy, so a thorough rinse is essential. The leaves should be dry enough to prevent excess liquid in the pot, which could dilute the flavors.
Step 3: Pressure Cook the Kale
Add the chopped kale to the Instant Pot, pressing it down gently to submerge it in the broth as much as possible. Secure the lid, set the valve to sealing, and cook on high pressure for 2 minutes. The kale will wilt significantly under pressure, so don’t be alarmed by the initial volume.
Once the cooking time is complete, perform a quick release to stop the cooking process immediately. This preserves the vibrant green color and prevents the kale from becoming mushy. Open the lid carefully, allowing the steam to escape away from your face.
Step 4: Finish with Brightness and Umami
Stir in the 1 tbsp Lemon Juice and 1 tsp Apple Cider Vinegar to brighten the dish and balance the earthy kale. The acidity cuts through the richness and enhances the overall flavor profile. Taste and adjust seasoning if needed, though the initial salt should suffice.
Sprinkle the 2 tbsp Nutritional Yeast over the kale and stir gently to incorporate. This adds a subtle cheesy, umami depth that complements the smoky and spicy notes. Let the dish sit for 2-3 minutes to allow the flavors to meld before serving.
Pro Tips For Making Instant Pot Kale
- Pre-cook the onion: Sauté the onion in olive oil for 3-4 minutes before adding kale—it builds a deeper flavor base than dumping everything in at once.
- Strip the stems: Remove the tough stems from kale leaves before cooking; they don’t soften like the leaves and leave a chewy texture in the final dish.
- Use enough liquid: Add at least 1 cup of vegetable broth to prevent burning; kale releases water but needs initial moisture to steam properly in the Instant Pot.
- Quick release carefully: Open the lid slightly away from your face after cooking—kale retains steam and can spurt hot liquid if released too fast.
Make-Ahead Tips for This instant pot kale
Prep Kale in Advance
Wash, stem, and chop your 1 lb Fresh Kale Leaves up to 2 days ahead. Store the prepped kale in a sealed container with a paper towel to absorb moisture. This saves precious minutes on busy nights while keeping the greens crisp. 💡
Pre-Cook Aromatics
Dice the 0.5 whole Onion and mince the 4 cloves Garlic Cloves the night before. Store them together in a small container. This way, you can start cooking immediately without any prep work.
Broth Infusion
Combine the 1 cup Vegetable Broth, 0.5 tsp Smoked Paprika, and 0.5 tsp Salt in a jar and refrigerate. The flavors will meld overnight, creating a more robust base for your kale.
Partial Cooking Method
Cook the kale for just 1 minute under pressure, then quick-release and stop the process. Store the partially cooked kale in the fridge for up to 2 days. Finish cooking when ready to serve.
Freeze for Later
Fully cook and cool the kale, then portion into freezer bags. It keeps well for 2 months. Thaw overnight in the fridge and reheat with a splash of water to restore vibrancy. ❄️
Reheating Tips
Reheat on the stovetop over medium-low heat with a splash of broth for 3-5 minutes. Avoid microwaving, as it can make the kale mushy. Stir in fresh lemon juice after reheating to brighten the flavors.
Nutrition Facts
Frequently Asked Questions
Do I need to remove kale stems?
Yes, stems are tough and fibrous. Remove them by holding the leaf and stripping the stem away with your fingers or a knife. Chop the leaves into bite-sized pieces for even cooking.
Can I use frozen kale?
Yes, but thaw and drain it first to remove excess water. Reduce the cooking time to 1 minute since frozen kale is already blanched. Avoid adding extra liquid.
Why did my kale turn brown?
Overcooking or delayed quick release can cause discoloration. Cook for exactly 2 minutes on high pressure and release immediately to preserve the bright green color.
What can I use instead of nutritional yeast?
Substitute with 1 tbsp grated Parmesan for non-vegan versions or 1 tsp soy sauce for umami. Both add depth without overpowering the dish.

- 6 Oz Chocolate Chip Cookie Recipe: Perfectly Balanced Crispy Edges and Chewy Hearts - September 25, 2026
- 6-Inch Coffee Cake Recipe: Vanilla Bean Swirls and Buttery Streusel Topping - September 25, 2026
- 1 Hour Soup Recipe: Velvety Richness Without the Wait - September 25, 2026