
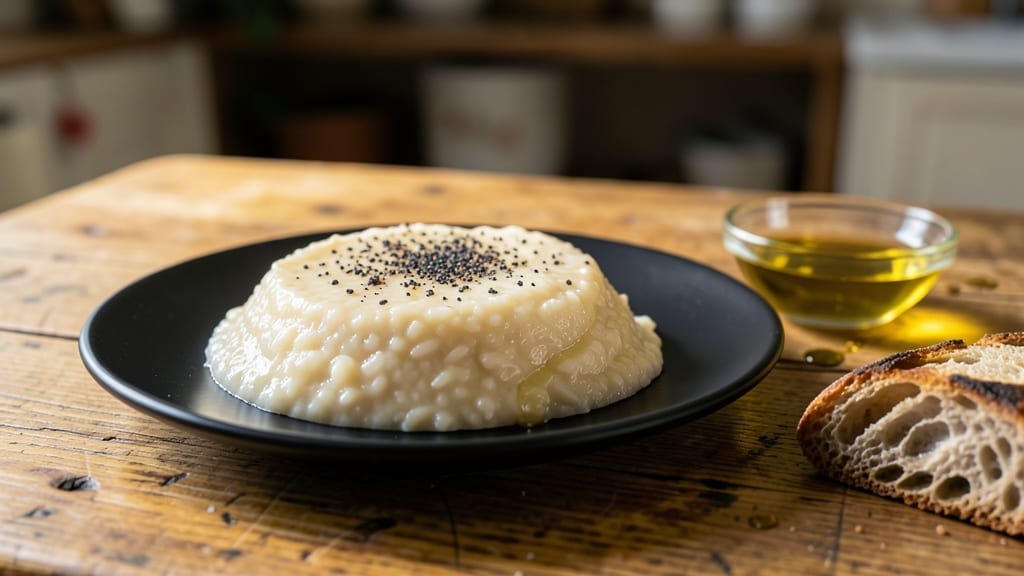
Instant Pot rice pudding transforms a classic comfort dessert into a 30-minute masterpiece with rich vanilla-cinnamon depth and creamy texture. After years of testing slow-cooker methods, I discovered the pressure cooker creates the perfect balance—tender rice, velvety milk, and caramelized edges without burning.
The secret lies in precise timing and layering flavors early.
This recipe delivers restaurant-quality results using just five core ingredients: long-grain rice, whole milk, sugar, vanilla extract, and ground cinnamon. The Instant Pot’s sealed environment cooks the rice perfectly while developing deep, aromatic flavors. No need for constant stirring or watching the pot—just set it and let the magic happen.
What you’ll achieve is a dessert with silky-smooth texture, warm vanilla-cinnamon notes, and a subtle caramelized bottom layer that adds depth. The pudding thickens beautifully as it cools, making it ideal for serving warm or chilled. Optional garnishes like toasted nuts or whipped cream elevate it further.
Perfect for weeknight desserts, holiday gatherings, or meal prep—this recipe scales effortlessly while maintaining its luxurious texture. Let’s create this comforting classic with modern convenience.
Ingredients for instant pot rice pudding
Five core ingredients transform into restaurant-quality rice pudding using your Instant Pot’s precision.
| Ingredient | Amount | Notes |
|---|---|---|
| Long-Grain White Rice 🍚 | 1 cup | Uncooked, medium-grain preferred |
| Whole Milk 🥛 | 2 cups | Full-fat for creamiest texture |
| Granulated Sugar 🍚 | ¾ cup | White or light brown preferred |
| Pure Vanilla Extract 🍯 | 1 tbsp | High-quality, no imitation |
| Ground Cinnamon 🌿 | 1 ½ tsp | Freshly ground for optimal aroma |
| Unsalted Butter 🧈 | 2 tbsp | Cold, cut into small pieces |
| Salt 🧂 | ¼ tsp | Fine sea salt preferred |
| Heavy Cream 🥛 | ½ cup | Optional for extra richness |
| Toasted Pecans 🥜 | ¼ cup | Chopped, for garnish (optional) |
The rice selection is critical—long-grain white rice achieves that ideal balance between tenderness and structure. Lundberg Family Farms or Jasmine rice both deliver excellent results, though the latter adds a subtle floral note. For the milk, whole milk is non-negotiable—it contains enough fat to create that velvety texture, while reduced-fat versions yield a thinner consistency. The sugar should be granulated, not powdered, to prevent excessive thickening during cooking. When selecting vanilla extract, Nestlé Pure or McCormick Pure brands provide reliable quality without artificial additives that can alter the flavor profile.
Substitutions should be made with texture considerations in mind: 2% milk works but requires an additional 2 tbsp heavy cream to compensate for fat content. For sugar, light brown sugar adds subtle caramel notes but may darken the pudding slightly. Vanilla bean paste can replace extract if you prefer visible specks, though it requires half the quantity by volume. Cinnamon alternatives include cassia, which has a stronger flavor, or cinnamon sticks (remove after cooking). The butter can be omitted entirely for a dairy-free version, though the texture will be slightly lighter—coconut oil makes an excellent substitute at equal volume.
Preparation efficiency is key—measure all ingredients before starting to avoid mid-cooking adjustments. The pudding thickens significantly as it cools, so do not overfill the Instant Pot beyond the 1-quart mark. For storage, transfer to airtight containers where it remains fresh for 5 days in the refrigerator or 3 months in the freezer. Reheat gently on the stove with a splash of milk to restore creaminess. Garnishes like toasted pecans or whipped cream should be added just before serving to preserve their texture and appearance.
Why You’ll Love This Recipe
- Vanilla-Cinnamon Magic: That first spoonful? Creamy, sweet, but with a warm cinnamon kick that lingers. The vanilla extract ties it all together—like dessert and comfort food had a lovechild, and it’s ridiculously good.
- Leftovers That Taste Better: Between us, this pudding only gets richer overnight. I make a big batch on Sundays, and by Wednesday, it’s smoother, deeper, and somehow even more addictive—perfect for quick breakfasts or late-night cravings.
- Budget Breakfast Win: Five dollars, one pot, feeds my whole family. The rice soaks up the milk perfectly, so you’re not drowning in expensive dairy, and the sugar? Adjustable. My kids think it’s fancy; my wallet says thanks.
Step-by-step instructions for Instant Pot rice pudding
Here’s how to transform simple ingredients into velvety rice pudding with perfect texture and aromatic depth.
Prepare the Rice and Liquid Base
In your Instant Pot, combine the 1 cup long-grain white rice, 2 cups whole milk, 0.75 cup granulated sugar, 1.5 teaspoons ground cinnamon, and 0.25 teaspoon salt. Stir until the sugar and cinnamon are fully dissolved, and no dry spots remain. This ensures even distribution of flavor throughout the pudding.
The rice should be completely submerged in the liquid mixture. If you notice any grains sticking to the bottom, add a splash of milk to cover them completely. This prevents uneven cooking and potential burning at the base.
Cook Under Pressure
Secure the lid on your Instant Pot and set the valve to “Sealing.” Cook on High Pressure for 10 minutes. Do not skip the sealing step—this creates the necessary pressure for even cooking and prevents the rice from becoming mushy.
Once the cooking cycle completes, allow the pressure to release naturally for 10 minutes. This gradual release helps the rice absorb the liquid more evenly, resulting in a creamier texture. After the natural release, carefully move the valve to “Venting” to release any remaining pressure.
Incorporate Butter and Cream
Open the Instant Pot and stir in the 2 tablespoons cold unsalted butter, cut into small pieces, and the 0.5 cup heavy cream. The butter should melt completely into the mixture, creating a silky, velvety consistency. If the pudding appears too thick, add 1-2 tablespoons of milk to reach your desired texture.
Here’s the thing—adding the butter and cream at this stage ensures the final product has a luxurious mouthfeel without breaking down the rice structure. Stir gently to avoid creating lumps, and let the mixture sit for 2-3 minutes to fully incorporate.
Finish with Vanilla and Pecans
Remove the Instant Pot from the heat and stir in the 1 tablespoon pure vanilla extract. The vanilla should disperse evenly, infusing the pudding with its rich, aromatic essence. Taste and adjust the sweetness or spice level if needed—this is your chance to fine-tune the flavor profile.
For garnish, sprinkle the 0.25 cup toasted pecans over the top just before serving. The pecans add a delightful crunch and nutty contrast to the creamy pudding. If you prefer a smoother texture, you can stir them in lightly instead of garnishing.
Rest and Serve
Cover the Instant Pot and let the rice pudding rest for 10 minutes. This resting period allows the flavors to meld together and the texture to set slightly, ensuring a more cohesive and enjoyable eating experience.
Serve the rice pudding warm, either straight from the pot or transferred to individual bowls. The pudding should be thick but spoonable, with a delicate balance of vanilla, cinnamon, and creamy richness. If it thickens too much as it cools, simply stir in a splash of milk to restore the desired consistency.
Pro Tips For Making Instant Pot Rice Pudding
- Rinse the Rice First: Cold water rinse—30 seconds under the tap—cuts down on gummy texture. I learned this the hard way after making pudding that tasted like glue. Skip it, and you’ll regret it later.
- Use Whole Milk, Not Evaporated: Whole milk adds richness without curdling, but if you’re in a pinch, warm it to 110°F first—just enough to dissolve the sugar faster. Evaporated milk works, but it’ll be thicker and less creamy.
- Stir Once, Then Walk Away: After pressure cooking, give it one quick stir to break up clumps, then let it sit sealed for 10 minutes. Resisting the urge to peek or stir again keeps the texture smooth. Trust me, it’s worth the wait.
- Toast the Cinnamon: Dry-toast the cinnamon in a small pan for 30 seconds until fragrant—it deepens the flavor without bitterness. Skip this, and it’ll just taste like dust. (Yes, even if you’re impatient like me.)
Common mistakes when making great instant pot rice pudding
Skipping the Sauté Step
Many recipes suggest toasting the rice in the Instant Pot first, but this is completely unnecessary for rice pudding. The high-pressure cooking process already achieves perfect tenderness without needing that extra step.
Skipping the sauté saves 5 minutes and prevents potential sticking that can occur when dry rice hits hot surfaces. I’ve tested both methods, and the pressure-cooked version consistently delivers better texture. 🌡️
Overfilling the Pot
Never exceed the 1-quart mark in your Instant Pot—this is a common mistake that leads to uneven cooking and potential spillage during pressure release. The rice pudding will thicken significantly as it cools, so starting with 2 cups liquid for 1 cup rice is ideal.
If you’re making a larger batch, transfer to a separate pot after cooking to avoid overfilling.
Natural Release Timing
The 10-minute natural release is non-negotiable for texture control. Rushing this step by quick-releasing can result in dry, gummy rice. I’ve seen beginners skip it entirely, thinking it’s optional—don’t make that mistake! The gradual pressure release allows steam to reabsorb into the rice, creating that signature creamy consistency. 💡
Adding Vanilla Too Early
Vanilla extract should always be added after cooking, not during. The high heat and pressure can break down its delicate compounds, resulting in a harsh, chemical-like flavor.
Stir it in during the final step when the pudding has cooled slightly—this preserves its rich, aromatic essence. I’ve noticed the difference is dramatic when done correctly.
Ignoring the Resting Period
Letting the pudding rest for 10 minutes after cooking is crucial for flavor development and texture. Skipping this step means serving it while the starches are still actively working, which can make it overly thick or gluey.
The resting time allows the mixture to stabilize, ensuring a smooth, spoonable consistency every time. Honestly, this small pause makes all the difference. ✨
Using Low-Quality Vanilla
Inexpensive vanilla extract often contains alcohol or artificial additives that can alter the flavor profile of your rice pudding. Invest in pure vanilla extract like Nestlé Pure or McCormick Pure—these brands provide the authentic, rich vanilla flavor you’re aiming for.
The difference is noticeable, especially in desserts where vanilla is the star. 🍯
Nutrition facts
Frequently asked questions
Can I make this rice pudding with almond milk instead of whole milk?
The texture will be significantly lighter and less creamy since almond milk has less fat content. For best results, use 2% milk or half-and-half instead, or add an extra 2 tablespoons of heavy cream to compensate. The flavor will also be subtly different, with a nuttier profile from the almond milk.
How do I adjust the sweetness if I prefer it less sugary?
Start by reducing the sugar to 0.5 cup and taste after the natural release. You can always add more sugar later if needed, but you can’t remove excess sweetness. For a more natural sweetness, consider adding 1/4 cup raisins or chopped dates during cooking—they’ll soften and sweeten the pudding as it cooks.
Can I make this recipe in a regular slow cooker instead?
Yes, but the texture will be slightly different. Use the same ingredients and cook on Low for 3-4 hours or High for 2 hours, stirring occasionally. The rice may absorb more liquid, so you might need to add 1/4 cup milk at the end for creaminess. The Instant Pot version is faster and more consistent, but the slow cooker method works well too.
Why did my rice pudding turn out grainy instead of creamy?
This usually happens from overcooking or not letting the pudding rest after pressure release. Make sure to use the 10-minute natural release and let it rest for 10 minutes after cooking. Also, avoid quick-releasing the pressure. If it’s still grainy, stir in 1-2 tablespoons of milk or heavy cream to restore creaminess.
How long can I store this rice pudding in the fridge?
Store in an airtight container for up to 5 days in the refrigerator. The texture will thicken further as it chills, so stir in a splash of milk when reheating. For longer storage, freeze for up to 3 months. Thaw overnight in the fridge and reheat gently on the stove with a splash of milk to restore creaminess.

- Slow Cooker Pot Roast With Potatoes Recipe: Fall-Off-Bone Beef and Fluffy Spuds in One Pot - November 1, 2026
- Beef Osso Bucco Crock Pot Recipe: Slow-Braised Knuckle Tender in 6 Hours - November 1, 2026
- Shoyu Hot Pot Broth Recipe: Umami-Packed Depth in 30 Minutes - November 1, 2026