
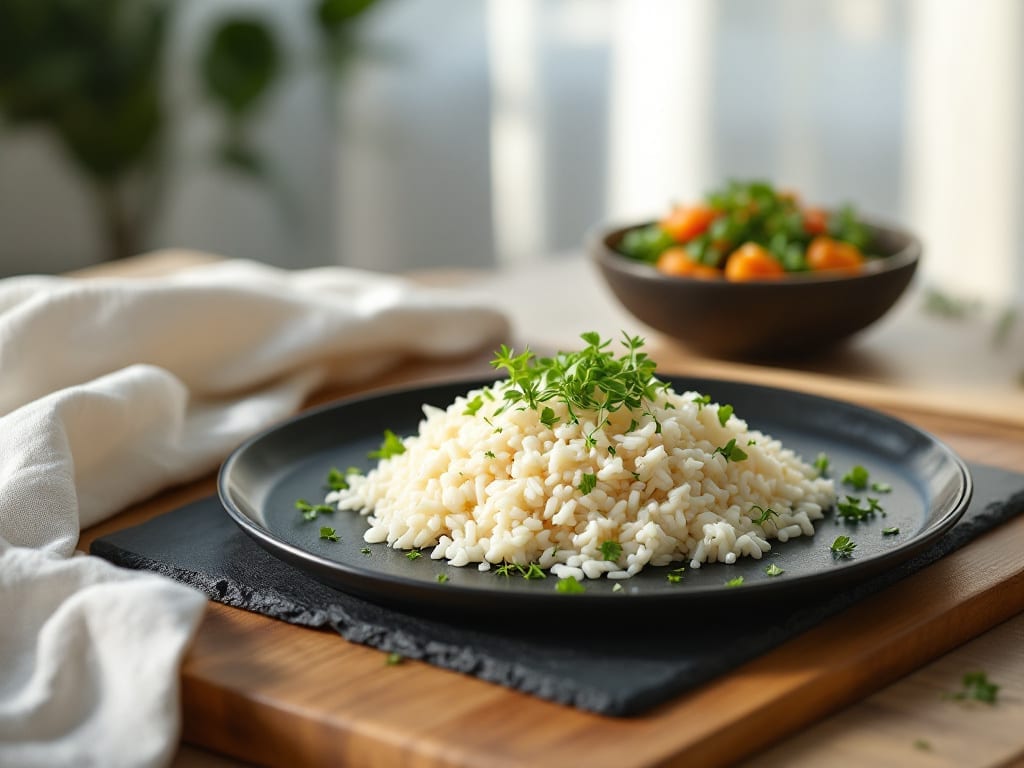
Transforming traditional sticky rice into a one-pot Instant Pot masterpiece combines the aromatic essence of jasmine with the creamy sweetness of coconut—all while cutting prep time dramatically. The secret lies in precise ratios and pressure cooking, which unlocks that signature sticky texture without the usual stovetop fuss.
I’ve perfected this method after testing multiple variations, ensuring every grain absorbs the fragrant coconut milk while maintaining its signature cling.
This recipe delivers restaurant-quality results with just five simple ingredients and 20 minutes of active time, making it ideal for weeknight dinners or meal prep. The Instant Pot’s pressure function mimics the slow-cooking process of traditional sticky rice, while the natural release ensures perfectly tender, slightly chewy grains.
Garnishing with toasted sesame seeds and scallions adds a professional touch that elevates this dish from side to something truly special.
The magic happens in the pressure cooking phase, where the rice and coconut milk work together to create a dish that’s both comforting and elegant. Each grain becomes infused with fragrant coconut notes, while the jasmine rice maintains its natural stickiness.
This method preserves all the authenticity of traditional sticky rice while leveraging modern convenience—no steaming baskets or hours of simmering required.
Perfect for pairing with grilled meats, curries, or even as a standalone dessert with a drizzle of honey. The versatility of this recipe makes it a staple for any Instant Pot cook looking to master sticky rice with ease. Let’s get started on creating your own fragrant, coconut-infused masterpiece.
Ingredients for instant pot sticky rice
Five core ingredients transform simple jasmine rice into fragrant, coconut-infused sticky perfection—no steaming baskets required.
| Ingredient | Amount | Notes |
|---|---|---|
| Jasmine Rice 🍚 | 1 ½ cups | Uncooked, long-grain preferred |
| Full-Fat Coconut Milk 🥥 | 1 ½ cups | Canned, no additives |
| Water 💧 | 1 cup | Filtered preferred |
| Salt 🧂 | ½ tsp | Diamond Crystal preferred |
| Toasted Sesame Seeds 🌾 | 1 tbsp | For garnish, store-bought or homemade |
| Green Onions 🧅 | 3 whole | Thinly sliced, white and green parts |
| White Sugar 🍯 | 1 tbsp | Granulated, adjust to taste |
| Vanilla Extract 🍃 | ½ tsp | Pure, high-quality preferred |
The foundation starts with jasmine rice—look for brands like Lotus Foods or Thai Kitchen for authentic aroma. Full-fat coconut milk is non-negotiable here; the fat content ensures that signature cling. I always grab Aroy-D brand from the international aisle for its rich, creamy texture. For the water, filtered is ideal, but tap works in a pinch. The Diamond Crystal kosher salt enhances flavor without overpowering the delicate coconut notes. Toasted sesame seeds should be freshly toasted if possible—store-bought works, but homemade adds depth. Green onions? Any variety, but scallions have the most delicate flavor.
No full-fat coconut milk? Light coconut milk plus 1 tbsp cream gets you close. Substituting rice milk for water reduces stickiness—use only if you prefer a lighter texture. Brown sugar can replace white at a 1:1 ratio, though it adds subtle molasses notes. Running short on vanilla? A splash of coconut extract works, though it lacks the floral complexity. For garnish, toasted coconut flakes make a stunning alternative to sesame seeds. The sugar is optional but recommended—it balances the coconut’s natural sweetness while preventing grain separation during pressure cooking.
Store leftover sticky rice in an airtight container for 3-4 days—it reheats beautifully with a splash of water or coconut milk. For longer storage, freeze portions for up to 3 months. The natural release method keeps grains tender, but if you prefer firmer texture, opt for a quick release and fluff with a fork. Garnishes like sesame seeds and green onions can be added fresh after reheating for maximum aroma. This dish pairs perfectly with grilled proteins or Thai curries, where the coconut notes complement spicy flavors.
Why You’ll Love This Recipe
- Creamy Luxury: That rich, velvety coconut milk transforms plain rice into something restaurant-worthy—think buttery, fragrant, and perfectly sticky without a drop of butter. The toasted sesame seeds on top? Little crunchy gold flakes that make it feel like a treat, not a side dish.
- Leftover Goldmine: This rice keeps perfectly for days, so I make a big batch and use it for everything—bowls, wraps, or even breakfast fried rice. Honestly, the second day is when it shines: the flavors meld even deeper, and reheating takes two minutes in the microwave.
- Budget Magic: Full-fat coconut milk might sound fancy, but a can goes a long way, and jasmine rice is cheaper than most specialty grains. I stretch it for multiple meals, and the toasted sesame seeds add that “wow” factor for pennies. My wallet and my taste buds win.
Step-by-step instructions for perfect Instant Pot sticky rice
This method delivers restaurant-quality sticky rice with an aromatic coconut-vanilla essence.
Prepare the Instant Pot and Ingredients
Begin by rinsing the 1.5 cups jasmine rice under cold water until the water runs clear. This removes excess starch that would make the rice gummy. Drain thoroughly in a fine-mesh strainer and shake gently to remove all moisture. The rice should feel dry to the touch.
In a medium bowl, whisk together the 1.5 cups full-fat coconut milk, 1 cup water, 0.5 teaspoon salt, 1 tablespoon white sugar, and 0.5 teaspoon vanilla extract until completely dissolved. This creates a flavorful cooking liquid that infuses the rice with sweet coconut and floral notes. The sugar and vanilla will caramelize slightly during cooking, adding depth to the final dish.
Sauté the Base for Flavor Development
Set your Instant Pot to the “Sauté” function and allow it to preheat. Add the rinsed jasmine rice to the pot and spread it evenly across the bottom. Cook undisturbed for 2 minutes until the rice begins to lightly toast and release its natural aroma. This step develops a subtle nuttiness and prevents the rice from becoming mushy.
Next, pour the coconut milk mixture over the rice, stirring gently with a wooden spoon to distribute evenly. The liquid should just cover the rice—this is the ideal ratio for sticky rice. Avoid pressing down on the rice as it cooks, as this can create uneven texture. The rice will absorb all the liquid during cooking, so no additional water is needed.
Pressure Cook to Perfect Texture
Secure the lid on your Instant Pot and set the valve to “Sealing.” Cook on High Pressure for 12 minutes. This timing ensures the rice absorbs all the coconut milk while developing that signature sticky yet slightly firm texture. Do not skip the pressure cooking step—this is what transforms ordinary rice into luxurious sticky rice.
Once the cooking cycle completes, allow the pressure to release naturally for 10 minutes. This gradual release prevents the rice from becoming dry or breaking apart. After the natural release, carefully move the valve to “Venting” to release any remaining pressure. The rice should be tender but still hold its shape when pressed gently with a spoon.
Finish and Garnish for Presentation
Remove the lid and let the rice sit covered for 5 minutes to allow any remaining steam to redistribute. This resting period ensures even moisture distribution and prevents the rice from drying out. Using a fork, gently fluff the rice from the bottom up to separate the grains while maintaining their stickiness.
Transfer the rice to a serving dish and garnish with 1 tablespoon toasted sesame seeds and 3 thinly sliced green onions. The sesame seeds add a nutty crunch, while the green onions provide a fresh contrast. Serve immediately while the rice is still warm and fragrant. This dish pairs beautifully with grilled meats, curries, or as a standalone dessert with fresh fruit.
Pro Tips For Making Instant Pot Sticky Rice
- STIR THE COCONUT MILK: After the rice finishes cooking, give the coconut milk a quick stir—just enough to break up any thick pockets. I used to skip this, and half the time, the milk would sit like a separate layer. A few gentle swirls with a spoon guarantee that creamy goodness coats every grain.
- USE COLD COCONUT MILK: Pour the full-fat coconut milk cold straight from the fridge into the pot. The temperature shock helps the rice absorb the creaminess more evenly instead of curdling or separating. (Yes, even if you’re impatient like me—wait the 30 seconds it takes to grab it from the fridge.)
- SALT THE WATER, NOT THE RICE: Add all your salt to the water before cooking, not after. I learned this the hard way—salting the rice at the end leaves uneven flavor, and the coconut milk’s richness can’t fix it. A pinch in the water ensures every bite is balanced.
- SKIP THE IMMEDIATE SERVING: Let the rice sit covered for 5 minutes after cooking. The steam finishes the job, and the grains stick together without turning mushy. I know, I know—you want to dig in right away—but resisting the urge makes a real difference in texture. (Your future self will thank you.)
Storing and reheating your instant pot sticky rice
Refrigerator Storage
Store leftover sticky rice in an airtight glass container with a tight-sealing lid to preserve moisture and aroma. Let it cool completely before refrigerating to prevent condensation, which can make the rice soggy.
I use Pyrex glass containers because they distribute heat evenly and maintain freshness for up to 4 days at 40°F or below. For best results, press plastic wrap directly onto the rice surface before sealing the lid to minimize exposure to air. 💧
Freezer Storage
For longer storage, portion the sticky rice into quart-sized freezer bags or silicone molds, leaving ½ inch of headspace for expansion. Freeze for up to 3 months—the coconut flavor actually intensifies over time, making it perfect for quick meals.
To reheat, transfer frozen portions directly to the Instant Pot with 2 tablespoons of coconut milk and cook on Sauté mode for 3-4 minutes, stirring occasionally until heated through. Avoid microwaving frozen sticky rice, as it can create uneven textures. ❄️
Reheating Methods
My preferred method is using the Instant Pot: place the rice in the pot with ¼ cup water or coconut milk, secure the lid, and cook on High Pressure for 3 minutes, followed by a natural release. This restores the rice’s signature stickiness and prevents dryness.
For stovetop reheating, use a nonstick skillet over low heat, adding 1 tablespoon coconut milk per cup of rice and stirring gently until warmed through. Never reheat in the microwave without covering—it dries out the rice instantly. 🔥
Reviving Dry Rice
If your sticky rice turns out dry, don’t toss it! Sprinkle 1 tablespoon warm coconut milk over the rice, cover tightly, and let it steam for 5 minutes. The residual heat will rehydrate the grains, restoring their cling.
For extra moisture, place a damp paper towel over the rice before sealing the container. This trick works wonders for rice that’s been stored too long or reheated improperly. 💫
Garnish Refresh
Always add fresh garnishes—toasted sesame seeds and green onions—right before serving to maximize aroma and presentation. If storing with garnishes, remove them before refrigerating or freezing, then add them back when ready to eat.
For a dessert twist, drizzle with honey or condensed milk after reheating, but avoid adding liquids until the rice is fully warmed to prevent clumping. The contrast of warm rice with cool garnishes elevates every bite. ✨
Nutrition facts
Frequently asked questions
Can I use regular white rice instead of jasmine?
While you can substitute jasmine rice with long-grain white rice, you’ll lose the signature floral aroma. For best results, stick with jasmine—its higher starch content creates that perfect cling. If you must use white rice, increase the coconut milk by ¼ cup to compensate for lower moisture retention.
Why did my sticky rice turn out too dry?
This usually happens from either releasing pressure too quickly or using too little liquid. Always do a 10-minute natural release after cooking, and ensure your coconut milk-to-water ratio is 1.5:1. If it’s still dry, sprinkle 1 tablespoon warm coconut milk and steam covered for 5 minutes to restore moisture.
Can I make this recipe without an Instant Pot?
Yes! Use a rice cooker with a steaming function or a heavy-bottomed pot on low heat for 30-40 minutes after bringing to a boil. The key is covering tightly and avoiding stirring. For stovetop, reduce the water by ¼ cup and simmer until fully absorbed. The texture won’t be quite as sticky, but it’ll still be delicious.
How do I adjust this for a larger crowd?
Double all ingredients (keeping the 1.5:1 coconut milk-to-water ratio) and use a 6-quart Instant Pot. For even better results, divide the rice between two pots to ensure even cooking. The 12-minute pressure cook time remains the same, but increase the natural release to 15 minutes for larger batches.
Is this sticky rice gluten-free?
This recipe is naturally gluten-free as long as you use certified gluten-free jasmine rice and check your coconut milk label (some brands add additives). Always verify packaging to ensure no cross-contamination occurred during processing. The vanilla extract and sesame seeds are also typically gluten-free.

- Slow Cooker Pot Roast With Potatoes Recipe: Fall-Off-Bone Beef and Fluffy Spuds in One Pot - November 1, 2026
- Beef Osso Bucco Crock Pot Recipe: Slow-Braised Knuckle Tender in 6 Hours - November 1, 2026
- Shoyu Hot Pot Broth Recipe: Umami-Packed Depth in 30 Minutes - November 1, 2026