
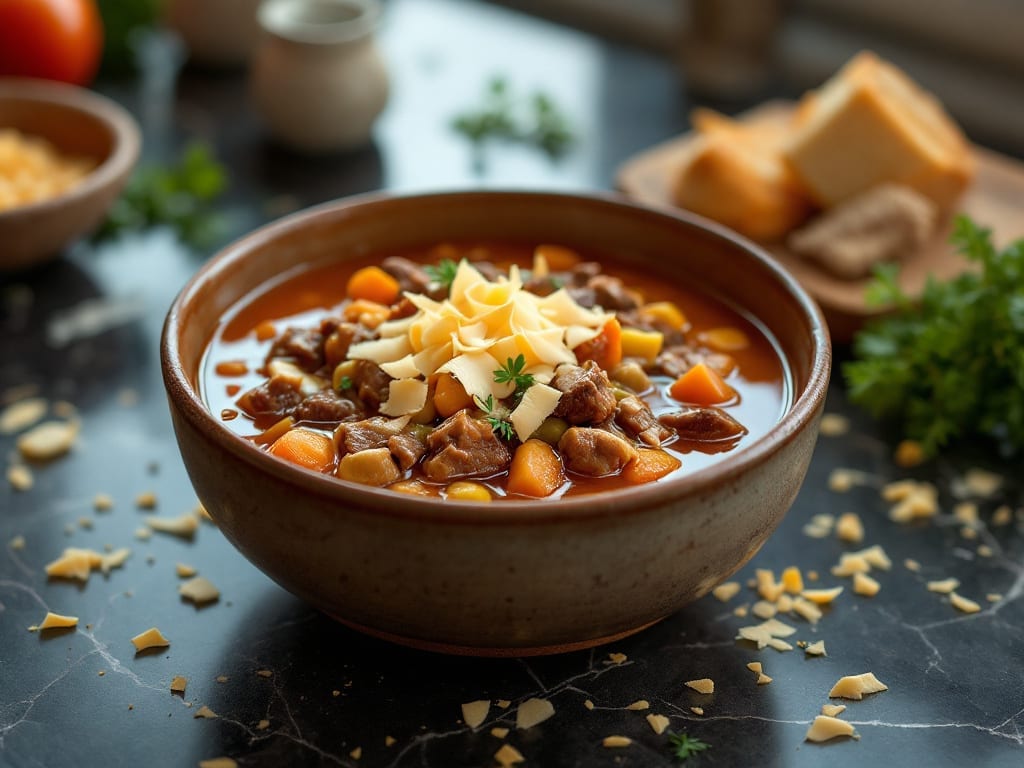
Creating a Lipton Soup Pot Roast transforms tough beef chuck into melt-in-your-mouth tenderness with surprisingly little effort. The secret lies in using Lipton soup as a flavorful foundation rather than the main ingredient—it adds depth while letting the beef and vegetables shine.
This method delivers restaurant-quality results in just 3 hours, making it perfect for busy weeknights when you crave hearty comfort food without the fuss.
What makes this recipe work is the combination of slow cooking and the Lipton soup’s concentrated flavors, which infuse the meat and vegetables without overpowering them.
You’ll start with a simple sear to lock in juices, then let the beef braise until fork-tender while carrots, potatoes, and onions develop natural sweetness. The herbs and spices create layers of warmth that elevate every bite, proving that minimal effort can yield maximum flavor.
By the time you serve this dish, you’ll have perfectly tender beef that practically falls apart, vegetables cooked to ideal tenderness, and a rich, savory broth that makes every spoonful satisfying.
The aroma alone will have everyone gathering around the table, and the leftovers reheat beautifully for lunch the next day. This is the kind of meal that transforms a simple dinner into a memorable experience.
The beauty of this recipe is its versatility—it works equally well for family dinners or holiday gatherings, and the flavors only deepen with time. Whether you’re feeding a crowd or just treating yourself, this pot roast delivers comfort in every bite. Let’s get started on creating this effortless masterpiece.
Ingredients for lipton soup pot roast
Eight simple ingredients transform tough beef into restaurant-style pot roast perfection.
| Ingredient | Amount | Notes |
|---|---|---|
| Beef Chuck Roast 🥩 | 3 lb | 3-4 inch thick cut preferred |
| Lipton Onion Soup Mix 🥕 | 2 tbsp | Granulated version works best |
| Beef Broth 💧 | 2 cups | Low-sodium preferred |
| Red Wine 🍷 | ½ cup | Dry Cabernet Sauvignon |
| Yellow Onions 🧅 | 1 whole | Medium size, sliced thick |
| Carrots 🥕 | 4 whole | Medium size, peeled |
| Russet Potatoes 🥔 | 2 lb | Cut into 2-inch chunks |
| Garlic Cloves 🧄 | 4 cloves | Smashed, not minced |
| Fresh Thyme 🌿 | 2 sprigs | Or 1 tsp dried thyme |
| Fresh Rosemary 🌿 | 1 sprig | Woody stems removed |
| Olive Oil 🫒 | 2 tbsp | Extra-virgin for searing |
| Diamond Crystal Kosher Salt 🧂 | 1 tsp | For seasoning |
| Freshly Ground Black Pepper 🌶️ | ½ tsp | Coarse grind preferred |
| All-Purpose Flour 🌾 | 2 tbsp | For dredging beef |
The beef is everything here. Chuck roast with good marbling delivers that melt-in-your-mouth texture—sirloin or ribeye won’t cut it. Grab the 3-pound cut from the butcher counter or pre-cut section at Costco or Walmart for convenience. Look for pieces with visible fat marbling; that’s what keeps the meat juicy. If your roast has a thick edge, trim it to about 3-4 inches thick—this ensures even cooking. Pat it dry before searing, which helps the crust form better. For best results, let it sit at room temperature for 30 minutes before cooking.
No red wine? Beef broth plus 1 tbsp balsamic vinegar works in a pinch, though the acidity won’t be as balanced. The Lipton soup mix is non-negotiable for that umami punch—granulated version dissolves better than the powdered kind. Fresh thyme and rosemary make all the difference, but dried works at one-third the amount if that’s what you’ve got. For the vegetables, baby carrots and fingerling potatoes work beautifully, but regular russets and whole carrots are fine too. Just cut them evenly so they cook at the same rate. The onions should be yellow or red—white gets bitter when slow-cooked.
This dish tastes even better the next day once all the flavors meld together. Store leftovers in an airtight container in the fridge for up to 5 days, or freeze portions for 3 months. I like to portion it into individual containers so I can grab a ready-made meal for lunch. The broth reduces and thickens beautifully, so you can even freeze it separately for future soups or gravies. If you’re making this ahead, the raw ingredients (beef, veggies, and seasonings) can be prepped and refrigerated for up to 24 hours before cooking—just add the liquids when you’re ready to slow-cook.
Why You’ll Love This Recipe
- No-Fuss Pot Roast: I swear, this takes less effort than ordering takeout. Chuck roast goes in raw, onions get a quick chop, and the soup mix does all the heavy lifting while you sip wine and pretend you’re fancy.
- Wine-Infused Magic: That splash of red wine? It turns this into something restaurant-worthy without trying. The broth and soup mix give it depth, but the wine adds this rich, almost velvety finish that makes everyone pause mid-bite.
- Leftovers That Don’t Suck: Between us, most pot roasts turn into sad, dry meat after reheating. Not this one. The broth stays luscious, the beef stays tender, and I’ve sent containers home with coworkers who now demand seconds.
- Budget-Friendly Crowd-Pleaser: A chuck roast is cheap, the soup mix is a dollar, and you’re feeding four for under $15. Honestly, it’s the kind of meal that makes you feel like you’re winning at life—no matter how many people you’re serving.
Step-by-step instructions for slow-cooked pot roast
Here’s the straightforward method for a deeply flavorful pot roast that practically cooks itself.
Prepare the Beef for Maximum Flavor
Pat the 3 lb beef chuck roast completely dry with paper towels. This step is crucial – any moisture on the surface will prevent that perfect browned crust we’re aiming for. Place the roast on a plate and season both sides generously with the 1 tsp diamond crystal kosher salt and 0.5 tsp freshly ground black pepper.
Next, dredge the roast in the 2 tbsp all-purpose flour, pressing the flour into the meat to create an even coating. This flour barrier helps develop that rich, caramelized crust during searing. Set the seasoned roast aside while you prepare the vegetables.
Sear the Roast for Deep Flavor
Heat the 2 tbsp olive oil in a Dutch oven over medium-high heat until shimmering. Add the roast and sear for 3-4 minutes per side until it develops a deep golden-brown crust. Here’s the thing – don’t move the roast around while it sears. Let it sit undisturbed so it develops that flavorful crust.
Once the roast is browned on all sides, remove it from the Dutch oven and set it aside. You’ll notice the bottom of the pot has beautiful browned bits – this is called the fond, and it’s packed with flavor we’ll incorporate later. Keep the Dutch oven on the heat for now.
Build the Flavor Base
In the same Dutch oven, add the sliced 1 whole yellow onions and peeled 4 whole carrots, cut into 2-inch chunks. Sauté for 3-4 minutes until the vegetables begin to soften slightly. Add the smashed 4 cloves garlic, 2 sprigs fresh thyme, and 1 sprig fresh rosemary, stirring for 30 seconds until fragrant.
Sprinkle the 2 tbsp lipton onion soup mix over the vegetables and stir to distribute evenly. Pour in the 0.5 cup red wine, scraping up those browned bits from the bottom of the pot. Let this mixture simmer for 2 minutes until the wine reduces by about half and the aroma becomes rich and complex.
Combine and Braise to Perfection
Return the seared roast to the Dutch oven along with the 2 lb russet potatoes, cut into 2-inch chunks. Pour in the 2 cups beef broth, making sure to completely submerge the roast and potatoes. Here’s where it gets easy – bring everything to a gentle simmer, then reduce heat to low.
Cover the Dutch oven and let it cook for 3 hours. This slow cooking time transforms the tough chuck roast into fork-tender perfection. The liquid should reduce significantly, creating a rich sauce that coats all the ingredients. Check occasionally and add a splash of water if the liquid gets too low.
Finish and Rest for Juicy Results
After 3 hours, remove the lid and increase heat to medium. Let the pot roast cook uncovered for an additional 15-20 minutes until the sauce has thickened to your desired consistency. The roast should be fork-tender with a deep brown crust.
Transfer the pot roast to a cutting board and tent loosely with foil. Let it rest for 10-15 minutes before carving. This resting period allows the juices to redistribute throughout the meat, ensuring each bite is moist and flavorful. Serve the roast with the vegetables and sauce spooned over the top.
Pro Tips For Making Lipton Soup Pot Roast
- Brown the Roast First: Skip the slow start—sear that chuck roast in a hot Dutch oven for 3-4 minutes per side before adding liquids. The Maillard reaction kicks in, and you’ll taste the difference in every bite. (Yes, even if you’re tempted to rush.)
- Bloom the Onion Mix: Dump the Lipton Onion Soup Mix into the pot before adding broth or wine, and let it sit for 30 seconds. This wakes up the flavors—no more bland, dusty aftertaste. (I learned this the hard way after making a pot that tasted like sad, wet crackers.)
- Deglaze Aggressively: After searing the roast, don’t just splash in the wine—scrape up those browned bits with a wooden spoon. They’re packed with flavor, and skipping this step means losing half the depth. (A splash of beef broth afterward helps loosen the rest.)
- Simmer, Don’t Boil: Keep the liquid at a gentle simmer (tiny bubbles, not a rolling boil) once the roast is submerged. Too much heat turns tough meat to mush, and you’ll end up with shredded beef instead of fork-tender slices. (Your patience here pays off.)
Storing and reheating this dish
Refrigerator Storage
Your Lipton Soup Pot Roast reheats beautifully after storage, and the flavors actually deepen overnight. Transfer leftovers to an airtight container—I recommend glass Pyrex with snap-on lids—and refrigerate for up to 5 days.
The beef and vegetables stay tender, while the reduced sauce becomes even more concentrated. For best results, store the roast and vegetables together with some of the sauce, keeping them submerged to prevent drying. 🥩
Freezer Prep Tips
Freezing this pot roast is a game-changer for busy weeks. Portion into quart-sized freezer bags (leave 1-inch headspace for expansion) or airtight glass containers. The roast freezes for 3 months without texture loss, though I find it’s best enjoyed within 2 months for peak flavor.
Label bags with the date—trust me, you’ll thank yourself later. For extra insurance, freeze the sauce separately in ice cube trays before transferring to a bag. ✨
Stovetop Reheating
My preferred method for reheating is stovetop because it keeps everything moist. Place the roast and vegetables in a heavy-bottomed pot with ¼ cup beef broth (or water) to prevent sticking. Heat over medium-low for 10-15 minutes, stirring occasionally.
The broth helps restore the sauce’s richness. If the sauce thickens too much, add another splash of liquid. Always reheat to an internal temperature of 165°F for food safety. 🔥
Slow Cooker Revival
For hands-off reheating, transfer the roast and vegetables to a slow cooker with ½ cup beef broth. Cook on low for 3 hours or high for 2 hours, stirring occasionally. The slow cooker’s gentle heat ensures even warming without overcooking the beef.
This method is perfect if you’re short on time but want restaurant-quality results. Pro tip: Add a sprig of fresh thyme while reheating for extra aroma. 🌿
Microwave Shortcuts
When you’re in a rush, the microwave works—but with caution. Transfer the roast and vegetables to a microwave-safe dish, cover loosely with a damp paper towel, and heat on 50% power in 2-minute intervals, stirring between each.
This prevents drying. Add 1-2 tablespoons of beef broth if the mixture looks too dry. The internal temperature should reach 165°F—use a meat thermometer to check. 💡
Sauce Rescue Tricks
If the sauce seems too thick after reheating, thin it with 1-2 tablespoons of beef broth or red wine (the same you used originally). For extra richness, whisk in 1 teaspoon of cornstarch mixed with 1 tablespoon water and simmer for 1 minute.
If the sauce is too thin, simmer uncovered for 5-10 minutes to reduce it. A splash of lemon juice brightens flavors if the dish tastes flat after reheating. 💫
Nutrition facts
Frequently asked questions
Can I use a different type of Lipton soup mix?
While the recipe calls for onion soup mix, you can experiment with other flavors like beef or mushroom for different depth. Just reduce the amount to 1 tbsp since these mixes tend to be saltier. The onion version provides the best balance for this dish, but any Lipton soup will add that signature umami boost.
How do I know when the beef is fully cooked?
Use a meat thermometer to check the internal temperature—it should reach 145°F for medium-rare or 160°F for medium. The beef will be fork-tender and easily pull apart with two forks when done. If you don’t have a thermometer, cut into the thickest part and check for juices that run clear.
What if I don’t have red wine?
No problem! Substitute with ½ cup beef broth plus 1 tbsp balsamic vinegar for acidity, or use ½ cup apple cider for a sweeter touch. The flavor won’t be identical, but the dish will still turn out delicious. The key is maintaining the liquid balance for proper braising.
Can I make this in an Instant Pot?
Sear the roast first, then add all ingredients to the Instant Pot. Cook on high pressure for 60 minutes, then let it naturally release for 15 minutes. The pressure cooker cuts the time significantly while keeping the beef tender. Just check the liquid level halfway and add water if needed.
Why does my pot roast turn out dry?
Overcooking is the most common cause. The beef should cook until fork-tender (3 hours in a Dutch oven), not until it’s falling apart. Also, never skip the 10-15 minute rest time after cooking—this lets juices redistribute. If it’s still dry, try adding ¼ cup beef broth during reheating to restore moisture.

- Baked Potatoes in Crock Pot Recipe: Buttery Interiors and Crispy Top Magic - November 1, 2026
- Braised Beef Short Ribs Recipe: Crock Pot Fall-Off-Bone Magic in 6 Hours - November 1, 2026
- Crock Pot Cocoa Recipe: Velvety Warmth With Hidden Spice Magic - November 1, 2026