
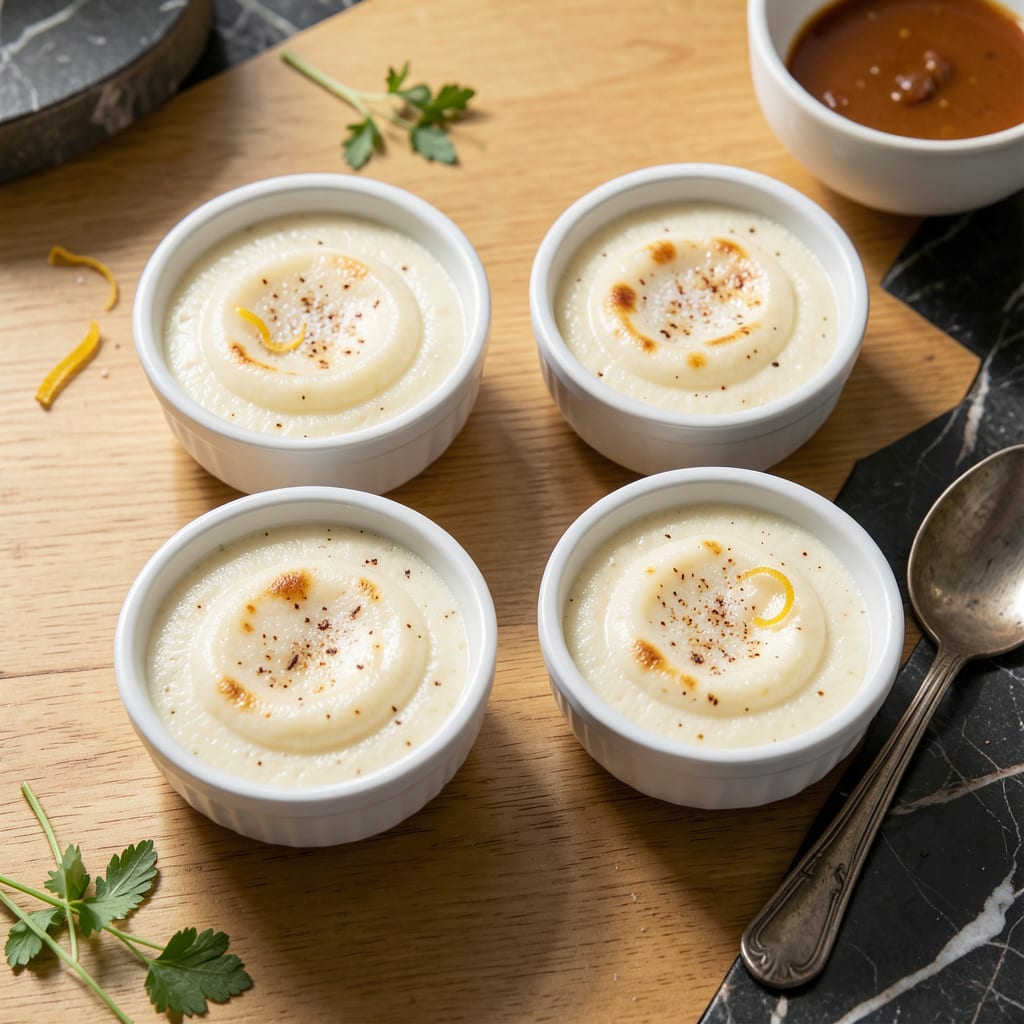
This lightened custard delivers the same silky texture you love without the guilt. I’ve perfected a method that uses skim milk and egg whites to create a smooth, creamy dessert that’s surprisingly rich.
Baked in a water bath, it emerges with that classic wobble and clean vanilla flavor. The secret is gentle heat and precise timing—no curdling, just perfect custard every time.
Ingredients for Low Fat Egg Custard
Light ingredients, rich results. Skim milk and egg whites keep it silky without the guilt.
| Ingredient | Amount | Notes |
|---|---|---|
| Skim Milk 🥛 | 2 cups | Cold, for smoothest texture |
| Egg Whites 🥚 | 6 whole | Large eggs, room temperature |
| Whole Eggs 🥚 | 2 whole | Large eggs, room temperature |
| Granulated Sugar 🍚 | ½ cup | Adjust to taste preference |
| Vanilla Extract 🌿 | 1 tsp | Pure vanilla for best flavor |
| Salt 🧂 | 0.125 tsp | Fine grain for even distribution |
| Ground Nutmeg 🌰 | 0.125 tsp | Freshly grated if possible |
| Cornstarch 🌾 | 1 tbsp | Thickening agent for stability |
| Butter 🧈 | ½ tsp | Unsalted, for greasing ramekins |
The milk and eggs are doing all the work here. Whole Foods or Trader Joe’s have great organic skim milk—look for the freshest date since it’s the base of your custard. Egg whites from a carton work in a pinch (about 3/4 cup equals 6 whites), but fresh separated whites whip up fluffier. If you’re buying a dozen just for this, grab large eggs—they’re the standard for most recipes.
No whole eggs? All egg whites at 8 total will still set, just less rich. Out of skim milk? 2% works fine—just don’t go higher or the texture changes. Vanilla bean paste can replace extract (use 1/2 the amount since it’s more concentrated). For a twist, swap nutmeg for cinnamon or cardamom. The cornstarch is key for that perfect wobble—don’t skip it.
Baked custard keeps 4 days in the fridge (covered, of course). It’ll firm up as it chills—completely normal. Not freezer-friendly, but you won’t have leftovers anyway. Serve chilled or barely warm, your call.
Why You’ll Love This Recipe
- Five Ingredients Only: I love that it uses just skim milk, egg whites, whole eggs, sugar, and vanilla—no fancy shopping required.
- Velvety Vanilla: The vanilla extract shines through the light custard, making every bite taste luxurious without the guilt.
- Make Ahead Magic: Honestly, it’s my go-to for Sunday prep—bake a batch and enjoy all week for breakfast or dessert.
Step-by-Step Instructions for Low Fat Egg Custard
Here’s my method for creating this light yet luscious dessert with perfect texture every time.
Step 1: Prep and Preheat for Success
Preheat your oven to 325°F. While it heats, grease four ramekins with the 0.5 tsp Butter, making sure to coat the bottoms and sides evenly. This prevents sticking and helps the custard release cleanly after baking.
I like to place the ramekins in a baking dish at this point—this water bath setup is crucial for gentle, even cooking. The water creates steam that keeps the custard silky rather than rubbery or curdled.
Step 2: Whisk Wet Ingredients Until Smooth
In a large bowl, whisk together the 6 whole Egg Whites, 2 whole Whole Eggs, and 0.5 cup Granulated Sugar until the mixture is pale and slightly thickened. I find that 2-3 minutes of vigorous whisking by hand does the trick, but you can use a mixer on low if preferred.
Pour in the 2 cups Skim Milk and 1 tsp Vanilla Extract, then whisk again until fully combined. The cold milk helps create a smooth, lump-free base. You’ll notice the mixture lightens slightly as air incorporates—this is good for texture.
Step 3: Add Thickeners and Seasonings
Sprinkle the 1 tbsp Cornstarch, 0.125 tsp Salt, and 0.125 tsp Ground Nutmeg over the wet mixture. Whisk thoroughly for 1 minute to ensure the cornstarch dissolves completely. Cornstarch can clump if not mixed well, so I always check the bottom of the bowl for any hidden pockets.
Here’s the thing—nutmeg adds that classic custard warmth, but too much can overpower. Stick with the 0.125 tsp for a subtle background note. The salt balances the sweetness without making it taste salty.
Step 4: Bake in Water Bath Until Set
Divide the custard mixture evenly among the prepared ramekins. Place the baking dish in the oven and carefully pour hot water into the dish until it reaches about halfway up the sides of the ramekins. This water bath is non-negotiable for that silky texture.
Bake for 35-45 minutes until the custards are just set—the centers should jiggle slightly when gently shaken, like firm gelatin. Overbaking is the most common mistake here; pull them out when they’re still a bit wobbly in the center. They’ll continue cooking as they cool.
Step 5: Cool and Chill Before Serving
Remove the ramekins from the water bath and let them cool to room temperature on a wire rack. This gradual cooling prevents cracking. Once cool, cover each with plastic wrap (pressed directly onto the custard surface to prevent a skin from forming) and refrigerate for at least 2 hours.
I know it seems weird, but chilling is essential. The custard firms up and develops its final texture during this time. Serve cold, perhaps with a sprinkle of extra nutmeg or a few berries. The result should be creamy, light, and perfectly balanced—proof that low fat doesn’t mean low flavor.
Pro Tips For Making Low Fat Egg Custard
- Strain the Mixture: After whisking the eggs and milk, run the custard through a fine-mesh sieve—I learned this the hard way when my first few batches had that slightly grainy texture from overworked eggs.
- Low and Slow: Bake at 300°F and resist the urge to crank the heat; custard sets best with gentle, even warmth, or you’ll end up with a weeping, curdled mess.
- Skip the Boil: Heat the skim milk just until steaming, not boiling, or you’ll scramble the eggs when you temper them—my grandmother swore by this, and she was right.
- Warm the Eggs: Take the eggs out of the fridge 10 minutes before starting—cold eggs shock the milk and can make the custard separate, and nobody wants that.
Make-Ahead Tips for Leftovers
Overnight Chilling
I always make this the night before serving. After baking, let the custards cool completely, then refrigerate for at least 8 hours. This extended chill time allows the cornstarch to fully set, creating that perfect wobble. 💡
Portion Control
Use 4-ounce ramekins for perfect single servings. I found these at Crate & Barrel—they’re oven-safe and just the right size. Smaller portions chill faster and more evenly than one large dish.
Prevent Skin Formation
Press plastic wrap directly onto the custard surface before refrigerating. This simple trick prevents an unappetizing skin from forming. If you forget, a quick stir before serving blends it back in.
Make-Ahead Timeline
Bake up to 2 days ahead—the flavor actually improves as it rests. On serving day, add fresh garnishes like berries or mint. The custard stays creamy for 4 days total in the fridge.
Reheating Option
While I prefer it chilled, you can warm individual ramekins in a water bath at 300°F for 10-15 minutes. Test one first—overheating can cause curdling.
Freezing Not Recommended
Honestly, this doesn’t freeze well. The texture becomes grainy upon thawing. Stick to fridge storage for best results. Your future self will thank you for the freshness.
Nutrition Facts
Frequently Asked Questions
Can I use all egg whites instead of whole eggs?
Yes, you can use 8 egg whites total instead of the combination. The texture will be slightly lighter but still delicious. Just ensure you whisk them thoroughly for 2-3 minutes to incorporate enough air.
What’s the best way to prevent lumps in the custard?
Whisk the cornstarch into the milk mixture for a full 1 minute before baking. Strain the mixture through a fine-mesh sieve if needed for extra smoothness. This guarantees a silky finish every time.
How do I know when it’s done baking?
The edges should be set, but the center should still jiggle slightly. Pull it out at 35-45 minutes—it will firm up as it cools. Overbaking causes curdling, so check early.
Can I make this in one large dish instead of ramekins?
Yes, use a 1.5-quart baking dish and increase baking time to 50-60 minutes. The texture may be slightly less uniform, but it will still taste great.

- 8 Bean Soup Recipe Crock Pot: Hearty Vegetable Medley in One Pot - September 25, 2026
- 4C Bread Crumbs Meatballs Recipe: Crispy Crust and Juicy Centers - September 25, 2026
- 6 Oz Chocolate Chip Cookie Recipe: Perfectly Balanced Crispy Edges and Chewy Hearts - September 25, 2026