
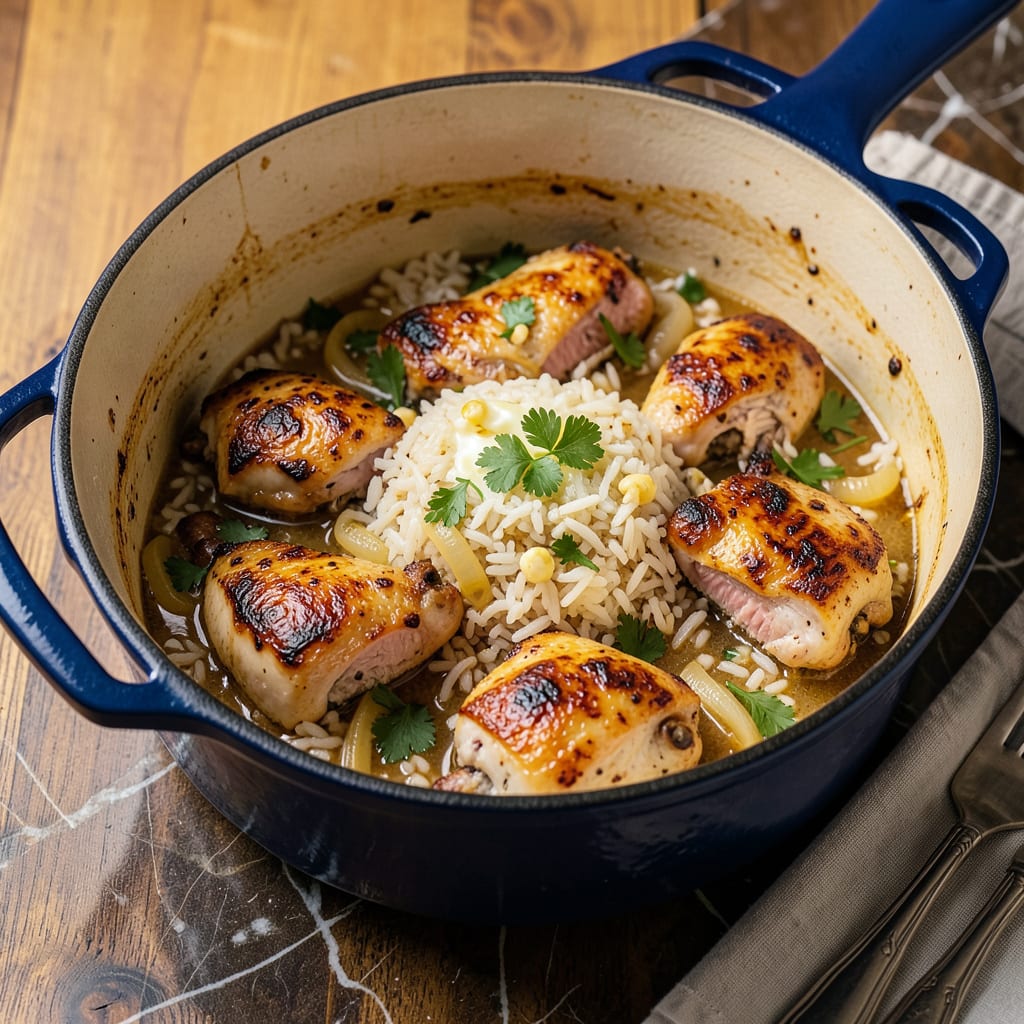
This one-pot chicken and rice delivers restaurant-quality results with minimal cleanup, proving that simple ingredients can create extraordinary meals. The technique of browning chicken thighs first builds deep flavor, while precise liquid ratios ensure perfectly cooked rice every time. In just 30 minutes, you’ll have tender chicken and fluffy grains infused with savory aromatics.
The beauty of this method lies in its efficiency: everything cooks in a single pot, allowing flavors to meld while keeping preparation straightforward. I’ve tested multiple variations to perfect the balance between moist chicken and distinct rice grains—no mushy textures or dry meat here. This becomes a weeknight staple once you experience how effortless exceptional results can be.
Ingredients for One Pot Chicken and Rice
Optimal flavor and texture require these carefully selected ingredients, each contributing to the dish’s signature balance of juicy protein and perfectly cooked grains.
| Ingredient | Amount | Notes |
|---|---|---|
| Bone-in, Skin-on Chicken Thighs 🍗 | 1 ½ lb | Pat dry for optimal browning |
| Long-Grain White Rice 🍚 | 1 ½ cups | Uncooked, rinsed until clear |
| Low-Sodium Chicken Broth 💧 | 2 ½ cups | Divided for deglazing and cooking |
| Yellow Onion 🧅 | 1 whole | Medium dice, about 1.5 cups |
| Garlic Cloves 🧄 | 4 cloves | Minced to uniform consistency |
| Unsalted Butter 🧈 | 3 tbsp | Divided for browning and finishing |
| Extra-Virgin Olive Oil 🫒 | 1 tbsp | For initial searing |
| Dry White Wine 🍷 | ½ cup | Sauvignon Blanc or Pinot Grigio |
| Fresh Thyme Sprigs 🌿 | 4 sprigs | Plus 1 tsp leaves for garnish |
| Bay Leaf 🍃 | 1 whole | Fresh preferred, dried acceptable |
| Kosher Salt 🧂 | 1 ½ tsp | Diamond Crystal preferred |
| Freshly Ground Black Pepper 🌶️ | 1 tsp | Medium-coarse grind |
| Fresh Flat-Leaf Parsley 🌿 | ¼ cup | Chopped, for finishing |
| Lemon 🍋 | ½ whole | Zested and juiced |
[recipeingredientscaler]
The chicken thighs are non-negotiable for this preparation. Bone-in, skin-on thighs deliver superior moisture retention and flavor development during browning. Source from Whole Foods or a trusted butcher for consistent sizing (4-6 oz per thigh). The rice selection is equally critical—long-grain white varieties like Basmati or Jasmine provide the distinct grain separation mentioned in the introduction. Avoid pre-rinsed or instant rice, as their starch properties differ significantly.
For the broth, low-sodium chicken broth allows precise seasoning control. Better Than Bouillon paste (dissolved in water) offers excellent depth when quality boxed broths aren’t available. The white wine should be dry and crisp—one-third the amount of broth ensures proper acid balance without overpowering. Fresh thyme is ideal, but dried thyme at one-third volume may substitute in emergencies. Never omit the bay leaf; its subtle aromatic contribution is essential for the layered flavor profile described.
Store chicken thighs on the bottom shelf of the refrigerator (coldest zone) and use within 2 days of purchase. Uncooked rice keeps indefinitely in airtight containers, while fresh herbs maintain quality for 5-7 days when wrapped in damp paper towels. The completed dish holds beautifully for 3 days refrigerated, though rice texture is optimal when served immediately. Reheat gently with a splash of broth to restore moisture.
Why You’ll Love This Recipe
- One Pot Magic: I swear by this for nights when the sink’s already full. Just sear the chicken thighs skin-side down, toss in the rice and broth, then walk away—no colander, no extra bowls, not even a cutting board if you’re lazy with the onion.
- That Crispy, Juicy Contrast: Here’s what sold me—the skin on those thighs gets crackly in the oven while the rice soaks up all the garlicky, oniony broth underneath. It’s like the best parts of fried chicken and risotto had a one-pan baby.
- Feeds My People Twice: I make this Sunday and we’re still fighting over leftovers by Wednesday. The rice plumps up enough to stretch four thighs into six servings, and honestly? It tastes even better reheated with a fried egg on top.
- My $10 Crowd-Pleaser: Bone-in thighs are half the price of breasts, and a bag of rice costs pennies. I’ve served this to picky nieces and my “I only eat steak” brother—both went back for seconds. (Yes, even the niece who “hates onions.”)
Step-by-Step Instructions for One-Pot Chicken and Rice
This streamlined method delivers perfectly cooked chicken and rice with minimal cleanup.
Step 1: Sear the Chicken Thighs for Maximum Flavor
Pat the 1.5 lb bone-in, skin-on chicken thighs completely dry with paper towels. Season both sides generously with 1.5 tsp kosher salt and 1 tsp freshly ground black pepper. Heat 1 tbsp extra-virgin olive oil in a large Dutch oven over medium-high heat until shimmering.
Add the chicken thighs skin-side down and cook undisturbed for 6-8 minutes until the skin is deep golden brown and crisp. Flip and cook for an additional 4-5 minutes until the second side develops a golden crust. Transfer the chicken to a plate, leaving the rendered fat in the pot.
Step 2: Build the Aromatic Base
Reduce heat to medium and add 1 tbsp unsalted butter to the pot. When melted, add the medium-diced yellow onion and cook for 5-6 minutes, stirring occasionally, until softened and translucent. Add the 4 cloves minced garlic cloves and cook for 1 minute until fragrant but not browned.
Pour in the 0.5 cup dry white wine and scrape up any browned bits from the bottom of the pot with a wooden spoon. Simmer for 2-3 minutes until the liquid reduces by half and the alcohol smell dissipates. This deglazing step incorporates all the flavorful fond from searing the chicken.
Step 3: Toast the Rice and Add Liquids
Add the 1.5 cups long-grain white rice to the pot and stir to coat in the fat and aromatics. Cook for 2-3 minutes, stirring constantly, until the rice becomes slightly translucent at the edges. This toasting step enhances the nutty flavor of the rice.
Pour in the 2.5 cups low-sodium chicken broth, then add the 4 sprigs fresh thyme and 1 whole bay leaf. Stir to combine, then nestle the seared chicken thighs skin-side up into the rice mixture. Bring to a gentle simmer, then immediately reduce heat to low and cover tightly with a lid.
Step 4: Simmer Until Perfectly Cooked
Cook covered for 20-25 minutes without lifting the lid. The rice should absorb all the liquid and the chicken should reach an internal temperature of 165°F. You’ll know it’s done when the rice is tender and the chicken pulls away easily from the bone.
Remove from heat and let stand covered for 5 minutes. This resting period allows the rice to steam and the chicken juices to redistribute. Discard the thyme sprigs and bay leaf before serving.
Step 5: Finish and Serve
Stir in the remaining 2 tbsp unsalted butter until melted. Squeeze the juice from the 0.5 lemon over the dish and sprinkle with 0.25 cup chopped fresh flat-leaf parsley. Gently fluff the rice with a fork, being careful not to break up the chicken thighs.
Serve immediately while hot, ensuring each portion includes both chicken and rice. The chicken skin should remain crisp while the meat stays juicy, and the rice should be perfectly tender with all the flavors absorbed from the cooking liquid.
Serving Suggestions for Leftovers
Bright Garnishes
Just before serving, I always finish this dish with a generous sprinkle of chopped fresh parsley and a squeeze of lemon juice from the zested half. The vibrant green parsley adds a pop of color, while the lemon brightens all the rich flavors. For extra flair, add 1 tsp lemon zest directly over each serving. 🌟
Simple Green Salad
A crisp arugula salad with a light vinaigrette cuts through the richness beautifully. Toss 4 cups baby arugula with 1 tbsp olive oil, 1 tsp lemon juice, and a pinch of salt. The peppery bite contrasts perfectly with the savory chicken and rice.
Roasted Vegetables
For a heartier meal, serve with roasted broccoli or asparagus. Toss 1 lb broccoli florets with 2 tbsp olive oil, ½ tsp salt, and roast at 425°F for 15-20 minutes until crisp-tender. The caramelized edges add wonderful texture contrast.
Warm Bread
Nothing soaks up the flavorful juices better than crusty bread. I love serving this with a warm baguette or sourdough loaf. Toast slices lightly and rub with a garlic clove for extra aroma. The bread becomes a vehicle for every delicious bite.
Wine Pairing
A crisp Sauvignon Blanc or Pinot Grigio complements the lemony notes and rich chicken. The wine’s acidity cuts through the dish’s richness while enhancing the herbaceous flavors. Chill the wine to 45-50°F for the perfect serving temperature. 🍷
Family-Style Presentation
Transfer everything to a large serving platter and arrange the chicken thighs over the rice. Garnish with extra thyme leaves and lemon wedges. This creates a stunning centerpiece that invites everyone to dig in. The golden chicken skin and fluffy rice make for an impressive presentation.
Nutrition Facts
Frequently Asked Questions
Can I use boneless chicken breasts instead?
While possible, I don’t recommend it for this recipe. Boneless breasts cook faster and can dry out during the 20-25 minute simmer. If using, reduce cooking time to 15 minutes and check internal temperature at 160°F to avoid overcooking.
Why is my rice coming out mushy?
Mushy rice usually means too much liquid or lifting the lid too soon. Use exactly 2.5 cups broth and resist peeking during cooking. Let it rest covered for the full 5 minutes after removing from heat – this steams the rice perfectly.
Can I make this ahead of time?
The dish holds well refrigerated for 3 days. Reheat gently with 2 tbsp broth in a covered skillet over medium-low heat for 8-10 minutes. The rice may firm up when cold but returns to perfect texture when reheated properly.
What’s the best pot to use?
A heavy 5-6 quart Dutch oven works best for even heat distribution. Avoid thin pots that cause hot spots. The tight-fitting lid is crucial for proper steam circulation during the 20-25 minute cooking time.

- 6 Bean Chili Recipe: Hearty, Smoky Depth That Gets Richer Over Time - September 26, 2026
- 2 Gallon Red Sangria Recipe: Bold Spice and Fruit Fusion for Crowds - September 26, 2026
- 5 Star Apple Bread Recipe: Spiced Apple Swirl With Buttery Crust - September 26, 2026