
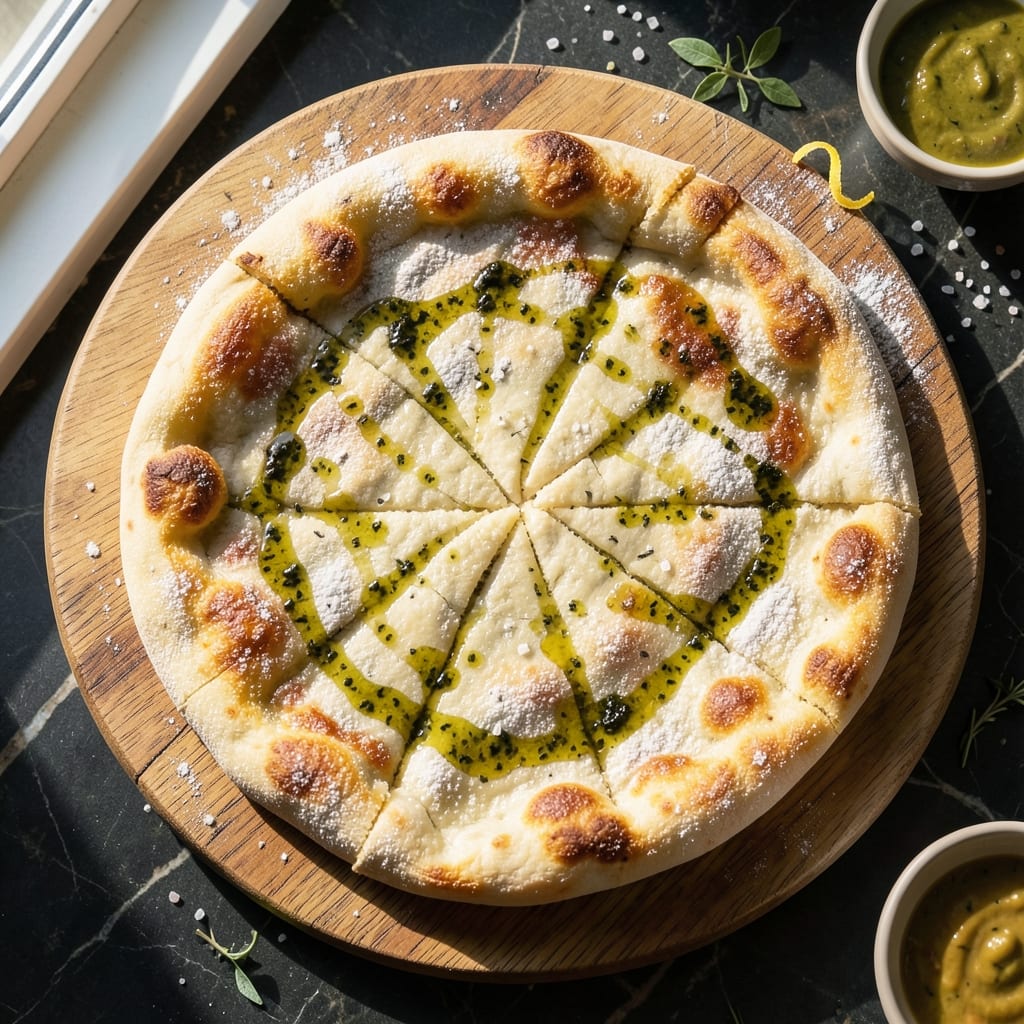
Mastering a 00 flour pizza crust transforms your homemade pizza into a crispy, chewy masterpiece with restaurant-quality texture. This recipe leverages the unique properties of 00 flour—its low protein content and fine texture—to create a delicate yet sturdy crust that holds toppings perfectly.
The key lies in precise dough handling and controlled fermentation, ensuring every bite delivers that ideal balance of crispness and chewiness.
What sets this recipe apart is its simplicity and reliability, designed for both beginners and experienced bakers. With just five core ingredients and a 30-minute prep time, you’ll achieve a professional-grade crust without gluten-free substitutes or complicated techniques.
The dough rests overnight, allowing flavors to develop deeply while maintaining an airy, tender crumb. This method eliminates guesswork, ensuring consistent results every time.
By the time your pizza emerges from the oven, you’ll have a golden, blistered crust with a crisp exterior and a chewy interior that’s impossible to resist. The 00 flour’s fine texture creates a silky smooth base, while proper baking techniques lock in that perfect texture.
Whether you’re a pizza enthusiast or a home cook looking to elevate your weeknight dinners, this recipe delivers restaurant-quality results with minimal effort.
Pair it with your favorite sauce, cheese, and toppings for a pizza that’s as impressive as it is delicious. The versatility of this crust means it works equally well for classic Margherita or loaded meat lovers—proving that great pizza starts with the foundation.
Let’s get started on crafting your perfect slice.
Ingredients for 00 pizza crust
Five simple ingredients transform into a restaurant-style 00 pizza crust with perfect crispy-chewy balance.
| Ingredient | Amount | Notes |
|---|---|---|
| 00 Pizza Flour 🌾 | 3 cups | Low protein, fine texture preferred |
| Active Dry Yeast 🍞 | ¼ tsp | Instant yeast works too |
| Granulated Sugar 🍬 | 1 tsp | Feeds yeast for activation |
| Diamond Crystal Kosher Salt 🧂 | 1 ½ tsp | Adjust to taste |
| Extra-Virgin Olive Oil 🫒 | ½ cup | High-quality, fruity variety |
| Warm Water 💧 | 1 ¼ cups | 110°F for optimal yeast activity |
| Semolina Flour 🌾 | ¼ cup | For dusting and rolling |
| Cornmeal 🌽 | ¼ cup | For pizza peel prep |
The 00 flour is non-negotiable here—its low protein content (8-10%) creates that signature silky texture. Caputo or Molino Caputo are gold standards, but King Arthur 00 flour works well too if you’re in the U.S. Look for bags labeled ’00’ or ‘double zero’—regular all-purpose won’t cut it. The yeast should be fresh: if it smells stale or doesn’t dissolve in warm water within 5 minutes, toss it. For the olive oil, California extra-virgin adds subtle fruitiness that complements the dough perfectly.
No 00 flour? King Arthur bread flour mixed with vital wheat gluten (90% bread flour, 10% gluten) mimics the protein structure, though texture won’t be identical. Running short on semolina? Regular all-purpose flour works in a pinch, but it’ll stick more to your rolling pin. The sugar can be swapped for honey or maple syrup, though it may slightly alter fermentation speed. For a lower-carb option, reduce sugar to 0.5 tsp and use erythritol. And yes, you can make this dough without a scale—just use the cup measurements precisely.
This dough is a 3-day project—the 24-hour cold proof is key for flavor development. Store the mixed dough in an airtight container in the fridge, covered with a damp towel to prevent drying. Once shaped, keep shaped crusts covered with a clean kitchen towel while prepping toppings. The final crust keeps well for 2 days refrigerated or 3 months frozen—just thaw overnight in the fridge before baking. For reheating, wrap cooled pizza in foil and warm at 350°F for 10 minutes.
Why You’ll Love This Recipe
- I’ll be real: 00 flour isn’t cheap, but a bag lasts forever, and you’re using way less than store-bought dough. Plus, no pre-made crusts here—just flour, a little patience, and you’re saving cash and calories. Win-win.
- Five-Ingredient Magic: Between us, this crust nails perfection with just flour, yeast, sugar, salt, and olive oil—no weird add-ins, no fuss. I swear, the high-gluten 00 flour gives that signature chew and crisp, while the olive oil keeps it tender without overpowering.
- Crispy-Creamy Crunch: That golden edge with a pillowy center? It’s all in the yeast’s slow rise and the kosher salt’s balance. Honestly, I’ve tried store-bought crusts, but this one’s ridiculously better—and it’s the olive oil that seals the deal.
- Weeknight to Party: Make a double batch on Sunday, and you’ve got lunch, dinner, or impressing guests covered. (Yes, even on a Tuesday night.) The dough keeps 3 days in the fridge, and it’s the perfect base for anything—margherita, BBQ chicken, or even breakfast pizza.
Step-by-step instructions for perfect 00 pizza crust
Here’s how to craft a crust with that signature crispy-chewy balance—no shortcuts, just proven technique.
Activate the Yeast for Maximum Rise
In a large bowl, combine the 3 cups 00 pizza flour, 1 tsp granulated sugar, and 1.5 tsp diamond crystal kosher salt. Whisk briefly to distribute the salt and sugar evenly through the flour. This creates an ideal environment for yeast activation.
Add the 0.25 tsp active dry yeast to 1.25 cups warm water (about 110°F) and let it sit for 5-10 minutes until it begins to foam and bubble vigorously. This foam confirms the yeast is alive and ready to work. If it doesn’t foam, your yeast may be dead—start over with fresh yeast. Pour the yeast mixture into the flour bowl and stir with a wooden spoon until a shaggy dough forms.
Knead and Hydrate for Elastic Dough
Add the 0.5 cup extra-virgin olive oil to the dough and knead by hand for 8-10 minutes until smooth and elastic. The dough should feel slightly tacky but not sticky—if it sticks to your hands, add 1 tablespoon flour at a time until it reaches the right consistency. The olive oil is crucial here; it develops that signature crispy-chewy texture by preventing excessive gluten formation while adding flavor.
Cover the bowl with a damp towel and let the dough rest at room temperature for 1 hour. This initial rest allows the gluten to relax and the dough to hydrate evenly. You’ll know it’s ready when the dough springs back slowly when poked with your finger—no quick rebound means it’s not ready yet.
Cold Proof for Enhanced Flavor
Transfer the dough to a lightly oiled bowl, cover, and refrigerate for 12-24 hours. This cold proofing step is non-negotiable for authentic flavor development. The slow fermentation allows enzymes to break down gluten and starches, creating a more tender, flavorful crust. The dough will rise slightly but won’t double in size—this is normal and desirable.
When you’re ready to shape, remove the dough from the refrigerator and let it sit at room temperature for 30-60 minutes until pliable. The cold proof also helps maintain the dough’s structure during shaping, preventing it from spreading too much in the oven. This is where patience pays off—rushed dough equals dense crust.
Shape and Pre-Bake for Crispy Foundation
Divide the dough into 4 equal portions (about 1 pound each) and shape each into a ball. On a lightly floured surface, roll each ball into a 12-inch circle, about ¼-inch thick. I use a rolling pin with semolina flour on both sides to prevent sticking—this also gives that classic textured surface.
Transfer each dough circle to a piece of parchment paper dusted with semolina flour. Preheat your oven to 375°F and bake the crusts for 8-10 minutes until they’re just starting to firm up at the edges. This pre-bake, called “par-baking,” creates the crispy base while keeping the center tender. Rotate the pans halfway through for even cooking.
Assemble and Finish for Perfect Texture
Remove the par-baked crusts from the oven and let them cool for 2 minutes. While they’re still warm, transfer them to a pizza peel dusted with cornmeal—this prevents sticking and adds that classic crunch. Add your sauce, cheese, and toppings, keeping them within 1 inch of the edge to prevent overloading.
Return the assembled pizzas to the oven and bake for another 10-12 minutes until the cheese is bubbly and the crust edges are golden brown. The cornmeal dusting on the peel ensures easy release, and the pre-baked base prevents a soggy bottom. Serve immediately while the crust is still crispy—this dough doesn’t wait!
Pro Tips For Making 00 Pizza Crust
- Measure Salt Right: Diamond Crystal kosher salt is fluffy—don’t eyeball it. Use 1½ teaspoons per 500g flour (that’s about 10 heaping pinches), or your crust will taste bland. I learned this the hard way after under-seasoning three batches and wondering why my pizza needed more salt after baking.
- Autolyse First: Mix flour and water (no yeast yet) and let it rest for 30–60 minutes before adding yeast. This relaxes the gluten, making your crust stretchier and easier to handle—no more tough, chewy disappointments. (Yes, even if you’re impatient like me.)
- Stretch, Don’t Roll: Skip the rolling pin—it compresses the dough and makes it dense. Instead, gently stretch the dough by hand, starting from the center and working outward. If it tears, patch it with a little water. This isn’t the prettiest method, but it’s the tastiest.
- Oil the Peel Well: Brush your pizza peel with extra-virgin olive oil before transferring the dough. A thin layer prevents sticking and adds a subtle flavor—no more scraping dough off the peel mid-flip. (Your future self will thank you.)
Wine and beer pairings for these flavors
Classic Italian Whites
For a traditional Margherita pizza with this 00 crust, a crisp Pinot Grigio from Friuli-Venezia Giulia is my go-to. The wine’s bright acidity and citrus notes cut through the rich tomato sauce and mozzarella, cleansing your palate between bites.
I love Santa Margherita Pinot Grigio—it’s affordable, widely available, and consistently delivers that perfect balance of minerality and fruit. Serve it slightly chilled (45-50°F) to enhance its refreshing qualities. 🍷
Crisp Lager Pairings
A light Italian lager like Peroni or Moretti works beautifully with this crust’s crispy texture. The beer’s subtle malt sweetness and effervescence complement the caramelized edges without overpowering the toppings. For a local option, try Coors Banquet—its crisp, clean profile makes it a great American alternative.
I recommend serving it ice-cold (38-42°F) to highlight its refreshing qualities against the warm pizza.
Bold Reds for Meat Lovers
If you’re loading up with pepperoni, sausage, or prosciutto, a medium-bodied Chianti Classico brings the perfect balance. The wine’s cherry and leather notes harmonize with cured meats while standing up to the crust’s crispy texture.
Look for Ruffino Chianti Classico—it’s approachable and won’t overwhelm the pizza. Serve at 60-64°F to let its tannins soften and complement the fatty toppings. 🍷
Sparkling Options
For a celebratory touch, a dry Prosecco from Veneto adds a festive element to your pizza night. The bubbles and slight sweetness create a delightful contrast with the savory crust. I prefer La Marca Prosecco—it’s crisp, affordable, and widely available.
Serve it well-chilled (40-45°F) to maintain its effervescence. This pairing works especially well with lighter toppings like arugula, prosciutto, and shaved Parmesan.
Beer Alternatives
If you prefer craft beer, a Belgian witbier like Hoegaarden offers a unique pairing with its coriander and orange peel notes. The beer’s slight tartness complements the crust’s crispy edges while adding an unexpected complexity.
For a hoppier option, try a light American pale ale with citrusy hops—just avoid heavy IPAs that could overpower the delicate crust. Serve craft beers at 45-50°F to balance their flavors with the warm pizza. 🍺
Nutrition facts
Frequently asked questions about 00 pizza crust
Why does 00 flour make the crust so different?
The secret lies in its low protein content (8-10%)—this creates a delicate, silky texture instead of a chewy, elastic dough. The fine texture also absorbs moisture differently, giving that signature crispy-chewy balance. Regular all-purpose flour (11-13% protein) would make a denser, less tender crust.
Can I make this dough without a stand mixer?
The recipe is designed for hand-kneading—just work the dough for 8-10 minutes until smooth and elastic. The olive oil helps prevent excessive gluten development, so you won’t need the mixer’s power. A lightly floured surface makes it easier to handle without sticking.
What’s the best way to store shaped but unbaked crusts?
Keep shaped crusts covered with a clean kitchen towel in the fridge for up to 2 days or freeze for 3 months. For freezing, wrap each crust tightly in plastic wrap before placing in a freezer bag. Thaw overnight in the fridge before baking—never at room temperature.
Why does my crust turn out dense instead of crispy?
Over-kneading or skipping the cold proof are the most common causes. The dough should be tacky but not sticky after kneading—if it’s too elastic, you’ve overworked it. Also ensure your yeast is fresh (it should foam within 5-10 minutes in warm water).
How do I adjust the recipe for a thinner or thicker crust?
For a thinner crust, roll the dough to ⅛-inch thickness and bake at 425°F for 10-12 minutes. For thicker (Neapolitan-style), roll to ¼-inch and bake at 375°F for 14-16 minutes. The pre-bake time may need adjustment—watch closely for golden edges.

- 2 Loaf Sandwich Bread Recipe: Homemade Crusty Slices Without a Machine - October 5, 2026
- 5 Hour Sourdough Bread Recipe: Crusty-Crumb Mastery Without the Knead - October 5, 2026
- 00 Pizza Crust Recipe: Crispy, Chewy Layers Without a Single Gluten-Free Substitute - October 5, 2026