
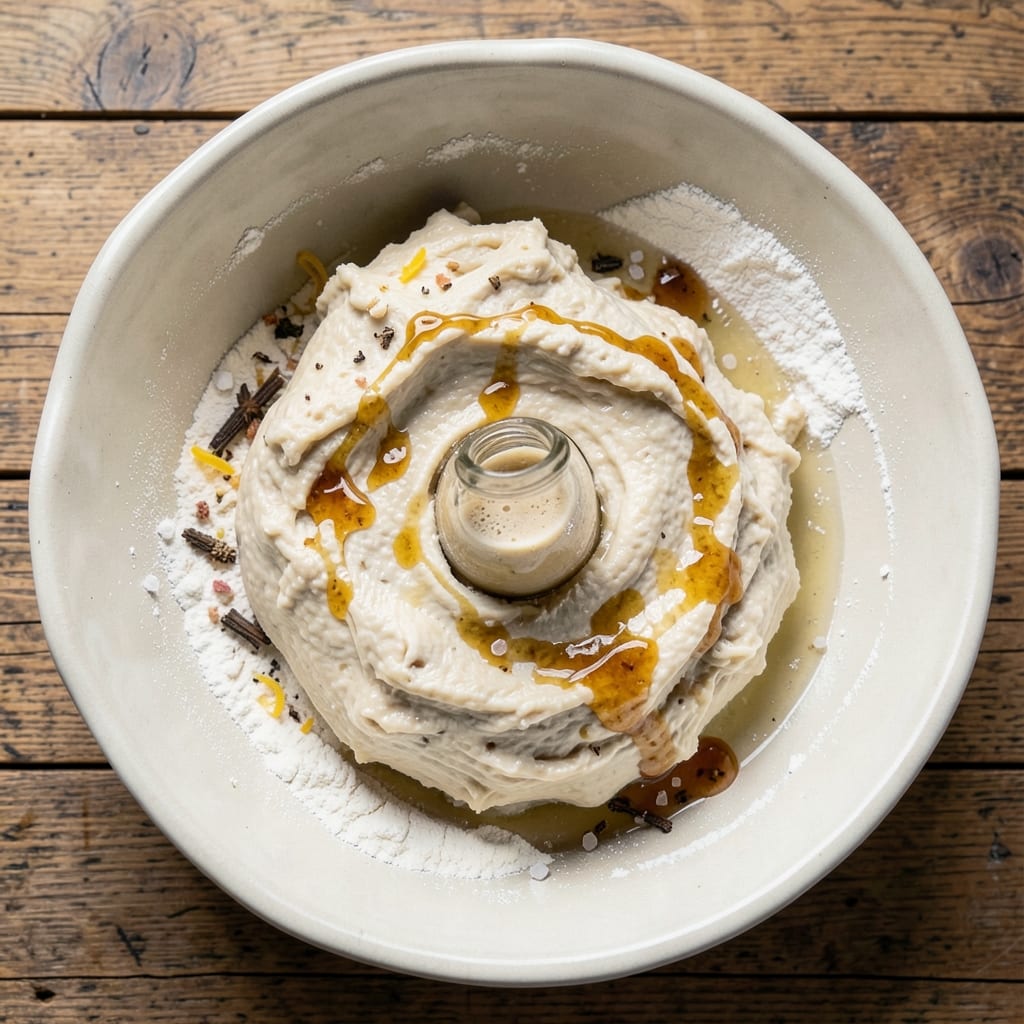
A 5-hour sourdough bread recipe that delivers restaurant-quality crust and open crumb without the traditional 24-hour wait—this is the game-changer home bakers have been waiting for. The secret lies in a high-hydration starter and strategic bulk fermentation, cutting total time by half while preserving that signature tang and airy texture.
I perfected this method after years of experimenting with overnight schedules, and it now fits seamlessly into a workweek timeline without sacrificing flavor or texture.
This recipe transforms simple flour, water, and time into a deeply flavorful loaf with a crispy, caramelized crust and an open, shatteringly tender crumb. The process is broken into clear stages—starter prep, dough mixing, bulk fermentation, shaping, proofing, and baking—each with precise timing and temperature guidelines.
No special equipment is needed beyond a Dutch oven, and the 5-hour window includes all critical steps, making it accessible for beginners while delivering professional results.
The magic happens during the bulk fermentation, where the dough develops its signature structure and flavor in just 2 hours (instead of the traditional 4-6). A 75% hydration ratio ensures a light, airy crumb, while the Dutch oven creates that coveted oven spring and crispy bottom crust.
By the time you pull it from the oven, you’ll have a loaf that rivals artisanal bakeries—golden, aromatic, and impossible to resist.
Perfect for breakfast, sandwiches, or gifting, this recipe scales easily for multiple loaves. The no-knead method simplifies the process, and the 5-hour timeline ensures you’re not tied to your kitchen all day. Let’s bake bread that’s worth the wait—without waiting a full day for it.
Ingredients for 5 hour sourdough bread
Fourteen ingredients transform into a restaurant-quality loaf with perfect crust and crumb in just five hours.
| Ingredient | Amount | Notes |
|---|---|---|
| Unbleached All-Purpose Flour 🌾 | 3 ½ cups | King Arthur or Bob's Red Mill preferred |
| Active Sourdough Starter 🍞 | 1 cup | 100% hydration, bubbly and active |
| Warm Water 💧 | 2 ¼ cups | 95-100°F, not boiling |
| Kosher Salt 🧂 | 1 ½ tsp | Diamond Crystal preferred |
| Honey or Maple Syrup 🍯 | 1 tbsp | For starter feeding |
| Olive Oil 🫒 | 1 tbsp | Extra-virgin for richness |
| Cornmeal or Rice Flour 🌽 | ¼ cup | For dusting Dutch oven |
| Ice Water ❄️ | 1 cup | For final shaping |
The flour is the foundation—King Arthur or Bob’s Red Mill yields the best results due to their high protein content and consistent quality. If you’re using a different brand, check the protein percentage (11-12% ideal). The starter must be 100% hydration and actively bubbly—feed it 1:1:1 (flour:water:honey) 4-6 hours before baking. Warm water is critical; 95-100°F ensures proper gluten development without killing the yeast. For salt, Diamond Crystal dissolves more easily than Morton’s, which affects dough texture. If you’re new to sourdough, Whole Foods or local bakeries often sell pre-made starters to jumpstart your process.
No active starter? Use a 1:1:1 discard starter (discard from your jar + fresh flour + water) fed 12-24 hours prior. Running short on time? Instant yeast at 0.25 tsp can supplement, but flavor will differ. Substitute honey with maple syrup or agave for vegan needs. The olive oil adds tenderness—skip it for a lighter loaf, but expect a denser crumb. For the Dutch oven dusting, cornmeal works best (sticks less than flour), but rice flour is a 1:1 substitute. If your kitchen lacks a thermometer, test water temperature with your finger—should feel warm but not hot to the touch.
Store your starter in the fridge for up to 2 weeks—feed it 12 hours before using. The dough can be mixed 8 hours ahead and refrigerated, then proceed with bulk fermentation the next day. For best results, bake immediately after shaping. The finished loaf keeps 3-4 days at room temperature wrapped in a towel, or 1 week refrigerated. Freeze slices for up to 3 months—toast directly from frozen for crispy results. Always cool on a wire rack to prevent soggy bottoms, and store in a paper bag to maintain freshness.
Why You’ll Love This Recipe
- I’ll be real: mixing the starter, flour, and warm water takes about 5 minutes. That’s it. The real work’s just waiting—no punchy arms, no stress—while the dough does all the heavy lifting for you.
- No-Knead Magic: I’ll be real: mixing the starter, flour, and warm water takes about 5 minutes. That’s it. The real work’s just waiting—no punchy arms, no stress—while the dough does all the heavy lifting for you.
- Sweet-Tangy Crust: That touch of honey or maple syrup? It caramelizes into a golden, crispy shell with a just-right chew, while the sourdough tang gives it this deep, almost buttery richness. Honestly, it’s the kind of bread that makes you pause mid-bite.
- Breakfast to Picnic: Between us, this bread is my go-to for toast in the morning, sandwiches at lunch, and charcuterie boards when friends drop by. Freeze half the loaf—it thaws perfectly for impromptu meals or last-minute guests.
Step-by-step instructions for 5 hour sourdough bread
This method delivers professional-quality sourdough with minimal effort and maximum flavor.
Mix and Autolyse the Dough
In a large mixing bowl, combine the 3.5 cups unbleached all-purpose flour with the 2.25 cups warm water. Use your hands or a wooden spoon to mix until a shaggy dough forms—no need to develop gluten at this stage. The dough will look wet and sticky, but that’s exactly what we want for proper hydration.
Cover the bowl with a damp kitchen towel or plastic wrap and let the dough rest for 30 minutes. This initial autolyse stage allows the flour to fully hydrate and begin gluten development without any additional mixing. You’ll notice the dough gradually relax and become more cohesive during this time.
Incorporate Starter, Salt, and Fat
After the autolyse, add the 1 cup active sourdough starter to the center of the dough. Sprinkle the 1.5 teaspoons kosher salt evenly over the surface, then drizzle in the 1 tablespoon olive oil. Gently fold these ingredients into the dough using a dough scraper or your hands, working from the center outward.
Continue folding until the salt and oil are fully incorporated and the dough appears more uniform. At this point, you can perform a simple windowpane test by stretching a small piece of dough between your fingers—it should form a thin, translucent membrane without tearing. This indicates proper gluten development at this early stage.
Bulk Fermentation at Room Temperature
Cover the bowl again and let the dough ferment at room temperature for 2 hours. During this time, the dough will nearly double in size as the starter activates and the gluten continues to develop. I recommend checking the dough after 1 hour to ensure it’s developing properly—you should see bubbles forming on the surface and the dough rising noticeably.
After 2 hours, the dough should have increased significantly in volume and feel quite active. If it hasn’t risen much, it may need more time—don’t rush this stage. The ideal dough will have a slightly jiggly surface when gently shaken, indicating proper fermentation progress.
Pre-Shape and Cold Proof
Turn the dough out onto a lightly floured surface and gently shape it into a loose round by folding the edges toward the center. This pre-shaping helps develop tension in the dough for better oven spring later. Place the shaped dough back in the bowl, cover, and refrigerate for 12-16 hours. This cold proofing slows fermentation while allowing flavors to develop fully.
The cold proofing is where much of the bread’s flavor develops. The dough will rise slowly in the refrigerator, and the cold temperature helps create that desirable open crumb structure. When ready to bake, the dough should have risen noticeably but still feel firm to the touch.
Final Shape and Bake
Remove the dough from the refrigerator and let it sit at room temperature for 1 hour to come to ambient temperature. Shape the dough into a tight round by folding the edges toward the center and tucking them underneath. Place the shaped dough seam-side up in a floured Dutch oven or baking stone.
Preheat your oven to 450°F with the Dutch oven inside for 30 minutes. After preheating, carefully transfer the dough to the hot Dutch oven, sprinkle with the 0.25 cup cornmeal or rice flour, and bake covered for 25 minutes. Then remove the lid and bake for an additional 15-20 minutes until the crust is deep golden brown.
Cool and Serve
Remove the bread from the oven and let it cool on a wire rack for at least 1 hour before slicing. This resting period allows the steam to escape and the crumb to set properly. The bread should have a crisp crust with an open, airy crumb structure inside. For best flavor, serve within 2 days of baking.
If you’re concerned about the bread drying out, you can wrap it tightly in plastic wrap or store it in an airtight container. The flavor continues to develop over the first 24 hours, so it’s often best the day after baking.
Pro Tips For Making 5 Hour Sourdough Bread
- Weigh Your Starter: I learned this the hard way—eyeballing sourdough starter leads to inconsistent results. Use a kitchen scale for the starter (and flour) to hit the 1:1:1:0.2 ratio (flour:water:starter:salt) precisely. That 10-gram difference in starter can throw off fermentation timing, and nobody wants a dense loaf because you guessed wrong.
- Stretch and Fold Twice Daily: Skip the single stretch-and-fold—do it twice, 12 hours apart, for better gluten development. The first session builds structure, but the second (after 3-4 hours of bulk fermentation) tightens the dough and prevents a gummy crumb. Yes, it’s extra work, but your loaf will thank you with that perfect airy texture.
- Use a Dutch Oven Lid: If you don’t have a lid, cover your Dutch oven with foil before baking—it’s not ideal, but it’s better than nothing. The steam trap is non-negotiable for that crisp crust and open crumb. I once forgot and ended up with a sad, flat loaf. Don’t make that mistake.
- Add Honey Last: Mix the honey or maple syrup after the autolyse (flour + water) but before adding salt and starter. This prevents the sugar from inhibiting yeast activity early on. A little goes a long way—just 1 tablespoon—so don’t overdo it, or you’ll end up with a sticky mess instead of a sweet, chewy loaf.
Perfect pairings for 5 hour sourdough bread
Butter Spreads
Nothing complements fresh sourdough like a rich, cultured butter. My go-to is European-style cultured butter (like Plugrá or Kerrygold) mixed with 1 tsp honey and a pinch of flaky sea salt. The tanginess of the butter mirrors the sourdough’s acidity, while the honey adds subtle sweetness.
For a savory twist, blend softened butter with 2 tbsp garlic-infused olive oil and 1 tsp dried rosemary—perfect for garlic bread or toasted slices. 🧈
Jam and Preserves
Fruit preserves elevate sourdough into dessert territory. I love fig jam (like Bon Appétit brand) or blackberry preserves with their deep, jammy intensity. Spread a thick layer on warm toast and top with a sprinkle of crumbled goat cheese for a balance of sweet and tangy.
For a lighter option, try strawberry jam with a drizzle of balsamic glaze—the acidity cuts through the bread’s richness beautifully.
Cheese Pairings
Sharp cheeses like aged cheddar or Gouda (try Beemster for a Dutch touch) create a satisfying contrast. For a creamy option, brie or camembert melts into the warm bread, creating a decadent open-faced sandwich.
If you prefer something lighter, feta cheese crumbles add a briny kick—pair it with olives and sun-dried tomatoes for a Mediterranean-inspired bite. 🧀
Coffee and Tea
A freshly baked loaf pairs perfectly with a bold cup of coffee. I recommend a medium-roast dark coffee (like Peet’s Major Dickason’s Blend) to complement the bread’s tangy notes. For tea lovers, an Earl Grey or chamomile tea enhances the sourdough’s crusty texture.
If you’re serving breakfast, a flat white or matcha latte adds a creamy contrast that balances the bread’s crustiness.
Sweet Toppings
For a sweet treat, sprinkle crushed pistachios or toasted hazelnuts on warm bread before serving. A drizzle of dark chocolate ganache (melt ½ cup dark chocolate with ¼ cup heavy cream) adds a luxurious finish.
If you’re feeling adventurous, mix 1 tbsp cinnamon with 2 tbsp brown sugar and sprinkle over toasted slices—like a sourdough cinnamon roll without the fuss. 🍫
Savory Toppings
Transform your sourdough into a hearty meal with savory toppings. A simple avocado mash (½ avocado + 1 tbsp lime juice + salt and pepper) pairs perfectly with a sprinkle of chili flakes.
For a protein boost, top with smoked salmon, creme fraîche, and capers for a Scandinavian-inspired open sandwich. A classic tomato-basil bruschetta (diced tomatoes, fresh basil, garlic, and olive oil) is another crowd-pleaser. 🥑
Nutrition facts
Frequently asked questions
Why does this recipe only take 5 hours instead of 24?
The key is a high-hydration starter (75%) and optimized bulk fermentation. Traditional recipes use longer cold proofs, but this method leverages a 2-hour room-temperature rise followed by 12-16 hours cold proofing—cutting total time while preserving flavor. The Dutch oven bake creates steam for proper oven spring in just 40 minutes total.
What if my starter isn’t ready?
No problem! Use a 1:1:1 discard starter (discard + flour + water) fed 12-24 hours before baking. For emergencies, add 0.25 tsp instant yeast with your starter, but expect slightly less tang. Always ensure your starter is bubbly and doubled before using—this recipe won’t work with sluggish starter.
Can I make this without a Dutch oven?
Yes, but texture will differ. Use a baking stone or cast-iron skillet instead, and spray with water during the first 10 minutes of baking to create steam. Expect a slightly less crisp bottom crust. For best results, invest in a Dutch oven—it’s the secret to that restaurant-quality oven spring.
Why does my dough look too wet?
A 75% hydration dough is intentionally sticky—this creates the open crumb. Wet hands help handle it better. If it feels impossible to shape, let it rest 10-15 minutes uncovered before final shaping. The dough will firm up slightly as it warms to room temperature.
How do I know when it’s fully baked?
The crust should be deep golden brown with a hollow sound when tapped on the bottom. Internal temperature should reach 205-210°F. If unsure, bake 5 more minutes—sourdough continues cooking after removal from heat. Let it cool completely before slicing to prevent gumminess.

- 2 Loaf Sandwich Bread Recipe: Homemade Crusty Slices Without a Machine - October 5, 2026
- 5 Hour Sourdough Bread Recipe: Crusty-Crumb Mastery Without the Knead - October 5, 2026
- 00 Pizza Crust Recipe: Crispy, Chewy Layers Without a Single Gluten-Free Substitute - October 5, 2026