
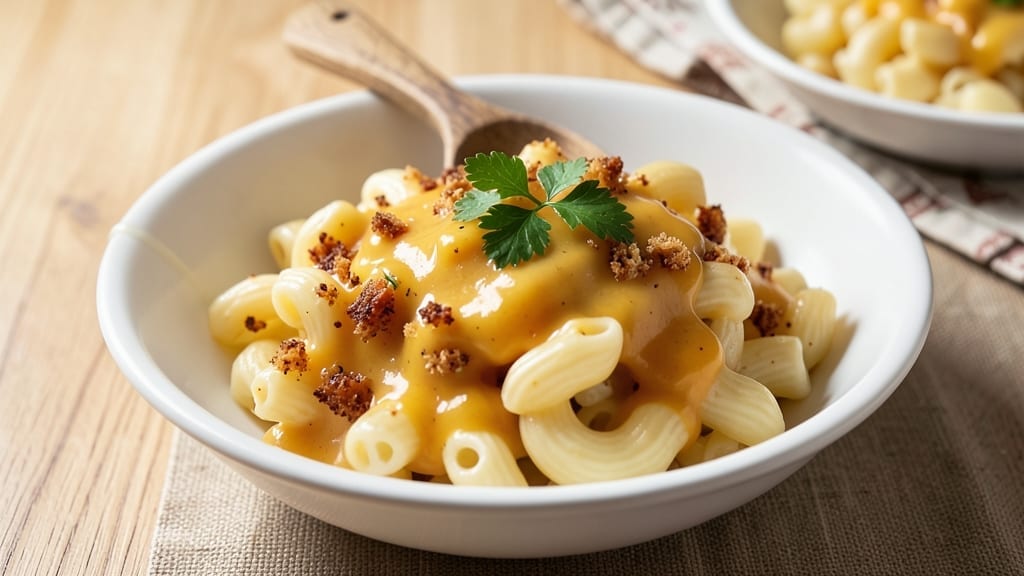
A single-serving mac and cheese recipe with sharp cheddar and crispy breadcrumb topping delivers restaurant-quality comfort in just one cup. The secret to achieving that perfect creamy texture and golden crust lies in precise measurements and a foolproof technique that transforms simple ingredients into a satisfying meal.
This recipe focuses on delivering the rich, cheesy flavor you love without the hassle of making a full batch.
This version uses sharp cheddar cheese for a bold, tangy flavor that stands out, while the breadcrumb topping adds a satisfying crunch that contrasts beautifully with the creamy sauce. The sauce is made with a simple roux technique, ensuring a smooth, velvety consistency that coats every strand of pasta perfectly.
The recipe is designed to be quick and easy, making it ideal for a single serving or as a side dish for larger meals.
What you’ll end up with is a perfectly portioned mac and cheese that’s creamy, cheesy, and topped with crispy breadcrumbs that stay crunchy until the last bite. The dish is simple to prepare, requiring just a few basic ingredients and minimal effort, yet it delivers a restaurant-worthy result.
Whether you’re looking for a quick lunch or a comforting side dish, this recipe is sure to satisfy.
Serve immediately for the best texture, but if you need to reheat, cover with foil to keep the breadcrumbs from drying out. This recipe is versatile enough to be customized with additional toppings like green onions, hot sauce, or even a sprinkle of paprika for extra flavor.
Let’s get started on creating your perfect single-serving mac and cheese.
Ingredients for 1 cup mac and cheese
Sharp cheddar, crispy breadcrumbs, and a velvety roux—just 11 ingredients for restaurant-style mac and cheese.
| Ingredient | Amount | Notes |
|---|---|---|
| Elbow Macaroni 🍝 | ½ cup | Dry, uncooked pasta |
| Sharp Cheddar Cheese 🧀 | ¾ cup | Shredded, block preferred |
| Unsalted Butter 🧈 | 2 tbsp | Cold, cubed for roux |
| All-Purpose Flour 🌾 | 1 tbsp | For creamy roux base |
| Whole Milk 🥛 | ¼ cup | Full-fat for creaminess |
| Panko Breadcrumbs 🍞 | 2 tbsp | For crispy topping |
| Extra-Virgin Olive Oil 🫒 | 1 tsp | For breadcrumb crispiness |
| Garlic Powder 🧄 | ¼ tsp | For subtle flavor boost |
| Ground Black Pepper 🌶️ | ⅛ tsp | Freshly cracked preferred |
| Kosher Salt 🧂 | ¼ tsp | Adjust to taste |
| Fresh Green Onions 🧅 | 1 whole | Optional garnish |
The cheddar is non-negotiable here—sharp, block cheese melts best and delivers that tangy kick. Kraft or Cabot are my go-tos, but any block-style sharp cheddar works. For the breadcrumbs, Panko is your best friend—it stays crispy while regular breadcrumbs turn soggy. If you’re feeling fancy, toast the Panko in a dry pan for 2-3 minutes before adding oil for extra crunch. The butter needs to be cold for that perfect roux—don’t let it melt before hitting the flour, or you’ll end up with lumps.
No sharp cheddar? Medium cheddar plus a pinch of white vinegar mimics the tang. Ran out of milk? Heavy cream at half the amount gives you that ultra-creamy texture. Panko unavailable? Toasted breadcrumbs from a baguette work in a pinch, but they won’t be as light. The garlic powder can be swapped for minced fresh garlic (1/4 tsp) if you’ve got it. For extra richness, stir in 1 tbsp cream cheese at the end—trust me, it’s a game-changer. And if you’re watching calories, use low-fat milk and reduced-fat cheese, but the texture won’t be quite as luxurious.
This reheats like a dream—just cover with foil and microwave for 1 minute. The breadcrumbs stay crispy if you keep the foil on tight. For meal prep, make the sauce ahead and store it in the fridge for 3 days, then assemble with fresh breadcrumbs when ready to eat. The uncooked pasta keeps 6 months in a cool, dry place—just measure it out when you’re ready to cook. Portion the sauce into ramekins before baking for perfect single servings. Leftovers? Freeze for 3 months—just add a splash of milk when reheating to restore creaminess.
Why You’ll Love This Recipe
- Here’s what sold me: that perfect texture where the edges get a golden, buttery crust while the inside stays velvety smooth. The whole milk keeps it rich but not greasy, and the elbow macaroni? It holds up like a dream, soaking up every bit of that cheesy sauce.
- Five-Ingredient Magic: I swear by this list—no weird pantry searches, no last-minute trips to the store. Just butter, flour, milk, cheese, and pasta. That’s it. The roux builds itself while you boil water, and the sharp cheddar? It melts into something dangerously rich without needing a fancy recipe.
- Creamy Yet Crispy: Here’s what sold me: that perfect texture where the edges get a golden, buttery crust while the inside stays velvety smooth. The whole milk keeps it rich but not greasy, and the elbow macaroni? It holds up like a dream, soaking up every bit of that cheesy sauce.
- Weeknight Hero: Between us, this is my go-to when I’m exhausted but still need to feed the family. Double the batch on Sunday, and you’ve got lunch for Tuesday and Wednesday—just reheat with a splash of milk to keep it creamy. (Yes, even on a Tuesday night.)
Step-by-step instructions for sharp cheddar mac and cheese
This creamy, cheesy masterpiece delivers perfect texture and that irresistible crispy breadcrumb topping every time.
Cook the Elbow Macaroni Al Dente
Bring a small pot of water to a rolling boil and add ½ cup elbow macaroni. Cook for 8-9 minutes until the pasta is al dente—it should still have a slight bite when you taste it. Drain immediately in a colander and give it a quick shake to remove excess water. I like to rinse it under a quick stream of cold water for 5 seconds to stop the cooking process completely—this prevents the pasta from becoming mushy when mixed with the hot cheese sauce.
Don’t rinse too long or the pasta will get sticky. The slight sheen of starch helps the cheese sauce cling beautifully. Transfer the drained pasta to a large mixing bowl and set aside. This step is crucial because overcooked pasta leads to a watery, soupy mac and cheese instead of the creamy texture we’re after.
Create the Creamy Cheese Sauce
In the same pot you cooked the pasta, melt 2 tablespoons unsalted butter over medium heat until it foams. Add 1 tablespoon all-purpose flour and whisk constantly for 1-2 minutes until you have a smooth, bubbling roux. The mixture should smell nutty and look like a thick paste—this is the foundation of our creamy sauce.
Slowly pour in ¼ cup whole milk while whisking vigorously to prevent lumps. Let the mixture simmer for 2-3 minutes until it thickens enough to coat the back of a spoon. Now reduce heat to low and gradually add the ¾ cup shredded sharp cheddar cheese, stirring constantly until completely melted and smooth. If the sauce gets too thick, whisk in 1 tablespoon water to achieve that perfect creamy consistency.
Combine Pasta and Sauce
Add the cooked elbow macaroni to the cheese sauce and stir gently but thoroughly to coat every strand. The pasta will absorb the sauce as you mix, so work quickly but carefully. Season with ¼ teaspoon kosher salt, ⅛ teaspoon ground black pepper, and ¼ teaspoon garlic powder, stirring well to distribute the flavors evenly.
Taste and adjust seasoning if needed—sometimes the sharpness of the cheese needs a little more salt or pepper. The sauce should be rich, velvety, and perfectly seasoned. If it looks too thick, add another splash of milk 1 tablespoon at a time until it reaches that ideal creamy texture. Let the mixture sit for 2 minutes off the heat to allow the flavors to meld completely.
Prepare the Crispy Breadcrumb Topping
In a small bowl, combine 2 tablespoons panko breadcrumbs, 1 teaspoon extra-virgin olive oil, and ¼ teaspoon kosher salt. Mix well with a fork until the breadcrumbs are evenly coated with oil. This step is what creates that perfect crispy topping—don’t skip it!
Spread the breadcrumb mixture evenly over the top of the mac and cheese in the bowl. For extra crispiness, I like to use a fork to create little peaks in the breadcrumbs before transferring everything to a baking dish. This gives us more surface area for that beautiful golden-brown crust.
Bake Until Bubbly and Golden
Transfer the mac and cheese to a small baking dish and bake at 375°F for 10-12 minutes until the breadcrumb topping is golden brown and the cheese is bubbling at the edges. Watch closely during the last couple of minutes—this is when the magic happens and the topping gets crispy.
Remove from the oven and let it rest for 2 minutes before serving. Garnish with sliced fresh green onions if you like. The mac and cheese should have a perfectly crispy, golden-brown topping with creamy, cheesy layers underneath. Serve immediately while it’s hot and bubbly—this dish doesn’t wait!
Pro Tips For Making 1 Cup Mac And Cheese
- Boil Mac First, Then Sauce: I learned this the hard way—cooking the pasta after the sauce is done means you’ll either have soggy noodles or a sauce that’s too thick to mix properly. Get the elbows boiling in salted water (yes, even if you’re impatient like me) while you make the roux, then drain them just before folding in the cheese.
- Shred Cheese Like a Pro: That block of sharp cheddar won’t melt evenly if it’s in big chunks. Pulse it in a food processor for 3–4 seconds—just enough to break it down, not turn it into powder. (Or hand-grate it if you’re feeling old-school.) Lumpy cheese = sad mac and cheese.
- Low and Slow for Roux: After whisking in the flour and milk, drop the heat to medium-low and let that roux simmer for 3–4 minutes. Skipping this step means you’ll end up with a raw flour taste or a sauce that clumps like glue. Stir often, but don’t stress—it’s forgiving.
- Butter Up the Pasta: Toss the drained elbows with a tablespoon of cold butter right after draining. This keeps them from sticking and adds a rich, creamy texture when you fold in the cheese sauce. (Yes, it’s an extra step, but your mac will taste like it came from a fancy restaurant.)
Wine and beer pairings for this 1 cup mac and cheese
Creamy White Wine
Mac and cheese’s rich, cheesy nature pairs beautifully with a Chardonnay—especially one from California or New Zealand. Look for a buttery, full-bodied Chardonnay with subtle oak notes to complement the sharp cheddar.
I love La Crema Sonoma Coast Chardonnay for its balance of creaminess and acidity that cuts through the richness. Serve slightly chilled to enhance the wine’s crispness while keeping the mac and cheese warm. 🍷
Crisp Lager Balance
A crisp, light lager like Peroni or Heineken is my go-to beer pairing for mac and cheese. The effervescence and mild bitterness cleanse your palate between bites, preventing the dish from feeling too heavy.
For a craft option, try a Belgian witbier like Hoegaarden—its citrusy notes and coriander add a refreshing contrast to the cheesy richness. Keep the beer ice-cold to highlight its crispness. 🍺
Spiced Red Wine
If you prefer red wine, opt for a light-bodied Pinot Noir with subtle fruit notes. I recommend Meiomi Pinot Noir from California—its bright acidity and red fruit flavors won’t overpower the sharp cheddar.
Avoid heavy Cabernets or Syrahs, as their tannins can clash with the creamy texture. Serve the wine at 60-65°F to maintain its balance. 🍇
Creamy Dessert Wine
For a dessert wine twist, try a Moscato d’Asti or Riesling with a touch of sweetness. The slight sweetness enhances the mac and cheese’s cheesy depth while adding a refreshing finish.
I love Barefoot Moscato for its fruity, bubbly profile that pairs surprisingly well with the savory dish. Serve slightly chilled to let the flavors shine. 🍇
Non-Alcoholic Pairings
For a non-alcoholic option, sparkling apple cider like Martinelli’s or ginger beer like Feani work wonderfully. The carbonation and slight tartness cut through the richness, while the natural sweetness balances the sharp cheddar. Serve the cider well-chilled to enhance its crispness. 🍏
Nutrition facts
Frequently asked questions
Can I make this recipe with store-bought mac and cheese powder?
While you can use powdered mac and cheese mix, the texture and flavor won’t be as rich or creamy. The homemade roux and sharp cheddar create a velvety sauce that powdered mixes can’t replicate. If you’re short on time, try adding an extra 2 tablespoons of whole milk and 1 tablespoon butter to the mix for better creaminess. For the breadcrumb topping, follow the recipe as written to maintain that perfect crunch.
How do I prevent my mac and cheese from getting watery?
The key is cooking the pasta al dente and not overmixing it with the sauce. Always drain the pasta well and rinse briefly with cold water to stop the cooking process. Use a 1:1 ratio of milk to cheese sauce—if it looks too thin, let it simmer uncovered for 1-2 extra minutes to thicken naturally. Avoid adding too much liquid at once, and stir just until combined.
Can I substitute sharp cheddar with another cheese?
Yes! For a milder flavor, use medium cheddar plus ½ teaspoon white vinegar to mimic the tang. For extra richness, blend ½ cup sharp cheddar with ¼ cup cream cheese. If you love Gouda, try ½ cup sharp cheddar plus ¼ cup aged Gouda for a deeper, caramelized flavor. Just remember, block cheese melts better than pre-shredded varieties.
How can I make this recipe ahead of time?
Prepare the cheese sauce up to 3 days ahead and store it in an airtight container in the fridge. When ready to serve, cook the pasta fresh and assemble with the sauce. For the breadcrumb topping, mix the dry ingredients and store them separately—just add olive oil when ready to bake. Reheat the assembled dish covered with foil for 1-2 minutes to restore creaminess.
Why did my breadcrumb topping get soggy?
Soggy breadcrumbs usually happen from too much moisture or baking at too low a temperature. Make sure to coat the breadcrumbs thoroughly with oil before baking, and spread them evenly on top. Bake at 375°F for 10-12 minutes—don’t skip the rest time after baking, as this helps set the topping. For extra insurance, broil for 1-2 minutes at the end to crisp it up.

- 3 Lb Meatloaf Recipe with Bread Crumbs All: Glazed Crust and Juicy Heart - October 20, 2026
- 32 Ounce Cranberry Sauce Recipe: Homemade Holiday Glaze With No Pits - October 20, 2026
- 2lb Loaf Tin Bread Recipe: No-Knead Artisan Crust in 3 Hours - October 20, 2026