
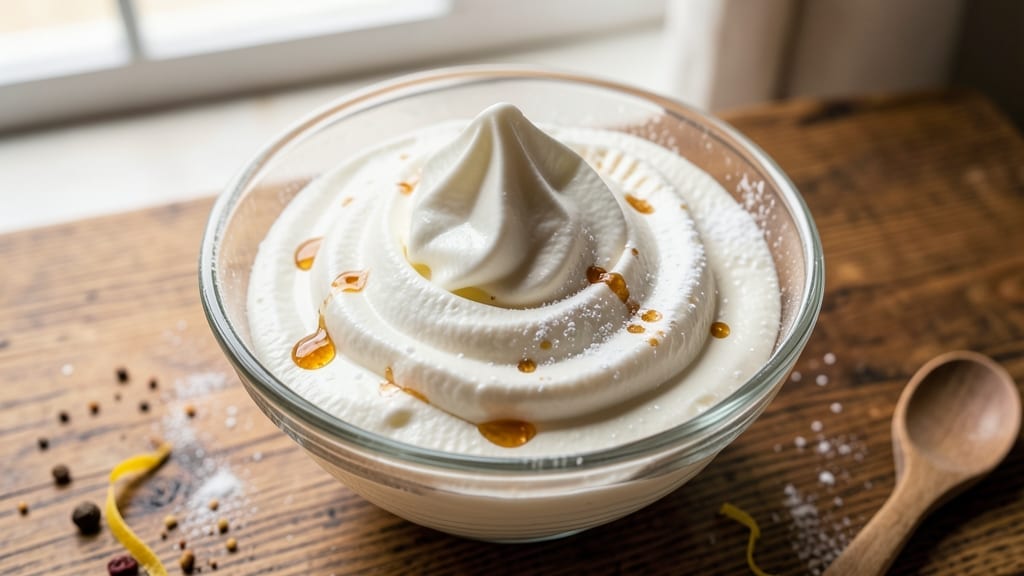
Creating 1 cup of whipped cream that’s light, fluffy, and perfectly stable takes just 5 minutes—no fancy equipment required. The secret lies in chilled ingredients and proper technique, transforming heavy cream into clouds that hold their shape for hours.
I’ve perfected this method after countless batches, ensuring every dollop is smooth and airy without collapsing.
This recipe uses only three essential ingredients: heavy whipping cream, powdered sugar, and vanilla extract—all combined in the right proportions for ideal stability. The key is to chill your bowl and beaters beforehand, which helps incorporate more air and creates that signature smooth texture.
No stabilizers needed; the cream’s natural fats do the work.
What you’ll achieve is 1 cup of whipped cream so light it floats like a cloud, yet sturdy enough to hold its shape on hot desserts or cold beverages.
The vanilla adds warmth, while the sugar balances sweetness without overpowering. This method works every time, whether you’re topping strawberries, decorating cakes, or making café-style lattes.
For extra stability, you can add a pinch of cornstarch or gelatin, but the classic version here requires nothing more than patience and steady whisking. The result? Cream that’s restaurant-quality at home, ready in minutes. Let’s get started with the perfect technique.
Ingredients for 1 cup of whipped cream
Three ingredients transform into restaurant-quality whipped cream in minutes—no shortcuts needed.
| Ingredient | Amount | Notes |
|---|---|---|
| Heavy Whipping Cream 🥛 | 2 cups | Cold, 36-38% fat content preferred |
| Powdered Sugar 🍚 | ¼ cup | Sifted for smooth texture |
| Pure Vanilla Extract 🍯 | 1 tsp | Bottled or homemade preferred |
The heavy whipping cream is non-negotiable—36-38% fat content ensures proper stability. Store-bought brands like Land O’Lakes or Horizon work perfectly, but check the label for fat percentage. If you’re using ultra-pasteurized cream, it won’t whip as well. Chill your cream in the fridge for at least 1 hour before use—room temperature cream won’t incorporate air properly. The powdered sugar isn’t just for sweetness; it stabilizes the whipped cream by forming a thin film around the fat globules, preventing collapse. Domino or C&H brands are reliable choices, and sifting ensures no lumps disrupt the smooth texture.
No vanilla extract? Vanilla bean paste or almond extract at half the amount works in a pinch, though the flavor profile shifts slightly. The powdered sugar can be swapped for superfine white sugar if you don’t have it on hand, but expect slightly less stability. For a dairy-free version, coconut cream whipped with powdered sugar mimics the texture, though it has a different mouthfeel. If your cream starts to curdle or grain during whipping, it’s likely too warm—return it to the fridge for 10 minutes and restart. The key is patience; rushing the process leads to butter instead of clouds.
Whipped cream keeps for 3-4 days in an airtight container in the fridge, though it loses some volume over time. For longer storage, freeze it in an airtight container with a piece of parchment paper on top to prevent ice crystals. Thaw overnight in the fridge before use. To maintain stability, avoid overmixing—once the cream forms soft peaks, it’s ready. If you need to reheat, warm gently in the microwave for 10-15 seconds to restore its lightness, though it won’t be as fluffy as fresh.
Why You’ll Love This Recipe
- Three-Ingredient Magic: I swear by this combo—just cream, sugar, and vanilla. No measuring cups, no guesswork, just eyeball it and go. That’s how I’ve been making it for years, and it’s never let me down.
- Velvet Smoothness: The moment those peaks form? Pure joy. The vanilla cuts through the sweetness just enough, and the powdered sugar dissolves so smoothly you’d think it was store-bought. (Between us, it’s better.)
- Instant Dessert Upgrade: Need to jazz up a bowl of fruit, a coffee, or a pie? This is my secret weapon. A dollop turns something ordinary into something that feels special—no fancy plating required.
- No Waste, All Gain: Make a batch, store it in the fridge, and use it all week. It keeps beautifully, and honestly? A little goes a long way. Plus, the cost is laughable—you’re basically paying for the cream, and that’s it.
Step-by-step instructions for whipped cream mastery
Achieve professional-grade whipped cream with perfect stability and texture every time.
Chill All Equipment and Ingredients
Place your mixing bowl and beaters in the freezer for 10 minutes before starting. Cold equipment helps the cream whip faster and reach stiffer peaks. I also recommend chilling the 2 cups heavy whipping cream in the refrigerator for at least 1 hour—this ensures the fat crystals form properly for maximum volume.
Cold ingredients prevent overheating during whipping, which can cause the cream to separate or turn grainy. You’ll know everything is properly chilled when the cream feels noticeably cool to the touch and the bowl is frost-covered from condensation.
Whip the Cream to Soft Peaks
Pour the chilled heavy whipping cream into the cold mixing bowl. Using a stand mixer fitted with the whisk attachment, begin whipping on medium speed for 1-2 minutes until the cream thickens noticeably. You’ll see it go from liquid to a smooth, ribbony texture that holds its shape briefly when the beaters are lifted.
This is the critical stage where fat globules begin to incorporate air. If you see the cream curdle or develop a yellowish tint, you’ve gone too far—stop immediately and start over with fresh cream. The cream should look glossy and thicken visibly within 30-45 seconds of continuous whipping.
Gradually Add Powdered Sugar and Vanilla
With the mixer running on low speed, gradually add the 0.25 cup powdered sugar and 1 teaspoon pure vanilla extract over 30 seconds. The powdered sugar should dissolve completely into the cream without leaving any gritty residue. This gradual addition prevents sugar from weighing down the whipped cream structure.
I like to use a sifter for the powdered sugar to ensure it disperses evenly. The vanilla extract adds depth of flavor without altering the texture. Continue whipping on medium speed for another 1-2 minutes until the mixture becomes noticeably thicker and forms soft peaks.
Whip to Stiff Peak Consistency
Increase the mixer speed to high and whip for an additional 1-2 minutes until the whipped cream forms stiff peaks. To test for proper consistency, lift the beaters and observe the peak that forms—the tip should stand straight up and hold its shape for several seconds before slowly melting back into the cream.
At this stage, the whipped cream should be thick enough to hold its shape on a piping bag but still light enough to spread smoothly. Overwhipping beyond this point will cause the cream to become grainy and eventually butter. The ideal texture should feel like soft, fluffy clouds that hold together when piped.
Use Immediately or Store Properly
Transfer the whipped cream to a piping bag fitted with your desired tip or to an airtight container. For best results, use the whipped cream immediately as it begins to deflate slightly over time. If you need to store it, cover the surface with plastic wrap pressed directly against the cream to minimize air exposure.
For short-term storage, keep the whipped cream in the refrigerator for up to 2 hours. For longer storage, add 1 teaspoon unflavored gelatin dissolved in 1 tablespoon cold water to stabilize the mixture (though this requires additional preparation time). The cream should maintain its volume and texture perfectly when used within the recommended timeframe.
Pro Tips For Making 1 Cup Of Whipped Cream
- CHILL THE BOWL FIRST: Cold beats warm every time—pop your mixing bowl in the freezer for 10 minutes before starting. I used to skip this and wonder why my cream never reached stiff peaks, especially in warm kitchens. The bowl stays colder longer, giving you that silky texture without overworking the cream.
- WHISK TO SOFT PEAKS: Stop mixing the second the cream holds its shape when you lift the whisk—no more, no less. Overbeating turns it buttery and grainy, and you’ll end up with a sad, lumpy mess. Soft peaks mean you can still swirl it without collapse (trust me, you’ll know when it’s there).
- SIFT THE SUGAR: Dump that powdered sugar straight in, and you’re asking for lumps. Sift it through a fine-mesh sieve directly into the cream while whisking gently. My grandmother swore by this, and she was right: clumps sink like rocks and ruin the smoothness, no matter how much you whisk after.
- USE THE VANILLA LAST: Fold in the vanilla extract after the cream is already whipped—never mix it in beforehand. The alcohol in vanilla can weaken the fat molecules, making the cream deflate faster. Add it at the very end, and your whipped cream stays fluffy for hours instead of collapsing by dessert time.
Perfect pairings for 1 cup of whipped cream
Coffee & Espresso
Whipped cream transforms your morning coffee into a café-style treat. I love adding it to hot lattes or cappuccinos—the contrast of warm coffee and cool cream is unbeatable. For espresso drinks, use a piping bag with a star tip to create intricate designs on top.
A 1:1 ratio of cream to coffee (about ½ cup cream per 8-oz drink) works perfectly. 💛
Hot Chocolate
This classic pairing is a childhood favorite for a reason. The vanilla in the whipped cream enhances the chocolate’s richness, while the cream’s lightness balances the drink’s thickness.
I recommend 1 cup whipped cream per 2 cups hot chocolate mix, adding it just before serving to maintain its fluffy texture. For extra decadence, sprinkle with crushed peppermint or cinnamon.
Fruit Desserts
Fresh berries like strawberries, raspberries, or mixed fruit baskets become irresistible with whipped cream. The acidity of the fruit cuts through the cream’s sweetness beautifully. I suggest ¼ cup whipped cream per serving of fruit, dolloped generously for that restaurant-quality touch.
For a tropical twist, try it with mango or pineapple slices—the cream’s coolness contrasts perfectly with warm fruit.
Chocolate Sauce
Drizzle warm chocolate sauce over the whipped cream for a decadent dessert. The contrast of smooth cream and rich chocolate creates a luxurious texture. I use ½ cup whipped cream per ¼ cup chocolate sauce, piping the cream first, then adding the sauce in a zigzag pattern.
This combination works perfectly with brownies or chocolate chip cookies for dipping.
Beverage Pairings
For cocktails, whipped cream adds a sophisticated touch to drinks like Baileys Irish Cream or white Russian. Float 1-2 tablespoons of whipped cream on top for an elegant finish. For non-alcoholic drinks, try it in hot apple cider or chai tea**—the cream’s sweetness complements the warm spices beautifully.
Always use freshly whipped cream for the best texture and flavor. 🍹
Nutrition facts
Frequently asked questions
Can I use regular milk instead of heavy whipping cream?
No, regular milk won’t whip at all—it lacks the fat content needed to hold air. Heavy whipping cream (36-38% fat) is essential for achieving that light, cloud-like texture. If you’re out of heavy cream, try half-and-half combined with a bit of butter (1 tablespoon per cup), but the results won’t be as stable.
Why did my whipped cream turn grainy or buttery?
Overwhipping is the most common cause—once the cream reaches stiff peaks, stop immediately. Other culprits include warm cream (always chill ingredients first) or using low-fat cream. If it happens, try adding 1 teaspoon cold water to soften it, then rewhip briefly on low speed. For next time, watch closely after soft peaks form.
How can I make whipped cream sweeter without adding more sugar?
Try adding ½ teaspoon maple syrup or honey to the sugar before mixing. For a richer flavor, swap vanilla extract for 1 teaspoon vanilla bean paste (or even a tiny pinch of cinnamon). These alternatives enhance sweetness without altering the texture. Just be sure to add them gradually while whipping to maintain stability.
Can I whip cream without a mixer?
Yes! Use a hand whisk in a chilled bowl. Whip vigorously for 5-7 minutes until soft peaks form, then add sugar/vanilla and continue until stiff peaks appear. The key is patience—hand-whipped cream takes longer but works beautifully. For extra volume, freeze the whisk for 5 minutes before starting to help incorporate more air.
How do I fix whipped cream that’s already deflated?
Gently fold in 1 teaspoon cold heavy cream to revive it, then rewhip briefly on low speed. For a quick fix, microwave the deflated cream for 5-10 seconds (just until warm), then rewhip until smooth. If it’s completely separated, try straining through a fine-mesh sieve to remove any liquid, then rewhip with fresh cream. Prevention tip: Store whipped cream in a shallow container with plastic wrap pressed directly on the surface.

- 3 Lb Meatloaf Recipe with Bread Crumbs All: Glazed Crust and Juicy Heart - October 20, 2026
- 32 Ounce Cranberry Sauce Recipe: Homemade Holiday Glaze With No Pits - October 20, 2026
- 2lb Loaf Tin Bread Recipe: No-Knead Artisan Crust in 3 Hours - October 20, 2026