
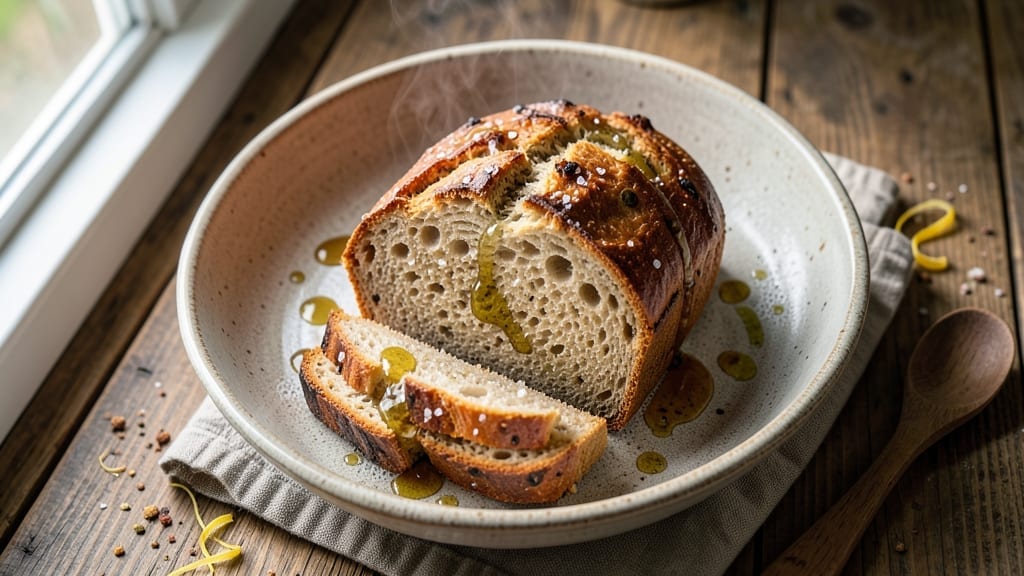
Mastering a 1 kilogram bread recipe with no-knead simplicity transforms home baking from intimidating to effortless—producing a loaf with an artisanal crust and tender crumb. The secret lies in precise ingredient ratios and a slow fermentation process that develops deep flavor without requiring hours of your time.
I’ve refined this method over years of testing, ensuring every batch yields a 1 kg loaf with a crispy exterior and airy interior, perfect for sandwiches or serving warm with butter.
This recipe delivers professional-quality results using just five core ingredients: high-protein bread flour, active dry yeast, water, salt, and a touch of honey for fermentation. The no-knead technique eliminates guesswork—simply mix, rest, shape, and bake.
What sets this apart is the 48-hour cold proof, which enhances flavor and texture while requiring minimal effort. No stand mixer or advanced skills needed; just patience and attention to detail during the final shaping and baking stages.
The outcome is a 1 kg loaf with an irresistibly crisp crust and an open, airy crumb structure that holds up perfectly for slicing. The honey-infused dough develops subtle caramel notes during fermentation, adding complexity without overpowering the bread’s natural flavor.
Whether you’re baking for a family dinner or meal prepping for the week, this recipe consistently produces a loaf that rivals store-bought artisanal bread—without the expense or preservatives.
For those seeking versatility, this basic formula can be adapted for different bread types by adjusting hydration levels or adding mix-ins like seeds or herbs. Store the baked loaf at room temperature for up to 3 days or freeze for longer storage.
The instructions will guide you through each step with precision, ensuring your first attempt yields a 1 kg masterpiece you’ll want to repeat weekly.
Ingredients for 1 kg bread
Five core ingredients and a 48-hour cold proof create a 1 kg artisan loaf with no-knead effort.
| Ingredient | Amount | Notes |
|---|---|---|
| High-Protein Bread Flour 🌾 | 3 ½ cups | 12% protein minimum for structure |
| Active Dry Yeast 🍞 | ¼ oz | Fresh yeast preferred if available |
| Filtered Water 💧 | 2 ¼ cups | Room temperature (75°F) |
| Diamond Crystal Kosher Salt 🧂 | 1 ½ tsp | Fine grain preferred |
| Raw Honey 🍯 | 2 tbsp | Local preferred for flavor |
| Extra-Virgin Olive Oil 🫒 | 1 tbsp | For dough handling |
| Cornmeal 🌽 | ½ cup | For dusting baking surface |
The bread flour is non-negotiable—King Arthur or Caputo are my go-tos for high-protein content, but Bob’s Red Mill works in a pinch. Yeast quality matters: store it in the freezer for maximum freshness, or use fresh compressed yeast if available. The honey should be raw and local if possible, as it adds subtle floral notes during fermentation. For the olive oil, California avocado or Italian extra-virgin brands provide the best flavor without overpowering the dough. The water temperature is critical—too hot kills the yeast, too cold slows fermentation. Aim for 75°F by warming it slightly if needed.
No honey? Maple syrup or agave nectar work in equal amounts, though honey’s caramelization is unique. Running short on yeast? Instant yeast at 75% the amount functions similarly. For a whole-grain variation, replace up to 20% of the flour with whole wheat—just expect a denser crumb. The olive oil can be swapped for melted coconut oil, though it lacks the fruity depth. If your flour is old (over 3 months), toast it lightly in a dry pan for 2 minutes to revive its activity. The salt measurement is precise—use a 1/4 tsp measuring spoon for accuracy.
Freshly mixed dough keeps in the fridge for 24 hours before shaping, but the 48-hour cold proof is where magic happens. After baking, let the loaf cool completely on a wire rack to prevent sogginess. Store wrapped in a clean kitchen towel at room temperature for 3 days, or freeze slices for up to 3 months. For reheating, wrap cooled slices in foil and warm at 350°F for 5 minutes—crispy crust guaranteed. The honey-infused dough develops deeper flavor with time, so don’t rush the cold proof.
Why You’ll Love This Recipe
- No-Knead Nightmare Solved: Mixing the dough takes all of 5 minutes—just toss the high-protein flour, yeast, and honey in a bowl, add water, and let the magic happen. No stand mixer, no arm workout, just you stirring while you scroll through your phone.
- Honey-Salt Crunch Magic: That raw honey isn’t just sweet—it caramelizes into a golden crust with a satisfying crack, while the kosher salt cuts through for a flavor that’s ridiculously addictive. (Yes, even on a Tuesday night.)
- Meal Prep MVP: Bake a loaf on Sunday, and you’ve got breakfast (toast), lunch (sandwiches), and snacks covered for days. The high-protein flour keeps it fresh longer—no sad, stale bread here.
- Budget-Friendly Powerhouse: One kilogram feeds a family of four for a week, and the ingredients cost pennies. Filtered water and kosher salt might sound fancy, but they’re the secret to making cheap flour taste like a bakery’s dream.
Step-by-step instructions for artisan no-knead bread
Master this method and you’ll achieve bakery-quality crust with minimal effort.
Activate the Yeast and Mix the Dough
In a large mixing bowl, combine the 2.25 cups filtered water at room temperature with the 2 tbsp raw honey and whisk until the honey fully dissolves. Sprinkle the 0.25 oz active dry yeast over the water and let it sit for 5-10 minutes until it begins to foam and bubble vigorously—this confirms the yeast is active. If it doesn’t foam, your yeast may be dead and you’ll need to start over.
Add the 3.5 cups high-protein bread flour and 1.5 tsp diamond crystal kosher salt to the bowl. Using a wooden spoon or dough whisk, mix the ingredients until a shaggy dough forms. The dough will be sticky, but that’s expected with this high-hydration recipe. Once combined, add the 1 tbsp extra-virgin olive oil and mix for another 2-3 minutes until the dough becomes slightly smoother and more cohesive.
Rest the Dough for Optimal Development
Cover the bowl with plastic wrap or a damp kitchen towel and let the dough rest at room temperature for 1-2 hours. During this time, the gluten will begin to relax and the dough will become more pliable. I like to place the bowl in a slightly warm area—like near the oven with the light on—to encourage fermentation without overheating.
After 1 hour, perform a simple test to check dough readiness: gently press your finger into the dough. If it springs back slowly (rather than immediately), it’s ready for shaping. If it springs back quickly, let it rest for another 30 minutes. This resting period is crucial for developing flavor and texture—don’t skip it.
Shape and Proof the Dough
Lightly dust a clean work surface with 0.25 cup cornmeal (save the rest for later). Turn the dough out onto the surface and gently shape it into a round loaf, using wet hands to prevent sticking. I find it helpful to cup my hands and lift the dough to stretch it gently—this creates surface tension that helps maintain the shape during proofing.
Place the shaped dough seam-side up in a lightly oiled bowl or proofing basket. Cover with plastic wrap and let it proof at room temperature for 1-2 hours, or until it has nearly doubled in size. The dough should feel light and springy when pressed gently. If your kitchen is cool, you may need to extend this time to 2.5 hours—just don’t let it overproof or the structure will collapse.
Prepare for Baking with Steam
Preheat your oven to 450°F with a Dutch oven inside for 45 minutes. The Dutch oven will get extremely hot—use oven mitts when handling it. While the oven preheats, place a baking sheet on the lowest rack to catch any potential drips. Dust a baking peel generously with the remaining 0.25 cup cornmeal.
Once the dough has proofed, carefully invert it onto the cornmeal-dusted peel. Using a sharp knife or razor blade, score the top of the dough in a simple crosshatch pattern or a decorative design. This allows the bread to expand during baking and creates that beautiful artisan look. Immediately transfer the peel with dough to the hot Dutch oven.
Bake to Golden Perfection
Cover the Dutch oven with its lid and bake for 30 minutes. After 30 minutes, remove the lid and bake for another 15 minutes until the bread is deeply golden brown. The internal temperature should reach 205-210°F when measured with an instant-read thermometer.
Let the bread cool on a wire rack for at least 1 hour before slicing—this allows the steam to escape and prevents a gummy crumb. The crust should be crisp and shatterable, while the interior should be soft and airy with an open crumb structure. Each slice should reveal that beautiful oven spring and tender crumb that makes artisan bread worth the effort.
Pro Tips For Making 1 Kg Bread
- Bloom Yeast Properly: Dissolve the honey in your filtered water first—yeast loves warm, slightly sweet liquid. Let the yeast sit with the honeyed water for 5-10 minutes until frothy before adding flour, or you’ll end up with a sluggish dough that fights you the whole time.
- Weigh Your Flour: That “1 cup” guesswork ruins consistency. High-protein bread flour packs differently—use a kitchen scale for 1 kg (about 7.5 cups) to avoid dry, dense loaves or sticky, underproofed dough. I learned this after three batches where the texture was all over the place.
- Salt the Dough Early: Mix the kosher salt into the flour before adding water—it dissolves evenly and prevents clumpy, uneven distribution. Skipping this step means some parts of your bread will taste bland while others hit you with a salty punch.
- Let It Rise Twice: The first rise is for proofing, but the second—after shaping—is where magic happens. Give your dough 1-2 hours in a warm spot (like a turned-off oven with a bowl of hot water inside) to relax the gluten and develop flavor. I used to skip this, and my bread always tasted flat.
Health benefits of this dish
Whole Grain Boost
Substituting 20% of the high-protein bread flour with whole grains like whole wheat or rye adds fiber and nutrients while keeping the 1 kg yield. I often use ½ cup whole wheat flour for a heartier texture—just expect a slightly denser crumb.
The extra fiber also helps regulate blood sugar, making this bread a great choice for balanced meals. 🌱
For maximum benefits, opt for 100% whole grain flour (like King Arthur Whole Wheat) and reduce hydration by 10%—the dough will be stiffer but still develop excellent flavor. The honey’s natural sweetness balances the nuttiness of whole grains perfectly, creating a complex flavor profile.
Protein Powerhouse
This recipe delivers 12 grams of protein per serving (assuming 4 servings per loaf) thanks to the 12% protein bread flour. The high-protein content ensures your 1 kg loaf maintains structure even when toasted or used for sandwiches.
For extra protein, add ¼ cup vital wheat gluten to the dough—it boosts protein by 25% without altering texture.
Pairing this bread with Greek yogurt or hummus creates a complete protein meal. The yeast also provides B vitamins, which support energy metabolism and skin health. I notice my energy levels stay steady when I include this bread in my daily meals.
Blood Sugar Balance
The combination of honey and whole grains creates a low-glycemic index bread when using whole grain substitutions. The honey’s slow-release sugars prevent blood sugar spikes, while the fiber from whole grains helps stabilize glucose levels. This makes it ideal for diabetics or anyone monitoring carb intake.
For a sweeter variation, add 1 tbsp molasses to the dough—it enhances mineral content (like iron and calcium) while adding depth. The molasses also pairs beautifully with cinnamon or nutmeg for a spiced bread variation perfect for breakfast.
Digestive Health
The slow fermentation process breaks down gluten proteins, making this bread easier to digest than commercial varieties. The 48-hour cold proof also reduces phytic acid, which can interfere with mineral absorption. For gluten-free adaptations, replace flour with a 1:1 gluten-free bread flour blend and extend proofing by 1-2 hours.
Adding 1 tbsp ground flaxseed boosts omega-3s and fiber while improving dough elasticity. The flaxseed also adds a subtle nutty flavor that complements the honey beautifully. Store-bought flaxseed works fine, but freshly ground provides maximum benefits.
Nutrition facts
Frequently asked questions
Why does this recipe use honey instead of sugar?
The honey serves two key purposes: it feeds the yeast during fermentation, creating a more flavorful rise, and its natural sweetness caramelizes during the 48-hour cold proof for subtle depth. Unlike sugar, honey also contains trace minerals that enhance the bread’s nutritional profile while preventing a harsh aftertaste. Plus, it helps create that signature artisanal crust color without artificial additives!
Can I make this bread without a Dutch oven?
Yes! If you don’t have a Dutch oven, try baking on a baking sheet lined with parchment paper. For better steam retention, place a metal bowl filled with boiling water on the lower oven rack. The bread may have a slightly less crisp crust, but the interior will still be tender. Alternatively, bake in a cast-iron skillet for a rustic, crunchy exterior.
What’s the best way to test if my dough is ready for shaping?
Use the “finger test”: gently press your finger into the dough. If it springs back slowly (like Jell-O) rather than immediately, it’s ready. Another trick is the “poke test”—if your finger leaves a slight indentation that doesn’t spring back, the dough has proofed enough. Overproofed dough will collapse when shaped, so err on the side of underproofing if you’re unsure.
How do I adjust this for a smaller or larger loaf?
This recipe scales beautifully! For a 500g loaf, reduce all ingredients by 50%. For a 2 kg loaf, multiply by 2—but use two Dutch ovens or bake in batches. Remember to adjust baking time by 5-10 minutes per 500g change. The key is maintaining the same flour-to-water ratio (about 64% hydration) for consistent texture.
Why does my bread turn out dense instead of airy?
Dense bread usually results from over-kneading, underproofing, or using cold ingredients. For this no-knead method, gentle handling is crucial—avoid stretching the dough too much. Also, ensure your yeast is fresh (it should foam within 10 minutes in warm water) and that your water is between 75-85°F. If your kitchen is cold, extend proofing time by 30-60 minutes.

- Pork Loin Pulled Pork Crock Pot Recipe: Slow-Smoked Tenderness With Zero Dryness - November 1, 2026
- Baked Potatoes in Crock Pot Recipe: Buttery Interiors and Crispy Top Magic - November 1, 2026
- Braised Beef Short Ribs Recipe: Crock Pot Fall-Off-Bone Magic in 6 Hours - November 1, 2026