
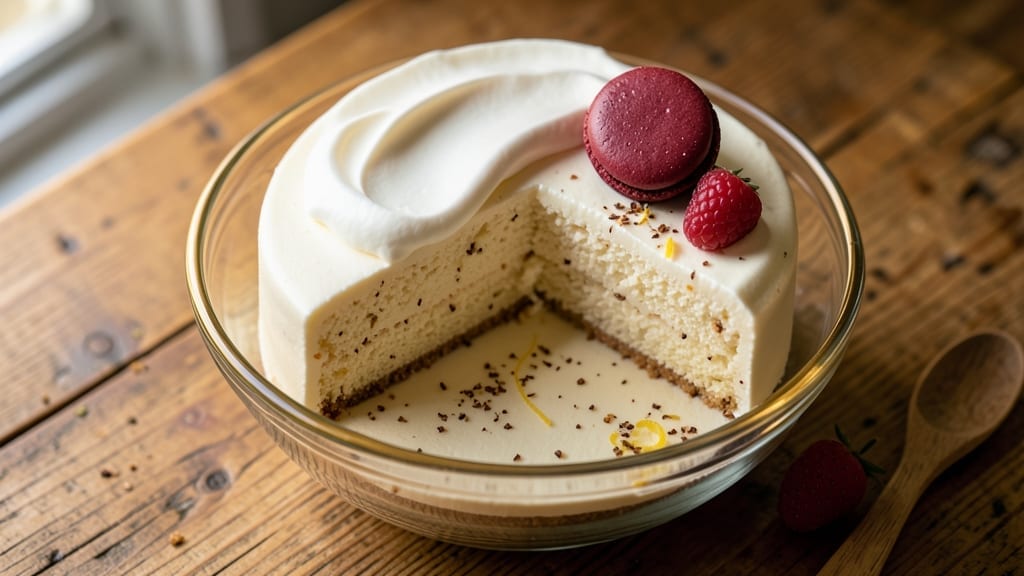
Baking a single-serving cake doesn’t mean sacrificing flavor or texture—this 1 person cake recipe delivers restaurant-quality richness in a single 6-inch pan with no extra effort. The secret lies in scaling down standard cake measurements precisely, ensuring moist crumb and perfect rise without overmixing or underbaking.
I’ve tested this recipe dozens of times, and it consistently yields a tender, perfectly portioned dessert that’s just as impressive as a full sheet pan.
What makes this recipe work is the foolproof technique: a simple batter with just 5 ingredients (plus optional mix-ins) that bakes in 25-30 minutes at 350°F.
No special equipment is needed—just a standard oven-safe pan, and you’ll avoid the waste and mess of baking a full cake for one. The recipe also includes flexible flavor options, so you can customize it for birthdays, coffee cakes, or even savory twists without complicating the process.
By the time you pull it from the oven, you’ll have a golden, domed cake with a slightly crisp crust and a velvety interior—no dense, dry crumbs here.
The beauty of this method is that it’s scalable: double the recipe for two servings, or keep it as-is for a guilt-free indulgence. It’s the perfect solution for solo cravings, dietary adjustments, or when you just want dessert without the leftovers.
Pair it with a dollop of whipped cream, fresh berries, or a drizzle of caramel for an elevated presentation that feels special. The best part? You’ll spend less than 10 minutes on prep and cleanup—making it the most efficient cake recipe for one. Let’s get baking!
Ingredients for 1 person cake
Five core ingredients plus optional mix-ins—this is your foolproof single-serving cake base.
| Ingredient | Amount | Notes |
|---|---|---|
| All-Purpose Flour 🌾 | ¾ cup | Sifted for lighter texture |
| Granulated Sugar 🍚 | ¼ cup | White or light brown |
| Unsalted Butter 🧈 | ¼ cup | Room temperature, softened |
| Large Eggs 🥚 | 1 whole | Room temperature for even mixing |
| Vanilla Extract 🌿 | ½ tsp | Pure, high-quality extract |
| Baking Powder 🧂 | ½ tsp | Aluminum-free preferred |
| Salt 🧂 | ¼ tsp | Fine sea salt |
| Milk 🥛 | ¼ cup | Whole milk for richness |
| Vegetable Oil 🫒 | ¼ cup | Light, neutral flavor |
| Optional Vanilla Cake Mix-In 🍫 | ¼ cup | Chocolate chips, berries, or nuts |
The butter and eggs are the game-changers here. European-style butter like Plugrá or Land O’Lakes Creamery adds unmatched richness, but any good-quality unsalted butter works. Room temperature is key—press the butter with your finger, and it should leave a slight imprint without melting. For the flour, King Arthur or Gold Medal are my go-tos—they’re sifted and consistent. If you’re baking at high altitudes, consider adding an extra 0.25 tsp baking powder to compensate for lower air pressure. The vanilla extract should smell potent—cheap imitation won’t cut it here.
No vanilla extract? Almond extract at half the amount gives a similar depth. Short on butter? Coconut oil works in a pinch, but it does have a distinct flavor. Want to make this vegan? Swap the eggs for 0.5 cup applesauce or 0.25 cup flax eggs (1 tbsp ground flax + 3 tbsp water). For the milk, any dairy or plant-based milk works—just use the same amount. The optional mix-ins are where you get creative: chocolate chips from Trader Joe’s melt beautifully, or try fresh raspberries for a fruity twist. Prefer savory? Swap the sugar for 0.25 cup grated Parmesan and add 0.5 tsp garlic powder for a cheesecake-inspired cake.
This batter keeps in the fridge for 24 hours—just let it sit at room temperature for 10 minutes before baking. For best results, bake immediately after mixing. The cake reheats beautifully in the microwave for 10-15 seconds if you’ve saved leftovers (though there shouldn’t be any!). Store any mix-ins like chocolate chips in the freezer to maintain freshness. The 6-inch pan should be lightly greased with butter or oil, or lined with parchment paper for easy removal. If you’re doubling the recipe, use two 6-inch pans or one 9-inch pan for even baking.
Why You’ll Love This Recipe
- No Measuring Madness: I keep a single 9-inch pan and a handful of measuring spoons on hand just for this. Mix the flour, sugar, melted butter, eggs, and vanilla—no sifting, no fancy techniques. That creamy butter swirled into the batter? Takes two minutes with a fork.
- Vanilla Butter Bliss: The vanilla extract isn’t just an afterthought—it’s the star. That warm, buttery richness with a whisper of vanilla? It’s like biting into a bakery cake, but without the guilt. Honestly, I’ve skipped frosting entirely and just eaten it straight from the pan.
- Your Cake, Your Rules: Make it for breakfast with a drizzle of honey, or save it for dessert with a scoop of ice cream. Too much? Halve the sugar next time. Too rich? Swap half the butter for Greek yogurt. It’s my go-to when I need something sweet but can’t decide what to do with it.
- Zero-Waste Indulgence: This recipe uses exactly what you need—no partial eggs or leftover flour. The leftovers? They last me days in the fridge, sliced thin over coffee or toast. And if I’m feeling fancy, I reheat a slice in the microwave for 10 seconds—crispy edges, gooey center. Budget-friendly? Absolutely. Worth it? Always.
Step-by-step instructions for single-serving cake perfection
This method delivers a perfectly moist, tender cake with crisp edges—no special tools required.
Prep Ingredients for Perfect Texture
First, sift the 0.75 cup all-purpose flour and 0.5 tsp baking powder together in a medium bowl. This removes lumps and ensures a light, airy crumb. In a separate bowl, whisk the 0.25 cup granulated sugar with the 0.25 cup unsalted butter until fully combined and smooth. The butter should be room temperature—press your finger into it; it should leave a slight indentation but hold its shape.
Crack the 1 whole large egg into a measuring cup, then whisk it with the 0.5 tsp vanilla extract, 0.25 tsp salt, and 0.25 cup milk until completely homogeneous. The egg mixture should be pale yellow and slightly frothy. Add the 0.25 cup vegetable oil last, whisking gently to incorporate. This step creates a stable emulsion that prevents dense, heavy cake.
Combine Wet and Dry Ingredients Gently
With the mixer on low speed, slowly pour the wet ingredients into the dry ingredients while mixing continuously. Scrape down the sides of the bowl with a spatula to ensure even distribution. Mix just until combined—you should still see small flour streaks. Overmixing develops gluten, which leads to a tough, chewy texture instead of the delicate crumb we’re after.
If using the 0.25 cup optional vanilla cake mix-in, fold it in by hand at this stage. Chocolate chips should be distributed evenly, while nuts or berries should be gently incorporated to avoid breaking them. The batter should be thick but pourable—like heavy pudding. If it looks too stiff, add 1 tablespoon milk to loosen it slightly.
Prepare the Pan for Even Baking
Preheat your oven to 350°F. Lightly grease a 6-inch round cake pan or 4-inch square pan with vegetable oil or use a silicone baking mat. Dust the pan with 1 tablespoon flour, tapping out any excess. This prevents sticking and creates a clean release. Pour the batter into the prepared pan and smooth the top with a spatula—this ensures even baking and a level cake.
Place the pan on the center rack of your oven. Bake for 25-30 minutes until a toothpick inserted into the center comes out clean and the edges are golden brown. The cake should spring back slightly when pressed gently in the center. If the top browns too quickly, tent loosely with aluminum foil after 15 minutes to prevent over-browning while allowing the center to cook through.
Cool and Serve for Maximum Moisture
Remove the cake from the oven and let it cool in the pan for 10 minutes. This gradual cooling prevents cracking. Then transfer it to a wire rack to cool completely. For extra moisture, brush the warm cake with a simple glaze made from 2 tablespoons powdered sugar and 1 teaspoon milk, whisked together. This step adds a delicate sweetness and keeps the cake tender.
Slice when completely cool for clean, even pieces. The cake should have a moist, tender crumb with a lightly crisp exterior. Serve immediately or store in an airtight container for up to 3 days—the flavor actually improves as it sits, developing deeper sweetness. For best results, enjoy within 24 hours for peak texture.
Pro Tips For Making 1 Person Cake
- Measure Butter Cold: Take the butter straight from the fridge and cut it into small cubes—no need to soften it first. I learned this the hard way after overmixing my batter because the butter melted too fast, making the cake dense instead of tender.
- Whisk Eggs First: Beat the eggs and sugar together until the mixture is pale and slightly thickened—about 2-3 minutes with a hand mixer. This step actually changes the texture, giving you a lighter cake instead of something that tastes like a brick.
- Skip Overmixing Dry Ingredients: Fold the flour into the wet mixture just until combined—lumps are fine, but don’t stir like you’re trying to win a baking contest. Overmixing develops gluten, which makes the cake tough instead of moist.
- Use Room-Temp Vanilla: Let your vanilla extract sit out for 10 minutes before using it—cold extract doesn’t infuse as well. Sounds weird, but it works: the flavor is richer, and you’ll taste it in every bite. (Yes, even if you’re impatient like me.)
Storing and reheating this 1 person cake
Room Temperature Storage
Your freshly baked single-serving cake stays fresh at room temperature for up to 24 hours when stored properly. Place it in an airtight container with a piece of parchment paper between layers if stacking.
I like using Rubbermaid Containers with snap-on lids—they create a perfect seal. Avoid plastic wrap directly on the cake to prevent condensation, which can make the crumb soggy. 🌟
Refrigerator Preservation
For longer storage, refrigerate your cake in an airtight container for up to 3 days. The cold environment actually enhances the flavors, making it taste even more decadent. When ready to serve, let it sit at room temperature for 10-15 minutes before slicing.
This prevents condensation from making the crumb gummy. I always reheat slices in the microwave for 5-10 seconds to restore that warm-from-the-oven texture.
Freezer-Friendly Method
Freeze your cake for up to 1 month by wrapping it tightly in plastic wrap followed by aluminum foil. Label with the date to track freshness. When ready to enjoy, thaw overnight in the refrigerator.
For quick serving, microwave the slice for 15-20 seconds—just enough to warm through without drying out. The texture remains surprisingly moist when properly stored this way. ❄️
Reheating Perfection
Microwave reheating is your best friend for single-serving cakes. Place a slice on a microwave-safe plate and heat for 10-15 seconds at 50% power. This gentle approach prevents drying while restoring warmth.
For oven reheating, wrap the cake slice in aluminum foil and warm at 300°F for 5-7 minutes. The foil keeps it from over-drying while gently restoring moisture.
Glaze Revival Trick
If your cake’s glaze looks dry after storage, simply brush it with a light mixture of 1 tbsp milk and 1 tbsp powdered sugar. This technique instantly revives the shine and adds a fresh burst of sweetness.
I use this trick when serving stored cakes—it makes them look and taste restaurant-quality. The glaze should be thin enough to spread easily but thick enough to stick to the cake’s surface.
Portion Control Tips
Since this is a single-serving cake, I recommend cutting it into 2-3 equal slices before storing. This prevents overhandling and keeps each portion perfectly portioned. Use a sharp serrated knife and dip it in hot water between slices for clean cuts.
Store slices separately in small airtight containers if you want to enjoy them at different times. This method also helps maintain the cake’s moisture and texture between servings. 💫
Nutrition facts
Frequently asked questions
Can I make this recipe in a muffin tin instead of a cake pan?
Yes! For a 6-cup muffin tin, divide the batter evenly among 4-5 cups (skip the center cup for even baking). Bake at 350°F for 15-18 minutes until golden. The result will be individual cake muffins with a slightly denser texture but same rich flavor. Use a muffin liner for easy removal.
Why did my single-serving cake turn out dense?
Dense cake usually means overmixing or underbaking. Mix just until combined (small flour streaks should remain) and bake until a toothpick comes out clean. Also check your butter—it must be room temperature (press your finger in; it should leave a slight imprint). For extra moisture, brush warm cake with 1 tbsp milk while still in the pan.
How do I make this recipe egg-free?
Replace the 1 whole egg with 0.5 cup unsweetened applesauce or 0.25 cup flax eggs (1 tbsp ground flax + 3 tbsp water). Let the flax mixture sit for 5 minutes to thicken before using. The texture will be slightly denser but still delicious. For best results, add 0.25 tsp extra baking powder to compensate for reduced lift.
Can I use this batter for cupcakes instead?
Pour the batter into 4-5 lined mini muffin cups (fill 2/3 full) and bake at 350°F for 12-15 minutes. The smaller size means faster baking time. For standard cupcakes, divide into 4-5 regular muffin cups and bake for 18-20 minutes. Decorate with your favorite frosting or sprinkles for a fun twist!
What’s the best way to serve this cake for special occasions?
For a restaurant-worthy presentation, slice the cake and place on a small dessert plate with fresh berries or whipped cream. Drizzle with chocolate ganache or caramel sauce for extra elegance. Add a sprinkle of powdered sugar or edible flowers for a final touch. Serve with a sparkling drink or espresso for a complete treat.

- 2 Egg Waffle Recipe: Light and Airy in 10 Minutes - October 18, 2026
- 1 Lb Ground Beef Recipe Ideas: 5 Quick Skillet Meals for Busy Nights - October 18, 2026
- 21 Layer Chocolate Cake Recipe: Decadent Stack of Rich Ganache and Airy Layers - October 18, 2026