
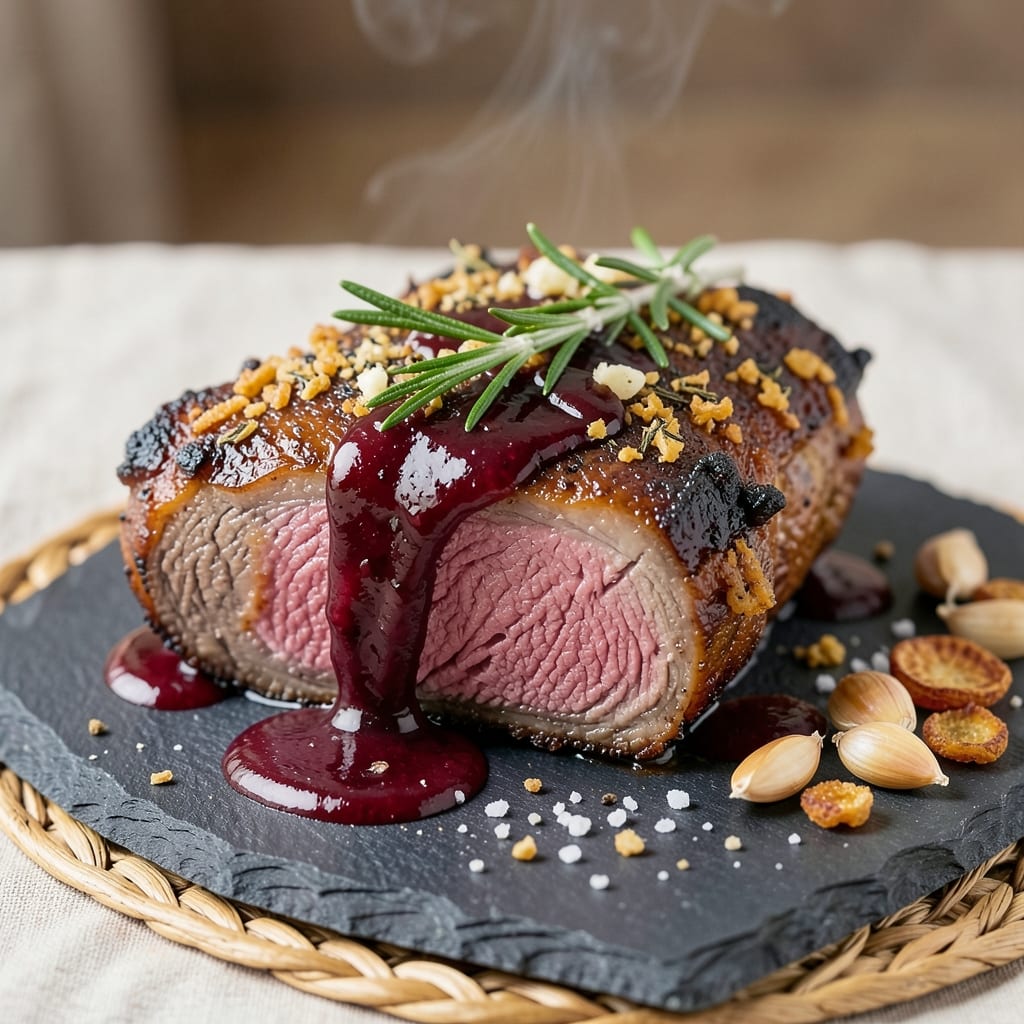
A 1-pound chuck roast transforms from tough to tender with the right slow-braising technique—this recipe delivers melt-in-your-mouth results every time. The secret lies in searing first to build flavor, then braising low and slow until the meat practically falls apart.
I’ve perfected this method for small batches, ensuring rich, juicy beef without drying out a single bite.
This approach works beautifully for weeknight dinners or meal prep, requiring just 30 minutes of active time followed by hands-off cooking. A simple blend of garlic, rosemary, and black pepper creates depth, while red wine and beef broth infuse the meat with layers of savory complexity.
The result? A shred-worthy roast that’s ideal for tacos, sandwiches, or serving alongside roasted vegetables.
By the end, you’ll have perfectly tender beef with a caramelized exterior and moist interior—no guesswork, no overcooking. The slow braising process ensures maximum flavor retention, making this the ultimate way to elevate an affordable cut of meat.
Serve with your favorite sides or use the leftovers for quick meals all week.
Ready to master this technique? Let’s get started with the step-by-step instructions that guarantee restaurant-quality results at home.
Ingredients for 1 pound chuck roast
Here’s everything you need to transform tough chuck into melt-in-your-mouth beef—simple ingredients, big flavor results.
| Ingredient | Amount | Notes |
|---|---|---|
| Chuck Roast 🥩 | 1 lb | Bone-in for flavor, trimmed of excess fat |
| All-Purpose Flour 🌾 | 1 tbsp | For dredging before searing |
| Kosher Salt 🧂 | 1 ½ tsp | Diamond Crystal preferred |
| Freshly Ground Black Pepper 🌶️ | 1 tsp | Freshly cracked for best flavor |
| Fresh Rosemary 🌿 | ¼ cup | Chopped, stems removed |
| Garlic Cloves 🧄 | 4 cloves | Smashed, not minced |
| Dry Red Wine 🍷 | ½ cup | Bold Cabernet or Merlot |
| Beef Broth 💧 | 1 cup | Low-sodium preferred |
| Tomato Paste 🍅 | 1 tbsp | Squeeze tube preferred |
| Carrots 🥕 | 2 medium | Whole, peeled, cut into chunks |
| Yellow Onion 🧅 | 1 whole | Quartered, skin on |
| Olive Oil 🫒 | 2 tbsp | Extra-virgin for searing |
| Fresh Thyme 🌿 | ⅛ cup | Leaves only, chopped |
| Bay Leaves 🍃 | 2 whole | Dried, standard size |
The chuck roast is the star, so grab the bone-in version—it stays juicier. Trim excess fat but leave some for flavor. Costco or local butchers often have the best prices, but grocery stores work too. Look for good marbling—those little white streaks mean more flavor. Fresh rosemary and thyme make all the difference here; Trader Joe’s has great pre-bundled stems for easy prep. The garlic should be firm, not sprouting, and the red wine? Whatever bold bottle you’ve got open works—no need to splurge.
No red wine? Beef broth with a splash of balsamic works in a pinch. The tomato paste can be skipped if you’re short, but it adds that deep, umami richness. Carrots and onions can be swapped for celery or potatoes if you prefer. The flour is just for dredging before searing—don’t skip it, but don’t overdo it either. Fresh thyme is ideal, but dried at one-third the amount gets you close. The bay leaves are non-negotiable though—they add that subtle earthiness that makes this dish sing.
This braise gets better the next day, so make extra. Keeps for 5-6 days in the fridge or 3 months frozen. I portion mine into containers for easy lunches—just reheat with a splash of broth. The leftovers? Perfect for tacos, sandwiches, or over rice. Store the roast in its juices to keep it moist, and save those flavorful braising liquids for soup or gravy later.
Why You’ll Love This Recipe
- One-Pan Magic: I swear by this—just sear, flour, and slow cook. No chopping, no fussing, and that crust? Pure satisfaction from a handful of pantry staples.
- Rosemary Kiss: Between us, the rosemary transforms this into something restaurant-worthy. Freshly ground pepper and kosher salt make it taste like you spent hours, not minutes.
- Weeknight Hero: This feeds four but costs less than takeout. Toss it in the oven while you prep sides—no one’s waiting for you to “get dinner ready.”
- Leftovers I Crave: The second day is even better. Shred it for tacos, sandwiches, or just reheat slices straight from the fridge—it’s my go-to lazy lunch.
Step-by-step instructions for slow-braised chuck roast
This method transforms tough chuck roast into melt-in-your-mouth perfection with minimal effort.
Sear the Roast for Deep Flavor
Pat the 1 lb chuck roast dry with paper towels—this ensures maximum browning. Heat 1 tablespoon of the olive oil in a heavy Dutch oven over medium-high heat until shimmering. Place the roast fat-side down and sear undisturbed for 4-5 minutes until deeply browned. Flip and sear the other side for another 4-5 minutes.
While searing, sprinkle the roast with 1 tablespoon of the all-purpose flour, shaking off any excess. This creates a golden crust and helps thicken the braising liquid. Transfer the seared roast to a plate and set aside—it’ll rest while you build the braising base.
Build the Aromatic Braising Base
In the same Dutch oven, add the remaining 1 tablespoon olive oil. Toss in the quartered yellow onion and 2 medium carrots, cooking for 5 minutes until softened. Add the smashed 4 cloves garlic, 0.25 cup chopped fresh rosemary, and 0.125 cup chopped fresh thyme, stirring for 30 seconds until fragrant.
Pour in the 0.5 cup dry red wine and scrape up any browned bits from the bottom—this releases all that caramelized flavor. Let it simmer for 2 minutes until reduced by half. Stir in the 1 tablespoon tomato paste and cook for another minute until it darkens slightly and coats the vegetables.
Braise Until Fork-Tender
Return the seared roast to the Dutch oven along with the 1.5 teaspoons kosher salt, 1 teaspoon freshly ground black pepper, and 2 whole bay leaves. Pour in the 1 cup beef broth, ensuring the roast is mostly submerged. Bring to a gentle simmer, then reduce heat to maintain a bare bubble at the surface.
Cover and braise for 2.5 to 3 hours until the roast is fork-tender. The internal temperature should reach 200°F—this is when connective tissues break down and the meat becomes melt-in-your-mouth tender. Real talk: resist the urge to peek or stir, as this disrupts the even cooking process.
Rest and Shred for Maximum Juiciness
Remove the roast from the braising liquid and transfer it to a cutting board. Tent loosely with foil and let it rest for 15 minutes. This resting period allows the juices to redistribute throughout the meat, ensuring every bite stays moist and flavorful.
While resting, skim any excess fat from the braising liquid and return it to medium heat. Simmer uncovered for 5-7 minutes to reduce slightly and intensify the flavors. Then, using two forks, shred the roast against the grain into bite-sized pieces. Return the shredded meat to the Dutch oven and toss with the reduced braising liquid to coat evenly.
Pro Tips For Making 1 Pound Chuck Roast
- SEAR HARD FIRST: Chuck roast needs that deep brown crust to lock in flavor, so don’t be shy with the heat—get your pan screaming hot before adding oil. I used to rush this and end up with a pale, flavorless mess; now I wait until the oil shimmers before laying the meat down.
- SALT THE FLOUR: Mix that kosher salt into the flour before dredging—not just on top. The flour clings better, and the seasoning gets evenly distributed. I learned this after my first batch tasted like half the seasoning had vanished into the ether.
- SKIP THE OVERCROWDING: If you’re browning multiple sides, work in batches—even with just one pound. A packed pan steams the meat instead of searing it, and you’ll end up with sad, uneven color. Trust me, your roast will thank you later.
- ROSEMARY NEEDS TIME: Fresh rosemary needs 10-15 minutes in a hot pan to soften and release its aroma—don’t just toss it in at the end. I used to treat it like garnish, but now I crisp it lightly first for maximum flavor punch. (Yes, even if it looks weird.)
Common mistakes when making this dish
Over-Searing the Roast
One of the biggest mistakes is burning the roast during searing. Chuck roast has a thick layer of fat that needs time to render, so don’t rush this step. I’ve seen people crank the heat to high and end up with a charred exterior that masks the meat’s natural flavor.
Use medium-high heat and let the fat slowly melt away—this takes about 4-5 minutes per side. A properly seared roast should be deep brown, not blackened. 🔥
Skipping the Resting Time
After braising, many people can’t wait to dig in and slice the roast immediately. Big mistake! The 15-minute rest is crucial for redistributing juices. Without it, you’ll end up with dry, stringy meat.
I’ve learned this the hard way—once I sliced into a roast too soon and nearly cried over the sad, dry result. Trust the process and let those juices settle.
Using Too Much Liquid
The braising liquid should mostly cover the roast, but drowning it in broth will dilute the flavors. I’ve seen recipes that call for 2 cups or more of liquid, but 1 cup is perfect for this size roast.
Too much liquid means watery, bland results. If you’re worried about drying out, just add a splash of broth later if needed—better to start with less.
Not Browning the Pan
After removing the roast, many people clean the Dutch oven before building the braising base. Don’t! Those browned bits (fond) are flavor gold. They dissolve into the liquid, creating depth.
I always scrape them up with a wooden spoon when adding the wine. This simple step transforms a good braise into an extraordinary one.
Peeking Too Often
I know it’s tempting to lift the lid and check on your roast, but every time you do, you’re letting heat escape and extending cooking time. The roast needs steady, gentle heat to break down collagen properly.
Set a timer and resist the urge—your patience will be rewarded with fork-tender meat. This is where slow cooking truly earns its name. ⏰
Ignoring the Internal Temp
Many home cooks guess when the roast is done, but chuck needs precision. Use a meat thermometer to check for 200°F internal temperature—this is when connective tissues fully break down. Without this, you risk serving meat that’s still tough.
I’ve invested in a Thermoworks Smoke thermometer, and it’s changed how I cook forever. No more guessing, just perfect results every time. 🌡️
Nutrition facts
Frequently asked questions
Can I substitute bone-in chuck roast for boneless?
The recipe works best with bone-in for extra flavor, but boneless will still turn out tender. Just reduce braising time by 15-20 minutes since boneless cooks faster. For a 1 lb boneless roast, aim for 2 hours instead of 2.5-3 hours. The bone adds natural moisture and depth, but the technique remains the same.
What’s the best way to reheat leftovers?
Shredded chuck reheats beautifully in the same Dutch oven. Add 2-3 tablespoons of beef broth, cover, and simmer on low heat for 10-15 minutes until warmed through. For microwave reheating, place portions in a bowl with 1 tablespoon of braising liquid, cover, and heat for 1-2 minutes on 50% power. Never reheat dry!
Can I make this in an Instant Pot instead?
Sear the roast first in a skillet, then transfer to the Instant Pot with all ingredients. Cook on high pressure for 60 minutes (natural release). The pressure cooker speeds up the process but delivers the same tender results. Just check the internal temp reaches 200°F before serving. The braising liquid will be more reduced than oven-braised.
How do I know when the roast is done?
Use a meat thermometer to check for 200°F internal temperature—this is when connective tissues fully break down. The meat should be fork-tender with no resistance. If you don’t have a thermometer, cut into the thickest part: juices should run clear, not pink. A properly cooked chuck roast will practically fall apart when shredded.
What are the best sides to serve with this?
This rich roast pairs perfectly with lighter sides to balance the meal. Try creamy mashed potatoes, roasted Brussels sprouts with bacon, or a simple arugula salad with lemon vinaigrette. For heartier options, serve with crusty bread to soak up the braising sauce. The acidity from roasted tomatoes or a tangy mustard sauce also cuts through the richness beautifully.

- 6 Bean Chili Recipe: Hearty, Smoky Depth That Gets Richer Over Time - September 26, 2026
- 2 Gallon Red Sangria Recipe: Bold Spice and Fruit Fusion for Crowds - September 26, 2026
- 5 Star Apple Bread Recipe: Spiced Apple Swirl With Buttery Crust - September 26, 2026