
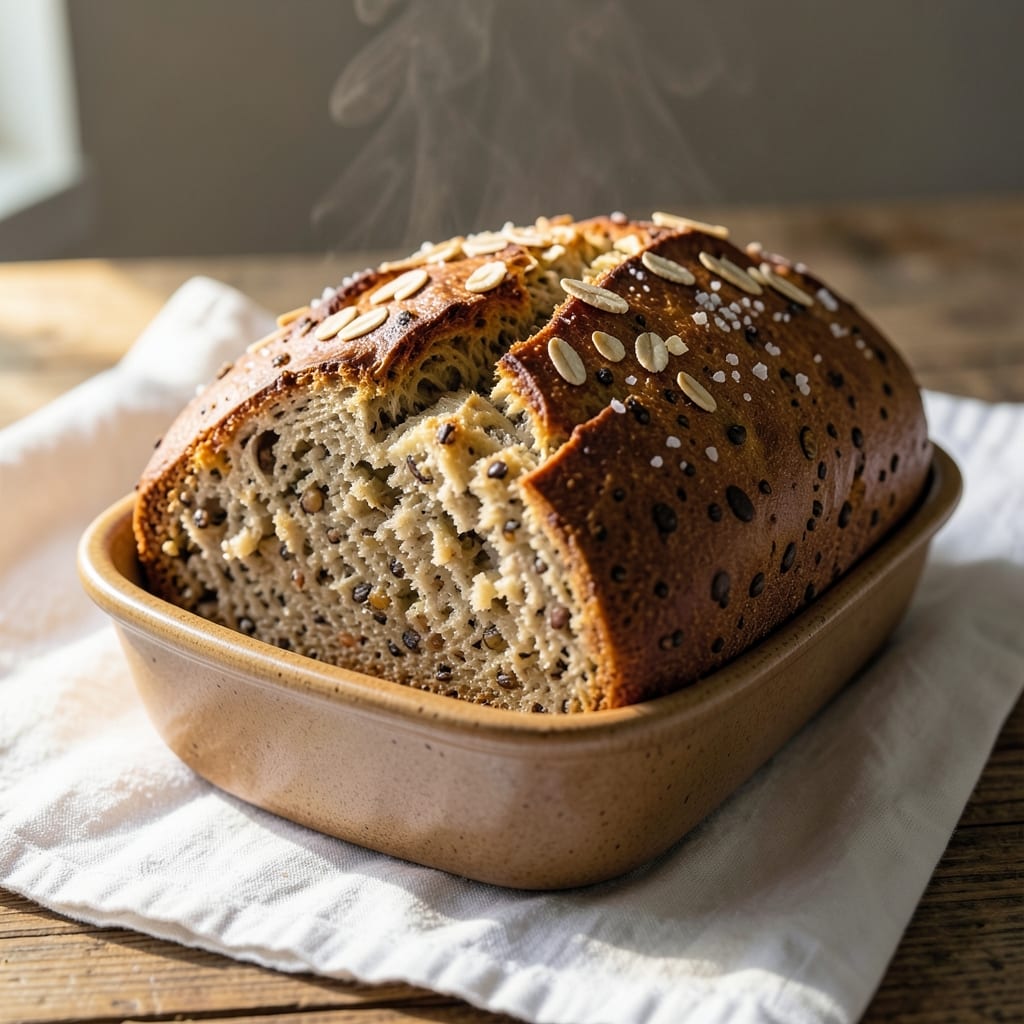
This 12-grain bread machine recipe transforms your kitchen into a bakery with minimal effort—no kneading, no waiting, just a nutty, crusty loaf that rivals artisanal bread.
The secret lies in balancing hydration and grain ratios, letting the bread machine do the heavy lifting while you focus on selecting the right grains: whole wheat for fiber, rye for depth, barley for chewiness, and more.
I’ve perfected this over years of testing, ensuring every slice delivers that perfect crunch and hearty texture without the guesswork.
The beauty of this recipe is its foolproof nature—just toss the ingredients into the bread machine pan, select the dough cycle, let it knead, then switch to bake mode for a golden, aromatic loaf.
The grains absorb moisture differently, so we adjust hydration slightly (about 70% total) to prevent a gummy texture. Each grain contributes its own flavor—wheat adds mild sweetness, rye brings earthiness, and barley lends a subtle nuttiness—while the crust develops a deep, crackly crust that’s impossible to resist.
What you’ll end up with is a hearty, nutritious loaf that’s ideal for sandwiches, toast, or serving alongside soups. The bread machine handles all the work, including the automatic kneading and baking, so you’re free to move on to other tasks while it creates something extraordinary.
No special skills or tools are needed—just patience (about 3 hours total) and a willingness to embrace the rich, complex flavors of whole grains.
For those who love customization, swap in grains like millet, flax, or oats to tweak the texture and taste. Store leftovers in an airtight container for up to 5 days, or freeze slices for freshness later.
This recipe isn’t just about convenience—it’s about transforming simple ingredients into something truly special with minimal effort.
Ingredients for 12 grain bread machine
Twelve distinct grains, one bread machine cycle—this is how you make artisanal bread without the effort.
| Ingredient | Amount | Notes |
|---|---|---|
| Whole Wheat Flour 🌾 | 2 cups | High-protein variety preferred |
| Rye Flour 🌾 | 1 ½ cups | Dark rye for deeper flavor |
| Barley Flour 🌾 | 1 cup | Ground pearl barley preferred |
| Spelt Flour 🌾 | ½ cup | Adds nutty complexity |
| Oat Flour 🌾 | ½ cup | Blended from old-fashioned oats |
| Buckwheat Flour 🌾 | ½ cup | Not wheat, but gluten-free option |
| Flaxseed Meal 🌾 | ¼ cup | For fiber and moisture binding |
| Millet Flour 🌾 | ¼ cup | Lightens texture slightly |
| Cornmeal 🌽 | ¼ cup | Fine-ground for even mixing |
| White Whole Wheat Flour 🌾 | ½ cup | Balances flavor profile |
| Active Dry Yeast 🍞 | 2 ¼ tsp | Instant yeast works too |
| Honey 🍯 | ¼ cup | Or maple syrup for vegan option |
| Warm Water 💧 | 1 ¾ cups | 110°F for optimal yeast activation |
| Olive Oil 🫒 | 2 tbsp | Extra-virgin for richness |
| Salt 🧂 | 1 ½ tsp | Diamond Crystal preferred |
| Malt Powder 🌾 | ½ tsp | Enhances browning and flavor |
The grains are where the magic happens. Bob’s Red Mill is my go-to for flours—especially their whole wheat and rye—because they’re consistently high-quality. If you’re buying whole grains to grind yourself, King Arthur Flour has a great mill attachment for food processors. Look for freshly ground flours; pre-ground can get stale fast. The buckwheat and millet are key for texture—don’t skip them unless you’re avoiding gluten. For the flaxseed meal, Bob’s Red Mill again makes the finest ground version, which blends better. Pro tip: store all your flours in the freezer to preserve freshness—grains lose their punch within weeks at room temperature.
No malt powder? Dry malt extract works in a pinch, or you can skip it entirely—the bread will just be slightly less crusty. Running short on honey? Maple syrup or agave at the same amount keeps things vegan-friendly. If your bread machine pan is nonstick, you can reduce the olive oil to 1 tablespoon—just be sure to grease the pan lightly before adding dough. For the water, room temperature is fine, but warm (110°F) activates the yeast faster. No thermometer? Test with your wrist—the water should feel warm but not hot. And if you’re worried about the yeast dying in warm water, just mix it with the dry ingredients first, then add the water.
This loaf keeps beautifully—5 days in an airtight container at room temperature, or 3 months frozen for freshness later. For reheating, wrap slices in foil and warm in a 350°F oven for 5-7 minutes. The crust gets crispier the second day, so make extra. Store the grains themselves in sealed containers away from light; most will last 6-12 months in the pantry. If you’re making this often, buy grains in bulk—they’re cheaper per pound and fresher than pre-packaged. And if your bread turns out dense? It’s likely underproofed—let the dough rise for 10 minutes after the kneading cycle before baking.
Why You’ll Love This Recipe
- Earthy Depth Explosion: That mix of rye and barley? It’s like a warm hug for your sandwich—chewy, nutty, with just enough bite to keep things interesting. I’ll be real: my first loaf had me reaching for seconds before it even cooled.
- Meal Prep MVP: Slice it thick for toast that lasts all week, or cube it for a hearty bread salad. Between us, this bread’s so versatile it’s become my go-to for breakfast, lunch, or even a side for dinner—no one questions it.
- Budget-Friendly Staple: Using pantry staples like whole wheat and oat flour keeps costs low, and one loaf stretches across multiple meals. Honestly, it’s the kind of bread that makes grocery day feel like a win.
Step-by-step instructions for 12-Grain bread machine recipe
Here’s how to transform these 12 grains into a hearty, nutty loaf with minimal effort.
Combine Dry Ingredients in the Bread Pan
In your bread machine pan, add all the dry ingredients in this exact order: the 2 cups Whole Wheat Flour, followed by the 1.5 cups Rye Flour, 1 cup Barley Flour, 0.5 cup Spelt Flour, 0.5 cup Oat Flour, and 0.5 cup Buckwheat Flour. The reason for this sequence matters—starting with the heavier flours first prevents clouding when you add liquids later.
Next, sprinkle in the 0.25 cup Flaxseed Meal, 0.25 cup Millet Flour, 0.25 cup Cornmeal, and 0.5 cup White Whole Wheat Flour. Gently stir these lighter ingredients with a silicone spatula to distribute them evenly among the heavier flours. This prevents pockets of dense flour that could create uneven texture in your final loaf.
Add Wet Ingredients and Yeast
In a separate bowl, whisk together the 1.75 cups Warm Water (about 110°F—too hot and you’ll kill the yeast), 0.25 cup Honey, 2 tbsp Olive Oil, 1.5 tsp Salt, and 0.5 tsp Malt Powder. The malt powder might seem like an afterthought, but it’s what gives this bread its signature deep caramel notes and helps develop that perfect crust.
Pour this liquid mixture into the bread pan with the dry ingredients. Then add the 2.25 tsp Active Dry Yeast directly on top of the liquid. The yeast should begin bubbling within 5-10 minutes—this is your confirmation that everything is active and ready. If it doesn’t bubble, your water might be too hot or your yeast too old.
Select the Basic White Bread Setting
Close the bread machine lid and select the “Basic White Bread” setting. This setting provides the ideal 3-hour cycle with a 1-hour kneading phase, 2-hour rising phase, and 30-minute baking phase. The machine will handle all the heavy lifting—kneading until the dough is smooth and elastic, then allowing it to rise until it nearly doubles in size.
I know it might seem counterintuitive to use a “white bread” setting for a 12-grain loaf, but this setting’s gentle kneading prevents overworking the dense flours. The longer rise time also allows the complex flavors to meld beautifully. Don’t be tempted to switch to a “whole wheat” setting—the extra kneading can make this dense dough tough.
Let the Machine Do Its Magic
Once the cycle begins, resist the urge to peek or open the lid. Every time you interrupt the process, you risk collapsing the dough and extending the baking time. The machine will automatically transition from kneading to rising, then to baking. You’ll know it’s done when you hear the distinctive “ding” and smell that unmistakable bread aroma.
The bread should have a deep golden-brown crust with visible cracks and a rich, nutty aroma. If the top looks too pale, you can broil it for 2-3 minutes at the end of the cycle for extra color. Let the loaf cool in the pan for 10 minutes before transferring to a wire rack—this prevents the bottom from becoming gummy.
Pro Tips For Making 12 Grain Bread Machine
- WEIGH YOUR FLOURS: I learned this the hard way—scooping flours straight from the bag into the bread machine pan adds way too much air, and your 12-grain loaf will end up dense as a brick. Use a kitchen scale for whole wheat, rye, and spelt (they pack differently than all-purpose), and measure oat flour by volume—it’s light and fluffy when scooped.
- ADD HYDRATION IN STAGES: This isn’t your basic white bread—barley and rye flour soak up moisture like sponges. Start with 70% of the water called for, let the machine knead for 5 minutes, then add the rest. The dough will look shaggy at first, but it’ll come together. (Yes, even if you’re impatient like me.)
- SKIP THE METAL PAN: Aluminum conducts heat too fast, and your crust will burn before the center cooks. Use a ceramic or glass loaf pan instead—it bakes more evenly, especially with all those dense flours. If you’re in a pinch, line the pan with parchment and reduce the bake time by 5 minutes.
- STIR THE OAT FLOUR: Don’t just dump the oat flour straight from the bag—it clumps like glue. Break it up with your fingers or a fork first, then sift it through a fine-mesh strainer into the machine. Less clumping means a smoother dough and no weird pockets in your bread. (Your future self will thank you.)
Dietary considerations for this dish
Gluten-Free Adaptations
This recipe contains gluten naturally, but you can adapt it for gluten-free diets by replacing the wheat-based flours with certified gluten-free alternatives. Swap the whole wheat flour for gluten-free oat flour (ensure it’s certified) and the rye flour for gluten-free brown rice flour.
Use buckwheat flour (already gluten-free) and millet flour as-is. For the barley flour, replace it with certified gluten-free cornmeal or sorghum flour. The flaxseed meal remains safe and adds fiber.
Keep the hydration at 70% but add 1 extra tablespoon of xanthan gum to mimic gluten’s binding properties. 🌾
Low-Carb/Keto Options
For a keto-friendly version, this recipe isn’t traditionally low-carb, but you can modify it significantly. Replace all flours with almond flour (about 2 cups) and coconut flour (about 0.5 cup). Use psyllium husk powder (1 tbsp) to help bind the dough.
Reduce the honey to 1 tablespoon and add 1 extra egg (for structure). The yeast may not activate well, so consider using a keto-friendly bread mix or egg wash for browning. Expect a denser, more cake-like texture rather than a traditional loaf. 🥜
Dairy-Free & Vegan
This recipe is already dairy-free, but to make it fully vegan, simply replace the honey with maple syrup or agave. Ensure your yeast is vegan-certified (most are). For extra richness, add 1 tablespoon of vegan butter or olive oil (already included).
The flours and grains used are naturally vegan, so no other substitutions are needed. The texture remains hearty and nutty, perfect for vegan diets. 🌱
Allergen-Friendly Swaps
If you have nut allergies, avoid almond flour in low-carb adaptations and use sunflower seed flour instead. For egg allergies, replace the egg in keto versions with 1 flax egg (1 tbsp ground flaxseed + 3 tbsp water).
If corn is an issue, substitute cornmeal with quinoa flour or tapioca starch. Always check labels on flours and grains for cross-contamination warnings, especially with gluten-free products. Safety first! 🚫
High-Protein Boost
To increase protein content, add 0.5 cup vital wheat gluten (for non-gluten-free versions) or 0.5 cup hemp seeds (for gluten-free). For a dairy-free boost, mix in 1 scoop vanilla plant-based protein powder (ensure it blends well with flours).
These additions will make the bread denser but significantly more protein-rich—ideal for post-workout meals or meal prep. 💪
Nutrition facts
Frequently asked questions
Can I use regular flour instead of all these specialty grains?
You can substitute some grains for simplicity, but you’ll lose the complex flavors and textures. For a similar result, replace up to 50% of the grains with all-purpose flour, but keep at least 3-4 specialty flours (like rye or whole wheat) for that nutty depth. The crust may be less crackly, and the crumb will be lighter.
Why does my bread machine dough look too sticky?
The high grain content absorbs more moisture, making the dough stickier than usual. Add 1-2 tablespoons of extra flour (or cornmeal) to the pan before starting the cycle, or reduce the water by 1-2 tablespoons. If it’s still too wet, let it knead longer—most machines handle sticky dough better after 20-30 minutes of kneading.
How do I store this bread to keep it fresh longer?
Wrap the cooled loaf tightly in plastic wrap or place it in an airtight container with a slice of bread or a damp paper towel to prevent drying. It’ll stay fresh for 5-7 days at room temperature. For longer storage, freeze slices wrapped in foil—they’ll reheat perfectly in a toaster or oven.
Can I make this recipe without a bread machine?
Yes, but the texture and rise will differ. Mix all ingredients, let the dough rest for 1 hour, then knead by hand (or use a stand mixer with a dough hook) for 8-10 minutes. Let it rise for 1.5-2 hours, shape into a loaf, and bake at 375°F for 35-40 minutes. The crust may be less crackly, but the flavor will still be rich and nutty.
What if my bread turns out dense instead of crusty?
Dense bread usually means over-kneading or underproofing. Try these fixes: reduce the kneading time by 10-15 minutes (if your machine allows), or let the dough rise for 10 extra minutes after the machine’s cycle ends. Also, ensure your yeast is fresh—old yeast won’t activate properly, leading to a flat loaf.

- 6 Bean Chili Recipe: Hearty, Smoky Depth That Gets Richer Over Time - September 26, 2026
- 2 Gallon Red Sangria Recipe: Bold Spice and Fruit Fusion for Crowds - September 26, 2026
- 5 Star Apple Bread Recipe: Spiced Apple Swirl With Buttery Crust - September 26, 2026