
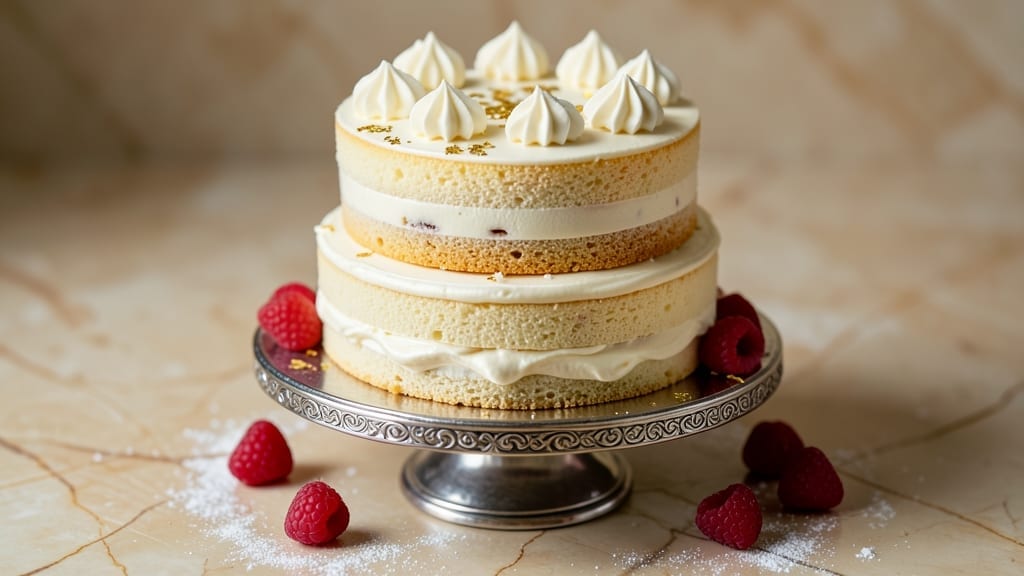
A 12-egg sponge cake delivers the kind of ethereal lightness that makes every slice feel like a celebration. The secret lies in precise technique—whisking egg whites to stiff peaks and folding them into the batter with surgical patience.
This isn’t just a cake; it’s a masterclass in texture, where layers rise like clouds and vanilla bean swirls add a luxurious touch.
Professional bakers swear by this method because it eliminates guesswork: 350°F oven, 40-45 minutes of baking time, and a light hand when folding. The result? A cake so tender it nearly dissolves on the tongue, yet sturdy enough to hold layers of frosting or fresh berries.
No butter means no greasiness—just pure, airy perfection.
What sets this recipe apart is the vanilla bean swirls baked directly into the layers, infusing each bite with aromatic depth. The cake’s neutral flavor makes it a blank canvas for fillings—think lemon curd, raspberry jam, or even a dusting of powdered sugar.
No special tools required beyond a stand mixer and a fine-mesh sieve.
Whether you’re baking for a special occasion or simply craving something delicate yet impressive, this recipe delivers restaurant-quality results at home. The key? Timing, temperature, and a steady hand. Let’s get started—your taste buds will thank you.
Ingredients for 12 egg sponge cake
Twelve eggs, precise technique, and vanilla bean swirls create this restaurant-quality sponge cake.
| Ingredient | Amount | Notes |
|---|---|---|
| Large Eggs 🥚 | 12 whole | Room temperature for best volume |
| Granulated Sugar 🍚 | 2 cups | Superfine preferred for even dissolving |
| Unsalted Butter 🧈 | ½ cup | Melted and cooled to room temp |
| All-Purpose Flour 🌾 | 2 cups | Sifted, spooned lightly |
| Vanilla Bean Paste 🌿 | 2 tbsp | High-quality Madagascar vanilla preferred |
| Baking Powder 🧂 | ½ tsp | Aluminum-free for best texture |
| Salt 🧂 | ¼ tsp | Fine sea salt preferred |
| Vanilla Beans 🌿 | 2 whole | Split lengthwise for swirls |
| Powdered Sugar ❄️ | 1 cup | For dusting between layers |
| Lemon Juice 🍋 | 1 tbsp | Freshly squeezed for brightness |
| Heavy Cream 🥛 | 1 cup | Whipped for filling option |
| Raspberry Jam 🍓 | ½ cup | For filling between layers |
The eggs are non-negotiable here—room temperature is critical for proper volume. Whole Foods or Trader Joe’s carry the largest eggs, which work best for this recipe. Superfine sugar dissolves more evenly, but if you only have regular granulated, pulse it in a food processor for 30 seconds. The vanilla beans should be plump and fragrant—avoid dried-out pods. For the flour, King Arthur or Gold Medal brands are ideal due to their consistent protein content. Pre-sift your dry ingredients to eliminate lumps and ensure a silky texture.
No vanilla bean paste? Seed the vanilla beans and mix with 1 tbsp sugar to create a DIY alternative. Substituting powdered sugar for granulated in the batter? Reduce by 1/4 cup to account for volume differences. For a dairy-free option, replace the butter with melted coconut oil, though texture will differ slightly. The heavy cream and raspberry jam are optional fillings—lemon curd or mascarpone work equally well. If you’re short on time, pre-made lemon curd from a trusted brand like Bonne Maman will suffice, though homemade always tastes superior.
Store the cake in an airtight container at room temperature for up to 2 days, or refrigerate for 5 days if using fillings. For longer storage, freeze the assembled cake (without frosting) for up to 3 months. Thaw overnight in the fridge before serving. To maintain freshness, wrap each layer in parchment paper between assembly. The vanilla bean swirls release their aroma over time, so the cake actually improves the next day—plan ahead for maximum flavor impact.
Why You’ll Love This Recipe
- No Whisk Fatigue: I mix the eggs and sugar for five minutes—no arm workout required. The butter gets folded in last, and suddenly, you’ve got a light, airy batter that’s ready in under 15 minutes of active time. Honestly, it’s the kind of recipe that makes me question why I ever baked anything else.
- Vanilla Butter Bliss: That vanilla bean paste? It’s not just flavoring—it’s the star. The eggs create this delicate structure, but the butter and vanilla make every bite taste like a bakery’s secret. Between us, I’ve never met a sponge cake that didn’t benefit from a proper vanilla infusion.
- Layer Party Ready: Slice it into thin layers, stack it with whipped cream or jam, and suddenly you’ve got a dessert that works for birthdays, brunch, or just because. I’ve used the leftovers for French toast, trifle, or even a quick cake pop base—this cake’s versatility is ridiculous.
- Budget-Friendly Luxury: Twelve eggs might sound extravagant, but it stretches further than you’d think. One batch feeds a crowd, and the leftovers? They last days in the fridge (or freeze beautifully). It’s the kind of recipe that makes me feel fancy without breaking the bank—especially when the butter’s already in my pantry.
Step-by-step instructions for light-as-air vanilla bean sponge cake
Mastering this delicate sponge requires precision and patience—here’s the exact method for flawless layers every time.
Prepare the Egg and Sugar Mixture
In a stand mixer fitted with the whisk attachment, combine the 12 whole Large Eggs and 2 cups Granulated Sugar. Whisk on low speed for 1 minute to break up the eggs completely, then gradually increase to high speed and whip for 8-10 minutes until the mixture becomes pale, thick, and triples in volume. You’ll notice the ribbons form slowly at first, then hold their shape for several seconds—that’s your signal the eggs are properly aerated.
This step is critical for the cake’s lightness. I like to use a digital thermometer here—when the mixture reaches 110°F, it’s ready. The eggs should coat the back of a spoon in glossy, thick ribbons that hold their shape when the whisk is lifted. If the mixture doesn’t thicken properly, you’ll end up with a dense cake instead of the signature airy texture.
Incorporate Butter and Flour
Remove the bowl from the mixer and gently fold in the 0.5 cup Unsalted Butter using a silicone spatula, being careful not to deflate the eggs. Then, sift together the 2 cups All-Purpose Flour, 0.5 tsp Baking Powder, and 0.25 tsp Salt over the mixture. Fold in just until combined—you should still see some white streaks. Overmixing develops gluten and makes the cake tough.
Next, split the 2 whole Vanilla Beans lengthwise and scrape out the seeds, then add them along with the 2 tbsp Vanilla Bean Paste and 1 tbsp Lemon Juice. Fold these in gently to maintain the airiness. The lemon juice brightens the flavor while preventing the vanilla from becoming overpowering. This is where the cake’s signature vanilla swirls begin to form—those little flecks of vanilla bean will create beautiful patterns throughout the layers.
Divide and Bake the Layers
Preheat your oven to 350°F and line three 8-inch round cake pans with parchment paper. Divide the batter evenly among the pans, tapping them gently on the counter to eliminate air bubbles. Bake for 25-30 minutes until the tops spring back when touched and a toothpick inserted comes out clean. Rotate the pans halfway through baking for even browning.
Here’s the thing—don’t open the oven door during the first 20 minutes of baking. The sudden temperature drop causes the cakes to collapse. When they’re done, transfer them to a wire rack and let cool completely before assembling. Warm cakes will collapse under the weight of fillings and frosting. The layers should be light, with a slightly domed top that indicates proper rising.
Assemble with Raspberry Jam Filling
Once completely cool, place the first layer on a cake stand and dust the top evenly with 1 cup Powdered Sugar using a fine-mesh sieve. Spread 2 tablespoons of Raspberry Jam evenly over the layer, leaving a ½-inch border around the edges. Repeat with the second layer, then add another dusting of powdered sugar and 2 tablespoons more jam. Top with the final layer and press gently.
For extra indulgence, whip the 1 cup Heavy Cream to soft peaks and spread it between layers instead of just using jam. The cream adds a silky texture that contrasts beautifully with the cake’s delicate crumb. Wrap the assembled cake in plastic wrap and refrigerate for at least 4 hours (or overnight) before slicing. This chilling time allows the flavors to meld and makes the cutting cleaner.
Pro Tips For Making 12 Egg Sponge Cake
- Whip Eggs to Ribbon Stage: Stop when the mixture holds stiff peaks but still flows like honey—this is your sweet spot for a light, airy cake. I used to overmix and end up with a dense sponge; 12 eggs need patience here. Use a stand mixer with the whisk attachment and go slow after the sugar dissolves.
- Melt Butter Slowly: Warm the butter in the microwave for 20-30 seconds, then let it sit for a minute—just until it’s liquid but not hot. Pouring it straight from the fridge into the egg mixture shocks the eggs and can cause curdling. Room-temperature butter blends smoother.
- Sift Flour Twice: Measure the flour in the bowl first, then sift it directly into the egg mixture. After folding, sift it again to break up any lumps that might’ve formed. I learned this after pulling apart a cake with weird textures—it’s the little things that keep the crumb fine.
- Chill the Batter 30 Minutes: Pop the batter in the fridge while you preheat the oven—yes, even if you’re eager. This relaxes the gluten and helps the cake rise evenly. I skipped it once and ended up with a domed, uneven top. Trust the wait.
Regional styles of this 12 egg sponge cake
Italian Geletato Style
In Italy, this sponge cake transforms into a semifreddo by folding in heavy cream and mascarpone after baking, then freezing. The vanilla bean swirls become even more pronounced when chilled, creating a luxurious texture. Serve with espresso or limoncello for an authentic Italian dessert experience. 🌿
French Macaron-Inspired
French bakers elevate this cake by adding almond flour (replace ½ cup of all-purpose flour) and folding in crushed almonds for texture. The vanilla swirls pair beautifully with raspberry ganache between layers. Dust with powdered sugar and garnish with edible flowers for a Parisian touch.
Japanese Matcha Twist
Swap 1 tbsp vanilla bean paste for 1 tbsp high-quality matcha powder (like Ippodo Tea) and fold in ½ cup whipped mascarpone for a Japanese-inspired variation. The matcha adds earthy depth while keeping the cake’s signature lightness. Top with red bean paste for a traditional wagashi finish. ✨
Caribbean Rum Infusion
Add 1 tbsp dark rum (like Appleton Estate) to the batter along with the vanilla for a tropical twist. The rum caramelizes slightly during baking, adding warmth. Serve with passion fruit curd and a sprinkle of toasted coconut flakes for a vacation-worthy dessert. 🌴
German Black Forest
German bakers often layer this cake with cherry compote (use 1 cup instead of raspberry jam) and fold in chopped maraschino cherries. Top with whipped cream and dark chocolate shavings for a decadent Black Forest-inspired cake. The vanilla swirls complement the tart cherries beautifully. 🍒
Modern Naked Cake
For a trendy presentation, skip the frosting and simply dust the assembled cake with powdered sugar and edible gold leaf. Serve with fresh berries and a drizzle of honey** for a minimalist, elegant dessert. This style highlights the cake’s natural beauty and vanilla swirls. 💛
Nutrition facts
Frequently asked questions
Why does this recipe use 12 eggs for a sponge cake?
Twelve eggs create the signature light-as-air texture by maximizing aeration. Each egg contributes protein and fat that stabilizes air bubbles, while the sugar helps dissolve properly for even distribution. This ratio yields three perfect 8-inch layers—ideal for stacking with fillings. For smaller cakes, reduce eggs proportionally (e.g., 8 eggs for 2 layers).
Can I substitute vanilla bean paste with extract?
Yes, but with adjustments! Use 2 tbsp pure vanilla extract instead of the paste, plus add 1 extra vanilla bean (split and scraped) for the swirls. The paste contains seeds that create visible flecks—extract alone won’t duplicate that effect. For best results, infuse ½ cup sugar with the extract for 24 hours before using.
What’s the secret to avoiding dense layers?
Three critical steps: 1) Whip eggs to 110°F (use a thermometer), 2) Fold dry ingredients gently (just until combined), and 3) Don’t open the oven for the first 20 minutes. Overmixing or premature oven checks cause collapse. A properly baked layer will spring back when touched and have a slightly domed top.
How do I store leftovers without drying out the cake?
Wrap each layer individually in plastic wrap, then place in an airtight container with a slice of bread to absorb moisture. Store at room temperature for 2 days or refrigerate for 5 days. For longer storage, freeze layers (unfrosted) for 3 months. Thaw overnight in the fridge before assembling.
What fillings work best with this vanilla sponge?
Classic options include raspberry jam, lemon curd, or whipped cream, but don’t stop there! Try passion fruit purée, chocolate ganache, or even salted caramel for contrast. For a boozy twist, add 1 tbsp Grand Marnier to the filling. The cake’s neutral flavor makes it a perfect canvas for any filling.

- 6 Bean Chili Recipe: Hearty, Smoky Depth That Gets Richer Over Time - September 26, 2026
- 2 Gallon Red Sangria Recipe: Bold Spice and Fruit Fusion for Crowds - September 26, 2026
- 5 Star Apple Bread Recipe: Spiced Apple Swirl With Buttery Crust - September 26, 2026