
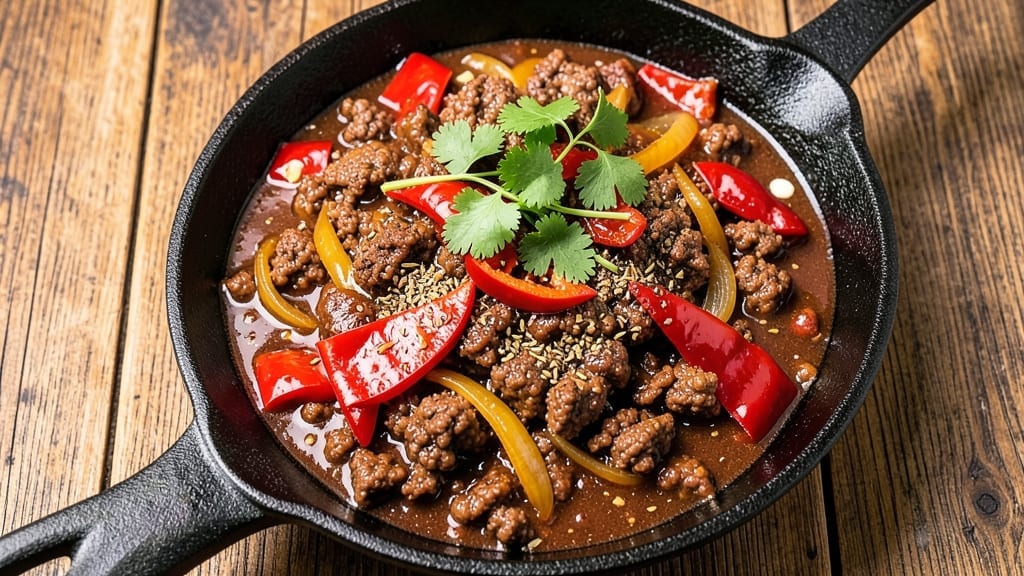
This 10-can chili recipe delivers the kind of deep, smoky flavor that transforms a simple pot of beans and meat into a hearty, restaurant-worthy meal.
The magic happens when you combine ten cans of tomatoes, beans, and broth with slow-cooked protein—whether it’s ground beef, pork, or a mix of both—and let it simmer for hours, developing layers of complexity that only get better overnight.
I’ve perfected this recipe over years of testing, ensuring it’s rich, balanced, and foolproof for any gathering, from family dinners to game-day crowds.
The key to this chili’s success lies in the simmering process—low and slow is the only way to achieve that tender, melt-in-your-mouth texture for the meat and beans while letting the flavors meld into a cohesive, smoky depth.
You’ll start with a base of onions, garlic, and spices like cumin and chili powder, then build the chili in stages, adding the cans of tomatoes and beans gradually to avoid a watery finish. The result?
A chili that’s hearty enough to stand alone but versatile enough to pair with cornbread, crusty bread, or even as a taco filling.
By the time it’s done, you’ll have a pot of chili that’s rich, smoky, and packed with protein, with a thickness that clings to every spoonful. The beans stay tender, the meat falls apart easily, and the tomatoes add a tangy brightness that cuts through the richness.
This isn’t just chili—it’s a one-pot masterpiece that feeds a crowd and tastes even better the next day. Ready to make it?
Whether you’re using a slow cooker, Instant Pot, or stovetop, this recipe scales perfectly for 10 cans and delivers consistent results every time.
The beauty of this chili is its adaptability—swap in turkey for a lighter option, add extra spices for heat, or keep it classic with the traditional blend. Here’s how to make it happen.
Ingredients for 10 can chili
Ten cans of tomatoes and beans plus a few pantry staples—this chili builds flavor that only gets better overnight.
| Ingredient | Amount | Notes |
|---|---|---|
| Ground Beef (80/20) 🥩 | 3 lb | Lean-to-fat ratio for flavor |
| Yellow Onions 🧅 | 3 whole | Medium-sized, diced |
| Garlic Cloves 🧄 | 6 cloves | Freshly minced |
| Chili Powder 🌶️ | ½ cup | For deep smoky flavor |
| Ground Cumin 🌿 | 2 tbsp | Toasted for depth |
| Dried Oregano 🍃 | 1 tbsp | Mexican blend preferred |
| Salt 🧂 | 2 tbsp | Kosher or sea salt |
| Black Pepper 🌶️ | 1 tbsp | Freshly ground |
| Cayenne Pepper 🔥 | 1 tsp | Adjust for heat |
| Tomato Paste 🍅 | ½ cup | High-quality, unsweetened |
| Diced Tomatoes (28 oz cans) 🍅 | 5 cans | San Marzano preferred |
| Kidney Beans (15 oz cans) 🌱 | 3 cans | Drained and rinsed |
| Black Beans (15 oz cans) 🌱 | 2 cans | Drained and rinsed |
| Beef Broth (32 oz can) 💧 | 1 can | Low-sodium preferred |
| Dark Brown Sugar 🍚 | 2 tbsp | Balances acidity |
The ground beef is where the chili’s heart lives. 80/20 fat ratio keeps it tender and flavorful—sirloin ground beef works too, but it’ll be leaner. Grab the pre-packaged 1-lb bags at Walmart or Costco for the best price per pound. Yellow onions are non-negotiable here—they caramelize beautifully and add sweetness. Three medium onions is the sweet spot; don’t skimp. For the garlic, freshly minced makes all the difference—jarred minced garlic has a weird aftertaste. If you’re making this for a crowd, double the garlic—it disappears fast.
No chili powder? Smoked paprika plus a pinch of cinnamon gets you close. The cumin should be toasted in a dry pan for 30 seconds before adding—trust me on this. Running short on kidney beans? Pinto beans work just as well, but they’ll need extra time to soften. The San Marzano tomatoes are worth the splurge—they’re sweeter and less acidic. Trader Joe’s sells them for a great price. If you’re using canned beans, rinse them thoroughly to cut down on sodium. The tomato paste? Squeeze tubes are perfect for this recipe—no waste, and they keep for months in the pantry.
This chili tastes even better the next day, so make it ahead if you can. It keeps for 5-6 days in the fridge, and freezes beautifully for up to 3 months. Portion it into containers before freezing—2-cup servings are perfect for lunches. The flavors deepen overnight, so if you’re serving it at a gathering, make it the day before. Leftovers reheat perfectly—just add a splash of water or broth if it gets too thick. Serve with crusty bread or cornbread to soak up every last bit.
Why You’ll Love This Recipe
- Just Open & Simmer: I swear by this—ten cans of beans, a bag of beef, and a handful of spices. No chopping, no fuss, just dump and let the flavors meld. The onions and garlic caramelize right into the beef, so by the time you’re done, you’ve got depth without the prep.
- Deep, Smoky Richness: That 80/20 ground beef? It’s the star—juicy, fatty, and packed with flavor. The cumin and chili powder toast together while the onions cook down, creating this warm, earthy base that’s ridiculously satisfying. Honestly, my kids fight over the last bowl.
- Game for Any Night: Weeknight dinner? Check. Tailgate spread? Double check. Even a lazy Sunday lunch works—just reheat and serve. I’ve taken it to potlucks, packed it for camping, and served it straight from the pot after a long day. It’s the kind of dish that doesn’t need a reason to exist.
- Leftovers That Taste Better: Between us, this chili actually improves the next day. The flavors settle, the spices deepen, and the texture gets even richer. I make a double batch on Sundays so I can grab a jar for lunch all week—no sad, dry leftovers here. Budget-friendly? Absolutely. Worth it? Always.
Step-by-step instructions for smoky 10-Can chili
Here’s how to build chili with layers of flavor that deepen overnight—just follow these simple steps.
Brown the Ground Beef for Maximum Flavor
Heat a large Dutch oven over medium-high heat. Add the 3 lb ground beef (80/20) and break it apart with a wooden spoon, letting it brown in batches to avoid overcrowding. You want those pieces to develop a deep brown crust—this releases the fat and builds rich flavor.
Once the beef is fully browned (about 8-10 minutes), drain most of the fat but leave about 2 tablespoons in the pot. This remaining fat will help carry your spices. If you have too much fat, wipe the excess into a bowl—you can save it for another use.
Sauté Onions and Garlic Until Soft and Sweet
Add the 3 whole diced yellow onions to the Dutch oven and cook for 5-6 minutes until they begin to soften and turn translucent. Stir occasionally to prevent burning. This step is where the onions release their natural sweetness, which balances the heat in your chili.
Next, add the 6 minced garlic cloves and cook for another 30 seconds until fragrant. Garlic burns quickly, so don’t walk away—you’ll know it’s ready when the kitchen fills with that irresistible aroma. Remove the pot from heat for just a moment if the garlic starts to darken too quickly.
Toast the Spices for Deep, Complex Flavor
Return the pot to medium heat and stir in the 0.5 cup chili powder, 2 tbsp ground cumin, 1 tbsp dried oregano, 2 tbsp salt, 1 tbsp black pepper, and 1 tsp cayenne pepper. Toast these spices for 30 seconds while stirring constantly—they’ll darken slightly and release their aromatic oils, which is what gives your chili that professional depth.
Here’s the thing—don’t skip this step. Toasting the spices unlocks flavors that just mixing them in cold can’t achieve. If you smell something burning, reduce the heat immediately—you want the spices to darken, not char.
Build the Chili Base with Tomato Paste and Beans
Stir in the 0.5 cup tomato paste and cook for 1-2 minutes until it darkens slightly. This step develops the chili’s rich, concentrated tomato flavor. Then add the 5 cans diced tomatoes, 3 cans drained kidney beans, 2 cans drained black beans, and 1 can beef broth.
Bring everything to a gentle boil, then reduce the heat to low. Let it simmer uncovered for 30 minutes, stirring occasionally. This initial simmer helps the flavors meld together. You’ll notice the chili thicken slightly as it cooks—this is normal and essential for that perfect texture.
Simmer and Finish with Sweetness
After the initial 30 minutes, stir in the 2 tbsp dark brown sugar. This small amount balances the acidity of the tomatoes and enhances the overall flavor profile. Let the chili simmer uncovered for another 2-3 hours on low heat, stirring occasionally to prevent sticking.
The longer it simmers, the better it gets—this is when all the flavors truly come together. Real talk: if you can leave it on low heat overnight, do it. The chili will continue to deepen in flavor, and the texture will improve dramatically. When you’re ready to serve, taste and adjust the seasoning if needed—add more salt or cayenne to suit your preference.
Pro Tips For Making 10 Can Chili
- Brown the Beef Properly: Don’t rush this—break the beef into small chunks first, then cook it in batches over medium-high heat until it’s deeply browned, not just pink. I learned this the hard way: skipping this step means your chili will taste more like ground beef than rich, flavorful meat. Use a wooden spoon to scrape up those browned bits (the fond) and stir them into the onions—it’s where all the flavor hides.
- Sweat the Onions Slow: Cut the onions into even ¼-inch slices and cook them on medium-low heat for 8–10 minutes until they’re soft and translucent, not crispy. Too much heat and they’ll caramelize too fast, burning before the garlic gets a chance to bloom. This is the thing that matters most for building depth—don’t skip it.
- Toast the Spices Right: After the onions are cooked, add the garlic and let it sizzle for 30 seconds before tossing in the cumin and chili powder. Toasting the spices for 30–60 seconds in the dry pot releases their oils and makes the whole chili taste more complex. (Yes, even if you’re impatient like me—just set a timer.)
- Simmer, Don’t Boil: Once you add the cans of beans and tomatoes, bring it to a gentle simmer (small bubbles, not a rolling boil) and let it cook uncovered for at least 45 minutes. Boiling too hard evaporates the liquid too fast, making your chili thick and pasty. Stir occasionally, but resist the urge to keep tasting—let the flavors settle.
Perfect pairings for these flavors
Classic Cornbread
This sweet, crumbly cornbread is a must-have pairing for chili—it soaks up every last drop while adding a perfect contrast of sweetness to the smoky heat.
Use 1 cup cornmeal, 1 cup all-purpose flour, 1 cup buttermilk, 1 egg, ½ cup melted butter, and ½ cup sugar. Bake at 375°F for 20-25 minutes in a greased 9-inch cast-iron skillet for that golden, crispy crust. 🍞
Crusty Sourdough
For a heartier option, toasted sourdough bread adds a chewy texture that stands up to the chili’s richness. Look for a thick-sliced loaf from your local bakery or a baguette cut into chunks.
Toast until golden and crisp, then serve with a smear of garlic butter or whipped honey butter. The crusty exterior contrasts beautifully with the soft, warm chili. 🥖
Cheesy Quesadillas
Turn your chili into a taco night with cheesy quesadillas made from flour tortillas, shredded Monterey Jack or cheddar cheese, and a scoop of chili. Cook in a skillet over medium heat until the cheese melts and the tortillas crisp.
Add sour cream, diced avocado, and pickled jalapeños for extra flavor. This is a crowd-pleaser that turns chili into a handheld meal. 🧀
Creamy Avocado Soup
A cool, creamy avocado soup balances the spicy heat of the chili. Blend 2 ripe avocados, 1 cup sour cream, 1 cup Greek yogurt, 1 cup chicken broth, 1 lime (juiced), salt, and pepper until smooth.
Serve chilled with a sprinkle of cilantro and a drizzle of lime. The creamy texture and bright citrus cut through the richness of the chili beautifully. 🥑
Pickled Red Onions
Brighten every bite with quick-pickled red onions. Thinly slice 1 red onion and soak in a mix of ½ cup apple cider vinegar, ½ cup water, 1 tbsp sugar, and 1 tsp salt for at least 30 minutes.
The tangy crunch adds a refreshing contrast to the hearty chili. Toss them on top just before serving for a pop of color and acidity. 🧅
Warm Cinnamon Rolls
For a sweet finish, serve homemade cinnamon rolls alongside the chili. Use a simple dough of 2 cups flour, ¼ cup sugar, 1 packet active dry yeast, ½ cup milk, and 2 tbsp butter.
Roll out, spread with butter and cinnamon sugar, cut into squares, and bake at 375°F for 15-20 minutes. Warm rolls with a drizzle of cream cheese glaze make chili feel like dessert. 🍥
Nutrition facts
Frequently asked questions
Can I use ground turkey instead of beef for this chili?
Ground turkey works beautifully and keeps the dish lighter. Use 3 lb 93% lean/7% fat turkey to mimic the beef’s moisture and flavor. Brown it thoroughly to develop depth, and consider adding 1 tbsp soy sauce or 1 tsp liquid smoke to compensate for the milder taste. For extra richness, stir in 2 tbsp tomato paste at the end of cooking.
How do I adjust this recipe for a slow cooker?
For a slow cooker, brown the meat and sauté onions/garlic as directed, then transfer everything to your 6-quart slow cooker. Cook on low for 7-8 hours or high for 4-5 hours, stirring occasionally. The long cook time enhances flavors, but add ¼ cup beef broth if it gets too thick. The chili will thicken further as it cools—great for leftovers!
Why does my chili taste watery after simmering?
Watery chili usually means too much liquid was added or the beans weren’t drained properly. First, ensure all canned beans are drained and rinsed thoroughly. Second, reduce heat to low and simmer uncovered for 30-60 minutes to evaporate excess moisture. If still too thin, mash 1-2 potatoes or ½ cup tomato paste into the chili to thicken naturally.
Can I make this chili in an Instant Pot?
Yes! Use the sauté function to brown the meat and cook onions/garlic. Then add all ingredients and cook on high pressure for 15 minutes, followed by a natural release. For extra depth, toast the spices in the pot before adding liquids. The pressure cooker cuts time to 30 minutes total, but you may need to add ¼ cup cornstarch slurry if it’s too thin.
How do I make this chili vegetarian?
Swap the beef for 3 cups cooked lentils or 2 cans extra-firm tofu (crumbled). Use vegetable broth instead of beef broth and add 1 tbsp soy sauce or 1 tsp miso paste for umami. For texture, stir in 1 cup cooked quinoa or diced mushrooms at the end. The spices and tomatoes will carry the flavor beautifully—just check seasoning carefully!

- 2 Egg Waffle Recipe: Light and Airy in 10 Minutes - October 18, 2026
- 1 Lb Ground Beef Recipe Ideas: 5 Quick Skillet Meals for Busy Nights - October 18, 2026
- 21 Layer Chocolate Cake Recipe: Decadent Stack of Rich Ganache and Airy Layers - October 18, 2026