
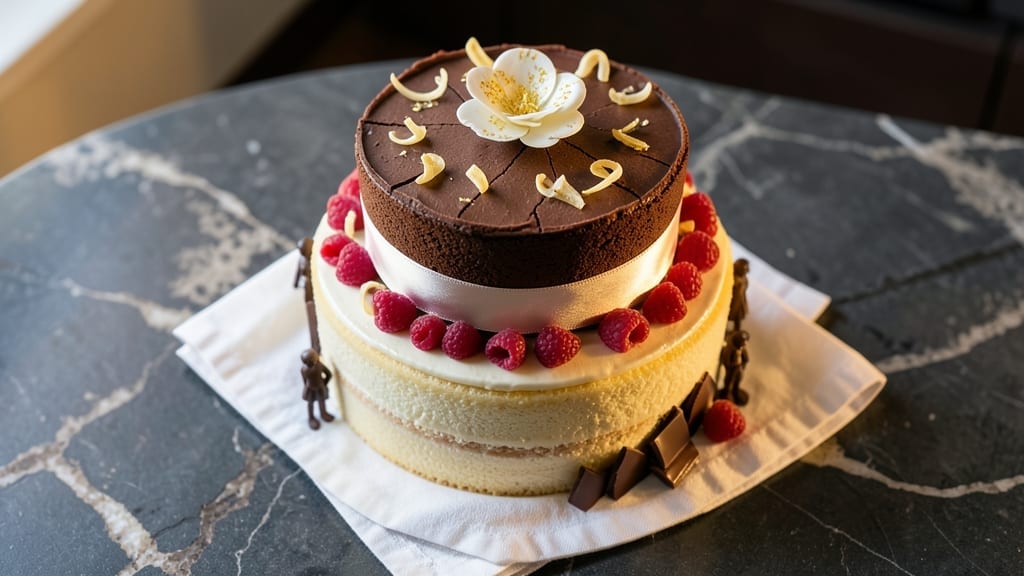
A 2-tier birthday cake isn’t just dessert—it’s the centerpiece that turns celebrations into memories. This recipe delivers showstopping layers with precise baking techniques, professional assembly, and flawless frosting that looks like it came from a bakery.
The secret lies in equal-sized tiers, smooth buttercream swirls, and a sturdy structure that holds up to candles, sprinkles, and even a cake topper.
We’ll start with two perfectly baked 8-inch layers, using a reliable vanilla cake recipe that yields tender crumbs and a moist interior. Baking at 350°F for 25–30 minutes ensures even doneness, while cooling completely prevents cracking.
The real magic happens in the assembly: leveling the cakes, layering stabilized buttercream, and stacking with precision to create a seamless, professional finish.
Frosting is where the drama unfolds—buttercream swirls add elegance, while fondant or ganache provides a sleek, polished look. Decorate with edible flowers, metallic sprinkles, or hand-piped borders for a custom touch.
Every slice will reveal fluffy layers, rich frosting, and a structure that impresses—no wobbly tiers or soggy bottoms here.
This recipe scales for any age or occasion, from a child’s first birthday to an adult milestone. Tools like a turntable and offset spatula make assembly effortless, while a leveling guide ensures perfect tiers. Ready to bake a cake that steals the show? Let’s get started with the step-by-step instructions.
Ingredients for 2 tier birthday cake
Twelve essential ingredients transform into a bakery-worthy 2-tier masterpiece with flawless layers.
| Ingredient | Amount | Notes |
|---|---|---|
| All-Purpose Flour 🌾 | 3 cups | Sifted for even texture |
| Granulated Sugar 🍚 | 2 ¼ cups | Divided for cake and frosting |
| Unsalted Butter 🧈 | 1 ½ cups | Room temperature, softened |
| Large Eggs 🥚 | 6 whole | Room temperature, separated |
| Pure Vanilla Extract 🌿 | 2 tsp | High-quality, pure vanilla |
| Baking Powder 🧂 | 2 tsp | Double-acting for lift |
| Salt 🧂 | ½ tsp | Fine sea salt preferred |
| Milk 🥛 | 1 cup | Room temperature |
| Powdered Sugar 🍚 | 4 cups | For buttercream, sifted |
| Heavy Whipping Cream 🥛 | 1 cup | Cold, for stability |
| Edible Gold Leaf 🍰 | 1 sheet | Optional for luxury finish |
| Fresh Flowers 🌸 | ½ cup | Edible variety, optional |
| Metallic Sprinkles 💎 | ¼ cup | For decorative accents |
| Cake Leveler ✂️ | 1 whole | Or serrated knife |
| Offset Spatula 🎨 | 1 whole | 8-inch for smooth frosting |
The all-purpose flour and unsalted butter form the foundation—look for King Arthur or Gold Medal flour for optimal texture. Butter should be room temperature but not melted; if too soft, chill the bowl. Eggs must be room temperature to prevent dense crumbs. For vanilla, Madagascar bourbon vanilla adds depth, but pure imitation works in a pinch. The baking powder should be fresh (test by mixing with water—it should fizz immediately). Pre-sift your dry ingredients to avoid lumps in the batter.
No powdered sugar? Granulated sugar plus 1 tsp cornstarch mimics its texture, though it won’t be as smooth. Substitute heavy cream with whipped coconut cream for a dairy-free option, but reduce to ¾ cup to avoid excess moisture. For a nut-free frosting, replace butter with vegan butter (like Miyoko’s) and use powdered sugar. The gold leaf can be swapped for edible silver or even a dusting of powdered sugar for a simpler look. Fresh flowers? Violas or pansies are edible and vibrant—avoid lilies or daffodils. Sprinkles should be added immediately after piping to prevent sticking.
Store cake layers in an airtight container at room temperature for up to 3 days; freeze for 3 months wrapped tightly in plastic. Buttercream keeps 5 days refrigerated or 3 months frozen. For assembly day, let everything sit at room temperature for 1 hour before decorating. The turntable is non-negotiable—it’s the only way to achieve those seamless swirls. Work quickly once frosting is piped to prevent melting. If transporting, keep the cake upright and chilled until serving.
Why You’ll Love This Recipe
- No Mixer Needed: I swear by this recipe when my mixer’s on strike—just a bowl and a whisk. Cream the butter and sugar by hand until light, fold in the eggs one at a time, and the vanilla ties it all together. The flour comes in last, and boom: silky batter with zero fuss.
- Vanilla Butter Bliss: That first bite? Pure comfort. The buttercream—just softened butter, sugar, and vanilla—melts on the tongue, while the cake’s tender crumb (thanks to the eggs and sugar ratio) stays moist. Honestly, it’s the kind of flavor that makes people ask, “What’s in this?” before you even answer.
- Double the Celebration: Two tiers mean you can customize each layer—vanilla on the bottom, chocolate on top, or even a funfetti surprise. It’s perfect for birthdays, showers, or just because. Between us, I’ve used the leftovers for cake pops or breakfast sandwiches. (Yes, even on a Tuesday night.)
- Budget-Friendly Showstopper: This recipe stretches my grocery budget without sacrificing wow factor. All-purpose flour and basic pantry staples mean no specialty ingredients, and the buttercream uses the same butter as the cake. Plus, the leftovers freeze like a dream—so I’m always covered for last-minute gatherings.
Step-by-step instructions for 2 tier birthday cake
Here’s how to create a flawless two-tiered cake with professional swirls and elegant presentation.
Prepare the Cake Batter
Preheat your oven to 350°F and grease two 9-inch round cake pans with butter or baking spray, then line the bottoms with parchment paper. In a large mixing bowl, combine the 3 cups all-purpose flour, 2.25 cups granulated sugar (reserve ½ cup for later), 2 tsp baking powder, and ½ tsp salt. Whisk until thoroughly blended and no lumps remain.
In a separate bowl, beat the 1.5 cups unsalted butter until smooth and creamy, about 2-3 minutes. Add the 6 whole large eggs one at a time, mixing well after each addition. Gradually incorporate the dry ingredients into the butter mixture, alternating with the 1 cup milk, beginning and ending with the flour. Mix on low speed until just combined—overmixing develops gluten, which can make the cake dense.
Divide the batter evenly between the two prepared pans. For the classic swirl effect, use an offset spatula to create gentle waves in each pan. Bake for 25-30 minutes, or until a toothpick inserted into the center comes out clean. Allow the cakes to cool in the pans for 10 minutes, then transfer to a wire rack to cool completely before removing from the pans.
Create the Buttercream Frosting
In a stand mixer fitted with the paddle attachment, beat the 4 cups powdered sugar and the reserved ½ cup granulated sugar on medium speed until smooth. Add the 1 cup heavy whipping cream and mix until fully incorporated. Gradually add the 1.5 cups unsalted butter, one tablespoon at a time, ensuring each addition is fully blended before adding the next.
Increase the mixer speed to medium-high and beat for 3-5 minutes until the frosting is light, fluffy, and holds its shape when piped. Add the 2 tsp pure vanilla extract and mix for an additional 1 minute. The frosting should be thick enough to pipe smoothly but still soft enough to spread easily. Cover with a damp towel and refrigerate for 30 minutes to firm up slightly before assembly.
Level and Assemble the Cake Tiers
Use the cake leveler to trim the tops of both cakes to create even surfaces. Place the larger tier on a cake stand or plate, then spread a thin layer of frosting over the top to create a “crumb coat.” Chill the cake for 15 minutes to set the crumb coat, then apply a final layer of frosting to the top and sides of the first tier. Repeat the process for the second tier, ensuring both layers are fully frosted and smooth.
To assemble, place the second tier on top of the first, using a small amount of frosting as “glue” to secure the layers. Use the offset spatula to create clean, straight sides and smooth any imperfections. For the signature swirl, pipe a border of frosting around the top tier, then use the spatula to gently pull the frosting upward in a spiral motion, creating a continuous swirl effect.
Decorate with Elegant Finishing Touches
Arrange the ½ cup fresh flowers and ¼ cup metallic sprinkles on a clean surface, then gently press them onto the sides and top of the cake. For a luxurious finish, carefully apply the 1 sheet edible gold leaf using a soft brush or your fingers, ensuring it adheres smoothly to the frosting. Allow the decorations to set for 10-15 minutes before serving.
This cake is designed to impress, with its flawless swirls and professional finish. Serve immediately for the best texture and presentation, and enjoy the compliments on your baking skills! The combination of moist cake, rich buttercream, and delicate decorations makes this the perfect centerpiece for any celebration.
Pro Tips For Making 2 Tier Birthday Cake
- Chill the Butter First: Take that cold butter straight from the fridge—don’t let it sit out even 10 minutes. I learned this the hard way when my first batch turned out dense and greasy because the butter melted into the flour too early. Room temp is fine after mixing, but start cold for fluffier layers.
- Sift That Flour: Skip the scooping-and-packing habit—sift the flour directly into the bowl. Aerating it removes lumps and prevents a heavy, gummy texture. Yes, it takes 30 seconds extra, but your cake’s crumb will thank you.
- Don’t Overmix the Eggs: Mix the eggs and sugar just until the bowl looks pale and ribbons form—about 2 minutes. I used to beat it until it got thick and warm, and the cake would sink in the middle. Stop when it’s smooth, not when your arm gets tired.
- Bake Both Tiers Together: Preheat the oven and place both cake pans inside at the same time. This evens out the heat so neither tier overbakes or stays underdone. Pro move: Swap the pans halfway through if your oven runs hot.
Make-ahead tips for this dish
Batter Prep Ahead
Mix your cake batter up to 24 hours in advance and store it in an airtight container in the refrigerator. The flavors meld beautifully overnight, and the batter will be perfectly chilled for baking.
When ready to bake, let it sit at room temperature for 30-60 minutes before pouring into pans. This trick ensures even baking and prevents doming. I always prep the batter the night before—it cuts morning stress in half! 💫
Frosting Stability
Make your buttercream 1-2 days ahead and store it in the fridge in an airtight container. The cold temperature helps stabilize the texture, making it easier to pipe later. When ready to use, let it sit at room temperature for 30-45 minutes to soften slightly.
For extra stability, add 1 teaspoon of meringue powder to the frosting recipe—it creates a firmer, more professional finish. 🎨
Cake Layer Storage
Bake your cake layers 1-2 days ahead and store them in parchment-lined airtight containers at room temperature. This prevents them from drying out or absorbing moisture. If you need to store them longer than 2 days, freeze them wrapped tightly in plastic for up to 3 months.
Thaw completely before assembling to avoid condensation issues. I always bake the layers the day before—it gives me time to focus on decorating without rushing. ❄️
Decorating Timeline
Plan to decorate your cake 2-3 hours before serving. This gives the frosting and decorations enough time to set properly without melting or sliding. If you’re using fondant or delicate decorations, work in a cool room (around 65°F) to prevent the frosting from softening too quickly.
For a stress-free assembly, keep your tools—like the offset spatula and turntable—ready and within reach. 💡
Transport Tips
If transporting your cake, keep it upright and chilled in a cool car (not the trunk) to prevent melting. Use a cake carrier with a lid to protect it from bumps. For long trips, place a cooling rack under the cake to prevent condensation from dripping onto the frosting.
If you’re delivering it, arrive 30 minutes early to let it adjust to room temperature before serving. This keeps everything looking flawless! 🚗
Make-Ahead Decorations
Prep your decorations a day ahead to streamline assembly. Pipe buttercream borders onto parchment paper and refrigerate until ready to use. Store fresh flowers in a vase with water and metallic sprinkles in a small container with a lid to keep them fresh.
If using edible gold leaf, handle it just before applying to avoid creasing. This way, assembly day is all about putting the finishing touches together—no last-minute scrambling! ✨
Nutrition facts
Frequently asked questions
How do I make the cake tiers the same height?
Use a cake leveler or serrated knife to trim the tops of both cakes to create perfectly even surfaces. Place each cake on a turntable and rotate while leveling to ensure uniformity. For extra precision, measure the height with a ruler after trimming. Pro tip: Chill the cakes for 15 minutes before leveling to prevent crumbs.
Can I substitute buttercream with another frosting?
Yes! For a lighter texture, try Italian meringue buttercream or ganache. For a dairy-free option, use coconut cream frosting (replace butter with coconut oil). Just adjust consistency—ganache needs to be thick enough to pipe, while meringue buttercream holds swirls beautifully. Always let frosting firm up slightly before assembly.
Why did my cake crack when frosting?
Cracking usually happens when cakes cool too quickly or aren’t fully cooled before frosting. Let cakes cool completely (2+ hours) before assembly. For extra stability, place cakes in the fridge for 30 minutes before frosting. Also, ensure your buttercream isn’t too warm—it should be cool enough to pipe but still soft.
How do I create the swirl effect without a turntable?
Pipe a thick border of frosting around the top tier, then use an offset spatula to gently pull the frosting upward in a spiral motion. Work quickly and keep the spatula at a 45-degree angle. For extra stability, chill the cake for 10 minutes between swirls. Practice on a practice cake first—it takes a light touch!
Can I make this cake gluten-free?
Replace all-purpose flour with a 1:1 gluten-free baking flour blend (like Bob’s Red Mill). Add ½ tsp xanthan gum to improve structure. Reduce milk to ¾ cup to prevent a dense texture. Test your blend first—some require extra moisture. The frosting can stay the same, but use dairy-free butter if needed.

- 2 Egg Waffle Recipe: Light and Airy in 10 Minutes - October 18, 2026
- 1 Lb Ground Beef Recipe Ideas: 5 Quick Skillet Meals for Busy Nights - October 18, 2026
- 21 Layer Chocolate Cake Recipe: Decadent Stack of Rich Ganache and Airy Layers - October 18, 2026