
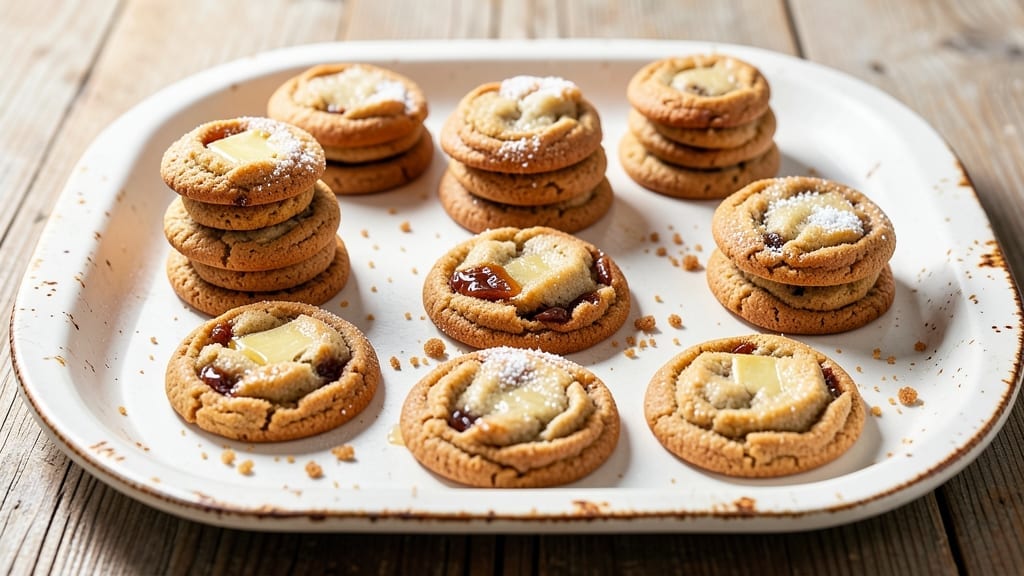
Mastering the art of perfectly crispy-edged cookies starts with a buttery dough that balances structure and flavor—this 101 cookie recipe delivers both. The secret lies in precise ingredient ratios and a foolproof technique that transforms simple pantry staples into golden, tender cookies with crisp edges every time.
I’ve baked hundreds of batches to perfect this method, ensuring consistent results whether you’re making classic chocolate chip or experimenting with variations.
This recipe uses a two-stage mixing process—first creaming butter and sugar until light and fluffy, then gently folding in dry ingredients—to create a dough that holds its shape while baking. The key to those crispy edges?
Chilling the dough for at least 30 minutes before baking, which prevents excessive spreading and ensures even browning. A 350°F oven and 10-12 minutes of baking time (depending on size) guarantee cookies that are tender inside with a satisfying crunch.
What sets this recipe apart is its versatility—swap in chocolate chips, nuts, or dried fruit for endless variations, or press dough into shapes for cut-out cookies. The dough’s buttery richness and precise texture make it ideal for holidays, gifts, or weeknight treats.
Once you try this method, you’ll never settle for anything less than restaurant-quality cookies made at home.
For those with dietary needs, substitutions like almond flour or coconut oil work seamlessly, proving this recipe adapts without sacrificing quality. Let’s get baking—your kitchen will smell like perfection in no time.
Ingredients for 101 cookie
Buttery richness meets precise technique—these 10 ingredients create golden, crisp-edged cookies every time.
| Ingredient | Amount | Notes |
|---|---|---|
| Unsalted Butter, Cold and Cubed 🧈 | 1 cup | High-fat content for crisp edges |
| Granulated White Sugar 🍚 | ¾ cup | Fine grain preferred for even texture |
| Packed Light Brown Sugar 🍚 | ¼ cup | Moisture for chewy centers |
| Large Eggs, Room Temperature 🥚 | 2 whole | Richness and binding |
| Pure Vanilla Extract 🌿 | 2 tsp | High-quality, 100% vanilla |
| All-Purpose Flour 🌾 | 2 ½ cups | Sifted for light texture |
| Baking Soda 🧂 | ½ tsp | Freshly opened for potency |
| Diamond Crystal Kosher Salt 🧂 | ½ tsp | Fine grain preferred |
| Semisweet Chocolate Chips 🍫 | 2 cups | High-quality, 60% cacao |
| Granulated Sugar, Extra 🍚 | ¼ cup | For sprinkling on top |
The butter is non-negotiable here—European-style unsalted butter (like Plugrá) has a higher fat content, which directly translates to those coveted crisp edges. Buy it in blocks and refrigerate until firm before cubing—room temperature butter makes for flat cookies. Sugar matters too: fine white sugar dissolves evenly for structure, while packed brown sugar adds moisture and chew. I always measure by weight for precision, but if you’re using volume, spoon and level your brown sugar to avoid packing it down. For the vanilla, Nielsen-Massey is my go-to—it’s consistently potent without artificial aftertaste.
No vanilla extract? Vanilla bean paste works at half the amount, or scrape seeds from a vanilla bean. Chocolate chips can be swapped for white chocolate, nuts, or dried fruit, but adjust quantities—chips should be 25% of the dough weight for proper distribution. For dietary adaptations, almond flour replaces regular flour at a 1:1 ratio (though texture will differ), and coconut oil can substitute butter at a 1:1 ratio when melted and cooled. The baking soda and salt are critical for flavor balance—Diamond Crystal is twice as salty as table salt, so don’t substitute without adjusting. For extra crisp edges, press dough balls into 1/4-inch discs before baking, rather than rolling them.
Chill the dough for at least 30 minutes—this prevents spreading and ensures even browning. Store dough in an airtight container in the fridge for up to 3 days or freeze for 3 months by wrapping portions in plastic. Baked cookies stay fresh for 5 days in an airtight container at room temperature, or freeze for 3 months for maximum freshness. For crispy edges, bake on the middle rack and rotate pans halfway through—this ensures even heat distribution. Underbake slightly (pull at 9 minutes) for cookies that crisp up as they cool.
Why You’ll Love This Recipe
- No-Fuss Mixing: I swear by the cold butter cubes—no waiting for it to soften, no greasy mess. Just toss those cubes with sugars until it’s almost crumbly, then eggs slide right in without overworking the dough. Honestly, my mixer barely gets a workout here.
- Buttery-Sweet Magic: That combo of white and brown sugar? It’s the secret weapon. The white gives crisp edges, while the brown keeps the center chewy—plus, the vanilla ties it all together like a warm hug. (Yes, even on a Tuesday night.)
- Bulk-Friendly Batches: Make a double batch, freeze half, and thank me later. These cookies reheat perfectly in the oven or straight from the freezer—no sad, dry leftovers here. I’ve sent them in lunchboxes, gift bags, and even as last-minute hostess treats.
- Classic for a Reason: This isn’t some trendy recipe—it’s the kind of cookie that works for birthdays, holidays, or just because. The simplicity means it’s budget-friendly too; you’re not chasing fancy ingredients, just good, old-fashioned flavor that never disappoints.
Step-by-step instructions for buttery-dough cookies with crispy edges
Master these precise techniques to achieve the signature crispy edges and tender centers promised.
Cream the Butter and Sugars to Peak Volume
In a stand mixer fitted with the paddle attachment, combine the 1 cup unsalted butter, cold and cubed with the 0.75 cup granulated white sugar and 0.25 cup packed light brown sugar. Beat on medium speed for 3-4 minutes until the mixture is light, fluffy, and nearly doubles in volume. You’ll notice the color lighten to a pale yellow—this indicates proper aeration.
I press down on the butter mixture occasionally with a spatula to ensure even incorporation. The cold butter should leave a slight resistance when pressed, but still crease easily. This step is critical for developing the cookie’s structure and creating those signature crispy edges. If the mixture feels too soft or melts prematurely, chill the bowl in the refrigerator for 5-10 minutes before continuing.
Incorporate Eggs and Vanilla for Richness
Add the 2 whole large eggs, room temperature one at a time, mixing on low speed for 30 seconds after each addition. This gradual incorporation prevents the eggs from breaking and ensures a smooth batter. After the eggs are fully incorporated, add the 2 teaspoons pure vanilla extract and mix for an additional 10 seconds on low speed.
The mixture should look slightly thickened and well-combined. Here’s where it gets technical: the eggs should be at room temperature to blend seamlessly without creating pockets of liquid. If your kitchen runs cold, let the eggs sit in warm water for 5 minutes before using. The vanilla extract should be high-quality—imitation extracts will leave a chemical aftertaste that ruins the delicate balance of flavors in these cookies.
Combine Dry Ingredients for Light Texture
In a separate bowl, whisk together the 2.5 cups all-purpose flour, 0.5 teaspoon baking soda, and 0.5 teaspoon diamond crystal kosher salt. Sift the flour mixture directly into the wet ingredients while the mixer runs on low speed. Mix just until combined—you should still see small flour streaks in the dough. Overmixing develops gluten, which leads to tough cookies instead of the tender texture we’re aiming for.
Remove the bowl from the mixer and fold in the 2 cups semisweet chocolate chips using a silicone spatula. The chocolate chips should be evenly distributed throughout the dough, with no large clumps. For even distribution, I press the dough together gently to break up any chocolate clusters. This step ensures each bite contains that perfect balance of buttery dough and rich chocolate. If you’re using a mix of chocolate types, fold them in separately to maintain their distinct melts during baking.
Chill the Dough for Optimal Texture
Cover the dough bowl tightly with plastic wrap and refrigerate for at least 1 hour, or up to 24 hours for best results. This chilling step is non-negotiable for achieving the crispy edges we’re after. The cold dough prevents excessive spreading in the oven, allowing the cookies to maintain their shape while developing that perfect crust.
During chilling, the butter solidifies further, which creates steam during baking. This steam contributes to the crispy exterior while keeping the centers tender. I like to press the dough into a disk shape before chilling—this makes it easier to portion later. If you’re short on time, the dough can chill in the freezer for 20 minutes, but it won’t develop the same texture as overnight chilling.
Bake to Golden Perfection with Crispy Edges
Preheat your oven to 375°F and line two baking sheets with parchment paper. Using a 2-tablespoon cookie scoop, portion the chilled dough onto the prepared sheets, spacing the cookies 3 inches apart to allow for spreading. Sprinkle each cookie with a pinch of the 0.25 cup granulated sugar, extra for that signature caramelized crust.
Bake for 10-12 minutes until the edges are deep golden brown and the centers still appear slightly underdone. The cookies will continue cooking on the hot baking sheet after removal. Here’s the professional trick: rotate the baking sheets halfway through baking for even heat distribution. The cookies are done when they pull away slightly from the parchment paper at the edges but still have a soft center. For extra crispy edges, bake for 1-2 minutes longer until you see those beautiful caramelized spots.
Pro Tips For Making 101 Cookie
- Cut Butter Precisely: Use a serrated knife—not a dull one—and cut the cold butter into ½-inch cubes before measuring. I learned this the hard way when my dough turned greasy and spread like a pancake; even cubes keep the texture consistent and prevent overmixing when they melt into the dough.
- Measure Brown Sugar Packed: Spoon that light brown sugar directly into your measuring cup, then level it off with the back of a knife—don’t scoop. After packing it too tightly once, I ended up with cookies that were dense as bricks. Loose and packed makes all the difference for that perfect chew.
- Chill Dough Longer: Give your dough a solid 30–45 minutes in the fridge, even if it feels like overkill. I used to rush it, and the cookies would spread into sad, flat pancakes. Cold dough = thicker cookies with better structure—trust the wait.
- Eggs at Room Temp: Crack those eggs into a bowl first, then let them sit for 10 minutes before mixing. Cold eggs add moisture unevenly, and I’ve had dough clump like glue when I skipped this. Room temp = smoother dough every time.
Common mistakes when making perfect results
Overmixing the Dough
I’ve ruined more cookies than I’d like to admit by overmixing the dough after adding the flour. When you mix beyond the point of just combining, you develop gluten, which creates tough, chewy cookies instead of the tender, crisp-edged ones we want.
Stop mixing as soon as you see small flour streaks remaining—this means the dry ingredients are evenly distributed without overworking the dough. 💡
Skipping the Chill
One of the biggest mistakes is skipping the 30-minute (or longer) chill. Without chilling, the butter melts too quickly in the oven, causing excessive spreading and flat cookies. The dough needs time to firm up so it holds its shape.
Pro tip: If you’re in a hurry, pop the dough in the freezer for 20 minutes—it’ll still work, but overnight chilling gives the best results.
Using Warm Butter
Cold butter is your secret weapon for crispy edges, but warm butter is the enemy. If your butter is too soft or melts during mixing, your cookies will spread into sad, flat discs.
Always use cold, cubed butter straight from the fridge. If your kitchen is warm, chill the butter for 15-20 minutes before cubing. Trust me, your cookies will thank you.
Overloading with Mix-Ins
Adding too many chocolate chips or nuts can weigh down the dough and prevent proper browning. Stick to 25% mix-ins by weight relative to the dough. For example, if your dough weighs 16 ounces, use no more than 4 ounces of chocolate chips.
Overloading also causes uneven baking—some cookies will burn while others stay undercooked.
Incorrect Oven Temperature
Baking at the wrong temperature throws off everything. If your oven runs hot, your cookies will burn before the centers set. If it’s too cool, they’ll spread into greasy pancakes.
Always preheat to 375°F and use an oven thermometer to confirm accuracy. I’ve seen ovens off by 25°F or more—don’t assume yours is perfect! 🌡️
Not Rotating Pans
Uneven heat distribution is a silent killer of perfect cookies. If you only bake on the top rack, one side of your pan will cook faster, leading to burnt edges and raw centers.
Rotate your baking sheets halfway through baking to ensure even golden-brown edges all around. This simple step saves more cookies than you’d think!
Nutrition facts
Frequently asked questions
Can I substitute butter with oil for this cookie recipe?
You can use melted coconut oil or vegetable shortening as a 1:1 substitute, but the texture will differ. Butter creates those signature crispy edges through its fat content and moisture release during baking. For best results, stick with cold butter—it’s non-negotiable for the signature texture. If you must substitute, chill the dough for 45 minutes instead of 30 to compensate for the lack of butter’s firmness.
Why do my cookies spread too much?
Over-spreading happens when butter melts too quickly or dough isn’t chilled properly. Always use cold cubed butter and chill dough for at least 30 minutes. Another common cause is room-temperature eggs—use cold eggs and let them warm to room temp naturally. For extra insurance, bake at 350°F instead of 375°F and reduce baking time by 1-2 minutes.
How do I make these cookies gluten-free?
Replace all-purpose flour with a 1:1 gluten-free baking flour blend like Bob’s Red Mill or King Arthur. Add 0.5 teaspoon xanthan gum to the dry ingredients to improve texture. For crispy edges, reduce baking time by 1 minute as gluten-free cookies brown faster. Chill the dough for 1 extra hour to prevent excessive spreading.
Can I bake these cookies without parchment paper?
You can use lightly greased baking sheets, but parchment paper prevents sticking and ensures even browning. If skipping parchment, use a silicone baking mat instead—it provides non-stick benefits without the paper. For extra insurance, dust cookies with 1 tablespoon cornstarch before baking to prevent sticking and create crispier edges.
What’s the best way to store leftover cookies?
Store in an airtight container at room temperature for 5 days to maintain crisp edges. For longer storage, freeze cookies for 3 months350°F oven for 3-5 minutes—they’ll crisp up perfectly while staying soft inside.

- 3 Lb Meatloaf Recipe with Bread Crumbs All: Glazed Crust and Juicy Heart - October 20, 2026
- 32 Ounce Cranberry Sauce Recipe: Homemade Holiday Glaze With No Pits - October 20, 2026
- 2lb Loaf Tin Bread Recipe: No-Knead Artisan Crust in 3 Hours - October 20, 2026