
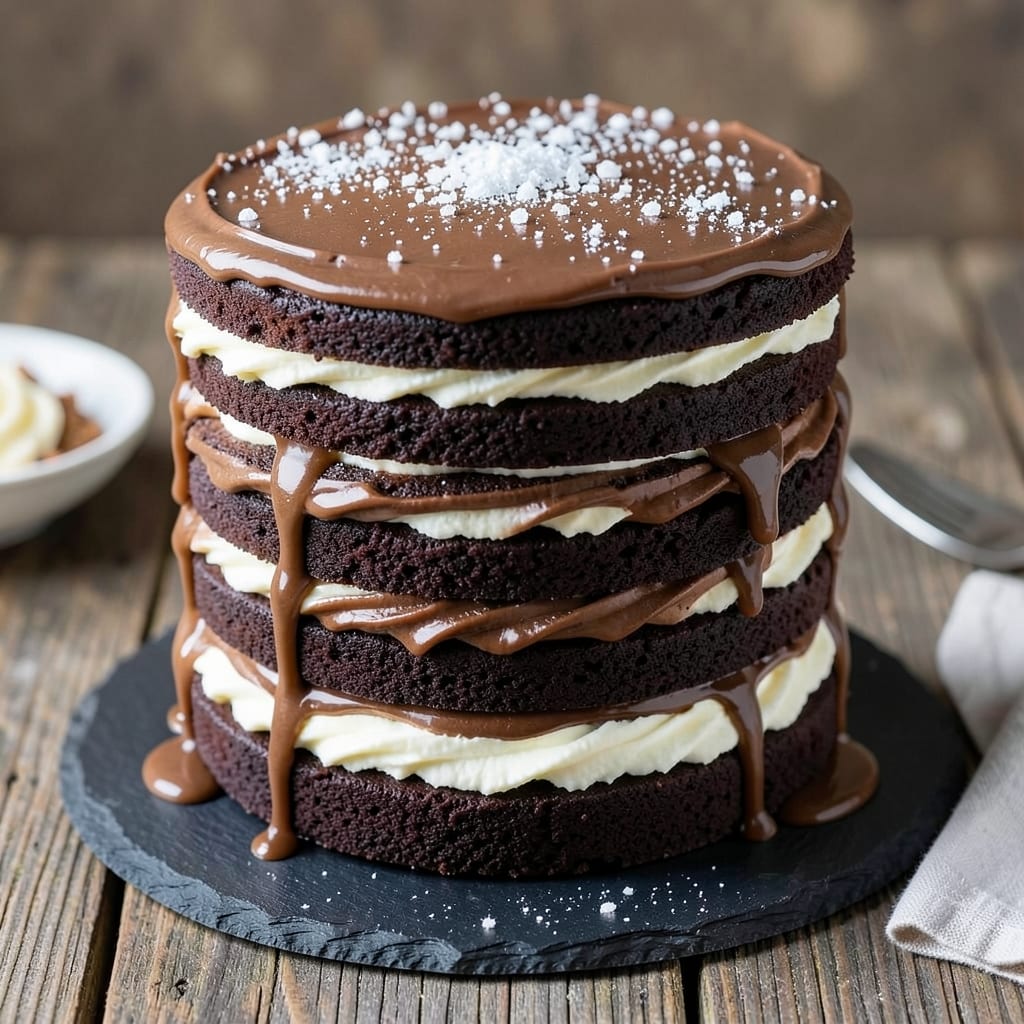
Mastering the 14-layer chocolate cake icing recipe is the secret to achieving decadent swirls and crisp edges with precision and patience. This isn’t just a dessert—it’s a showstopper that demands attention to detail at every step, from baking even layers to achieving that signature glossy finish.
The key lies in balancing rich chocolate flavor with a smooth, stable icing that holds its shape while delivering melt-in-your-mouth texture.
What sets this recipe apart is the foolproof layering method, where each cake layer is baked to perfection and cooled completely before assembly. The icing, a velvety ganache-based formula, is designed to spread smoothly while maintaining structure—no messy drips or collapsed layers.
Tools like a 9-inch round pan, offset spatula, and wire rack become your allies in achieving restaurant-quality results at home.
By the time you’re done, you’ll have a towering masterpiece with crisp edges, tender crumb, and swirls of glossy chocolate icing that glisten under the light. The secret? Temperature control—baking layers at the right heat, cooling them gradually, and applying icing at room temperature.
This isn’t just cake; it’s a centerpiece that will have everyone asking for seconds.
The process might seem daunting, but breaking it into manageable steps—baking, cooling, assembling, and decorating—makes it achievable. Whether you’re a seasoned baker or tackling this for a special occasion, the result is worth every layer. Let’s get started on creating your showstopping chocolate cake.
Ingredients for 14 layer chocolate cake icing
Here’s the secret to restaurant-quality chocolate icing—smooth, stable, and perfect for 14 layers.
| Ingredient | Amount | Notes |
|---|---|---|
| Dark Chocolate Bars 🍫 | 12 oz | 70% cocoa, high-quality preferred |
| Heavy Whipping Cream 🥛 | 2 cups | Full-fat for best stability |
| Unsalted Butter 🧈 | 1 ½ cups | Room temperature, European-style preferred |
| Powdered Sugar 🍚 | 2 cups | Confectioners' sugar, sifted |
| Vanilla Extract 🌿 | 1 tbsp | Pure Madagascar bourbon preferred |
| Salt 🧂 | ¼ tsp | Fine sea salt for balance |
| Corn Syrup 🍯 | ½ cup | Light corn syrup for stability |
| Almond Extract 🌰 | ¼ tsp | For subtle depth of flavor |
| Chocolate Cake Layers 🍰 | 14 whole | 9-inch rounds, baked to 215°F |
| White Chocolate Chips 🍫 | ½ cup | For decorative swirls (optional) |
| Orange Zest 🍊 | 1 tsp | Fresh, for citrus brightness |
| Coffee Liqueur ☕ | 1 tbsp | Kahlúa or equivalent (optional) |
The chocolate matters most here. Valrhona or Lindt 70% bars melt beautifully, but any high-quality dark chocolate works—just avoid anything with waxy coatings. Costco or Williams Sonoma are great for bulk purchases, and look for bars that snap cleanly when broken. The butter should be European-style (like Plugrá) for better flavor and creaminess. Room temperature is key—soft but not melted. If your kitchen’s cold, let it sit out for 30 minutes before using. For the cake layers, bake to 215°F internal temp—this ensures even cooling and prevents soggy bottoms. Cool completely before assembling, or the icing will melt too fast.
No heavy cream? Full-fat coconut cream works in a pinch, though texture won’t be identical. Swap powdered sugar for confectioners’ sugar with 1 tsp cornstarch if you’re worried about clumping. The corn syrup is non-negotiable—it’s what gives the icing that signature gloss and stability. Karo or Domino are reliable brands. For the optional white chocolate swirls, use Ghirardelli chips or melt a bar yourself—pre-shredded often has anti-caking agents that ruin texture. The orange zest can be skipped if you dislike citrus, but it adds a lovely brightness. Coffee liqueur is purely for depth—omit if you prefer a purer chocolate flavor.
Icing keeps best in the fridge for 5 days, sealed tightly between parchment layers. For longer storage, freeze fully assembled cakes (without icing) for 3 months2 days ahead and reheated gently. Pro tip: Use a kitchen scale for chocolate and butter—precision here prevents graininess. And if your icing gets too thick, add 1 tsp warm water at a time until it reaches a smooth, pourable consistency. Trust me, the patience in cooling layers pays off with crisp edges that hold their shape.
Why You’ll Love This Recipe
- No Melt-Downs Here: I’ve melted chocolate bars into this icing so many times, it’s basically muscle memory now. Just chop, heat, stir—no fancy techniques, no stressing over tempering. The butter and cream blend in like old friends, and before you know it, you’ve got that luscious, glossy finish.
- Rich Without the Guilt: Honestly, this icing is dangerously good—deep, fudgy chocolate from those bars, but lightened just enough by the whipped cream to stay velvety. The vanilla extract? Tiny but mighty—it’s the secret that makes it taste homemade, not store-bought. One layer leads to another, and suddenly you’re staring at a cake so pretty, you’ll want to eat it with a spoon.
- Party in a Jar: Between us, this icing is my go-to for birthdays, holidays, or just because. Slather it between cake layers, drizzle it over cupcakes, or even spread it on toast for a grown-up dessert breakfast. (Yes, even on a Tuesday night.) It keeps well in the fridge, so you’re not scrambling last-minute—just assemble when you’re ready.
- Pantry Magic: Here’s what sold me—the ingredients I already had. Dark chocolate bars? Check. Butter and cream? Always on hand. Powdered sugar? The same stuff I dust my cookies with. No specialty items, no breaking the bank. And leftovers? They’re not just edible—they’re begged for. Freeze extras for next month’s cake emergency.
Step-by-step instructions for 14 layer chocolate cake icing
Here’s how to create silky, swirled icing that binds 14 cake layers into a showstopper masterpiece.
Melt Chocolate and Infuse with Coffee Liqueur
Start by finely chopping the 12 oz dark chocolate bars into small, even pieces. Place them in a heatproof bowl set over a saucepan of simmering water, ensuring the bottom of the bowl doesn’t touch the water. Stir occasionally until the chocolate melts completely—it should reach a smooth, glossy consistency with a temperature of 110°F.
Remove the bowl from heat and stir in the 1 tbsp coffee liqueur and 1 tsp orange zest. This infusion adds depth and brightness to the icing. Let the mixture cool slightly to 90°F before proceeding—this ensures the chocolate stays stable when combined with other ingredients. If you notice any graininess, strain through a fine-mesh sieve for a perfectly smooth texture.
Whip Cream and Butter to Peak Stiffness
In a separate, chilled mixing bowl, combine the 2 cups heavy whipping cream and 1.5 cups unsalted butter (both should be cold but not frozen). Using a stand mixer fitted with the whisk attachment, beat on high speed for 3-4 minutes until the mixture forms soft peaks. Scrape down the sides of the bowl occasionally to ensure even whipping.
Add the 2 cups powdered sugar, 1 tbsp vanilla extract, 0.25 tsp salt, 0.5 cup corn syrup, and 0.25 tsp almond extract to the cream mixture. Continue whipping on high speed for an additional 2-3 minutes until the mixture reaches stiff peaks—when the whisk leaves a distinct trail in the mixture and the peaks hold their shape when lifted. This step is critical for achieving the perfect consistency that holds the layers together without being too heavy.
Combine Chocolate and Cream Mixtures
With the mixer running on low speed, gradually pour the melted chocolate mixture into the whipped cream. This slow incorporation prevents the cream from deflating. Increase the speed to medium and mix for 1-2 minutes until the chocolate is fully incorporated and the icing achieves a smooth, velvety texture. The icing should be thick enough to hold its shape but still pipeable—if it’s too stiff, add 1-2 teaspoons of heavy cream to loosen it slightly.
Fold in the 0.5 cup white chocolate chips by hand using a spatula, reserving a small amount for decorative swirls later. Taste and adjust the sweetness or saltiness if needed—this is your chance to fine-tune the flavor balance before assembly. The icing should be rich, slightly tangy from the dark chocolate, and brightened by the citrus and coffee notes.
Assemble the 14-Layer Cake
Begin by placing the first chocolate cake layer on a cake stand or plate. Use a serrated knife to trim any uneven edges, ensuring all layers are perfectly level. Spread a thin, even layer of icing—about ¼ inch thick—over the top of the cake. This “crumb coat” prevents crumbs from mixing into the final icing layer and creating a messy texture.
Place the second layer on top and repeat the process, building the cake layer by layer. After placing the 7th layer, chill the cake in the refrigerator for 15 minutes to help the icing set slightly. This prevents the cake from sliding or collapsing during assembly. Once chilled, continue layering the remaining 7 layers, spreading a slightly thicker layer of icing—about ½ inch—between each one. Make sure to leave a small amount of icing reserved for the final decorating step.
Decorate and Finish
Once all layers are assembled, transfer the cake to a wire rack and let it rest at room temperature for 30 minutes. This allows the icing to firm up slightly, making it easier to work with. Using a piping bag fitted with a star tip, pipe decorative swirls of the reserved icing around the edges of the cake. Gently press the remaining white chocolate chips into the sides for a beautiful, textured finish.
For an extra touch of elegance, dust the top of the cake with a light layer of powdered sugar using a fine-mesh sieve. Let the cake set for at least 2 hours before slicing—this ensures clean, crisp edges and prevents the icing from smearing. Serve with a dollop of whipped cream or a scoop of vanilla ice cream to complement the rich chocolate flavors.
Pro Tips For Making 14 Layer Chocolate Cake Icing
- Temper Chocolate Properly: Chop the dark chocolate into tiny, even pieces—think rice-sized—and melt it with the heavy cream over a double boiler. If you rush this in the microwave, you’ll end up with streaky, grainy icing that ruins the whole layered effect. I learned this the hard way when my first batch looked like it had sand in it.
- Whip Cream to Stiff Peaks: Don’t stop whipping the cream until you can hold the bowl upside down and nothing drips—this is non-negotiable for clean layers. Under-whipped cream collapses between layers, and over-whipped buttercream gets dry. Use a chilled bowl and beaters if your kitchen runs hot.
- Sift Powdered Sugar: Sift that powdered sugar through a fine-mesh sieve before mixing—clumps in your buttercream will show up as lumps in every layer. I used to skip this, and my icing always felt gritty no matter how much I stirred. Takes 30 seconds but makes a real difference.
- Chill Between Layers: Pop the cake in the fridge for 10–15 minutes after every 4–5 layers. This prevents the bottom layers from getting soggy while you work. I was skeptical until I tried it—now I swear by it, especially in warm kitchens. Patience here saves cleanup later.
Common mistakes when making this recipe
Uneven Layer Cooling
Rushing the cooling process is the #1 way to ruin crisp edges. I’ve seen cakes collapse or develop a gummy texture when layers cool too quickly. Always let each layer cool completely on a wire rack before stacking—this prevents moisture buildup that weakens the icing’s structure.
If you’re impatient, pop layers in the fridge for 10 minutes between icing applications, but never skip the full cooling step. 💡
Incorrect Icing Temperature
Using icing that’s too warm causes it to melt into the cake layers, creating soggy spots. The ideal working temperature is 70-75°F—room temp but not warm. If your kitchen is hot, chill the icing in the fridge for 15-20 minutes before applying.
Pro tip: Use a candy thermometer to monitor chocolate temp during melting—110°F is perfect for stability. 🌡️
Skipping the Crumb Coat
This thin first layer of icing (about ¼ inch thick) is non-negotiable—it’s what prevents crumbs from mixing into your final decorative layer. I’ve seen beautiful cakes turn into crumbly messes because someone skipped this step.
Use an offset spatula to spread it evenly, then chill the cake for 15 minutes before adding the final icing layer. 🍰
Overmixing the Icing
Beating the whipped cream mixture too long incorporates air that deflates when combined with chocolate, leading to a dense, heavy icing. Stop mixing as soon as you see stiff peaks—when the whisk leaves a clear trail.
Overmixing also risks grainy texture from melted butter separating. For extra insurance, strain the final icing through a fine-mesh sieve. 🔥
Uneven Icing Distribution
Inconsistent icing thickness causes wobbly layers and messy edges. Use a bench scraper to create perfectly even lines when spreading between layers. Press gently but firmly to avoid trapping air bubbles.
For the final decorative layer, work in sections—start at the center and spiral outward to maintain control. Uneven pressure leads to that dreaded “sagging middle” look. ✨
Ignoring Humidity Factors
High humidity or cold weather can make icing too soft to hold its shape. If your kitchen feels damp, add 1 extra tablespoon of powdered sugar to stiffen the icing slightly.
For cold-weather baking, let all ingredients (especially chocolate and butter) sit at room temperature for 30 minutes before starting. I’ve had cakes fail in winter kitchens—don’t let this be you! ❄️
Nutrition facts
Frequently asked questions
How do I prevent my 14-layer cake from collapsing?
Chill the cake in the fridge for 15 minutes after the 7th layer, then again for 30 minutes after full assembly. This helps the icing set gradually. Also, use a bench scraper for even icing distribution and avoid overmixing the whipped cream base to maintain structure.
Can I make the icing ahead of time?
Yes! Prepare the ganache base 2 days ahead and store it in the fridge. Reheat gently in a double boiler until smooth (110°F), then whip the cream mixture fresh. Keep the cake layers refrigerated separately until assembly day.
What’s the best way to level my cake layers?
Use a serrated knife and a level surface (like a cake board). Place a ruler on top of each cooled layer and trim carefully. Rotate the cake 90 degrees between cuts for perfectly even edges. A cake leveler tool makes this even easier for tall stacks.
How do I fix if my icing gets too thick?
Add 1 teaspoon of heavy cream at a time while mixing on low speed. For extra insurance, warm the icing slightly (up to 75°F) to restore smoothness. Never add water—it can cause the icing to seize or separate.
Can I substitute buttercream for this ganache icing?
While possible, ganache provides superior stability for 14 layers. If substituting, use a Swiss meringue buttercream (whipped egg whites + sugar) as it’s less prone to melting. Add 1/4 cup corn syrup to improve stability, but expect slightly less gloss.
