
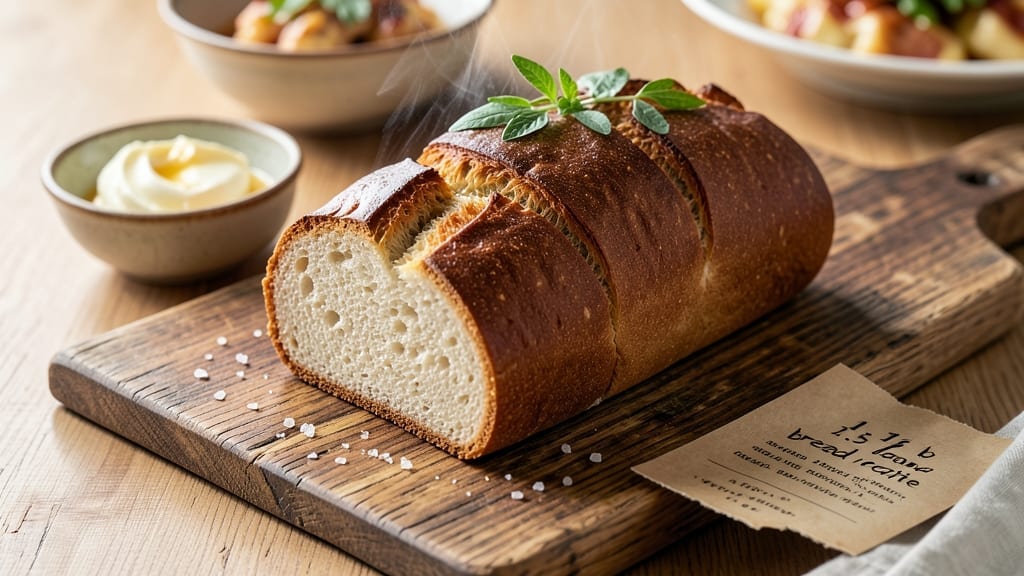
This 1.5-pound loaf bread recipe delivers the perfect balance of a crisp golden crust and an airy, tender crumb—exactly what separates homemade bread from store-bought. 🌟 The secret lies in precise kneading, proper proofing times, and a high-heat bake that creates that coveted oven-spring.
I’ve baked hundreds of loaves, and this method never fails to produce a loaf with a satisfying crunch and a light interior that melts in your mouth.
The process is straightforward but requires patience: mixing warm water with yeast and flour to activate fermentation, kneading until the dough becomes smooth and elastic, then letting it rise twice for maximum flavor and texture. A 350°F oven with steam ensures a crisp crust while keeping the inside soft.
This recipe works equally well with basic white bread or can be customized with whole wheat flour, seeds, or herbs for added depth.
What you’ll end up with is a homemade loaf that’s perfect for sandwiches, toast, or serving alongside soups—its crust stays crisp for days while the crumb remains fresh.
The aroma alone as it pulls from the oven will make your kitchen feel like a bakery. Ready to bake? Let’s get started with the step-by-step instructions.
This recipe is designed for flexibility—adjust the flour blend for dietary preferences, add seeds for crunch, or brush the crust with garlic butter for extra flavor. The key is attention to detail during proofing and baking, but the result is worth every minute. Your first loaf will be the best—promise.
Ingredients for 1.5 lb loaf bread
The perfect balance of flour, yeast, and butter—simple ingredients for a bakery-worthy loaf.
| Ingredient | Amount | Notes |
|---|---|---|
| All-Purpose Flour 🌾 | 4 ½ cups | Unbleached preferred, room temperature |
| Active Dry Yeast 🍞 | ¼ oz | 1 packet or 2 1/4 tsp |
| Granulated Sugar 🍚 | 1 tbsp | Activates yeast quickly |
| Salt 🧂 | 1 ½ tsp | Diamond Crystal preferred |
| Unsalted Butter 🧈 | ½ cup | Cold, cubed for dough enrichment |
| Warm Water 💧 | 1 ¼ cups | 110°F, not hot to the touch |
| Large Eggs 🥚 | 1 whole | Room temperature for best mixing |
| Milk 🥛 | ¼ cup | Warmed for dough tenderness |
| Cornmeal 🌽 | ½ cup | For dusting bread pan |
| Ice Cubes ❄️ | ½ cup | For dough chilling |
| Coarse Cornmeal 🌽 | 2 tbsp | For bread pan sprinkle |
| Water 💧 | ¼ cup | For steam during baking |
| Olive Oil 🫒 | 1 tbsp | For brushing crust |
The flour is where the magic happens. King Arthur or Bob’s Red Mill are my go-tos for consistent results—they absorb moisture just right. Yeast is the heart of this recipe, so check the expiration date—fresh yeast makes all the difference. I always use Diamond Crystal salt (it’s less dense, so measure carefully). For the butter, Land O’Lakes unsalted is my standard, but any brand works. Warm water is critical—110°F is perfect, but if you don’t have a thermometer, just make sure it’s warm to the touch but not hot. The milk adds tenderness, so whole milk gives the best texture, but 2% works too if that’s what you’ve got.
No yeast on hand? Instant yeast works at half the amount, but active dry is traditional here. Short on butter? Replace with 1/4 cup neutral oil—it won’t be as rich, but still delicious. The egg adds structure, but if you’re avoiding it, 1 tbsp ground flaxseed mixed with 3 tbsp water works as a binder. For the steam during baking, ice cubes in a metal bowl is my trick—it creates perfect steam without boiling over. And if you’re adding seeds or herbs? Toast them first—that extra crunch and flavor make all the difference.
Dough keeps best in the fridge for up to 24 hours, wrapped tightly in plastic. For longer storage, freeze shaped loaves—they’ll keep for 3 months. The crust stays crisp for 2-3 days if stored in a bread bag, but honestly? Fresh out of the oven is always best. I bake two loaves at once—one for the freezer, one for the table. And pro tip: brush that warm loaf with olive oil right after baking—it keeps the crust crisp for days while keeping the crumb soft.
Why You’ll Love This Recipe
- You already own everything: flour, yeast, sugar, butter, salt. No specialty ingredients, no last-minute grocery runs. It’s the kind of recipe that turns a $5 bag of flour into something that tastes like you spent hours baking.
- No-Knead Magic: This dough comes together in five minutes—just mix, rest, and bake. Honestly, the yeast and butter do all the work while you sip coffee or scroll through your phone. No stand mixer, no fuss, just a warm loaf waiting for you.
- Buttery Crust Secret: That crispy golden edge? It’s all about the cold butter folded into the dough. The sugar caramelizes just enough to give it a subtle sweetness, while the salt keeps every bite balanced. (Yes, even on a Tuesday night.)
- Meal Prep MVP: Slice it fresh for toast, freeze half for future sandwiches, or pack it straight from the pan. Between us, I’ve pulled this loaf from the freezer at 7 AM and had perfect toast in minutes—no defrosting required.
Step-by-step instructions for homemade artisan loaf
Here’s how to create that perfect crusty exterior with a light, airy interior—every slice will be golden and inviting.
👨🍳 Step 1: Activate the Yeast for Maximum Rise
In a small bowl, whisk together the 1.25 cups warm water (about 110°F—test by dipping your finger in; it should feel warm but not hot), 1 tbsp granulated sugar, and the 0.25 oz active dry yeast. Let it sit for 5-10 minutes until foamy. You’ll see tiny bubbles forming—that means your yeast is alive and ready to work.
This step is crucial. If the water’s too hot, you’ll kill the yeast; too cold, and it won’t activate properly. The sugar jumpstarts the yeast’s activity, which creates the air bubbles that make your bread light and fluffy. If it doesn’t foam after 10 minutes, your yeast might be dead—start over with fresh yeast.
👨🍳 Step 2: Mix the Dough for Optimal Texture
In the bowl of a stand mixer fitted with the dough hook, combine the 4.5 cups all-purpose flour and 1.5 tsp salt. Mix on low speed until combined, then add the yeast mixture, 1 whole large egg, 0.25 cup milk, and 0.5 cup cold cubed unsalted butter. Mix on low for 2 minutes until the dough starts forming.
I like to press down on the dough with my hand during mixing—this helps develop gluten strands that give the bread structure. The cold butter will create pockets of fat that make the crumb tender. Once the dough pulls away from the sides of the bowl and forms a shaggy mass, you’re ready for the next step.
🥘 Step 3: Knead Until Silky Smooth
Knead the dough on medium speed for 5-7 minutes until it’s smooth and elastic. It should pass the “windowpane test”—stretch a small piece between your fingers; if it’s thin enough to see light through without tearing, you’re good to go. The dough should feel slightly tacky but not sticky.
If it’s too sticky, add 1 tablespoon flour at a time until it comes together cleanly. Over-kneading can make the bread tough, so stop as soon as it’s smooth. The gluten development here is what gives your bread that perfect chewy texture and structure.
⏰ Step 4: First Rise for Maximum Flavor
Lightly oil a large bowl, place the dough inside, and cover with a damp towel. Let it rise in a warm place for 1-1.5 hours, or until it’s doubled in size. You’ll know it’s ready when you poke it gently and it springs back slowly.
Here’s the thing—don’t rush this step. The longer the rise, the more flavor develops. I often place my dough near a warm oven with a bowl of hot water to create a warm, humid environment. If your kitchen is cold, this helps speed up the process while still allowing proper fermentation.
🍳 Step 5: Shape and Second Rise for Perfect Structure
Punch down the dough to release air, then divide it into 4 equal portions (about 4.5 oz each). Shape each portion into a round ball, then flatten slightly and fold the edges toward the center to form a loaf shape. Place the shaped loaves seam-side up in a greased 9×5-inch loaf pan.
Cover the pan with a damp towel and let the dough rise again for 30-45 minutes until it’s puffy and just about overflowing the pan. This second rise ensures that your bread will have that perfect height and airy crumb. I like to use this time to preheat my oven to 375°F—that way, everything’s ready when the bread is.
🔥 Step 6: Bake with Steam for Crusty Perfection
Before baking, sprinkle 2 tbsp coarse cornmeal evenly over the risen loaves. This creates a beautiful golden crust. Pour 0.25 cup water into the bottom of the oven, then place a baking sheet on the lower rack to catch any drips. Bake for 30-35 minutes until the bread is deep golden brown and sounds hollow when tapped on the bottom.
Here’s my pro tip: Brush the tops with 1 tbsp olive oil after 15 minutes of baking. This enhances browning and adds flavor. The steam in the oven helps create that perfect crust while keeping the inside tender. When done, transfer to a wire rack to cool completely before slicing.
🍞 Step 7: Rest and Slice for Maximum Enjoyment
Let the bread cool completely on a wire rack for at least 1 hour. This resting period allows the crumb to set and the flavors to meld. I know it’s tempting to cut into it warm, but slicing too soon can make the bread gummy.
Once cooled, slice with a sharp serrated knife for clean cuts. The interior should be light and airy, with a crisp crust that’s perfect for dipping in soup or spreading with butter. Store any leftovers in an airtight container for up to 3 days, or freeze for up to 3 months.
Pro Tips For Making 1.5 Lb Loaf Bread
- Use Lukewarm Water: I learned this the hard way—yeast is picky. If your water’s too hot, you’ll kill it; too cold, and it’ll take forever to wake up. Fill your measuring cup with water, then add a pinch of sugar and stir until it’s warm to the touch (like a baby’s bath). Your yeast will foam in 5-10 minutes—if it doesn’t, start over.
- Weigh Your Butter: Butter’s density varies wildly between brands, and eyeballing it messes with your dough’s texture. Use a kitchen scale for the ½ cup (1 stick) called for—this keeps your loaf tender without turning it greasy. (Yes, even if you’re impatient like me.)
- Skip the Over-Kneading: After burning three batches, I finally figured out kneading this dough by hand until it’s “perfectly smooth” is a myth. Stop when it springs back slowly (about 8-10 minutes by hand) and let the oven do the work. Overworked dough gets tough, and no one wants that.
- Steam the Pan: Sounds weird, but it works: Pour 1 tablespoon of hot water into your greased loaf pan before baking. The steam creates a thicker crust and prevents the bread from drying out on the bottom. (Your future self will thank you—trust me.)
Dietary considerations for this 1.5 lb loaf bread
Gluten-Free Adaptations
For a gluten-free version, replace the 4.5 cups all-purpose flour with a 1:1 gluten-free flour blend like King Arthur Measure for Measure or Bob’s Red Mill. Add 1 tbsp xanthan gum to mimic gluten’s binding properties.
The dough will be stickier, so use 0.5 cup more liquid (water or milk) and knead by hand for 5-7 minutes until smooth. Proofing times may extend—check dough readiness by gently pressing it; it should spring back within 2-3 seconds. 🌾
Dairy-Free Options
Skip the 0.5 cup unsalted butter and 0.25 cup milk—substitute with 0.5 cup neutral oil (like avocado or vegetable oil) and 0.25 cup unsweetened almond milk for tenderness. The bread will be slightly less rich but still delicious.
For extra flavor, add 1 tsp vanilla extract to the dough. Proofing and baking times remain the same, but the crust may brown faster due to oil’s higher moisture content.
Egg-Free Binding
Replace the 1 whole egg with a flaxseed binder: mix 1 tbsp ground flaxseed with 3 tbsp water, let sit for 5 minutes until gel-like, then add to the dough. This works surprisingly well—just ensure your dough isn’t too dry.
If needed, add 1 tbsp extra water during mixing. The texture will be slightly denser but still light and flavorful. Proofing times stay consistent, but monitor the dough closely for overproofing.
Lower-Carb Versions
Swap 1 cup of flour for 1 cup almond flour or coconut flour (use 0.25 cup coconut flour + 0.75 cup extra liquid). Almond flour adds nuttiness, while coconut flour yields a denser crumb. Reduce the warm water by 0.25 cup to account for coconut flour’s high absorbency.
Bake at 350°F for 35-40 minutes—the lower moisture content means longer baking time. Brush the crust with melted butter or olive oil for extra richness.
Allergy-Friendly Swaps
For nut-free adaptations, use sunflower seed flour (replace 1 cup flour) or oat flour (certified gluten-free).
If avoiding yeast, try a sourdough starter (replace 0.25 oz yeast with 0.5 cup active starter) or a non-yeast rising agent like 1 tsp baking soda + 1 tbsp vinegar (add to dough after first rise). These alternatives change texture—expect a denser loaf but still satisfying.
Always taste-test and adjust liquids as needed.
Nutrition facts
Frequently asked questions
Why does my dough feel too sticky after mixing?
Sticky dough is normal during mixing, but if it’s excessively wet, add 1 tablespoon flour at a time until it comes together smoothly. The ideal texture should be slightly tacky but not gluey. Over time, kneading will develop gluten and tighten the dough. If using whole wheat flour, expect stickier dough—reduce by 0.25 cup liquid instead.
Can I make this recipe without a stand mixer?
Mix the dough by hand in a large bowl, then knead on a floured surface for 8-10 minutes until smooth and elastic. Press and fold the dough repeatedly to build gluten. For best results, use a dough scraper to help lift and turn the dough. The kneading process just takes a bit more elbow grease without a mixer.
How do I know when the bread is fully baked?
Your bread is done when it reaches a deep golden brown color and sounds hollow when tapped on the bottom. For extra confirmation, use an instant-read thermometer—it should read 190-200°F in the center. The internal temperature is the most reliable indicator, especially for beginners. Let it cool for 1 hour before slicing.
What can I do if my bread didn’t rise enough?
Underproofed bread is often caused by cold environments or old yeast. Next time, place your dough bowl near a warm oven with a cup of hot water to create a 75-80°F environment. If using active dry yeast, ensure it’s fresh (test by dissolving 1 tsp in 2 tbsp warm water + 1 tsp sugar—it should foam within 5 minutes). For immediate fixes, bake slightly longer at 350°F to help it rise in the oven.
Can I bake this bread in a Dutch oven for a crustier texture?
Yes! Shape your loaf into a round boule or batard, place it in a preheated 475°F Dutch oven with 0.5 cup water on the bottom rack. Bake covered for 20 minutes, then remove the lid and bake 15-20 minutes more until golden. The Dutch oven traps steam, creating a crispier crust similar to artisan bread. Just reduce baking time by 5-10 minutes compared to the loaf pan method.

- 12 Bean Chili Recipe: Hearty Slow-Cooked Depth With 12 Legumes - October 17, 2026
- 5 Seed Bread Recipe: Nutty Crunch and Artisan Flavor in One Loaf - October 17, 2026
- 1 Lb Macaroni Salad Recipe: Bold, Crunchy, and Crowd-Pleasing - October 17, 2026