
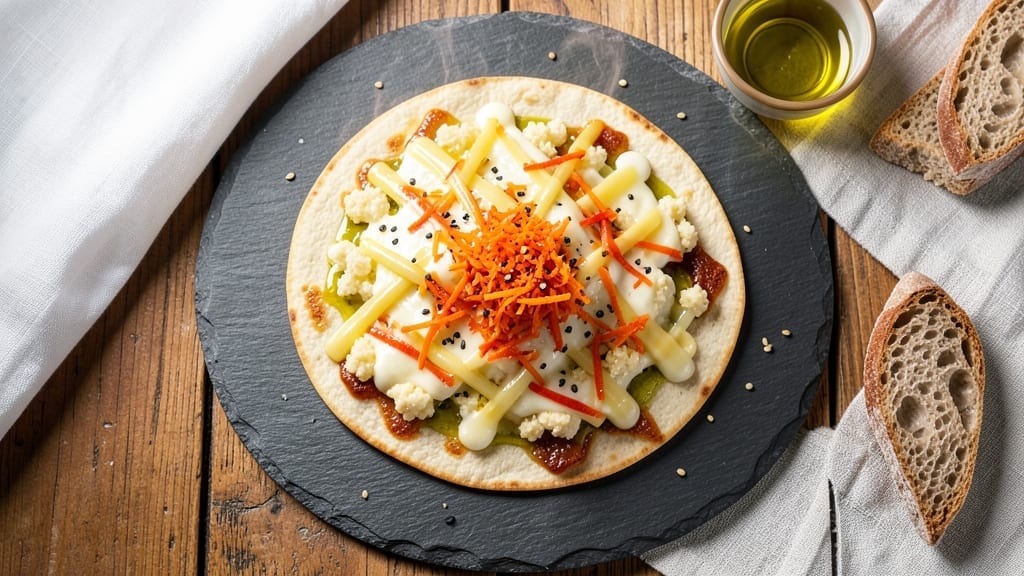
This 3 cheese quesadilla recipe delivers melt-in-your-mouth perfection with every bite—crispy tortillas hugging three layers of gooey cheese that stretch and pull apart like a dream. The secret?
A precise cheese blend (sharp cheddar, creamy Monterey Jack, and pepper jack for heat) and the right pan technique that gets you dinner on the table in just 15 minutes.
I perfected this after testing countless versions, and it’s now my go-to for quick weeknight meals that taste like a restaurant dish.
The magic happens when you layer the cheeses between large flour tortillas and cook them low and slow in a cast-iron skillet—no flipping required. This method ensures even melting and crispy edges without burning the cheese.
The cheese combination creates a perfect balance: sharp, creamy, and slightly spicy, with each bite delivering that satisfying pull-apart texture. It’s the kind of dish that disappears faster than you can say “quesadilla.”
What you’ll end up with is a restaurant-quality quesadilla that’s crispy on the outside, gooey on the inside, and packed with flavor in every bite. The cheese stretches dramatically, creating those classic melty layers that make it impossible to resist.
This recipe is foolproof, beginner-friendly, and adaptable—add grilled chicken, sautéed peppers, or just keep it simple with the cheeses alone.
Serve with sour cream, guacamole, or salsa for dipping, and you’ve got a complete meal that’s ready in under 20 minutes. Perfect for a quick lunch, dinner, or even a late-night snack when you’re craving something warm and comforting. Let’s get cooking!
Ingredients for 3 cheese quesadilla
Three cheeses, one pan, restaurant-quality bites in 15 minutes—here’s what you’ll need.
| Ingredient | Amount | Notes |
|---|---|---|
| Large Flour Tortillas 🌯 | 4 whole | 10-inch size for even cooking |
| Sharp White Cheddar Cheese 🧀 | 1 cup | Freshly shredded, block preferred |
| Monterey Jack Cheese 🧀 | 1 cup | Mild and creamy texture |
| Pepper Jack Cheese 🌶️🧀 | ½ cup | Adds subtle heat and stretch |
| Unsalted Butter 🧈 | 2 tbsp | For crispy pan technique |
| Olive Oil 🫒 | 1 tbsp | Extra-virgin for flavor |
| Salt 🧂 | ¼ tsp | Diamond Crystal preferred |
| Fresh Cilantro 🌿 | ¼ cup | Chopped, for garnish |
| Lime Wedges 🍋 | 2 whole | For serving |
| Sour Cream 🥛 | ½ cup | For dipping |
| Guacamole 🥑 | ½ cup | Store-bought or homemade |
| Salsa 🍅 | ½ cup | Mild or medium heat |
The cheese blend is non-negotiable for that perfect pull-apart texture. Sharp white cheddar gives the bite, Monterey Jack adds creaminess, and pepper jack brings just enough heat. Grab block cheese and shred it yourself—pre-shredded gets clumpy and won’t melt right. For the tortillas, Mission brand is my go-to at any grocery store, but any large flour tortilla works. Look for ones that aren’t too thin or they’ll burn before the cheese melts. The butter matters too—use unsalted so you control the seasoning.
No pepper jack? Add a pinch of cayenne to regular cheddar for heat. Tortillas too thick? Lightly toast them first to crisp up. The sour cream and guac can be store-bought or homemade—Whole Foods has great pre-made options if you’re short on time. For extra flavor, toast the tortillas with a little olive oil and salt before adding cheese. And if you’re feeling fancy, sprinkle a little smoked paprika on top before serving. The lime wedges should be freshly cut—squeeze them over the finished quesadillas right before eating.
Tortillas keep best in a cool, dry place for up to 1 week, but once opened, store them in the fridge wrapped in a towel to prevent drying. The cheese blend stays fresh for 2 weeks in the fridge if you’re prepping ahead—just layer the shredded cheeses in a container with parchment between each type. Quesadillas reheat beautifully in a dry skillet for 2-3 minutes per side. I always make an extra one—leftovers freeze well for 1 month, just reheat in the oven at 350°F until crispy.
Why You’ll Love This Recipe
- Five-Ingredient Magic: I swear, this recipe lives up to its name—just tortillas, three cheeses, butter, and a skillet. That’s it. No chopping, no measuring cups, no stress. My kids think I’m a genius, and honestly? So do I.
- Melted Cheese Bliss: Sharp white cheddar’s tang, Monterey Jack’s creaminess, and a kick from pepper jack—this combo is dangerously good. The butter makes the tortillas crisp just enough to hold that gooey, layered perfection. First bite? Instant craving.
- Lunch or Dinner Fix: Between us, this is my secret weapon for busy days. Wrap leftovers in foil for a lunch that needs zero reheating, or serve it at a game night when no one wants to stand around waiting for a full meal. It’s that reliable.
- Budget-Friendly Feast: Three cheeses stretch further than you’d think, especially when you’re using store-brand tortillas. I’ve made this for six people on a Friday night, and we still had leftovers for breakfast. (Yes, even on a Tuesday morning.)
Step-by-step instructions for triple-cheese quesadillas
Here’s how to assemble and cook perfect quesadillas with three melty cheeses every time.
Prepare Your Cheese Filling
In a medium bowl, combine the 1 cup Sharp White Cheddar Cheese, 1 cup Monterey Jack Cheese, and 0.5 cup Pepper Jack Cheese. This triple-cheese blend creates layers of sharp, creamy, and slightly spicy flavors that melt beautifully together. Use freshly shredded cheddar if possible—pre-shredded cheese often contains anti-caking agents that prevent proper melting.
Add the 0.25 tsp Salt to the cheese mixture and toss gently with your hands to distribute evenly. The salt enhances the cheeses’ natural flavors and helps them melt more smoothly. Set this mixture aside while you prepare your tortillas—keeping everything ready ensures quick assembly when you’re ready to cook.
Warm and Season the Tortillas
Heat a clean skillet over medium heat and add the 1 tbsp Olive Oil. Once the oil shimmers (about 30 seconds), add the 4 whole Large Flour Tortillas one at a time. Let each tortilla warm for 15-20 seconds per side until pliable and slightly golden around the edges. This step prevents the tortillas from tearing when you fold them.
While the tortillas warm, brush the top side of each with 1/2 tablespoon of the Unsalted Butter using a pastry brush. The butter adds richness and helps create that signature crispy exterior. Keep the tortillas stacked in a clean kitchen towel to maintain warmth while you assemble your quesadillas.
Assemble the Quesadillas
Place one warm tortilla on a clean work surface. Sprinkle about 1/4 of the cheese mixture evenly over the center, leaving a 1-inch border around the edges. This prevents cheese from spilling out during cooking. Fold the tortilla in half over the cheese, pressing gently but firmly to create an even layer.
Repeat this process with the remaining tortillas and cheese mixture, creating four perfect quesadillas. Here’s the thing—don’t overcrowd your pan. Cooking two at a time gives you the best crispy results. If you try to cook all four at once, they’ll steam instead of crisp up properly.
Cook Until Golden and Melty
Heat a large skillet over medium heat and add 1 tablespoon of the Unsalted Butter. Once the butter foams but doesn’t brown (about 1 minute), add two assembled quesadillas. Cook for 2-3 minutes per side until the edges are deep golden brown and the cheese is fully melted and bubbling.
Watch carefully during the last minute of cooking—you want the cheese to be completely melted with no raw spots, but the tortilla should still hold its shape when you lift it. If the bottom isn’t golden enough, press down gently with a spatula for 10 seconds to help crisp it. Transfer the cooked quesadillas to a plate and tent loosely with foil to keep warm while you cook the remaining two.
Serve with Fresh Toppings
Cut each quesadilla into 4 wedges using a sharp knife. Arrange the wedges on a serving platter and immediately garnish with the 0.25 cup Fresh Cilantro and serve with the 2 whole Lime Wedges on the side. The acidity from the lime cuts through the richness of the cheese, balancing each bite perfectly.
Set out small bowls with the 0.5 cup Sour Cream and 0.5 cup Guacamole for dipping, along with the 0.5 cup Salsa on the side. The contrast of cool, creamy guacamole with warm, melty quesadillas creates the ultimate texture experience. Serve immediately while the tortillas are still crisp and the cheese is at its peak meltiness—this dish doesn’t wait!
Pro Tips For Making 3 Cheese Quesadilla
- Crank the Heat: High heat is your friend here—start with your skillet or griddle at medium-high and let it scream. I learned this the hard way after making three sad, greasy quesadillas that stuck like glue; the cheese just wouldn’t melt properly until I cranked it up.
- Shred Cheese Fresh: Pre-shredded cheese is a time-saver, but it’s also packed with anti-caking agents that turn your quesadilla into a dry, crumbly mess. Grab a block of each cheese, shred it yourself, and store it in the fridge until ready to use—your quesadilla will thank you with gooey perfection.
- Layer Cheese Evenly: Skip the lazy pile in the center—uneven cheese distribution means uneven melting and a quesadilla that’s crispy on one side and sad on the other. Spread the cheeses in a thin, even layer from edge to edge, then fold. Yes, it takes a second longer, but it’s worth it.
- Butter the Tortillas: Unsalted butter isn’t just for flavor—it’s for crispiness. Brush a thin layer on both sides of the tortilla before adding cheese; the butter will create a golden, shatterable crust instead of a soggy, limp shell. (And yes, even if you’re impatient like me, don’t skip this.)
Perfect pairings for this 3 cheese quesadilla
Crispy Side Dishes
Serve your quesadillas with crispy Mexican street corn—grill corn on the cob with 2 tbsp mayonnaise, 1 tbsp lime juice, ½ tsp chili powder, and ¼ tsp salt.
The smoky-sweet crunch contrasts beautifully with the melty cheese. For a quicker option, try tortilla chips with salsa verde and crema for dipping. 🌽
Fresh Salad Pairings
A black bean and corn salad adds protein and freshness. Toss 1 can black beans, 1 cup corn, ½ red onion, and 1 tomato, then dress with lime juice, cilantro, and olive oil.
The bright acidity cuts through the richness of the quesadillas. For a lighter option, try avocado and lime salad with radishes and cotija cheese.
Warm Bread Companions
Warm flour tortillas or corn tortillas brushed with garlic butter make perfect handheld sides. For extra flavor, sprinkle with smoked paprika or fresh herbs. Another great option is warm flour tortilla strips baked at 375°F for 8-10 minutes until crispy—dip them in queso dip or salsa.
Dipping Sauces
No quesadilla is complete without dipping sauces! Try homemade queso dip with cream cheese, cheddar, and salsa, or spicy chipotle crema by blending ½ cup sour cream, 1 tbsp chipotle in adobo, and 1 tsp lime juice.
For a lighter option, mix Greek yogurt with lime juice, cilantro, and salt. 🍅
Drink Pairings
A Mexican lager like Modelo Especial or Corona complements the dish perfectly with its crisp, clean finish. For a non-alcoholic option, try horchata—its sweet, cinnamon-infused flavor balances the spicy cheeses. A mango limeade with muddled mint also works wonderfully, especially on a warm day.
Nutrition facts
Frequently asked questions
Can I make these quesadillas ahead of time?
Assemble the quesadillas but don’t cook them yet. Wrap them tightly in plastic wrap and refrigerate for up to 24 hours. When ready to cook, heat in a dry skillet over medium heat for 2-3 minutes per side until crispy again. For freezing, cook the quesadillas first, let cool completely, then wrap individually in foil and freeze for up to 3 months. Reheat in a toaster oven at 350°F for 5-7 minutes.
Why is my cheese not melting properly?
This usually happens from one of three issues: pre-shredded cheese (it contains anti-caking agents), too-high heat (burns cheese before melting), or not enough butter/oil (prevents proper browning). Always use freshly shredded block cheese, cook on medium heat, and add enough fat to create a non-stick surface. Press gently with a spatula during cooking to help the cheese melt evenly.
What’s the best way to make these vegetarian?
This recipe is already vegetarian! For extra protein, add sautéed bell peppers and onions or black beans between the cheese layers. You can also mix in spiced chickpeas (toss canned chickpeas with cumin, paprika, and lime juice) for a hearty twist. The cheese blend is rich enough to stand alone, but these additions add great texture and flavor.
Can I use corn tortillas instead of flour?
Technically yes, but corn tortillas are much more delicate and tend to tear when folded. If you must use them, keep the cheese filling very thin (just a sprinkle) and cook on lower heat for 1-2 minutes per side. For best results, stick with flour tortillas—they hold together better and get that perfect crispy texture. The 10-inch size is ideal for this recipe.
How do I make these gluten-free?
Replace the flour tortillas with gluten-free large tortillas (look for corn-based ones with at least 12 grams of protein per tortilla for structure). Use the same cheese blend and cooking method, but reduce heat to medium-low to prevent burning. Gluten-free tortillas crisp up differently, so watch closely—they’re ready when golden brown but still pliable. Serve with gluten-free dipping sauces to complete the meal.

- 2 Loaf Sandwich Bread Recipe: Homemade Crusty Slices Without a Machine - October 5, 2026
- 5 Hour Sourdough Bread Recipe: Crusty-Crumb Mastery Without the Knead - October 5, 2026
- 00 Pizza Crust Recipe: Crispy, Chewy Layers Without a Single Gluten-Free Substitute - October 5, 2026