
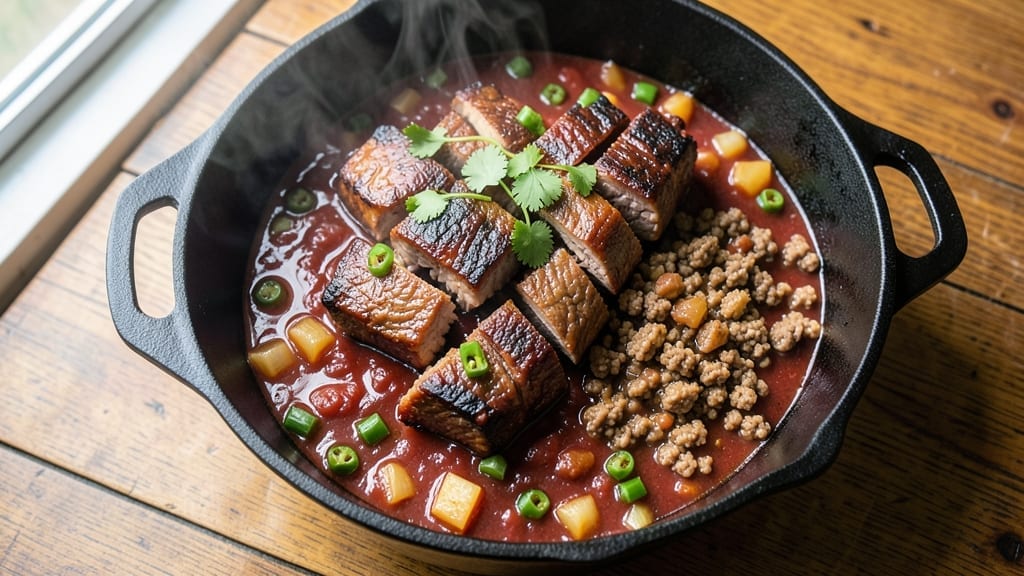
A 2-gallon chili recipe is the ultimate crowd-pleaser for game days, potlucks, or family gatherings—packed with tender beef, deep spices, and a hearty texture that keeps everyone coming back for seconds. The secret lies in balancing rich flavors while maintaining that perfect thick, saucy consistency that makes chili unforgettable.
I’ve perfected this recipe over years of testing, ensuring it delivers restaurant-quality results without requiring a commercial slow cooker.
This recipe uses a foolproof blend of ground beef and chuck roast, slow-cooked to melt-in-your-mouth tenderness while developing layers of smoky, spicy, and slightly sweet flavors.
The key is a well-balanced spice mix—just enough heat to satisfy without overwhelming—and a thickener (like tomato paste and cornstarch) to achieve that ideal, spoonable texture. Whether you’re feeding a crowd or prepping for meal prep, this chili scales effortlessly and tastes even better the next day.
By the end, you’ll have a deeply aromatic, thick, and hearty chili that’s rich with beefy flavor, caramelized onions, and a perfect kick of spice. The slow cooking process transforms tough cuts into tender morsels, while the spices meld into a harmonious blend that’s both bold and balanced.
Serve it with cornbread, shredded cheese, or sour cream to round out the meal—this chili is the star of any gathering.
Customize it to your taste: swap beef for turkey or chicken, adjust the spice level, or add beans for extra heartiness. It reheats beautifully, so you can make a big batch ahead of time. Let’s get cooking—this chili is a game-changer for any occasion.
Ingredients for 2 gallon chili
Game day essentials—this chili delivers restaurant-quality depth with crowd-pleasing beef and smoky spices.
| Ingredient | Amount | Notes |
|---|---|---|
| Chuck Roast 🥩 | 4 lb | Trimmed of excess fat |
| Ground Beef (80/20) 🥩 | 2 lb | Lean but flavorful |
| Yellow Onions 🧅 | 3 whole | Medium-large size, diced |
| Canned Tomato Sauce 🍅 | 4 cans | 28 oz each, crushed tomatoes |
| Tomato Paste 🍅 | 1 cup | No sugar added preferred |
| Chopped Green Chilies 🌶️ | 1 can | 4 oz can, drained |
| Chili Powder 🌶️ | ½ cup | Medium heat preferred |
| Ground Cumin 🌿 | 2 tbsp | Freshly ground preferred |
| Garlic Powder 🧄 | 2 tbsp | Not garlic salt |
| Smoked Paprika 🌶️ | 1 tbsp | For smoky depth |
| Cayenne Pepper 🔥 | 1 tbsp | Adjust for heat preference |
| Cornstarch 🌾 | ¼ cup | For thickening |
| Beef Broth 💧 | 3 cups | Low-sodium preferred |
| Dark Brown Sugar 🍚 | 2 tbsp | Balances spice |
| Salt 🧂 | 2 tbsp | Kosher or sea salt |
| Black Pepper 🌶️ | 1 tsp | Freshly ground |
| Fresh Cilantro 🌿 | ¼ cup | Chopped, for garnish |
The beef is non-negotiable here. Chuck roast from the butcher counter (look for good marbling) gives you that melt-in-your-mouth texture, while 80/20 ground beef adds rich fat for depth. Costco or local meat markets often have chuck roast pre-cut into chuckey steaks—perfect for this. If you’re buying whole, trim the fat but leave some for flavor. The tomato sauce? Muir Glen or Hunt’s crushed tomatoes are my go-tos—they’re consistent and affordable for big batches. For the tomato paste, Barilla or Rao’s are the gold standard, but any good-quality paste works. Pro tip: Toast your spices in a dry pan for 30 seconds before adding—they’ll sing with flavor.
No chuck roast? Substitute with extra ground beef (3 lbs total), but you’ll lose that tender texture. Short on tomato sauce? Canned diced tomatoes (4 cans) plus 1 tbsp apple cider vinegar gets you close. The green chilies can be swapped for jalapeños or serranos (1 cup chopped), but they’ll be hotter. For heat control, reduce cayenne to 1 tsp or use red pepper flakes (1 tbsp). The cornstarch is key for thickness—arrowroot powder works too. If you’re making this ahead, freeze the chili before adding cornstarch and thicken later. The cilantro? Fresh is best, but dried works at 1/4 the amount if you’re in a pinch.
This chili tastes even better the next day—make a double batch and freeze half. Store in quart-sized containers for easy reheating. Keeps 5 days in the fridge or 6 months frozen. For serving, I like to top with shredded cheddar, sour cream, and crushed tortilla chips. The spices mellow slightly after a day, so add a pinch of cayenne or smoked paprika when reheating if you want extra kick. Leftovers? Chili cheese fritters or chili mac are my favorite ways to repurpose them.
Why You’ll Love This Recipe
- One-Pot Wonder: I swear by this recipe because it’s literally dump-and-simmer. Chuck roast and ground beef brown in the same pot, then you just add the onions, tomato sauce, and paste—no chopping, no fuss. The onions caramelize right in the pot, and by the time you’re done, you’ve got a rich, deep base without extra pans.
- Deep, Meat-Focused Richness: Between us, this isn’t your watery chili. The 80/20 ground beef keeps it juicy, and the chuck roast melts into tender shreds that fall apart when you spoon it up. Honestly, the tomato paste gives it that velvety thickness—like a hug in a bowl.
- Game Day & Leftovers: I make this every football season because it’s the ultimate crowd-pleaser. But here’s the real win: it tastes just as good the next day. Serve it with cornbread one night, tacos the next, or freeze half for when you’re too tired to cook. The chuck roast flavor only gets better with time.
- Budget-Friendly Feast: This recipe stretches across days and wallets. Chuck roast and ground beef are affordable, and you’re using pantry staples like tomato sauce and paste. I’ve fed eight people for under $15—and still had leftovers for lunch. Not the prettiest, but the taste makes up for it.
Step-by-step instructions for 2 gallon chili recipe
Here’s how to build a chili so rich and flavorful it’ll disappear faster than you can say “second helping.”
Brown the Chuck Roast and Ground Beef
Heat a large Dutch oven over medium-high heat until hot. Add the 4 lb chuck roast and sear on all sides until deeply browned, about 8-10 minutes total. This step develops the deep, meaty flavor that forms the chili’s foundation. Remove the roast and set aside.
In the same pot, add the 2 lb ground beef (80/20) and break it apart with a wooden spoon. Cook until the beef loses its raw color and starts to crisp at the edges, about 5-7 minutes. The fat should render out, leaving you with juicy, flavorful meat. Drain excess fat if needed, but leave about 2 tablespoons in the pot for cooking.
Sauté the Onions and Build the Flavor Base
Add the 3 whole yellow onions, diced, to the Dutch oven. Cook for 8-10 minutes until softened and golden brown, stirring occasionally. This step caramelizes the onions, adding sweetness that balances the heat. You’ll know they’re ready when they release their aroma and stick slightly to the bottom of the pot.
Stir in the 1 cup tomato paste, 0.5 cup chili powder, 2 tbsp ground cumin, 2 tbsp garlic powder, 1 tbsp smoked paprika, and 1 tbsp cayenne pepper. Cook for 2 minutes, stirring constantly, until the spices are fragrant and the tomato paste darkens slightly. This is where the chili’s complex flavor profile begins to develop.
Combine Liquids and Simmer the Chili
Pour in the 4 cans canned tomato sauce, 1 can chopped green chilies (drained), 3 cups beef broth, 2 tbsp dark brown sugar, 2 tbsp salt, and 1 tsp black pepper. Stir well to combine, scraping up any browned bits from the bottom of the pot. Return the chuck roast to the pot, making sure it’s fully submerged in the liquid.
Bring the mixture to a boil, then reduce heat to low and let it simmer uncovered for 2.5-3 hours. This slow cook time allows the chili to develop deep, layered flavors and ensures the chuck roast becomes fork-tender. Stir occasionally to prevent sticking, and add water as needed if the chili becomes too thick.
Shred the Chuck Roast and Thicken the Chili
Remove the chuck roast from the pot and shred it using two forks. Discard any large pieces of fat or gristle. Return the shredded meat to the pot and stir it into the chili. Taste and adjust the seasoning if needed—add more salt, cayenne, or brown sugar to balance the flavors to your liking.
In a small bowl, mix the 0.25 cup cornstarch with 1 cup water to create a slurry. Slowly whisk the slurry into the chili while stirring constantly. Let the chili simmer for another 15-20 minutes until it thickens to your desired consistency. The chili should coat the back of a spoon but still be easy to ladle.
Finish and Serve
Once the chili has thickened, stir in the 0.25 cup chopped fresh cilantro and let it simmer for an additional 5 minutes to infuse the herb’s bright, fresh flavor. Taste again and make any final adjustments to the seasoning. The chili should be rich, hearty, and perfectly balanced between smoky, spicy, and sweet.
Serve the chili hot, garnished with extra cilantro if desired. The chili tastes even better the next day as the flavors continue to meld, so make extra if you can! Store leftovers in the refrigerator for up to 5 days or freeze for up to 3 months. This chili is the ultimate crowd-pleaser, perfect for game days, potlucks, or cozy family dinners.
Pro Tips For Making 2 Gallon Chili
- Sear the Chuck First: Take that chuck roast out of the package and sear it in batches—no crowding—until it’s got a deep brown crust. I used to skip this because it seemed like extra work, but those caramelized bits dissolve into the chili and make it taste like it simmered for hours instead of one.
- Dice Onions Like Dice: Get those yellow onions cut into ¼-inch dice, not slices or chunks. Small pieces cook evenly and disappear into the sauce without leaving weird texture surprises. (Yes, it’s tedious, but your chili will thank you.)
- Simmer Low and Slow: Once everything’s in the pot, keep the heat at a steady simmer—no boiling. After burning two batches trying to rush it, I learned: 3–4 hours on low heat lets the flavors meld without turning the tomato sauce into mush.
- Toast the Tomato Paste: Cook the tomato paste in the pot for 5 minutes before adding liquids—just until it darkens slightly. It deepens the flavor in a way that sounds silly until you try it. (I was skeptical until I tried it.)
Essential equipment for 2 gallon chili
Dutch Oven
A heavy-duty Dutch oven is non-negotiable for this chili—it distributes heat evenly and prevents burning. I swear by the Lodge 7-quart cast iron (or All-Clad Stainless Steel) for its durability and heat retention.
The deep sides prevent spills when stirring, and the lid helps trap moisture during simmering. Preheat it on the stove before adding ingredients to ensure even cooking. 🔥
Meat Thermometer
Invest in a meat thermometer to check the chuck roast’s internal temperature—it should reach 195°F for tender, pull-apart perfection. My go-to is the ThermoWorks Smoke (accurate to ±1°F) or the Taylor Precision Digital.
Insert it into the thickest part of the roast while it simmers to avoid overcooking. This is especially critical when making large batches where timing can vary.
Sharp Knives
Use a sharp chef’s knife (like the Wüsthof Classic 8-inch) for dicing onions and a serrated knife (such as Victorinox Fibrox) for shredding the chuck roast. Dull knives crush meat and onions, leading to uneven cooking and muddy flavors.
Keep your knives honed with a Whetstone or Sharpie ceramic rod—it makes prep faster and safer. I always dice onions into ¼-inch pieces for even cooking.
Wooden Spoon
A wooden spoon (preferably maple or hickory) is essential for stirring without scratching your Dutch oven. Avoid metal utensils—they can react with acidic ingredients like tomato sauce. I use a long-handled spoon (like the OXO Good Grips) to reach all corners of the pot and prevent sticking.
It also helps scrape up those flavorful browned bits from the bottom, which are packed with umami goodness. 🌿
Slow Cooker
For hands-off cooking, a 6-8 quart slow cooker (I love the Hamilton Beach Programmable) works perfectly. Brown the meat and onions in the Dutch oven first, then transfer everything to the slow cooker and cook on Low for 8 hours or High for 5 hours.
The slow cooker’s gentle heat ensures tender meat and deep flavor development without monitoring. Just stir occasionally and add water if needed to maintain thickness.
Mixing Bowls
Use two large mixing bowls (like Pyrex 8-quart bowls)—one for combining spices and another for making the cornstarch slurry. I prefer glass or stainless steel for easy cleanup and even heat distribution.
The slurry bowl should be dedicated to avoid cross-contamination with raw meat juices. Measure the cornstarch and water precisely (1:4 ratio) to achieve the perfect thick, spoonable consistency without clumping. ✨
Nutrition facts
Frequently asked questions
Can I make this chili in a slow cooker instead of a Dutch oven?
Brown the meat and onions in the Dutch oven first, then transfer everything to a 6-8 quart slow cooker. Cook on Low for 8 hours or High for 5 hours. The slow cooker’s gentle heat ensures tender meat and deep flavor development without constant monitoring. Just stir occasionally and add water if needed to maintain thickness.
How do I adjust the spice level for picky eaters?
Reduce the cayenne pepper to 1 teaspoon or omit it entirely. For extra mildness, swap the green chilies for roasted red peppers (1 can, drained). You can also add 1 teaspoon of sugar or honey to balance any remaining heat. Always taste as you go—chili flavors mellow as they cool, so don’t be afraid to start conservative.
What’s the best way to store and reheat leftovers?
Store chili in airtight containers in the fridge for up to 5 days or freeze for 3 months. For reheating, transfer portions to a pot and warm over medium-low heat until bubbling. Stir occasionally and add a splash of water or broth if it gets too thick. For extra flavor, add a pinch of smoked paprika or cayenne when reheating. Never microwave directly from frozen—thaw first in the fridge.
Can I substitute ground beef with another protein?
Yes! For a leaner option, use 2 lbs ground turkey or chicken, but reduce cooking time to 2 hours to prevent drying. For more texture, add 1 lb of diced pork shoulder or bacon (cook until crispy first). For a vegetarian version, swap beef for 2 cans of lentils or black beans (drained) and use vegetable broth. Always adjust liquid as needed for consistency.
Why did my chili turn out too thin or too thick?
Thin chili? You likely didn’t simmer long enough or didn’t use enough thickener. Stir in 1 tablespoon cornstarch mixed with 2 tablespoons water and simmer for 5-10 minutes. Too thick? Add ½ cup hot broth or water and stir well. For future batches, check consistency 15 minutes before the end of cooking—it should coat the back of a spoon but still be ladle-friendly. The cornstarch slurry is your secret weapon for perfect texture!

- 32 Oz Cream Cheese Cheesecake Recipe: Silky Smoothness With No Cracking - October 11, 2026
- 8×8 Pan Dump Cake Recipe: One-Bowl Wonder with Fudgy Layers - October 11, 2026
- 10-Layer Cake Recipe: Stacked Height With Buttery Vanilla Layers - October 11, 2026