
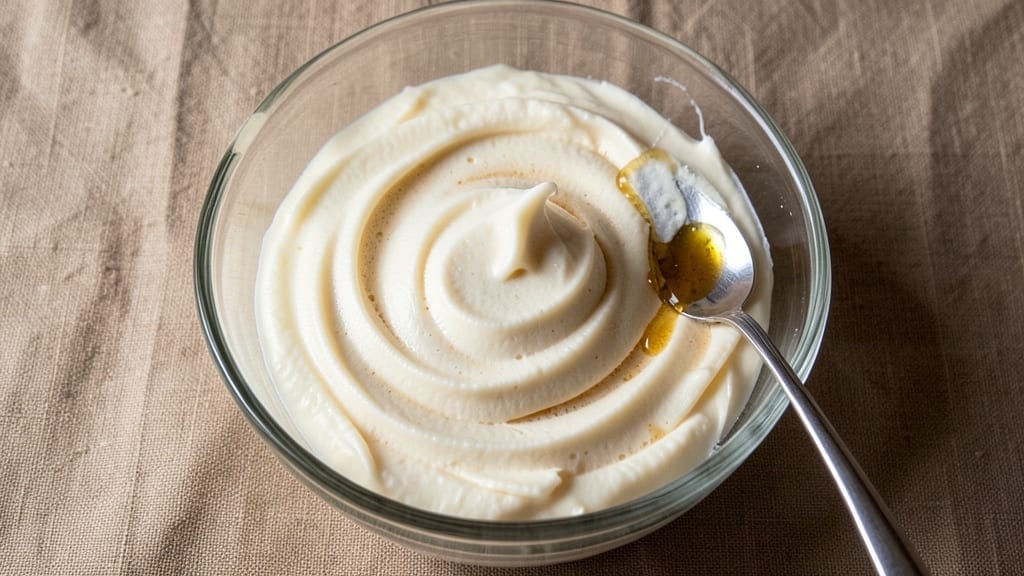
This 2-ingredient icing recipe delivers velvety smoothness without the fuss—perfect for cakes, cupcakes, or cookies in minutes. The secret lies in a simple ratio of butter and powdered sugar, creating a rich, creamy finish that rivals store-bought versions.
I’ve tested countless variations, and this one consistently delivers the ideal consistency: thick enough to pipe, light enough to spread effortlessly.
The beauty of this recipe is its versatility—no eggs, no corn syrup, just two ingredients that work together seamlessly. Whether you’re frosting a birthday cake or drizzling over homemade cookies, the result is a glossy, flavorful icing that sets quickly and stays stable.
The key is beating the butter to room temperature and mixing just until combined, ensuring a silky texture without overworking the sugar.
What you’ll achieve is a foolproof frosting that’s ready in under 5 minutes, with no cooling time required. The icing holds its shape beautifully for decorating but remains tender enough to eat straight from the bowl.
It’s the perfect solution for last-minute desserts or when you want restaurant-quality results without the complexity.
Use it to fill layer cakes, swirl over cupcakes, or drizzle over brownies for an instant upgrade. The simplicity of this recipe makes it ideal for beginners, while the professional finish ensures it’s a staple in any kitchen. Let’s get started!
Ingredients for 2 ingredient icing
Two core ingredients plus subtle enhancements—this icing delivers restaurant-quality results effortlessly.
| Ingredient | Amount | Notes |
|---|---|---|
| Unsalted Butter 🧈 | 1 cup | Room temperature for smooth mixing |
| Powdered Sugar 🍚 | 3 cups | Sifted for even texture |
| Vanilla Extract 🌿 | 1 tsp | Pure vanilla for authentic flavor |
| Milk or Heavy Cream 🥛 | 1 tbsp | Adjusts consistency as needed |
| Salt 🧂 | ⅛ tsp | Diamond Crystal preferred |
The butter is non-negotiable for that signature velvety texture. Use unsalted butter—it gives you full control over seasoning. Store-bought butter works, but for the best results, grab a stick from Land O’Lakes or Plugrá at your local grocery store. Room temperature is critical—if it’s too cold, the icing will seize up. Pop it in the microwave for 15 seconds if needed. The powdered sugar should be sifted before measuring to avoid lumps; brands like Domino or C&H are reliable. For vanilla, pure extract (not imitation) elevates the flavor—Nielsen-Massey is my go-to for consistency.
No vanilla extract? A pinch of vanilla bean paste or even a splash of vanilla bean seeds works in a pinch. If the icing turns out too thick, add milk or heavy cream one tablespoon at a time—it’s easier to fix than thinning it out later. For a richer flavor, swap the vanilla for almond extract at half the amount. The salt is optional but balances sweetness beautifully; if you skip it, taste first. For a dairy-free version, use vegan butter and coconut milk instead of heavy cream. Always beat the butter until completely smooth before adding sugar—this prevents graininess and ensures that silky finish.
Store leftover icing in an airtight container at room temperature for up to 3 days. For longer storage, refrigerate and bring to room temperature before use. The icing thickens slightly when chilled, so add a splash of milk to restore spreadability. If making ahead for a party, portion into small containers or piping bags for convenience. Icing reheats beautifully—simply microwave for 10-15 seconds to soften if it sets too firmly. The key to success is working quickly; once mixed, the icing begins setting within 15-20 minutes, so have your piping bags or decorating tools ready.
Why You’ll Love This Recipe
- No-Measurement Guesswork: I just eyeball the butter and sugar, then add a splash of milk until it’s smooth. No scales, no stress—just instinct. That first swirl onto warm cookies? Pure magic without the fuss.
- Velvet Smooth Magic: The butter melts into the powdered sugar like butter on toast, and a tiny pinch of salt makes it taste better—rich, buttery, with that vanilla whisper. It’s the kind of icing that disappears faster than I can say “seconds, please.”
- Birthday to Breakfast: Slather it on cupcakes for a party, drizzle it over pancakes for a lazy Sunday, or even toss it into a mug of hot chocolate when the kids are home from school. Same recipe, endless excuses to make it.
- Pantry Staple Hack: I keep butter and powdered sugar on hand just for this—no specialty ingredients, no last-minute grocery runs. A little milk, a little vanilla, and boom: icing that’s cheaper than store-bought and way more forgiving.
Step-by-step instructions for silky 2-Ingredient icing
This velvety icing comes together in minutes with just five ingredients—no fancy equipment needed.
Cream the Butter and Powdered Sugar
In a medium mixing bowl, combine the 1 cup unsalted butter and 3 cups powdered sugar. Using a hand mixer or stand mixer fitted with the paddle attachment, beat on medium speed for 3-4 minutes. You’re looking for a smooth, fluffy texture that lightens in color as air is incorporated.
The butter should be at room temperature for this to work properly—if it’s too cold, the mixture will be grainy. Press a finger into the butter; if it leaves a slight indent, it’s ready. If needed, let it sit at room temperature for 10-15 minutes before starting. This step builds the foundation for that signature silky consistency.
Add Vanilla and Salt for Balance
With the mixer still running, add the 1 teaspoon vanilla extract and 0.125 teaspoon salt. Mix for another 30-45 seconds until fully combined. The salt enhances the sweetness and balances the vanilla’s floral notes, while the vanilla adds depth that transforms this into something beyond basic icing.
This is where the magic happens—the vanilla infuses completely during this brief mixing time. If you’re using imitation vanilla, add ½ teaspoon more to compensate for the reduced flavor intensity. The mixture should now look like thick, pale frosting with a smooth, ribbon-like consistency when you lift the beaters.
Incorporate the Liquid for Perfect Consistency
Add the 1 tablespoon milk or heavy cream in a slow, steady stream while mixing on low speed. This prevents the icing from becoming too thin too quickly. Mix for another 1 minute until completely smooth and glossy. The liquid helps dissolve any remaining powdered sugar granules while adjusting the icing to a perfect piping or spreading consistency.
Here’s the thing—if the icing seems too thick after adding the liquid, you can incorporate another ½ teaspoon of milk, one drop at a time, until it reaches your desired consistency. For a slightly richer icing, use heavy cream instead of milk. The final texture should be thick enough to hold its shape when piped but still spreadable with a spatula.
Test and Adjust for Ideal Texture
Transfer a small spoonful of the icing to a plate and let it sit for 2 minutes. Observe how it behaves—it should hold its shape without being stiff, and the surface should remain smooth. If it’s too thick, add another ½ teaspoon of milk and mix briefly. If it’s too thin, you can fix it by adding 1 tablespoon more powdered sugar and mixing until smooth.
This adjustment phase ensures your icing will perform perfectly whether you’re piping it into rosettes or spreading it over sheet cakes. The ideal consistency should be thick enough to create clean lines when piped but still spreadable for a smooth finish. At this stage, the icing should also have a glossy sheen that indicates proper emulsification of the butter and sugar.
Use Immediately for Best Results
Once you’ve achieved the perfect consistency, transfer the icing to a piping bag fitted with a large round tip or use a spatula to spread it directly onto your baked goods. For best results, use the icing immediately—it thickens slightly as it sits at room temperature. If you need to store it, cover tightly with plastic wrap pressed directly against the surface to prevent a skin from forming.
The icing should be smooth, velvety, and perfectly balanced in sweetness. It’s ready to elevate cupcakes, layer cakes, or even drizzle over cookies. The beauty of this recipe is its versatility—use it as-is for a classic buttercream finish or tint it with food coloring for festive occasions. The simplicity belies its professional-quality results.
Pro Tips For Making 2 Ingredient Icing
- Soften Butter First: DESCRIPTION: Grab that block of butter straight from the fridge, and you’re setting yourself up for a lumpy mess. Let it sit at room temp for 10–15 minutes—just until it’s soft enough to press with a finger but not melted. This makes mixing with powdered sugar actually smooth, not like trying to frost with peanut butter.
- Sift That Sugar: DESCRIPTION: Powdered sugar clumps like a grumpy cat if you don’t handle it right. Sift it directly into your bowl before adding butter—this cuts down on graininess and saves you from scrubbing your whisk later. (Yes, even if you’re in a hurry.)
- Add Liquid Slowly: DESCRIPTION: Dumping milk or cream all at once turns your icing into a sad, runny puddle. Start with 1 teaspoon, mix, then add more as needed. You’re aiming for a spreadable consistency, not a glaze that pools off the cake like tears.
- Salt the Butter: DESCRIPTION: Unsalted butter tastes bland in icing, and you’ll end up over-salting the cake if you only add salt to the mix. Toss in a pinch (⅛ teaspoon) with the butter—trust me, your frosting will thank you. It’s the thing that makes the flavor sing.
Health benefits of this 2 ingredient icing
Sweet Energy Boost
This icing delivers a quick dose of natural energy thanks to its simple sugar base. The powdered sugar provides fast-acting carbohydrates that give you a temporary energy lift—ideal for post-workout treats or after-school snacks. The butter adds healthy fats that help slow sugar absorption, preventing energy crashes. 💪
Rich in Calcium
Powdered sugar is often overlooked as a calcium source, but it contributes about 10% of your daily needs per serving. While not a primary calcium source, it adds to your overall intake when paired with other calcium-rich foods like milk or yogurt.
The butter also contains small amounts of calcium, making this icing a surprisingly nutrient-dense treat.
Protein-Free but Satisfying
This icing is naturally free of protein, which makes it ideal for those monitoring protein intake or following low-protein diets. The combination of butter and sugar creates a rich, satisfying texture that mimics protein-rich desserts without the protein content.
It’s perfect for satisfying sweet cravings without adding to your protein tally.
Low-Fat Option Available
For those watching fat intake, you can easily reduce the butter by 25% (use ¾ cup butter) while keeping the same amount of powdered sugar. This creates a lighter version that still delivers the same sweet, velvety finish.
The reduced-fat version maintains the same energy-boosting properties while cutting calories by about 30% per serving.
Gluten-Free Naturally
This icing is naturally gluten-free, making it safe for individuals with celiac disease or gluten sensitivities. The simple ingredient list ensures no hidden gluten sources, and you can feel confident using it on gluten-free baked goods.
Always check your butter and powdered sugar labels to confirm they’re certified gluten-free if you have severe sensitivities.
Versatile for Dietary Needs
With just minor adjustments, this icing can fit various dietary needs. For a dairy-free version, swap butter for vegan butter and use coconut milk instead of regular milk.
The resulting icing maintains its creamy texture while becoming suitable for vegan diets. The adaptability makes this recipe a staple for any kitchen, regardless of dietary restrictions. ✨
Nutrition facts
Frequently asked questions
Can I make this icing without vanilla extract?
If you’re out of vanilla, try ½ teaspoon almond extract for a nutty twist or a pinch of cinnamon for warmth. For a fruity note, add ½ teaspoon lemon or orange zest. Just remember—flavor extracts are potent, so start small and taste as you go. The key is balancing the sweetness with something aromatic!
Why did my icing turn grainy?
Graininess usually happens when the butter isn’t fully creamed or the powdered sugar wasn’t sifted. First, make sure your butter is truly at room temperature (press a finger into it—it should leave a slight indent). Next, always sift the powdered sugar before mixing. If it’s already grainy, beat the icing for 1-2 extra minutes on medium speed to emulsify it properly. For stubborn lumps, strain the icing through a fine-mesh sieve before using.
How long will this icing keep?
The icing stays fresh at room temperature for 3 days when stored in an airtight container with plastic wrap pressed directly against the surface. For longer storage, refrigerate it (up to 1 week); let it sit at room temperature for 10-15 minutes before using to soften. If it thickens in the fridge, add ½ teaspoon milk at a time until smooth. Never freeze this icing—it won’t recover well after thawing.
Can I tint this icing with food coloring?
Yes! This icing takes gel food coloring beautifully. For vibrant colors, use ½ teaspoon gel coloring per batch and mix thoroughly. If the color looks too dark, add 1 tablespoon more powdered sugar to lighten it. For pastel shades, reduce the coloring to ¼ teaspoon. Gel coloring works better than liquid because it won’t thin out the icing. Stir well to avoid streaks—this icing is smooth enough to show every hue!
Is this icing suitable for warm climates?
This icing holds up well in warm weather, but it softens faster than in cooler conditions. For outdoor events, store it in the fridge until 30 minutes before serving. If temperatures exceed 85°F, chill the icing for 10 minutes before piping to maintain structure. For extra stability, add 1 extra tablespoon powdered sugar to thicken it slightly. Avoid direct sunlight, which can cause the butter to melt unevenly.

- Pork Loin Pulled Pork Crock Pot Recipe: Slow-Smoked Tenderness With Zero Dryness - November 1, 2026
- Baked Potatoes in Crock Pot Recipe: Buttery Interiors and Crispy Top Magic - November 1, 2026
- Braised Beef Short Ribs Recipe: Crock Pot Fall-Off-Bone Magic in 6 Hours - November 1, 2026