
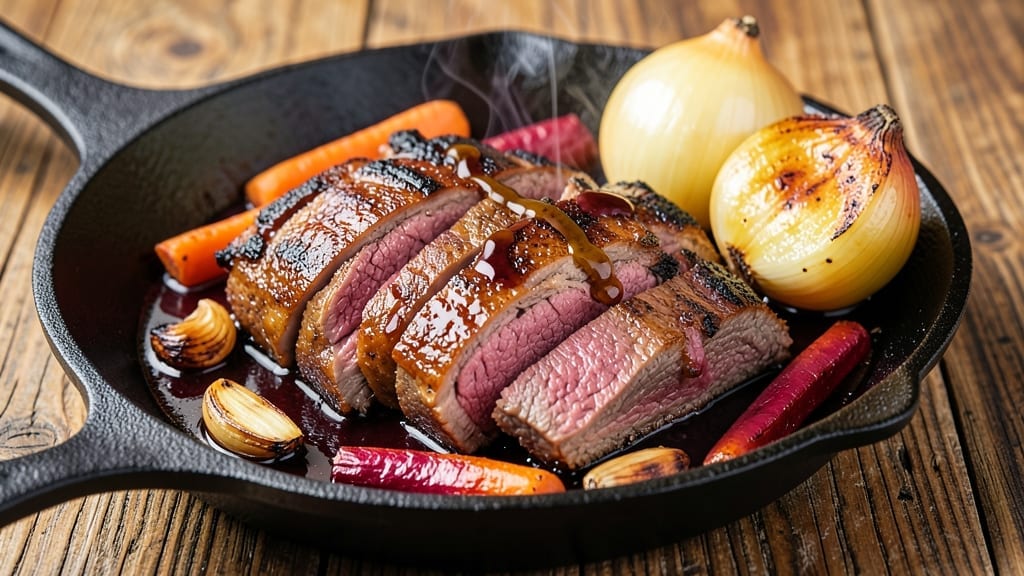
A 2-pound beef brisket cooked to fall-apart tenderness transforms tough cuts into a showstopping centerpiece—no smoker required. This one-pan method delivers deep, smoky flavor with minimal effort, perfect for weekend projects or special occasions.
The secret lies in slow cooking at low temperatures, allowing connective tissue to break down naturally while forming a rich, caramelized crust.
This recipe focuses on simplicity without sacrificing quality: just a few pantry staples, a Dutch oven, and patience. You’ll start with a dry rub that clings to the meat, then braise it until the internal temperature reaches 203°F—the magic number for melt-in-your-mouth texture.
The result? A brisket so tender it nearly dissolves with each bite, with a surface so flavorful it could feed a crowd.
What makes this brisket stand out is its versatility. Slice it against the grain for sandwiches, shred it into tacos, or serve it whole with a side of au jus for dipping.
The slow-cooked method ensures every bite is moist and packed with beefy richness, while the caramelized exterior adds depth. This isn’t just dinner—it’s a centerpiece that turns any meal into an event.
Pair it with classic sides like creamy mashed potatoes, buttery cornbread, or a crisp green salad to round out the plate. The brisket’s natural juices and smoky aroma will have everyone at the table asking for seconds. Ready to master this technique? Let’s get started.
Ingredients for 2 pound beef brisket
Six aromatic ingredients transform a tough cut into melt-in-your-mouth beef brisket perfection.
| Ingredient | Amount | Notes |
|---|---|---|
| Beef Brisket 🥩 | 2 lb | Whole packer cut, fat cap intact |
| Yellow Onion 🧅 | 1 whole | Cut into large chunks |
| Carrots 🥕 | 4 whole | Large, peeled, cut into chunks |
| Garlic Cloves 🧄 | 6 cloves | Smash lightly with knife blade |
| Beef Broth 💧 | 2 cups | Low-sodium preferred |
| Apple Cider Vinegar 🍎 | ¼ cup | For tenderizing |
| Dark Brown Sugar 🍚 | 2 tbsp | Packed for moisture |
| Smoked Paprika 🌶️ | 1 tbsp | For deep smoky flavor |
| Ground Black Pepper 🌶️ | 1 tsp | Freshly cracked |
| Kosher Salt 🧂 | 1 ½ tbsp | Diamond Crystal preferred |
| Fresh Thyme 🌿 | ½ ounce | Stems removed, chopped |
| Olive Oil 🫒 | 1 tbsp | For searing |
| Bay Leaves 🍃 | 2 whole | Dried, for aromatic depth |
The brisket cut is non-negotiable here—packer cut with fat cap delivers both tenderness and flavor. Costco or Whole Foods typically carry this whole, which is ideal for even cooking. Look for vibrant color and good marbling; avoid cuts with grayish hues or excessive lean. The fat cap isn’t just for flavor—it insulates the meat during cooking, ensuring even moisture. If your butcher doesn’t have whole brisket, ask for a 2-pound packer cut with the fat intact, and trim any excess silver skin. For the best results, let the brisket sit at room temperature for 1 hour before cooking to ensure even heat penetration.
No smoked paprika? Substitute with 1 tbsp regular paprika plus 1/2 tsp liquid smoke—it won’t be identical, but close. Fresh thyme unavailable? Dried thyme at one-third the amount works, though the flavor will be more muted. The apple cider vinegar might seem unusual, but it’s essential for breaking down collagen—substitute with 1/4 cup beef broth if you’re avoiding acidity. For the carrots, baby carrots work in a pinch, but whole carrots develop deeper flavor. The beef broth should be low-sodium; if yours isn’t, reduce the added salt by 1/2 teaspoon. The bay leaves might seem minor, but they add subtle earthiness—don’t skip them.
This brisket reheats beautifully—350°F for 20 minutes with a splash of beef broth restores moisture. Store leftovers in an airtight container in the fridge for 5 days, or freeze for 3 months by wrapping tightly in butcher paper before plastic. For serving, slice against the grain for maximum tenderness. The au jus formed in the Dutch oven? Strain and reduce it by half for a rich dipping sauce. Portion the brisket into individual containers for meal prep—it keeps well and tastes even better reheated.
Why You’ll Love This Recipe
- One-Pot Magic: I swear by this—just toss the brisket, onions, carrots, and garlic into one pot with broth, then let it slow-simmer. No chopping boards, no extra pans, just hands-off cooking while you do anything else.
- Deep Flavor Payoff: That beef broth and garlic? They work their magic, turning tough brisket into melt-in-your-mouth perfection. Honestly, the first bite makes you forget it’s a weeknight meal.
- Leftovers That Shine: This recipe actually improves the next day—shred it for tacos, sandwiches, or just reheated with a splash of broth. I keep a bag in the freezer for lazy days (yes, even on a Tuesday night).
- Budget-Friendly Feast: Two pounds of brisket stretches across meals without breaking the bank. Between us, it’s my go-to for feeding the whole family without sacrificing flavor—or my wallet.
Step-by-step instructions for smoky brisket in one pan
Here’s the method for transforming a tough cut into melt-in-your-mouth perfection.
Sear the Brisket for Deep Flavor
Heat 1 tablespoon olive oil in a heavy Dutch oven over medium-high heat until shimmering. Pat the 2 lb beef brisket completely dry with paper towels—this ensures maximum browning. Place the brisket fat-side down in the pan and sear undisturbed for 8-10 minutes until the fat renders and the surface develops a deep golden crust.
Flip the brisket and sear the other side for another 6-8 minutes. The fat cap should be blistered and crisping at the edges. Remove the brisket and set it aside. You’ll notice the pan now contains rendered fat and browned bits—this is the flavor foundation for your dish.
Build the Aromatic Base
In the same Dutch oven, add the 1 whole yellow onion and 4 whole carrots cut into chunks. Cook for 5 minutes until the vegetables begin to soften and caramelize slightly. Add the 6 cloves garlic cloves (lightly smashed) and cook for 30 seconds until fragrant.
Stir in 1.5 tablespoons kosher salt, 1 tablespoon smoked paprika, 1 teaspoon ground black pepper, 0.5 ounce chopped fresh thyme, and 2 whole bay leaves. Pour in 0.25 cup apple cider vinegar and scrape up all the browned bits from the bottom of the pan—this releases maximum flavor. Let the mixture cook for 2 minutes until the vinegar evaporates.
Braise for Maximum Tenderness
Return the brisket to the Dutch oven, fat-side up. Add 2 cups beef broth and 2 tablespoons dark brown sugar, then bring to a simmer over medium heat. The liquid should come about halfway up the sides of the brisket. Cover tightly with a lid and transfer to a 325°F preheated oven.
Braise for 3 hours, checking occasionally to ensure the liquid doesn’t evaporate completely. If it reduces too much, add 2-3 tablespoons water to maintain moisture. The brisket is done when it reaches 200-203°F internally and pulls apart easily with two forks.
Rest and Slice for Perfect Texture
Remove the brisket from the oven and transfer it to a cutting board. Tent loosely with foil and let it rest for 15-20 minutes. This resting period allows the juices to redistribute throughout the meat, ensuring each slice remains moist and tender.
Discard the bay leaves and any herb stems. Skim excess fat from the braising liquid if desired, then slice the brisket against the grain into ½-inch thick pieces. Serve the brisket with the reduced braising liquid spooned over the top, accompanied by the caramelized vegetables from the pan.
Pro Tips For Making 2 Pound Beef Brisket
- USE A MEAT THERMOMETER: That 2-pound brisket won’t tell you when it’s done—you need a thermometer. Aim for 195°F in the thickest part of the flat, then pull it when it hits 203°F in the point. I learned this the hard way after cutting into a brisket that was still tough as shoe leather, and now I never guess again.
- TRIM THE FAT UNEVENLY: Leave a thin layer of fat on the point end (about ¼-inch), but trim the flat down to an even ⅛-inch. The fat on the point renders slowly, keeping that side juicy while the flat gets a better crust. Sounds fussy? It’s worth the 10 minutes—your brisket will thank you.
- DON’T CROWD THE PAN: If you’re braising, start with a hot pan and let the brisket sear undisturbed for 3-4 minutes per side. Then add onions and carrots in a single layer—no stacking. I used to toss everything in at once, and the onions burned before the brisket got a proper crust. Patience here makes all the difference.
- SAUTE THE AROMATICS FIRST: Cook the onions, carrots, and garlic in the same pan until the onions are deep golden and the carrots are tender-crisp (about 12-15 minutes). This builds flavor into the pan juices, which you’ll use to deglaze and baste. Skipping this step means your broth will taste like it’s missing something—trust me, it does.
Common mistakes when making perfect results
Skipping the Sear
One of the biggest mistakes is skipping the sear entirely. That golden crust isn’t just for looks—it’s where the Maillard reaction happens, creating deep, complex flavors. If you skip it, your brisket will taste bland and flat.
I’ve learned this the hard way: once, I rushed and just tossed the brisket into the Dutch oven with everything else. The result? A brisket that lacked that rich, caramelized depth. Always take the 10-15 minutes to sear both sides properly. 🔥
Overcrowding the Pan
Adding all your vegetables and broth at once can lead to steaming instead of browning. When you overcrowd, the brisket won’t develop that beautiful crust, and the vegetables will turn mushy instead of caramelized.
Instead, build your base in stages: sear the brisket first, then add the onions and carrots in batches if needed. This ensures everything gets properly browned before braising. Trust me, your brisket will thank you.
Ignoring the Rest Time
This is a classic rookie mistake: cutting into the brisket as soon as it comes out of the oven. The resting period—15-20 minutes—is crucial. It allows the juices to redistribute, so when you slice, you get tender, moist meat instead of dry, stringy pieces.
I once sliced into a brisket right away and was disappointed by how dry it was. Now, I always resist the urge to dig in immediately. Patience pays off big time here. ⏰
Not Monitoring Liquid Levels
If you let the liquid evaporate completely during braising, your brisket can dry out. The goal is to keep it moist enough to break down those tough connective tissues. Check the liquid every 30-45 minutes and add 2-3 tablespoons of water or broth if needed.
I’ve seen briskets turn out tough because the cook forgot to monitor the liquid. A little attention here makes all the difference in the final texture.
Using the Wrong Cut
Not all brisket cuts are created equal. If you grab just any cut of beef labeled “brisket,” you might end up with something that doesn’t have the right fat cap or connective tissue. For this recipe, you need a whole packer cut with fat cap intact.
This ensures the right amount of fat for flavor and moisture. I once used a leaner cut and ended up with a brisket that was tough and dry. Always ask your butcher for the packer cut—it’s worth the effort. 🥩
Overcooking or Undercooking
The sweet spot for brisket is 200-203°F internal temperature. Anything below, and it won’t be tender enough. Anything above, and it risks drying out. I’ve seen briskets overcooked to 210°F, and while they might look done, they’re often dry and tough.
Use a meat thermometer to check the temperature—it’s the only reliable way to know when it’s perfect. Don’t guess; measure. 🌡️
Nutrition facts
Frequently asked questions
Can I use a different cut of beef instead of brisket?
This recipe is specifically designed for a 2-pound packer cut brisket with fat cap intact. For similar results, try a chuck roast or short ribs, but cooking times and tenderness will vary. Never substitute with lean cuts like sirloin—they lack the connective tissue needed for this slow-cooking method. The fat cap is essential for moisture and flavor.
How do I know when the brisket is fully cooked?
The brisket is done when it reaches an internal temperature of 200-203°F and pulls apart easily with two forks. A meat thermometer is your best tool—insert it into the thickest part of the meat, avoiding the fat. If it’s below 200°F, return it to the oven for another 30-45 minutes. Never rely on time alone; temperature is key!
Can I make this brisket in a slow cooker instead?
Yes! Sear the brisket first, then transfer it to a slow cooker with all ingredients (except broth). Cook on low for 8 hours or high for 5 hours, adding broth as needed. The texture will be slightly different but still tender. For best results, finish with a quick 10-minute broil to create a crust. The slow cooker method is perfect for hands-off cooking.
What’s the best way to reheat leftovers?
Reheat brisket slices in a skillet over medium-low heat with a splash of beef broth for 3-5 minutes until warmed through. For larger portions, cover with foil and bake at 300°F for 20 minutes. Avoid microwaving—it makes the meat tough. Leftovers keep well in the fridge for 5 days or frozen for 3 months.
How should I serve this brisket?
Slice against the grain into ½-inch thick pieces for maximum tenderness. Serve with the reduced braising liquid spooned over the top, alongside caramelized vegetables. Classic pairings include creamy mashed potatoes, crusty bread, or a fresh green salad. For a hearty meal, add pickled onions or roasted sweet potatoes. This brisket works equally well for sandwiches or tacos!

- 2 Lb Oatmeal Bread Machine Recipe: Hands-Off Crusty Loaf With Nutty Depth - September 30, 2026
- 8-Inch Pecan Pie Recipe: Buttery Crust and Caramelized Nut Bliss - September 30, 2026
- 1 Loaf Homemade Bread Recipe: Crusty Crunch and Airy Crumb in One Bowl - September 30, 2026