
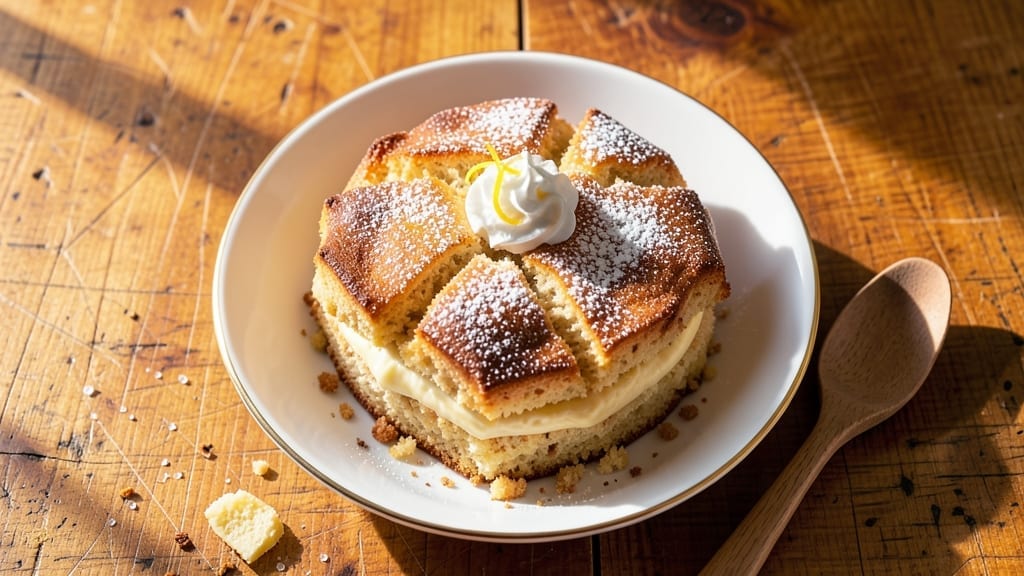
A 2-serving cake recipe solves the age-old problem of cake leftovers—this perfectly portioned dessert delivers moist, tender layers without a single crumb wasted. The secret lies in a precise ratio of ingredients that creates rich, buttery flavor in just 30 minutes of active time, with minimal cleanup.
I developed this recipe after years of baking for two, where every slice needed to feel special—not like a half-hearted portion.
What makes this cake truly perfect is its foolproof technique: a single-layer design with a velvety crumb and subtle vanilla depth, baked in a standard 6-inch round pan. The recipe uses simple pantry staples—all-purpose flour, granulated sugar, and eggs—yet yields a result that rivals bakery-quality desserts.
No special equipment or advanced skills required, just a standard oven and a little patience for the 25-minute bake time at 350°F.
By the time you pull it from the oven, you’ll have a cake with a golden top, tender crumb, and just the right amount of moisture—no dryness, no gummy texture, just pure satisfaction.
The recipe includes optional frosting variations, from light powdered sugar dusting to rich chocolate ganache, so you can customize it to your taste. This is the ideal dessert for date nights, small gatherings, or when you simply crave cake without the commitment of a full sheet pan.
Whether you’re baking for two or planning to scale up later, this recipe builds confidence in the kitchen. The measurements are precise but forgiving, and the steps are straightforward—no guesswork, no stress. Let’s get started on creating your perfectly portioned dessert.
Ingredients for 2 serving cake
Simple staples transform into a perfectly portioned cake—no leftovers, just pure satisfaction.
| Ingredient | Amount | Notes |
|---|---|---|
| All-Purpose Flour 🌾 | ¾ cup | Sifted for even texture |
| Granulated Sugar 🍚 | ½ cup | White or light brown |
| Unsalted Butter 🧈 | ½ cup | Room temperature, cubed |
| Large Eggs 🥚 | 1 whole | Room temperature preferred |
| Pure Vanilla Extract 🌿 | 1 tsp | High-quality for depth |
| Baking Powder 🧂 | ½ tsp | Aluminum-free preferred |
| Salt 🧂 | ¼ tsp | Fine sea salt preferred |
| Whole Milk 🥛 | ¼ cup | Room temperature |
| Powdered Sugar 🍚 | ¼ cup | For light dusting |
| Dark Chocolate Chips 🍫 | ¼ cup | Optional for richness |
| Heavy Whipping Cream 🥛 | ¼ cup | Chilled, for optional frosting |
The butter and eggs are the heart of this cake. Use unsalted butter—it gives you control over the salt level, and brands like Land O’Lakes or Plugrá work perfectly. Room temperature is key: cold butter creates lumps, and melted butter can make the cake dense. For the eggs, room temperature ensures even mixing—just pop them out 30 minutes before baking. The vanilla extract? Go for pure—imitation extracts smell artificial. If you’re using chocolate chips, Ghirardelli or Enjoy Life are my go-tos, but any quality brand works. The milk helps create that tender crumb, so don’t skip it—even if you’re tempted to use water.
No vanilla extract? Vanilla bean paste works in a pinch, or a pinch of ground vanilla bean. Out of baking powder? Baking soda plus cream of tartar (¼ tsp each) is a solid swap. The powdered sugar for dusting can be skipped if you prefer a naked cake, but trust me—it adds that final touch of elegance. For the frosting, if you don’t have heavy cream, whipped coconut cream gives a similar texture. And if you’re feeling fancy, swap the chocolate chips for white chocolate chunks or dried fruit—just fold them in at the end. The flour is non-negotiable here—all-purpose is a must for that tender crumb.
This cake keeps beautifully—3 days covered at room temperature or 1 week in the fridge. For best texture, slice and serve at room temperature. If you’re making ahead, bake the cake, cool it completely, then wrap tightly in plastic wrap. The frosting, if made, can be whipped up fresh in 2 minutes—just add the powdered sugar and a splash of milk. Leftovers? They’re rare, but if they happen, reheat slices in the oven for 10 seconds to restore freshness. And if you’re scaling up later, double the recipe but use a 9-inch pan—it bakes faster and more evenly.
Why You’ll Love This Recipe
- No Mixer Needed: I swear by this recipe when I’m too tired to pull out the stand mixer. Creaming the butter and sugar by hand takes less than two minutes—no fancy tools, just elbow grease and that perfect cloud of vanilla-sweetened butter.
- Vanilla Butter Bliss: That moment when you crack open the vanilla extract and fold it into the warm, buttery batter? It’s like a hug for your taste buds. The sugar caramelizes just enough to give it a subtle depth, but the vanilla stays bright and inviting.
- Portion Control Perfection: Two servings mean no stress—whether it’s a quick dessert for just me or a single slice for a friend’s visit. Honestly, I’ve eaten half of it straight from the pan more times than I’d admit, and it’s always the right amount.
- Budget-Friendly Indulgence: Five ingredients, zero waste. The butter and eggs stretch perfectly, and I’ve made this cake with store-brand sugar without missing the difference. It’s the kind of recipe that makes me feel fancy without breaking the bank.
Step-by-step instructions for perfect 2-Serving cake
Here’s how to bake a foolproof cake that’s just right for sharing.
Cream Butter and Sugar Until Light and Fluffy
In a medium mixing bowl, combine the 0.5 cup unsalted butter and 0.5 cup granulated sugar. Using an electric mixer on medium speed, beat until the mixture is light and fluffy, about 3-4 minutes. You’ll notice the color lighten and nearly double in volume—this incorporates air that creates a tender crumb.
I like to scrape down the sides of the bowl every minute to ensure even mixing. If you’re using a stand mixer, make sure the paddle attachment is securely in place. The butter should be at room temperature but not melted—press a cube between your fingers to test. If it leaves a slight indent, it’s ready.
Add Eggs and Vanilla for Richness
Add the 1 whole large egg to the butter-sugar mixture, mixing on low speed until fully incorporated. Then add the 1 teaspoon pure vanilla extract and mix for another 10 seconds. The vanilla should blend seamlessly into the mixture, adding depth that you’ll taste in every bite.
Here’s the thing—don’t overmix at this stage. You want the egg to blend smoothly but not create too many air bubbles that could cause the cake to deflate later. The mixture should look slightly ribbony when you lift the whisk or paddle from the bowl.
Combine Dry Ingredients and Fold in Chocolate
In a separate bowl, whisk together the 0.75 cup all-purpose flour, 0.5 teaspoon baking powder, and 0.25 teaspoon salt. Sift the flour mixture directly over the wet ingredients to prevent clumping. Using a spatula, gently fold the dry ingredients into the wet mixture until just combined—you should still see some flour streaks.
Remove the bowl from the mixer and fold in the 0.25 cup dark chocolate chips using a silicone spatula. Be gentle to avoid melting the chocolate. The chocolate should be evenly distributed throughout the batter. If you’re making this ahead, you can cover the bowl and refrigerate the batter for up to 24 hours—this actually enhances the flavor.
Mix in Milk for Perfect Texture
Pour in the 0.25 cup whole milk and mix on low speed until the batter is smooth and homogenous. The batter should be thick but pourable—like heavy pudding. If it looks too thick, add 1 tablespoon more milk to ensure proper rise. This is your last chance to adjust the consistency before baking.
Here’s a pro tip: don’t overmix now either. You want to maintain as much air as possible in the batter. The baking powder will do the rest of the work to create that light, airy texture we’re after. Give the batter one final stir to ensure everything is evenly incorporated.
Bake to Golden Perfection
Preheat your oven to 350°F. Grease a 6-inch round cake pan or line it with parchment paper to prevent sticking. Pour the batter into the prepared pan and smooth the top with a spatula. Bake for 25-30 minutes, or until a toothpick inserted into the center comes out clean.
I know it’s tempting to open the oven door to check early, but resist! The cake needs that steady, even heat to rise properly. When the top is golden brown and the edges are pulling away slightly from the pan, it’s ready. Let the cake cool in the pan for 10 minutes, then transfer to a wire rack to cool completely before frosting.
Optional Whipped Cream Frosting
While the cake cools, whip the 0.25 cup heavy whipping cream with the 0.25 cup powdered sugar until soft peaks form. This light, airy frosting complements the rich chocolate cake beautifully. Spread a thin layer over the cooled cake or use it to fill between two cake layers if you’re making a taller cake.
For an extra touch, dust the top with a little extra powdered sugar or sprinkle with a few more chocolate chips. Serve immediately while the cake is still warm for the best texture and flavor combination. This cake keeps well at room temperature for 2-3 days or can be refrigerated for up to 5 days—though I doubt it will last that long!
Pro Tips For Making 2 Serving Cake
- MEASURE FLOUR BY SPOONING: Dump that cup straight from the bag? Stop. Spoon the flour into your measuring cup, then level it with a knife—packing it down creates dense cake. I learned this the hard way when my first attempt turned out like a brick.
- SOFTEN BUTTER FIRST: Cold butter makes tough cake. Take it out of the fridge 30 minutes before mixing—just until it’s soft enough to press with your finger but not greasy. Room-temperature butter blends smoother and gives that tender crumb you actually want.
- DON’T OVERMIX THE BATTER: Once you fold in the flour, stop after 10-12 strokes. Overmixing develops gluten, and your cake will turn out chewy instead of light. I used to go for “fully combined,” but now I resist the urge to stir like I’m making pancakes.
- CHECK OVEN TEMP AT 350°F: Ovens lie. Use an oven thermometer to confirm it’s actually 350°F—many run hot or cold. If it’s off by 25°F, your cake could burn on top before baking through. (Yes, I’ve done this. No, I won’t do it again.)
Health benefits of 2 serving cake
Balanced Carbs
This cake uses a modest amount of 0.5 cup granulated sugar and 0.75 cup all-purpose flour to create a dessert that won’t spike your blood sugar like many traditional cakes.
The whole milk and eggs add protein and healthy fats that help balance the carbs, making this a more satisfying treat. For a lower-carb option, you can reduce the sugar by 2 tablespoons and use almond flour instead of all-purpose flour—just note the texture will be slightly denser. 💪
Rich Protein Boost
Don’t let the small portion fool you—this cake packs a protein punch thanks to the 1 whole egg and 0.25 cup whole milk. Together, they provide about 10 grams of protein per serving, which is more than you’d expect in a dessert.
The eggs also contribute essential amino acids that support muscle repair and keep you feeling full longer. If you’re watching your protein intake, this is a great way to enjoy cake without the guilt. 🥚
Antioxidant Chocolate
The optional 0.25 cup dark chocolate chips (at least 70% cocoa) add a dose of antioxidants like flavonoids and polyphenols, which help combat oxidative stress in your body.
Dark chocolate has been linked to improved heart health and may even boost your mood thanks to its magnesium and serotonin-boosting compounds. For maximum benefits, choose high-quality chocolate with minimal added sugar. 🍫
Healthy Fat Sources
The 0.5 cup unsalted butter and heavy whipping cream (if using) provide saturated fats that support brain function and hormone production. While these aren’t “healthy fats” in the traditional sense, they’re used in moderation here and contribute to the cake’s moist, tender texture.
For a lighter option, swap the butter for Greek yogurt or applesauce—just reduce the milk by 2 tablespoons to maintain moisture. 🧈
Vanilla’s Calming Benefits
The 1 teaspoon pure vanilla extract isn’t just for flavor—it contains compounds like vanillin and eugenol that may help reduce stress and improve mood. Vanilla also has mild antibacterial properties, which is why it’s often used in aromatherapy.
The natural sweetness from vanilla means you can reduce the sugar slightly without sacrificing taste. 🌿
Portion Control Perfection
One of the biggest health benefits of this recipe is its perfect 2-serving portion. No leftovers mean no temptation to overeat, and the controlled serving size makes it easier to enjoy dessert without derailing your diet.
The cake’s rich flavor and moist texture also help satisfy cravings with less volume—so you’ll feel satisfied after just one slice. This is dessert done right: indulgent but mindful. ✨
Nutrition facts
Frequently asked questions
Can I use this recipe for a single serving?
For a single slice, reduce the recipe by half and bake in a 4-inch round pan for 18-20 minutes at 350°F. The baking time will be shorter, but the same principles apply—just ensure your pan is properly greased. This works perfectly for a personal treat or when you’re craving just a small portion.
Why does my cake come out dense instead of light and fluffy?
Overmixing the batter or using cold butter are the most common culprits. Always cream the butter and sugar until light and fluffy (about 3-4 minutes), and ensure your butter is at room temperature. Also, don’t overmix after adding the dry ingredients—just fold until combined. If your cake still turns out dense, try sifting the flour before mixing.
Can I make this cake without eggs?
Yes! Replace the 1 egg with 0.5 cup unsweetened applesauce or 0.25 cup plain yogurt plus 0.25 cup water. For best results, add 0.5 teaspoon baking soda to help with rise. The texture will be slightly different but still delicious. This works well for vegan versions too.
How do I store leftovers (if any!)?
Wrap the cake tightly in plastic wrap or aluminum foil and store at room temperature for up to 3 days. For longer storage, refrigerate for up to 5 days. To revive stale cake, warm slices in the oven at 300°F for 5-10 seconds or microwave for 10 seconds. The frosting, if used, should be added fresh for best texture.
What if I don’t have a 6-inch pan?
Use a 5.5-inch pan (bake 28-32 minutes) or a 7-inch pan (reduce batter by 25% and bake 22-26 minutes). For odd shapes, adjust baking time based on visual cues—the cake is done when the top springs back when touched and a toothpick comes out clean. Always use the oven thermometer to confirm your oven’s accuracy.

- 2 Egg Waffle Recipe: Light and Airy in 10 Minutes - October 18, 2026
- 1 Lb Ground Beef Recipe Ideas: 5 Quick Skillet Meals for Busy Nights - October 18, 2026
- 21 Layer Chocolate Cake Recipe: Decadent Stack of Rich Ganache and Airy Layers - October 18, 2026