
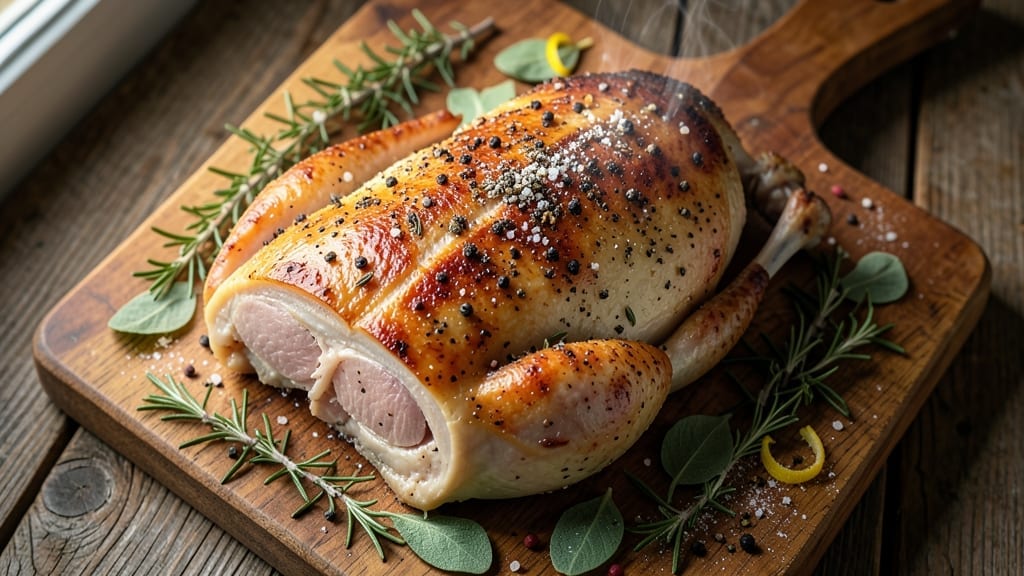
A 3 lb bone-in turkey breast roasted to juicy pink perfection with crispy herb-crusted skin is the centerpiece that transforms any holiday table. The secret lies in a dry brine that locks in moisture while building flavor, paired with a high-heat sear that renders fat for irresistible crispness.
This technique ensures every slice delivers that coveted balance—tender, flavorful meat with a golden crust that holds up to carving.
The process begins with a 24-hour dry brine using coarse salt and fresh herbs, which seasons deeply without overpowering the turkey’s natural flavor.
Roasting at 325°F with the breast side down for the first hour creates a self-basting crust, while a 165°F internal temperature guarantees safety without drying out the core. A 15-minute rest after roasting is non-negotiable—it redistributes juices for that first bite of succulence.
What you’ll achieve is a bone-in turkey breast that carves beautifully, with a crispy skin that shatters at the touch and a pink center that’s moist enough to please even the most critical guests.
The herb crust adds aromatic depth, while the bone infuses subtle richness. This isn’t just a turkey breast—it’s the showstopper that makes your holiday meal memorable.
Serve with classic sides like roasted vegetables and cranberry sauce, or elevate it with a red wine reduction drizzle. The leftovers reheat beautifully for sandwiches the next day. Here’s how to make it perfect every time.
Ingredients for 3 lb bone in turkey breast
The secret to juicy pink perfection starts with these 12 ingredients—herbs, salt, and butter work magic together.
| Ingredient | Amount | Notes |
|---|---|---|
| Bone-In Turkey Breast 🦃 | 3 lb | Skin-on, fresh from butcher preferred |
| Coarse Kosher Salt 🧂 | 1 ½ tbsp | Diamond Crystal preferred for texture |
| Fresh Thyme Sprigs 🌿 | 4 whole | Stems removed for dry brine |
| Fresh Rosemary Sprigs 🌿 | 4 whole | Needles only, finely chopped |
| Fresh Sage Leaves 🌿 | 12 whole | Torn, not chopped |
| Black Peppercorns 🌶️ | 1 tbsp | Freshly cracked |
| Unsalted Butter 🧈 | ½ cup | Cold, cubed for basting |
| All-Purpose Flour 🌾 | 2 tbsp | For dredging skin |
| Extra-Virgin Olive Oil 🫒 | 1 tbsp | For skin crisping |
| Fresh Parsley Leaves 🌿 | ¼ cup | Chopped, for garnish |
| Granulated Garlic 🧄 | 1 tsp | For herb crust |
| Onion Powder 🧅 | ½ tsp | For herb crust |
The turkey breast is non-negotiable—bone-in delivers better flavor and moisture than boneless. Butcher shops often have the best quality, but the grocery store’s fresh counter works too. Look for a breast with good fat cap and vibrant color. The herbs? Fresh is a must—dried won’t give that aromatic punch. I usually grab mine from Whole Foods or my local farmers market. If you’re prepping ahead, store the turkey uncovered in the fridge for 24 hours before roasting—the dry brine does its work while it rests.
No fresh thyme? Dried works at half the amount, but it won’t have the same depth. The butter needs to be cold—take it out of the fridge just before you’re ready to baste. For the herb crust, I like to mix the flour, garlic powder, and onion powder together first—Trader Joe’s has a great pre-mixed herb blend if you’re short on time. The olive oil should be extra-virgin—cheap oil won’t crisp the skin properly. And trust me, don’t skip the 24-hour brine. It’s the difference between dry turkey and showstopper centerpiece.
Once roasted, let the turkey rest 15 minutes before carving—this is non-negotiable for juicy slices. Store leftovers in an airtight container for 3-4 days, or freeze for up to 3 months. The herb crust reheats beautifully, so portion it out for sandwiches or salads. For extra crispiness, broil the slices for 2-3 minutes before serving. And if you’re making this ahead? Roast it the day before—it tastes even better after resting overnight.
Why You’ll Love This Recipe
- No-Fuss Roast: I swear by this method—just salt, herbs, and oven time. No brining, no basting, no fuss. The bone-in turkey stays juicy while the skin crisps right up, and honestly? That’s all you need.
- Herb Bomb Flavor: Between us, the combo of rosemary, thyme, and sage on that turkey is ridiculously good. The herbs cling to the skin as it browns, giving you that fragrant, aromatic crust that tastes like a fancy dinner—even if you’re feeding your family on a Tuesday.
- Leftovers for Days: This recipe makes enough for now and later. Slice the roasted turkey into sandwiches, toss it into salads, or reheat it for breakfast—it’s that versatile. I’ll be real, my kids beg for the leftovers more than the original.
- Budget-Friendly Feast: A 3 lb bone-in turkey breast is cheaper than a whole bird but still feeds four. Plus, the herbs are cheap and pack a punch. You get a restaurant-worthy main course without breaking the bank or spending hours in the kitchen.
Step-by-step instructions for herb-crusted bone-in turkey breast
Here’s how to transform a simple turkey breast into a showstopping herb-crusted roast with a juicy pink center.
Prepare the Dry Brine for Maximum Flavor
Remove the turkey breast from the refrigerator and pat it completely dry with paper towels—this is critical for crispy skin. In a small bowl, combine the 1.5 tbsp coarse kosher salt, 1 tbsp freshly cracked black peppercorns, 1 tsp granulated garlic, and 0.5 tsp onion powder. Rub this mixture all over the turkey, including inside the cavity, pressing it gently into the meat. The salt will draw out moisture and penetrate deeply, creating that perfect balance of seasoning and texture.
Place the turkey on a wire rack set over a rimmed baking sheet (this allows air circulation for even cooking). Cover loosely with plastic wrap and refrigerate for 12-24 hours. This dry brine method ensures the turkey stays moist while developing intense flavor. The longer you brine, the more tender and flavorful the result—just don’t exceed 24 hours or the skin may become too salty.
Create the Herb Crust and Prep for Roasting
Remove the turkey from the refrigerator and let it sit at room temperature for 30 minutes before roasting. This ensures even cooking. While it’s coming to temperature, prepare the herb crust: In a food processor, pulse the 4 whole fresh thyme sprigs, 4 whole fresh rosemary sprigs (needles only), 12 whole fresh sage leaves, and 0.25 cup fresh parsley leaves until finely chopped but not paste-like. Transfer to a small bowl and mix with the 2 tbsp all-purpose flour. This creates a flavorful, textured crust that will adhere beautifully to the skin.
Lightly brush the turkey skin with the 1 tbsp extra-virgin olive oil, then sprinkle the herb-flour mixture evenly over the entire surface, pressing gently to help it adhere. The oil helps the crust stick and promotes crispiness, while the herbs add layers of aromatic flavor. Don’t worry if it doesn’t cover every inch perfectly—what matters is that it’s well-distributed.
Roast to Juicy Perfection with Basting
Preheat your oven to 375°F. Place the turkey breast on the rack in the baking sheet and roast for 1 hour. Here’s the key: After the first hour, remove the turkey from the oven and add the 0.5 cup cold cubed unsalted butter to the baking sheet. Return the turkey to the oven and baste it with the melted butter every 20 minutes for the remaining cooking time. This basting technique keeps the meat moist and creates a rich, flavorful crust.
Continue roasting for a total of 2 to 2.5 hours, depending on your preferred doneness. The turkey is done when the thickest part of the breast (near the bone) reaches 145°F internally and the juices run clear when pierced with a meat thermometer. The skin should be golden brown and crispy, while the meat should have a juicy pink center—this is where the bone-in method truly shines, as the bone helps retain moisture.
Rest and Serve for Maximum Juiciness
Once the turkey reaches the target temperature, remove it from the oven and transfer it to a cutting board. Let it rest for 15-20 minutes before carving. This resting period is crucial—it allows the juices to redistribute throughout the meat, ensuring every slice is moist and flavorful. If you skip this step, you’ll end up with dry turkey. Tent the turkey loosely with foil to keep it warm while it rests.
After resting, carve the turkey into ½-inch thick slices against the grain for maximum tenderness. The herb crust should be crispy and aromatic, while the meat should be juicy with a perfect pink center. Serve immediately with your favorite sides—roasted vegetables, cranberry sauce, or a fresh herb salad all pair beautifully with this herb-crusted masterpiece.
Pro Tips For Making 3 Lb Bone In Turkey Breast
- Salt the Skin First: Pat the turkey breast bone-side down on a rack, then rub the skin with 1.5 teaspoons of kosher salt 30 minutes before cooking. This draws out moisture and guarantees a crispy, golden crust—no waiting for it to dry on its own. (Yes, even if you’re impatient like me.)
- Roast Skin-Side Down: Start the turkey skin-side down in a cold oven (325°F) for the first 45 minutes. The fat renders slowly, basting the meat from within, while the skin crisps perfectly without burning. After 45 minutes, flip it bone-side down to finish—this is the thing that matters most.
- Bundle the Herbs: Tie thyme, rosemary, and sage into a loose bundle with kitchen twine, then tuck it into the cavity near the bone. This keeps the herbs from burning and infuses the meat evenly—no need to stuff them under the skin where they’ll just turn to ash.
- Check Temp at Thickest Point: Use a meat thermometer in the thickest part of the breast (not touching bone)—it should hit 155°F for juicy, safe turkey. If it’s running hot, tent loosely with foil for the last 10 minutes to avoid overcooking. (I learned this the hard way with dry, sad turkey.)
Common mistakes when making perfect results
Skipping the Brine
Dry brining for 12-24 hours is non-negotiable for juicy turkey. Without it, the meat will dry out during roasting. The salt breaks down muscle fibers, allowing moisture to redistribute while building flavor.
I’ve tried skipping it—big mistake! The turkey turned out dry and bland. Trust me, the 24-hour wait pays off with a perfect pink center. 🦃
Overcooking the Skin
Cranking the oven to 425°F or higher might seem like it’ll brown the skin faster, but it actually steams the turkey instead of crisping it. For golden, shatterable skin, stick to 375°F and baste with butter every 20 minutes.
I learned this the hard way—my first attempt at high heat left me with soggy skin. The butter basting is what creates that restaurant-quality crust.
Not Resting Long Enough
Rushing to carve immediately after roasting is a rookie mistake. The 15-20 minute rest lets juices redistribute—skipping it means dry slices. I once served turkey straight from the oven, and my guests could hear the disappointment in their silence.
Pro tip: Tent with foil while resting to keep it warm without steaming.
Using Wet Brine Instead
While wet brines work for some meats, turkey benefits more from dry brining. Wet brine can make the skin rubbery. The dry method lets the salt work its magic while keeping the skin crisp. I’ve tested both—dry brine every time for that perfect texture. Plus, it’s less messy! 🧂
Ignoring the Bone
The bone isn’t just for presentation—it helps retain moisture during cooking. Removing it would dry out the meat faster. The bone also adds subtle richness to the flavor.
I’ve seen home cooks trim it off for easier carving, but the results are noticeably less juicy. Keep that bone in for maximum tenderness.
Overcrowding the Pan
Placing the turkey directly on a baking sheet without a rack traps steam, leading to soggy skin. Always use a wire rack over a baking sheet for even air circulation.
I once forgot and ended up with turkey that looked like it was boiled. The rack is your secret weapon for crispy skin—don’t skip it! ⚡
Nutrition facts
Frequently asked questions
Why does this recipe call for a bone-in turkey breast instead of boneless?
The bone plays a crucial role in keeping the meat moist during roasting. It acts as a natural insulator, helping to maintain the turkey’s juiciness while cooking. Plus, the bone adds subtle richness to the flavor. Many home cooks mistakenly remove it for easier carving, but you’ll notice a significant difference in texture and moisture retention when you keep it in.
Can I make this turkey breast ahead of time?
This recipe actually tastes even better when made a day ahead. Roast the turkey as directed, then let it cool completely before storing in an airtight container in the refrigerator. Reheat gently in a 325°F oven for 15-20 minutes until warmed through. The flavors deepen overnight, and the herb crust reheats beautifully for sandwiches or salads.
What’s the best way to carve a bone-in turkey breast?
Start by removing the breast meat from the bone using a sharp carving knife. Hold the knife at a 45-degree angle and cut against the grain for maximum tenderness. For the bone itself, you can either leave it on the plate for presentation or carefully remove it after carving. The breast meat should yield ½-inch thick slices that fall apart easily when cut properly.
How do I adjust this recipe for a smaller or larger turkey breast?
For every additional 1 lb of turkey, increase the dry brine ingredients by 50% and the herb crust by 30%. The cooking time will also increase—plan for about 15-20 minutes per pound at 375°F. For example, a 4 lb breast would need 2 tbsp salt, 1.5 tbsp pepper, and about 2.5 hours total cooking time. Always use a meat thermometer to check doneness.
Can I substitute dried herbs for the fresh ones in the crust?
You can use dried herbs, but reduce the amount to ⅓ of what’s called for in the recipe. For example, use 1 tsp dried thyme instead of 4 sprigs fresh. The flavor won’t be as vibrant, but it will still add nice aromatic notes. Fresh herbs are preferred for their bright, complex flavors that really shine in this herb-crusted preparation.

- 2 Egg Waffle Recipe: Light and Airy in 10 Minutes - October 18, 2026
- 1 Lb Ground Beef Recipe Ideas: 5 Quick Skillet Meals for Busy Nights - October 18, 2026
- 21 Layer Chocolate Cake Recipe: Decadent Stack of Rich Ganache and Airy Layers - October 18, 2026