
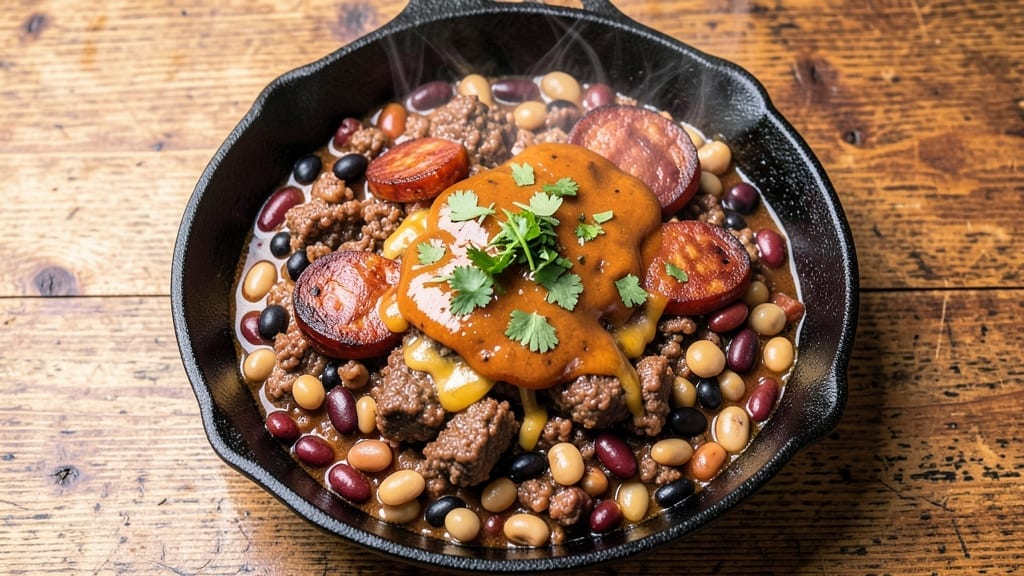
A 3 bean 3 meat chili recipe transforms weeknight dinners into hearty, smoky masterpieces with minimal cleanup. The secret lies in slow-cooked layers—tender beef, spiced pork, and smoky sausage meld with kidney, black, and pinto beans into a thick, flavorful stew.
This one-pot wonder delivers restaurant-quality depth without the fuss, perfect for feeding a crowd or meal prepping for the week ahead.
The foundation starts with browning the meats in batches to develop rich, caramelized flavors before adding aromatic onions, garlic, and bell peppers. A blend of chili powder, cumin, and smoked paprika creates that signature deep, smoky backbone, while tomatoes and broth build a velvety base.
The beans soften as they simmer, absorbing all those complex flavors into every bite.
By the time it finishes simmering, you’ll have a chili so rich and satisfying it begs for seconds—thick enough to hold its shape on a spoon but still tender enough to melt in your mouth.
The combination of textures (crumbly sausage, tender beef, creamy beans) and flavors (smoky, spicy, slightly sweet) makes this more than just a chili. It’s a foolproof weeknight solution that tastes like a labor of love.
Serve it with cornbread, shredded cheddar, or a dollop of sour cream to balance the heat. This recipe scales perfectly for gatherings, freezes beautifully for later, and proves that homemade chili can be both impressive and effortless. Let’s get cooking!
Ingredients for 3 bean 3 meat chili
Six hearty ingredients transform into a smoky, meaty chili that feeds a crowd.
| Ingredient | Amount | Notes |
|---|---|---|
| Ground Beef (Chuck) 🥩 | 1 ½ lb | 80% lean for best flavor |
| Ground Pork 🐖 | ¾ lb | Freshly ground preferred |
| Smoked Sausage 🌭 | ¾ lb | Kielbasa or Italian sausage |
| Kidney Beans 🌱 | 15 oz | Canned, drained and rinsed |
| Black Beans 🌱 | 15 oz | Canned, drained and rinsed |
| Pinto Beans 🌱 | 15 oz | Canned, drained and rinsed |
| Yellow Onion 🧅 | 1 whole | Diced, about 1.5 cups |
| Bell Pepper 🌶️ | 1 whole | Any color, diced |
| Garlic Cloves 🧄 | 4 cloves | Minced, about 1 tbsp |
| Chili Powder 🌶️ | 2 tbsp | Medium heat preferred |
| Ground Cumin 🌿 | 1 tbsp | Toasted for deeper flavor |
| Smoked Paprika 🌶️ | 1 tbsp | For authentic smokiness |
| Diced Tomatoes 🍅 | 14 ½ oz | Canned, fire-roasted preferred |
| Beef Broth 💧 | 2 cups | Low-sodium preferred |
| Salt 🧂 | 1 ½ tsp | Adjust to taste |
| Black Pepper 🌶️ | ½ tsp | Freshly ground preferred |
| Olive Oil 🫒 | 1 tbsp | For browning meats |
The meats are the stars here—ground chuck for deep beef flavor, pork for richness, and smoked sausage for that unmistakable chili-house taste. Grab these from the butcher section if possible; pre-packaged ground meat works fine too. Look for 80% lean beef—the fat renders out and adds flavor. For the beans, canned is fine (just drain and rinse), but if you’ve got time, soaking overnight makes them creamier. Trader Joe’s usually has the best prices on canned beans, but any brand works. The bell pepper can be any color—red, yellow, or green—whatever’s on sale.
No smoked sausage? Italian sausage or even hot dogs (yes, really) will work in a pinch. Short on chili powder? Mix smoked paprika and cayenne at a 2:1 ratio. The tomatoes? Fire-roasted canned tomatoes add smoky depth, but regular works too. If you’re watching sodium, rinse the beans thoroughly—they often have added salt. The broth matters—low-sodium is key here, or you’ll end up with a salty chili. For extra smokiness, add a dash of liquid smoke (about 1/2 tsp), but don’t go overboard—it can get overpowering.
This chili tastes even better the next day—make a double batch and freeze half for lazy nights. Store leftovers in the fridge for up to 5 days or freeze for up to 3 months. The flavors meld beautifully over time, so don’t rush it. To reheat, add a splash of water or broth if it gets too thick. Portion into meal prep containers with a side of cornbread or tortilla chips for easy lunches all week. The beans will soften further as it sits, so if you’re serving it right away, simmer just until heated through.
Why You’ll Love This Recipe
- One-Pot Magic: I swear by this recipe when I’m too tired to scrub pots—just brown the meats in the same Dutch oven you’ll simmer in, dump everything in, and walk away. The pork and sausage add layers of flavor without extra effort, and the beans thicken the chili naturally. (Yes, even on a Tuesday night.)
- Smoky Depth Bomb: That combo of ground beef, pork, and smoked sausage? It’s like a flavor party in your mouth. The chuck gives it richness, the pork keeps it tender, and the sausage smokes up the whole pot—no fancy rubs needed. Honestly, the first bite makes me forget I’m making dinner.
- Leftovers That Win: This chili tastes better the next day (I know, it’s a bold claim). I make a double batch on Sundays, freeze half, and reheat it for lazy nights or when friends drop by. The beans hold up, the meats stay juicy, and no one ever turns down seconds.
- Budget-Friendly Powerhouse: You’re getting three types of meat and three kinds of beans for a fraction of what takeout costs. Chuck roast is cheap but packs flavor, and canned beans save time without sacrificing texture. Between us, this is how I feed my family for under $10 a serving.
Step-by-step instructions for 3 bean 3 meat chili
This chili comes together in one pot with layers of smoky, spicy goodness.
Brown the Meats for Maximum Flavor
Heat a large Dutch oven over medium-high heat and add the 1 tablespoon olive oil. Once shimmering, add the 1.5 lb ground beef (chuck) in batches, breaking it up with a wooden spoon. Cook for 5-6 minutes until it loses its raw color and starts to brown—this releases those deep meaty flavors. Transfer the beef to a plate.
Repeat the process with the 0.75 lb ground pork, cooking until it’s no longer pink. Then add the 0.75 lb smoked sausage, breaking it apart as it cooks for 3-4 minutes until it’s lightly browned. Here’s the thing—don’t rush this step. Proper browning builds the chili’s rich foundation. If your pan gets too crowded, work in batches to avoid steaming instead of browning.
Sauté the Aromatics and Spices
In the same Dutch oven, add the diced 1 whole yellow onion and 1 whole bell pepper. Cook for 5-6 minutes until softened and slightly caramelized—this adds sweetness that balances the heat. Stir in the 4 cloves minced garlic and cook for 30 seconds until fragrant.
Now add the 2 tablespoons chili powder, 1 tablespoon ground cumin, and 1 tablespoon smoked paprika. Stir constantly for 1 minute until the spices are toasted and the raw aroma disappears. This activates their flavors and prevents bitterness. Don’t walk away—spices burn fast.
Build the Chili Base
Pour in the 14.5 oz diced tomatoes and 2 cups beef broth, scraping up any browned bits from the bottom of the pot. Add the browned meats back in along with the 15 oz kidney beans, 15 oz black beans, and 15 oz pinto beans. Stir well to combine everything.
Bring to a boil, then reduce heat to low. Here’s where it gets good—let it simmer uncovered for 1 hour 15 minutes. You’ll see the chili reduce slightly as moisture evaporates, concentrating the flavors. Stir occasionally, but not constantly—this prevents the beans from breaking down too much. The chili should smell deeply aromatic with smoky, spicy notes.
Season and Simmer to Perfection
After the initial simmer, taste and adjust the seasoning with 1.5 teaspoons salt and 0.5 teaspoon black pepper. Add more if needed—this is where you personalize the flavor. Let the chili continue simmering for another 30-45 minutes until it reaches your desired thickness. The texture should be thick enough to coat the back of a spoon but still be spoonable.
Here’s the pro tip: The longer it simmers, the deeper the flavors develop. I like to cook mine for at least 2 hours total for maximum richness. If it gets too thick, add a splash of water or broth to loosen it. Serve hot with cornbread or over rice—this chili is hearty enough to stand alone.
Pro Tips For Making 3 Bean 3 Meat Chili
- CRACK THE MEAT FIRST: Brown each meat separately in the same pot—beef and pork first on high heat until deeply browned, then remove and set aside. The pork will release more fat, which helps sear the sausage later without sticking. I used to cook them all together, and the chili always tasted muddled.
- SALT THE BEANS BEFORE ADDING: Drain and rinse the kidney and black beans, then toss them in a bowl with ½ teaspoon salt per cup. This keeps them from turning mushy later. I learned this the hard way—skipping it makes the beans waterlogged, and no one wants a chili swimming in bean juice.
- LOW AND SLOW AFTER 20 MINUTES: Once the meats are browned and the beans are in, crank the heat to medium-high for the first 15 minutes to build flavor, then drop it to a simmer. Rushing the simmering stage means undercooked beans and bland meat—this isn’t soup, it’s chili.
- USE THE SAUSAGE CASINGS: Don’t toss the casings from the smoked sausage—save them and add them to the pot with the beans. They’ll burst during cooking, releasing extra flavor and thickening the chili naturally. It’s a lazy person’s shortcut, and it works every time.
Best sauces and condiments for this dish
Classic Chili Toppings
Start with a simple shredded sharp cheddar cheese—about ½ cup per bowl—to add a creamy, tangy contrast. I love diced avocado (about ¼ cup per serving) for a fresh, buttery element that cuts through the richness.
For extra crunch, sprinkle chopped green onions or cilantro—just 1 tablespoon each—right before serving. 🌶️
Creamy Complements
A dollop of sour cream (about 2 tablespoons per bowl) adds a cooling, velvety texture that balances the heat. For a tangier option, try Mexican crema or Greek yogurt—both work beautifully.
If you want to go bold, drizzle with hot honey (just ½ teaspoon per bowl) for a sweet-spicy finish that’s become one of my go-tos.
Spicy Kick Boosters
Add pickled jalapeños (about 2 slices per bowl) for a tangy, fiery bite that brightens the chili.
For those who love heat, a sprinkle of crushed red pepper flakes (start with ¼ teaspoon and adjust to taste) or a few drops of chipotle tabasco sauce (just ½ teaspoon) will take it to the next level. Trust me, these small additions make a big difference!
Crunchy Textures
Top with tortilla strips (about ¼ cup per bowl) for a satisfying crunch that’s perfect for scooping up every last bite. Crushed tortilla chips (about 2 tablespoons) or toasted pepitas (pumpkin seeds) also work wonders.
For something heartier, try crumbled bacon (about 1 tablespoon per bowl)—it adds a smoky, salty depth that pairs perfectly with the chili’s flavors.
Herbaceous Finishes
Fresh herbs elevate the dish instantly. Try chopped cilantro (about 1 tablespoon) for a bright, citrusy note or thinly sliced scallions for a milder onion flavor. If you’re feeling fancy, a sprinkle of dried oregano (just ½ teaspoon) adds an earthy depth that ties everything together.
These herbs are the secret to making your chili taste restaurant-quality. ✨
Nutrition facts
Frequently asked questions
Can I substitute any of the meats in this 3-meat chili?
Swap ground beef for ground turkey or lentils for a lighter version, or replace pork with chorizo for extra spice. For sausage, try Italian sausage or even hot dogs (drained well) in a pinch. Just adjust cooking times—lean meats like turkey brown faster, while denser meats need more time. The key is browning well to build flavor.
How can I make this chili less spicy for kids?
Reduce the chili powder to 1 tablespoon and skip cayenne entirely. For milder heat, add ½ teaspoon sugar or 1 teaspoon cocoa powder to balance the spices. Serve with extra toppings like cheese or sour cream to help cool their palates. You can also set up a topping bar so kids can customize their own bowls with mild toppings.
Why does my chili taste bland after simmering?
Bland chili usually means under-seasoned or insufficient browning. Always brown meats in batches to develop deep flavors, and toast your spices for 1 full minute before adding liquids. Taste as you go—add ½ teaspoon salt or ¼ teaspoon smoked paprika at the end if needed. A splash of apple cider vinegar (1 teaspoon) can also brighten flavors if the chili tastes flat.
Can I make this chili in a slow cooker?
Yes! Brown the meats first, then combine everything in your slow cooker and cook on low for 6-8 hours or high for 3-4 hours. The long cook time enhances flavors, but you may need to add ½ cup broth if it gets too thick. For best results, use a 6-quart slow cooker to avoid overflowing. Stir once halfway through to distribute ingredients evenly.
How do I store and reheat leftovers?
Store in an airtight container in the fridge for up to 5 days or freeze for 3 months. To reheat, warm on the stovetop over medium-low heat with 2-3 tablespoons broth or water to prevent drying out. For microwave reheating, cover with a damp paper towel and heat in 1-minute intervals, stirring between each. The flavors actually improve after resting overnight!

- 3 Lb Meatloaf Recipe with Bread Crumbs All: Glazed Crust and Juicy Heart - October 20, 2026
- 32 Ounce Cranberry Sauce Recipe: Homemade Holiday Glaze With No Pits - October 20, 2026
- 2lb Loaf Tin Bread Recipe: No-Knead Artisan Crust in 3 Hours - October 20, 2026