
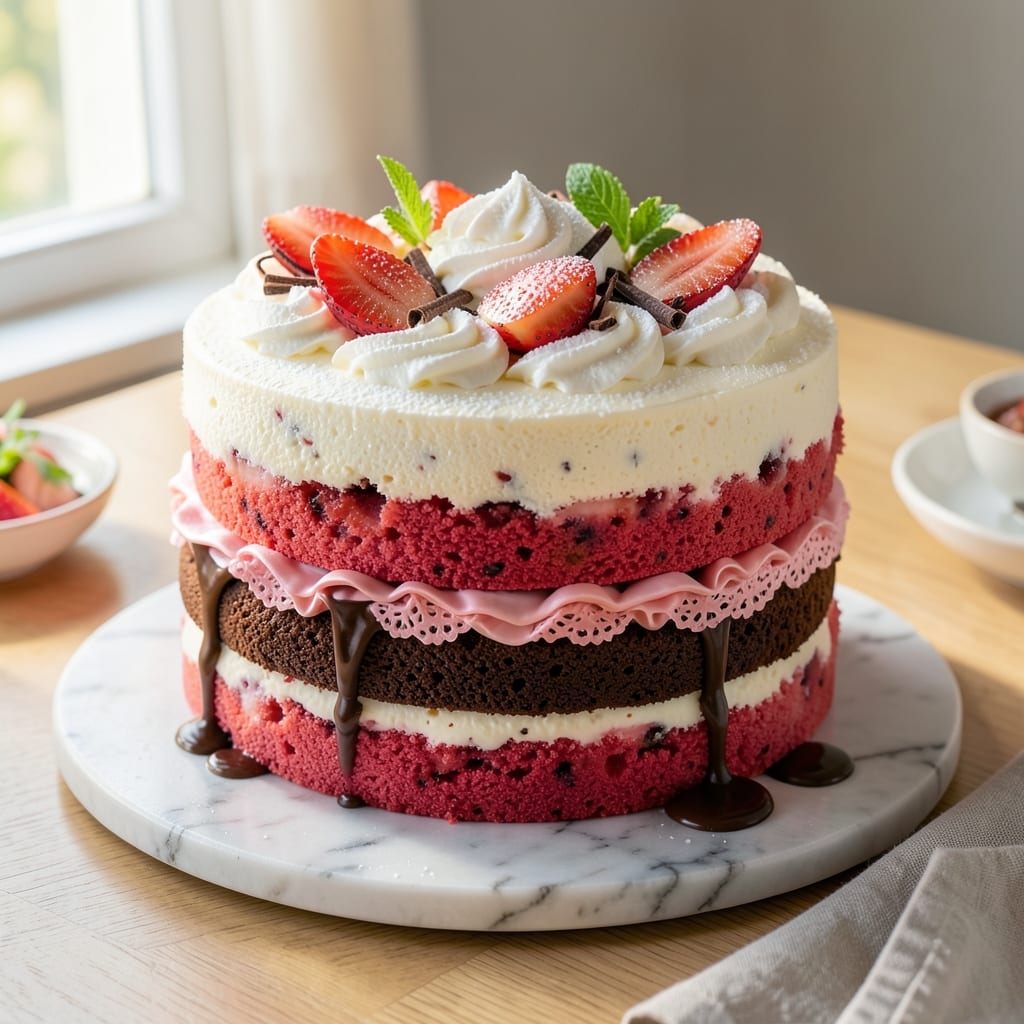
A 3 color cake recipe transforms baking day into a celebration of vibrant flavors and textures, where vanilla, chocolate, and strawberry layers create a showstopping dessert. The secret lies in precision—balancing cake batter consistency, vibrant food coloring techniques, and careful layering to ensure each hue pops while maintaining structural integrity.
This isn’t just a cake; it’s a masterpiece that demands attention at every slice.
What sets this recipe apart is the foolproof method for achieving professional results at home: using boxed cake mixes (for simplicity) but elevating them with homemade fillings and buttercream.
The vanilla layer stays light and airy, the chocolate develops deep richness, and the strawberry adds a tangy brightness that ties everything together. Each step is designed to prevent common pitfalls like sinking layers or muddy colors.
By the time you’re done, you’ll have a visually stunning cake with crisp edges, perfectly filled layers, and a smooth frosting that highlights the colors without overpowering them.
The strawberry preserves in the filling add bursts of fruitiness, while the chocolate ganache between layers ensures every bite is a harmonious blend of textures. This is the kind of cake that makes guests ask, “How did you do that?”
Whether you’re celebrating a birthday, anniversary, or just treating yourself, this recipe adapts to both classic and modern styles. For a restaurant-quality finish, add edible gold leaf or fresh berries on top.
The instructions walk you through every detail—from baking times to frosting techniques—so you can focus on the joy of creating something extraordinary.
Ingredients for 3 color cake
Here’s everything you need to create a showstopping 3-color cake with layers that pop.
| Ingredient | Amount | Notes |
|---|---|---|
| Vanilla Cake Mix 🍰 | 1 box | High-quality boxed mix for light texture |
| Chocolate Cake Mix 🍫 | 1 box | Rich cocoa content preferred |
| Strawberry Cake Mix 🍓 | 1 box | Or substitute vanilla with strawberry extract |
| Large Eggs 🥚 | 6 whole | Room temperature for even baking |
| Unsalted Butter 🧈 | 2 cups | Softened, not melted |
| Granulated Sugar 🍚 | 2 cups | For cake layers and frosting |
| Whole Milk 🥛 | 1 ½ cups | Full-fat for rich flavor |
| Vegetable Oil 🫒 | ½ cup | Light neutral oil preferred |
| Vanilla Extract 🌿 | 2 tbsp | Pure, not imitation |
| Strawberry Preserves 🍓 | 1 ½ cups | No sugar added preferred |
| Dark Chocolate Chips 🍫 | 1 ½ cups | 70% cocoa or higher |
| Heavy Whipping Cream 🥛 | 3 cups | Cold for perfect whipping |
| Powdered Sugar 🍚 | 4 cups | For buttercream frosting |
| Food Coloring 🎨 | 1 tbsp | Gel-based for vibrant colors |
| Aluminum Cake Pans 🍳 | 3 whole | 9-inch round pans |
The cake mixes are the foundation, but the real magic happens with the homemade fillings and frosting. Betty Crocker or Duncan Hines are solid choices for boxed mixes—they bake consistently. For the strawberry layer, I always grab Welch’s no-sugar-added preserves at Kroger, but any high-quality jam works. The chocolate chips? Ghirardelli 72% or Lindt Excellence melt beautifully for the ganache. Pro tip: use gel food coloringMichaels
No strawberry preserves? Fresh strawberries blended with powdered sugar works in a pinch, but strain out the seeds for a smooth filling. Running short on chocolate chips? Melt a bar of dark chocolate and let it cool—it sets up just like ganache. The whipping cream should be cold straight from the fridge—never use warm or partially thawed. For the cake pans, Wilton or USA Pan are my go-tos—they bake evenly and release cleanly. Grease them with butter and flour, but don’t skip the parchment circles at the bottom. Trust me on that—it prevents sticking like nothing else. Once baked, let the layers cool completely before assembling—at least 2 hours at room temperature. The frosting keeps for 3 days in the fridge, covered tightly. For the cake itself, wrap it in plastic wrap and store at room temperature for up to 2 days. Freezing? Wrap each layer individually and freeze for up to 3 months. I always make a double batch of frosting—half goes on the cake, the rest gets piped into decorative swirls on top. Use a Wilton 1M tip for those perfect rosettes.
Why You’ll Love This Recipe
- Box Mix Magic: I swear, this cake feels like cheating—just three boxes, a few eggs, and butter. No measuring cups, no fuss, and no stress. The layers come together faster than I can say “frosting.”
- Triple-Layer Joy: That first bite? Vanilla’s sweet hug, chocolate’s deep richness, strawberry’s bright punch—all in one forkful. Honestly, I’ve never tasted a cake where every layer actually delivers.
- Party in a Pan: Birthdays, showers, or just because—this cake’s vibrant colors make any table look festive. And since it’s box mix, I can throw it together even when I’m the last person to notice a party’s coming.
- Leftovers? More Like Leftovers Loved: The cake keeps beautifully for days, and slices reheat in the microwave like a warm hug. Between us, I’ve fed a crowd with half the batch and still had enough for breakfast the next morning.
Step-by-step instructions for vibrant 3-Color cake layers
Here’s how to create stunning vanilla, chocolate, and strawberry layers that look as delicious as they taste.
Prepare the Cake Pans and Mixes
Begin by preheating your oven to 350°F. Generously grease the three aluminum cake pans with vegetable oil, then line the bottoms with parchment paper circles cut to fit. This prevents sticking and ensures clean layers. I like to spray the sides with baking spray for extra insurance—especially important for the chocolate layer which can dry out faster.
In three separate large bowls, prepare each cake mix according to package instructions using the specified amounts of eggs, milk, and oil. For the vanilla layer, add 1 tablespoon of vanilla extract to the batter. For the strawberry layer, stir in 1.5 cups of strawberry preserves until completely smooth. The chocolate layer stays as-is—its rich flavor needs no enhancement. Divide the 2 cups of granulated sugar evenly among the three bowls if your mixes don’t include sugar.
Bake the Cake Layers Evenly
Pour each batter into its prepared pan, smoothing the tops with an offset spatula. Bake for 25-30 minutes or until a toothpick inserted in the center comes out clean. I check at the 22-minute mark because ovens vary—look for edges pulling away from the pan and a golden top. Rotate the pans halfway through baking for even cooking.
Remove the cakes from the oven and let them cool in the pans for 10 minutes before transferring to a wire rack to cool completely. This gradual cooling prevents cracking. While they cool, prepare your frosting by beating 2 cups of softened unsalted butter with 4 cups of powdered sugar until light and fluffy. Add 1 tablespoon of vanilla extract and mix until smooth.
Create the Colorful Buttercream Layers
Divide the buttercream into three portions. For the strawberry layer, tint one portion with 1 tablespoon of food coloring until vibrant pink. For the chocolate layer, fold in 1.5 cups of dark chocolate chips until melted and smooth. The vanilla layer stays plain. Chill the frostings for 15 minutes to firm up slightly—this makes piping easier.
Once the cakes are completely cool, level the tops if needed using a serrated knife. Place the vanilla layer on your serving plate, then spread 1 cup of plain buttercream on top. Add the chocolate layer, spreading 1 cup of chocolate buttercream on top. Finish with the strawberry layer and spread the remaining 1 cup of strawberry buttercream on top. The chilled frosting will hold its shape beautifully.
Assemble and Chill for Perfect Layers
Use a long serrated knife to carefully cut through all three layers at once, creating clean 1-inch slices. This is where the magic happens—each slice will show all three vibrant colors. Arrange the slices on a platter, alternating colors for visual appeal. For extra flair, pipe rosettes between layers using the remaining buttercream.
Cover and refrigerate for at least 2 hours before serving. This chilling time ensures the layers stay intact and the flavors meld perfectly. Serve with fresh berries or whipped cream for a stunning presentation that matches the cake’s vibrant interior.
Pro Tips For Making 3 Color Cake
- Bake at 325°F: The box says 350°F, but I learned this the hard way—chocolate and strawberry layers dry out faster at that temp. Lower heat means even baking without a gummy center or burnt edges. Use an oven thermometer to confirm, because home ovens lie.
- Room-temperature eggs matter: Cold eggs mix poorly and create dense layers. Take them out of the fridge 30 minutes before mixing, or worse, you’ll end up fighting clumps in your batter. Trust me, your cake will thank you with a lighter crumb.
- Don’t overmix the batters: Once you add the eggs and butter to each mix, combine just until smooth—about 20 seconds per batch. Overmixing activates the gluten and turns your fluffy cake into a dense brick. The chocolate batter is the worst offender here.
- Layer buttercream first, not last: Spread a thin, even layer of buttercream between the cake layers before adding the final top coating. This seals in moisture and prevents the colors from bleeding into each other. Skip this, and you’ll get a soggy middle or muddy layers.
Flavor customization for this dish
Vanilla-Chocolate-Strawberry Fusion
For a bold twist, replace the strawberry layer with a raspberry swirl by folding 1 cup of raspberry jam into the batter before baking. The tartness cuts through the richness of chocolate beautifully.
I’ve also had success using strawberry glaze between layers—just mix ½ cup powdered sugar with 2 tbsp strawberry preserves and 1 tsp lemon juice for a glossy, fruity surprise. 🍓
Mocha Espresso Boost
Elevate the chocolate layer by adding 2 tablespoons of instant espresso powder to the batter for a mocha flavor. This deepens the cocoa taste and pairs perfectly with the vanilla’s sweetness.
For extra richness, fold ½ cup of Nutella into the chocolate buttercream. The contrast with the bright strawberry layer is next-level. ☕
Citrus Zest Variations
Brighten the vanilla layer with 1 teaspoon of lemon zest and 1 teaspoon of orange zest for a citrusy kick. The zing balances the chocolate’s intensity and complements the strawberry’s tartness.
For the strawberry layer, add 1 tablespoon of lime juice to the preserves before mixing—it enhances the fruit’s natural acidity. 🍋
Caramelized Toppings
Drizzle homemade caramel sauce (melt 1 cup brown sugar with ½ cup butter and ¼ cup heavy cream) over the strawberry layer before assembling. The gooey contrast with the crisp cake layers is irresistible. For a crunchy twist, sprinkle toasted pecans or crushed graham crackers between layers. 🥜
Spiced Chocolate Layer
Infuse the chocolate layer with ½ teaspoon of cinnamon and ¼ teaspoon of nutmeg for warmth. The spices add depth without overpowering the other flavors. Pair it with a gingersnap crumble (blend 1 cup gingersnaps into fine crumbs) between layers for a cozy, spiced contrast. 🌶️
Modern Twist: Matcha Green Tea
Swap the vanilla layer for matcha green tea by adding 1 teaspoon of matcha powder to the batter. The earthy notes create a sophisticated balance with the chocolate and strawberry.
Use white chocolate buttercream for the matcha layer to keep it light and airy. The vibrant green hue will wow your guests! 🍵
Nutrition facts
Frequently asked questions
Can I use boxed cake mixes for this 3-color cake?
This recipe is designed to work perfectly with boxed mixes for simplicity while still delivering professional results. The key is using high-quality mixes like Betty Crocker or Duncan Hines, and enhancing them with homemade fillings and buttercream. Each layer gets its own special treatment—vanilla stays light, chocolate gets rich depth, and strawberry gets fruity brightness.
How do I prevent my cake layers from sinking?
Let the cakes cool completely in their pans for 10 minutes before removing, then cool fully on a wire rack. Never stack layers until they’re completely cool—usually 2 hours. Also, make sure your frosting is chilled for 15 minutes before spreading, and don’t overfill between layers. Use a serrated knife to level tops for even pressure distribution.
What’s the best way to get vibrant colors in each layer?
Use gel-based food coloring instead of liquid dyes—it won’t make your cake layers soggy. For the strawberry layer, fold in strawberry preserves for natural pink color. For chocolate, melted dark chocolate chips create rich depth. Divide your buttercream into portions and tint each one separately. Start with small amounts of coloring and adjust gradually for perfect hues.
Can I make this cake ahead of time?
Yes! Bake the layers up to 2 days ahead and store them wrapped at room temperature. The frosting keeps for 3 days in the fridge covered tightly. For best results, assemble the cake 2 hours before serving to let flavors meld. If freezing, wrap each layer individually and freeze for up to 3 months—thaw completely before assembling.
How do I cut clean slices showing all three colors?
Use a long serrated knife and cut through all three layers at once for clean 1-inch slices. Place a ruler or straightedge against the knife’s edge for guidance. For extra precision, chill the assembled cake for 2 hours before slicing—this helps maintain clean lines. Serve immediately to prevent layers from separating during transport.

- 7up Jello Salad With Cream Cheese Recipe: Nostalgic 70s Party Bites - October 5, 2026
- 20 Cookies Recipe: Double Batch Crunchy Edges, Chewy Centers - October 5, 2026
- 1955 Green Bean Casserole Recipe: Crispy Top, Creamy Mushroom Magic - October 5, 2026