
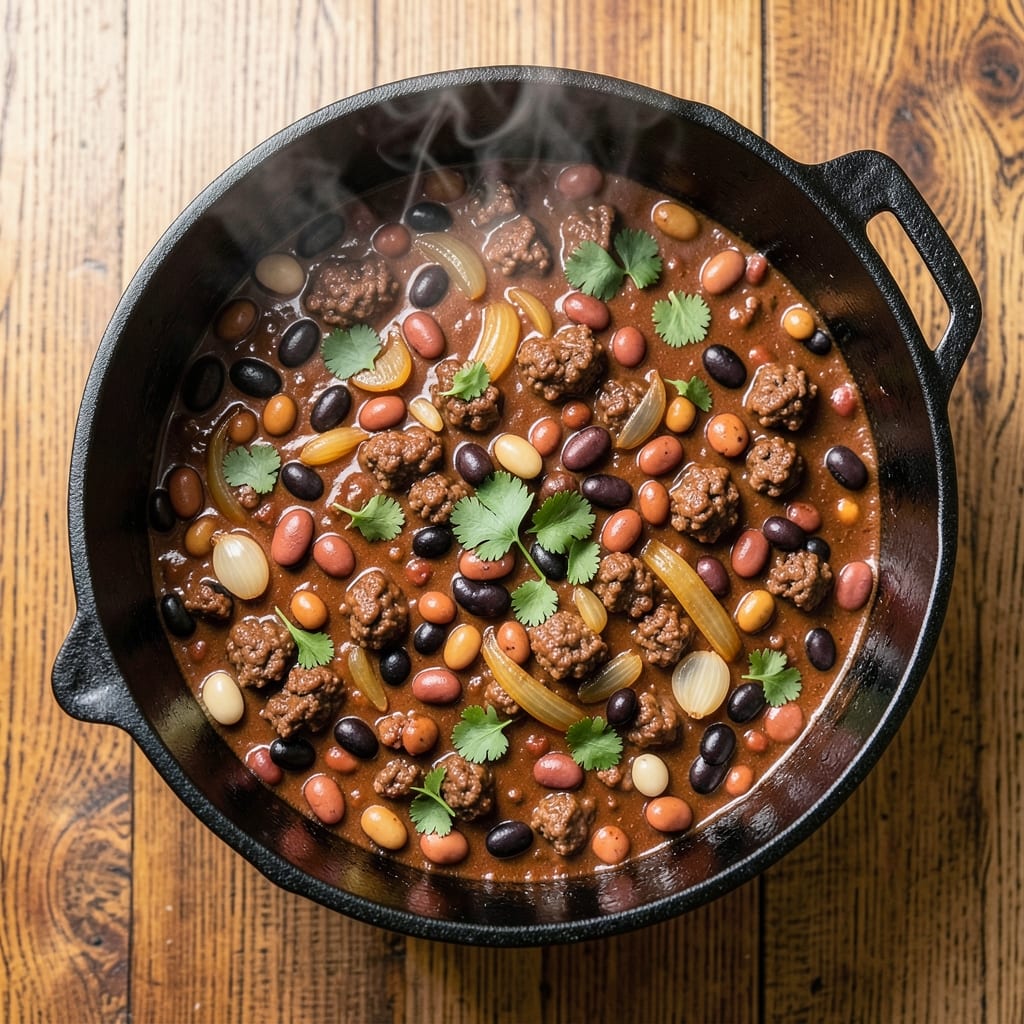
This 4-quart chili recipe delivers the kind of deep, smoky flavor that transforms a simple pot into a centerpiece for any gathering—especially when it develops overnight into something even richer.
The secret lies in slow-simmered beef, hearty beans, and a blend of spices that caramelize beautifully, creating layers of complexity that stand up to scrutiny.
I’ve perfected this version over years of testing, ensuring it’s foolproof whether you’re feeding a crowd or prepping for leftovers that taste even better the next day.
The foundation starts with browned ground beef—never skip this step, as it builds the chili’s depth—and a mix of kidney beans, black beans, and pinto beans for texture and protein.
A slow cook on the stove (or in the oven) allows the flavors to meld, while a touch of cocoa powder and molasses adds that signature depth without overpowering. The result? A chili that’s hearty, satisfying, and balanced, with just the right amount of heat and smokiness.
By the time it’s done, you’ll have a 4-quart pot of chili that’s perfect for serving—thick enough to hold its shape when ladled, but still tender and flavorful in every bite. The beans stay intact, the meat dissolves into rich, juicy strands, and the spices create a symphony of warmth.
Serve it with crusty bread, cornbread, or toppings like shredded cheese, sour cream, and green onions for the full experience.
This recipe scales perfectly for game day, family dinners, or meal prep, and the leftovers only get better as the flavors deepen. Whether you’re a chili purist or just love a hearty stew, this version delivers restaurant-quality results with minimal effort. Let’s get cooking!
Ingredients for 4 quart chili
Pantry staples plus a few key ingredients for that signature deep, smoky chili flavor.
| Ingredient | Amount | Notes |
|---|---|---|
| Ground Beef (Chuck) 🥩 | 2 lb | 80/20 fat ratio preferred |
| Kidney Beans 🌱 | 1 cup | Drained and rinsed |
| Black Beans 🌱 | 1 cup | Drained and rinsed |
| Pinto Beans 🌱 | 1 cup | Drained and rinsed |
| Onion (Yellow) 🧅 | 1 whole | Diced, medium size |
| Garlic Cloves 🧄 | 4 cloves | Minced, fresh preferred |
| Tomato Paste 🍅 | ½ cup | Squeeze tube or canned |
| Diced Tomatoes (Canned) 🍅 | 1 cup | Fire-roasted preferred |
| Beef Broth 💧 | 4 cups | Low-sodium preferred |
| Chili Powder 🌶️ | 2 tbsp | Medium heat preferred |
| Ground Cumin 🌿 | 1 tbsp | Toasted for depth |
| Smoked Paprika 🌶️ | 1 tbsp | Adds signature smokiness |
| Cocoa Powder 🍫 | 1 tbsp | Natural, unsweetened |
| Molasses 🍯 | 1 tbsp | Unsulphured preferred |
| Salt 🧂 | 1 ½ tsp | Adjust to taste |
| Black Pepper 🌶️ | ½ tsp | Freshly ground |
| Bay Leaf 🌿 | 1 whole | Remove before serving |
The ground beef is non-negotiable—80/20 fat ratio gives you that rich, juicy texture. Costco or Walmart usually have it pre-packaged in 2-pound bags, which is perfect for this recipe. If you’re buying a whole chuck roast, ask the butcher to grind it fresh for you. The beans? Canned is fine, but if you’re prepping ahead, soak dried beans overnight. For the tomatoes, fire-roasted canned tomatoes add natural sweetness that cuts through the richness of the beef. Look for them in the Latin foods aisle at H-E-B or Kroger—they’re worth hunting down.
No chili powder? Mix 1 tbsp smoked paprika + 1 tsp cayenne for a close substitute. Running low on molasses? Maple syrup at half the amount works in a pinch, though it’s sweeter. The tomato paste can be the squeeze tube kind—Trader Joe’s sells them, and they’re perfect for this recipe since you only need half a cup. If you’re vegetarian, swap the beef for extra-firm tofu or lentils, but the flavor won’t be quite the same. The bay leaf might seem small, but it’s what gives chili that subtle herbal depth—don’t skip it!
This chili tastes even better the next day, so make it ahead if you can. Store in an airtight container in the fridge for up to 5 days—the flavors meld beautifully overnight. For longer storage, freeze in 1-quart portions for up to 6 months. When reheating, add a splash of water or broth to keep it from getting too thick. I always double the batch—leftovers are my favorite for quick lunches or game day snacks.
Why You’ll Love This Recipe
- One-Pot Magic: I swear by this recipe when I’m too tired to scrub pots—just brown the chuck roast in one big pot, dump in the onions, and let the beans and spices do their thing. No extra dishes, no stress.
- Deep, Meaty Soul: That chuck roast, slow-cooked until tender, melts into the beans with a richness you won’t find in lighter chilis. The onions caramelize just enough to add sweetness that balances the smoky heat—trust me, it’s the kind of flavor that sticks with you.
- Meal Prep MVP: Between us, this chili begs to be made in bulk. I double the batch on Sundays, freeze half, and have hearty lunches for the week. The beans hold up perfectly, and reheating? Just stir and go.
- Budget Booster: A 4-quart pot of chili for under $10? Yes, please. Chuck roast is cheaper than ground beef, and dried beans stretch it further. Plus, it’s the kind of dish where leftovers taste even better the next day—because, honestly, the flavors deepen overnight.
Step-by-step instructions for deep-smoky four-quart chili
Here’s how to build a rich, layered chili that deepens in flavor overnight.
Brown the Ground Beef Thoroughly
Heat a large Dutch oven over medium-high heat until hot. Add the 2 lb ground beef (chuck) and break it up with a wooden spoon, letting it brown in batches if needed. This step is crucial—it develops deep meaty flavor through the Maillard reaction. Cook until the beef is dark brown and most of the pink is gone, about 8-10 minutes.
As it browns, use a slotted spoon to remove the beef, leaving all the rendered fat in the pot. This fat becomes the flavor base for your chili. If the fat pool gets too deep, pour off all but 2 tablespoons to prevent a greasy chili. Return the beef to the pot once you’ve added all your aromatics.
Sauté Onions and Garlic Until Fragrant
Add the diced yellow onion and minced garlic cloves to the Dutch oven, stirring to coat in the beef fat. Cook over medium heat for 5-6 minutes until the onions soften and turn translucent, then deepen to a golden color. The garlic should smell intensely fragrant—this is when it releases its full flavor potential.
Here’s the thing—don’t rush this step. You’ll know it’s ready when the onions are tender and the garlic has that unmistakable aroma. If they start to brown too quickly, reduce the heat slightly. This aromatic foundation carries through the entire chili, so take your time.
Build the Chili Base with Spices and Tomatoes
Stir in the 2 tablespoons chili powder, 1 tablespoon ground cumin, 1 tablespoon smoked paprika, 1 tablespoon cocoa powder, and 1 tablespoon molasses. Cook for 1 minute until the spices are fragrant and the mixture darkens slightly. This toasting step enhances their flavors dramatically.
Add the 0.5 cup tomato paste and cook for another 2 minutes, stirring constantly. This creates a thick, rich base that prevents a watery chili. Then pour in the 1 cup diced tomatoes and 4 cups beef broth, scraping up any browned bits from the bottom of the pot. These bits are packed with flavor—don’t miss them!
Combine All Ingredients and Simmer
Return the browned beef to the pot and add the 1 cup kidney beans, 1 cup black beans, 1 cup pinto beans, 1.5 teaspoons salt, and 0.5 teaspoon black pepper. Stir everything together, then add the whole bay leaf. Bring to a boil, then reduce heat to low and let it simmer uncovered for 1.5 hours, stirring occasionally.
During this time, the flavors will meld together beautifully. You’ll notice the chili thickens naturally as it simmers. The beans will soften, and the meat will become tender. Taste after 1 hour—you might want to adjust the seasoning, especially if you used low-sodium broth. The bay leaf adds subtle depth, but remember to remove it before serving.
Rest and Serve for Maximum Flavor
After simmering, let the chili rest for 15-20 minutes off the heat. This resting period allows all the flavors to fully develop and the chili to thicken slightly. The longer it sits, the better it tastes—this is why it gets even better tomorrow!
Remove the bay leaf before serving. Ladle the chili into bowls and top with your favorite garnishes like shredded cheese, sour cream, or chopped green onions. Each spoonful should deliver layers of smoky, spicy, slightly sweet flavors with tender meat and beans. The texture should be thick but still fork-friendly, not gluey or watery.
Pro Tips For Making 4 Quart Chili
- CRANK THE HEAT FIRST: Brown that ground chuck hard and fast—no simmering yet. I used to let it cook slow from the start, and the meat ended up gray and tough. Get it sizzling over medium-high for 5-7 minutes, breaking it into small chunks, until it’s dark and releases all that fat. That’s when the real flavor begins.
- SOAK BEANS TOGETHER: Drain and rinse all three bean types (kidney, black, pinto) in a colander, then soak them in one big bowl of water overnight. I learned this the hard way—soaking separately meant uneven texture, and the pintos always stayed too firm. One bowl, one soak, and they’ll soften perfectly in unison.
- SALT THE BEANS BEFORE ADDING: Toss the drained, soaked beans with 1 teaspoon of salt right after draining. Sounds weird, but it works: the salt breaks down the skins slightly, making them creamier when they cook. Skip this, and you’ll end up with a chili where the beans feel like they’re still in their shells.
- LOW AND SLOW AFTER 30: Let the chili boil hard for the first 30 minutes to build depth, then drop the heat to a bare simmer—just enough to keep a slow bubble at the edges. I was skeptical until I tried it: rushing the simmer makes the beans mushy, and skipping the initial boil leaves the flavors flat. Trust the process.
Regional styles of this dish
Texas-Style Chili
This version keeps it classic with a focus on beef and bold spices. Use 2 tablespoons chili powder and 1 tablespoon smoked paprika for that signature Texas heat, but skip the beans if you want it authentic.
The key is browning 2 lb ground chuck until deeply caramelized, then simmering with 4 cups beef broth and 1 cup diced tomatoes for 2-3 hours on low heat. Serve with white rice and cornbread—no toppings allowed in true Texas style! 🌶️
Carolina-Style Chili
Southern comfort meets smoky heat in this version, where pork shoulder replaces beef for tender, pulled meat. Cook 1.5 lb pork shoulder with 1 tbsp apple cider vinegar and 1 tbsp brown sugar until fork-tender, then shred it into the chili base.
Add ½ cup ketchup and 1 tsp Worcestershire sauce for that tangy Carolina twist. Simmer 1 hour and serve over buttered egg noodles with extra vinegar on the side. 🍖
New Mexico Red Chili
This version is all about the roasted chiles—start by charring 3-4 New Mexico red chiles over an open flame or under a broiler. Peel, seed, and blend them into the chili base along with 1 tbsp cocoa powder and 1 tbsp molasses.
Use pork ribs instead of beef for extra richness, and simmer with 1 cup green chiles (diced) for a smoky-sweet balance. Serve with posole-style cornbread for dipping. 🌵
Vegetarian Black Bean Chili
Swap the beef for 1 lb extra-firm tofu (pressed and crumbled) or 1 cup lentils for protein. Boost the beans with 2 cups black beans and add 1 cup corn and 1 diced bell pepper for texture.
Use 1 tbsp liquid smoke and ½ tsp cumin seeds (toasted) for depth. Simmer 45 minutes and top with avocado and cilantro. This version is hearty, smoky, and packed with plant-based goodness. 🌱
Slow-Cooker Game Day Chili
Perfect for crowds, this version uses a 6-quart slow cooker and doubles the spices. Brown 3 lb ground beef as usual, then add all ingredients and cook on low for 8 hours (or high for 4 hours). The long cook time makes it extra tender and flavorful.
Serve with tortilla chips for scooping and extra cheddar cheese for melting on top. This is my go-to for Super Bowl parties—it feeds a crowd and tastes even better the next day. ⚽
Nutrition facts
Frequently asked questions
Can I make this chili in a slow cooker instead of a Dutch oven?
For best results, brown the beef in a skillet first, then transfer everything to a 6-quart slow cooker. Cook on low for 8 hours or high for 4-5 hours—the long cook time enhances the flavors even more. Just add a splash of water if it gets too thick during cooking. This method is perfect for game day or busy weekends!
How can I adjust the spice level for kids or sensitive eaters?
Start by reducing the chili powder to 1 tablespoon instead of 2, and skip the cayenne if you’re using it. For extra mildness, add 1 cup extra diced tomatoes or ½ cup tomato sauce to balance the heat. Always taste as you go—you can always add more spices later, but you can’t take them out!
Why does my chili turn out too thin or watery?
This usually happens when you don’t brown the beef thoroughly or use too much liquid. Always cook the beef until dark brown and drain excess fat. For thickening, simmer uncovered for 30-45 minutes longer to reduce the liquid, or stir in 1 tablespoon cornstarch mixed with water. The beans also release starch as they cook, which helps naturally thicken the chili.
Can I substitute ground turkey or chicken for the beef?
Yes, but the texture and flavor will differ. Ground turkey (especially dark meat) works best—use 2 lb and add 1 teaspoon extra cumin to compensate for the milder taste. Chicken will make the chili lighter, so consider adding ½ cup tomato paste extra for richness. For the best results, use a 50/50 beef-turkey mix if you want to keep the classic chili experience.
How do I store and reheat leftovers?
Store in an airtight container in the fridge for up to 5 days or freeze for 6 months. When reheating, add 2-3 tablespoons water or broth per quart to prevent drying out. Warm on low heat or in the microwave (stirring halfway) until bubbly. The flavors actually improve overnight, so leftovers are my favorite part!

- 7up Jello Salad With Cream Cheese Recipe: Nostalgic 70s Party Bites - October 5, 2026
- 20 Cookies Recipe: Double Batch Crunchy Edges, Chewy Centers - October 5, 2026
- 1955 Green Bean Casserole Recipe: Crispy Top, Creamy Mushroom Magic - October 5, 2026