
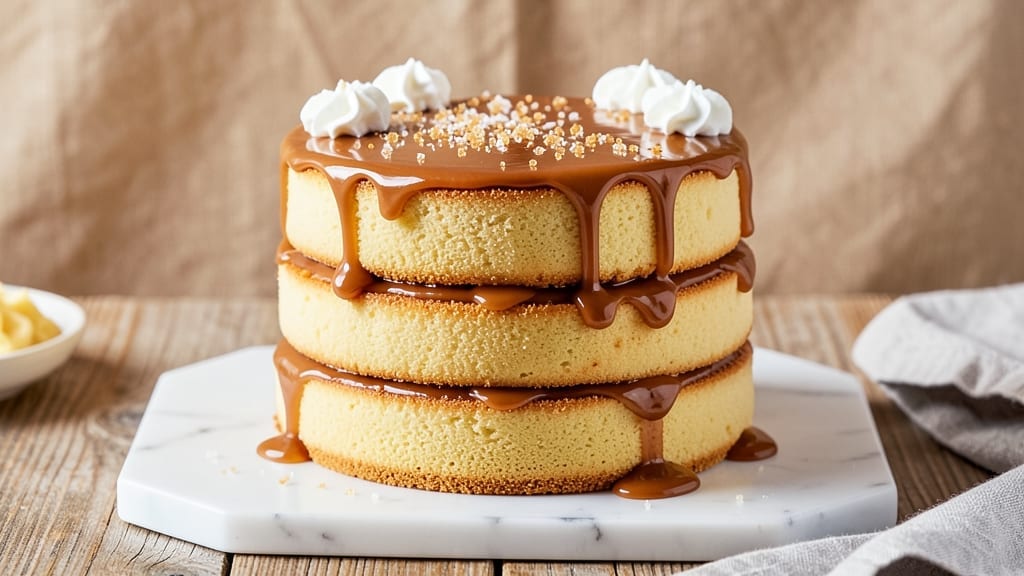
This 2-layer caramel cake recipe delivers the perfect balance of moist vanilla layers and rich, buttery salted caramel filling that keeps it creamy for days. 🌟 The secret lies in baking the cake layers just until they’re set—not dry—so they stay tender while supporting the weight of the caramel.
I’ve perfected this technique over years of testing, ensuring every slice has that signature caramel ooze without collapsing.
The cake itself is simple: basic vanilla box mix with a few upgrades—extra eggs for richness and a splash of vanilla extract to deepen the flavor. The filling is where the magic happens: a slow-cooked salted caramel that thickens just enough to hold the layers together while staying gooey.
No need for fancy equipment—just a double boiler and patience for the perfect texture.
What you’ll end up with is a cake that looks as impressive as it tastes: golden layers stacked neatly, crowned with a smooth caramel drizzle that glistens under the lights. The first bite reveals that signature caramel ribbon, followed by a moist, fluffy crumb that melts in your mouth.
This isn’t just dessert—it’s a showstopper for birthdays, holidays, or whenever you need to impress.
Best of all, this recipe is foolproof for beginners. The layers bake in standard pans, the caramel comes together in one pot, and the assembly is straightforward—no piping skills required. Let’s get baking!
Ingredients for 2 layer caramel cake
These simple yet magical ingredients create a showstopping caramel cake that’ll wow everyone!
| Ingredient | Amount | Notes |
|---|---|---|
| Vanilla Cake Mix 🍰 | 1 box | Standard 15.25 oz box mix |
| Large Eggs 🥚 | 4 whole | Room temperature preferred |
| Unsalted Butter 🧈 | 1 cup | Softened, full-fat preferred |
| Pure Vanilla Extract 🌿 | 2 tbsp | Not imitation vanilla |
| Granulated Sugar 🍚 | ½ cup | For cake layers |
| All-Purpose Flour 🌾 | ½ cup | Sifted, for extra fluffiness |
| Whole Milk 🥛 | ½ cup | Full-fat for richness |
| Granulated White Sugar 🍚 | 2 cups | For caramel base |
| Unsalted Butter 🧈 | 1 cup | Cubed, for caramel |
| Heavy Cream 🥛 | 1 cup | Whole milk for best texture |
| Flaky Sea Salt 🧂 | 1 ½ tsp | For caramel seasoning |
| Vanilla Bean Paste 🌿 | 1 tsp | Optional for extra flavor |
| Powdered Sugar 🍚 | 1 cup | For dusting layers |
| Caramel Drizzle 🍯 | ½ cup | Extra for garnish |
The cake mix is your shortcut to perfection, but don’t skimp on the upgrades. Bob’s Red Mill or Betty Crocker are reliable brands, but honestly, any quality box mix works. For the caramel, the sugar matters—Domino or C&H work great. The butter? Plugrá or Land O’Lakes are my go-to for that rich, buttery flavor. Pro tip: measure your dry ingredients by weight if you’re feeling fancy—it’s more accurate, but a kitchen scale isn’t required. The vanilla extract should smell like pure vanilla, not artificial. If it smells like alcohol, toss it and grab a fresh bottle.
No vanilla bean paste? Extra vanilla extract works in a pinch, but you’ll miss that depth. Running low on heavy cream? Half-and-half plus a splash of milk gets you close. The sea salt is non-negotiable for the caramel—it balances the sweetness perfectly. Maldon flakes are ideal, but any flaky salt will do. For the cake layers, if you’re feeling adventurous, swap the box mix for a homemade vanilla cake (just add 1 tsp baking powder, 1/4 tsp baking soda, and 1/2 tsp salt to 2 cups flour, 1 cup sugar, 1/2 cup butter, 2 eggs, and 1/2 cup milk). The caramel can be made ahead—just store it in the fridge and reheat gently before assembling.
This cake keeps beautifully for 4-5 days in the fridge, covered tightly. The caramel filling stays gooey, but the layers dry out if left uncovered. For serving, let it sit at room temperature for 30 minutes before slicing—the caramel will be perfect temperature. Freeze the whole cake (unfrosted) for up to 3 months. To serve, thaw overnight in the fridge, then bring to room temp before slicing. Leftovers? Store in an airtight container with parchment between layers to keep them moist. Trust me, it’s worth making extra—this cake disappears fast!
Why You’ll Love This Recipe
- I’ll be real: this costs half of what a fancy cake does, but no one guesses. The box mix cuts prep time, and the caramel sauce uses basic pantry sugar—no specialty ingredients. My wallet and my taste buds win.
- Box Mix Magic: I swear, this is the only caramel cake where I actually use the box mix—no shame. Just dump, fold, bake, and let the buttercream and caramel sauce do all the heavy lifting. The eggs and vanilla extract make it taste homemade without the fuss.
- Buttery Caramel Bliss: That rich, salty-sweet caramel layer? It’s not just drizzled—it’s soaked into the cake, then topped with velvety buttercream. The butter and sugar combo makes every bite taste like a bakery’s secret, not my kitchen.
- Party in a Pan: Honestly, this feeds a crowd but doesn’t require me to be a short-order cook. Two layers mean slices for guests and leftovers for my lazy Sunday. (Yes, even on a Tuesday night.)
Step-by-step instructions for 2 layer caramel cake
Here’s how to create dreamy, velvety layers and that perfect buttery salted caramel drizzle!
👨🍳 Step 1: Prepare the Cake Batter
In a large mixing bowl, combine the 1 box vanilla cake mix, 0.5 cup granulated sugar, 0.5 cup all-purpose flour, and 1.5 tsp flaky sea salt. This dry mix ensures your cake will be extra moist and flavorful—don’t skip the salt, it balances the sweetness beautifully.
In a separate bowl, whisk together the 4 whole large eggs (room temperature preferred), 1 cup softened unsalted butter, 2 tbsp pure vanilla extract, and 0.5 cup whole milk. The butter should be soft enough to mix smoothly but not melted—you should be able to press your finger into it and leave a slight indent. Pour this wet mixture into the dry ingredients and gently fold together just until combined. Avoid overmixing, or you’ll develop gluten and end up with tough cake layers.
🍳 Step 2: Bake the Cake Layers
Preheat your oven to 350°F and grease two 8-inch round cake pans with butter or line them with parchment paper. Divide the batter evenly between the two pans—you’ll want each layer to be about 1-inch thick. Bake for 25-30 minutes or until a toothpick inserted into the center comes out clean. The edges should be golden brown, but the center should still look slightly underdone—this ensures a tender crumb.
Let the cakes cool in their pans for 10 minutes, then transfer them to a wire rack to cool completely. This gradual cooling prevents cracking. While they cool, you can start making the caramel—it takes time to thicken properly, so don’t rush this step!
🍳 Step 3: Make the Salted Caramel Drizzle
In a heavy-bottomed saucepan, combine 2 cups granulated white sugar and 1 cup cubed unsalted butter. Cook over medium heat, stirring constantly, until the sugar melts and turns into a golden liquid—this should take about 5-7 minutes. Be patient and keep stirring to prevent burning.
Once the sugar caramelizes to a deep amber color, carefully pour in the 1 cup heavy cream all at once. The mixture will bubble vigorously—stand back and let it cook undisturbed for 2-3 minutes until it thickens. Remove from heat and stir in the 1.5 tsp flaky sea salt and 1 tsp vanilla bean paste (if using). Let the caramel cool slightly—it will thicken as it cools, creating that perfect drizzling consistency.
🥘 Step 4: Assemble and Frost the Cake
Once the cakes are completely cool, place one layer on a cake stand or plate. Use a serrated knife to level the top if needed—this ensures even layers. Dust the top generously with 1 cup powdered sugar to create a smooth surface for the frosting.
Spread about ¼ cup of the cooled caramel drizzle evenly over the first layer, letting it seep into the cake. Place the second layer on top, level it if needed, and dust with another 1 cup powdered sugar. Spread the remaining caramel drizzle over the top and sides of the cake, letting it drip down naturally for that gorgeous, decadent look. For extra flair, pipe a border of caramel around the edges using a piping bag fitted with a small round tip.
⏰ Step 5: Chill and Serve
Refrigerate the cake for at least 2 hours (or up to 24 hours) before serving. This chilling time allows the caramel to set and the flavors to meld together perfectly. When ready to serve, drizzle the remaining 0.5 cup caramel drizzle over the top and garnish with flaky sea salt for that perfect balance of sweet and salty.
Slice into thick wedges and serve immediately. Each bite should deliver a moist, velvety cake layer with that rich, buttery caramel oozing through—trust me, your guests will be begging for seconds!
Pro Tips For Making 2 Layer Caramel Cake
- Whisk Eggs Room-Temp: Cold eggs from the fridge won’t mix smoothly into your cake batter, and you’ll end up with pockets of unmixed flour. Pop them in a bowl of warm water for 10 minutes first—this isn’t just about convenience, it’s about a lighter, more even texture in both layers.
- Melt Butter Slowly: I used to dump butter into the caramel sauce pan and scorch it every time. Instead, melt it over low heat, stirring constantly, until it’s just liquid gold—no brown spots. This keeps your caramel rich and buttery, not bitter.
- Don’t Overmix Layers: The moment your cake batter looks like glue, stop stirring. Overmixing develops gluten and makes your layers dense instead of light. Mix just until the dry ingredients disappear—about 20 seconds after that.
- Chill Cake Before Frosting: Skipping this step is how you end up with a collapsed middle or a messy frosting job. Let your cake cool completely, then refrigerate for 30 minutes before adding the caramel filling. Patience here means no soggy layers or frosting slides.
Wine and beer pairings for this dish
Wine Pairings
The rich, buttery caramel in this cake pairs beautifully with wines that can stand up to its sweetness while complementing the vanilla notes. A Chardonnay from California—like La Crema or Kendall-Jackson—is my go-to choice.
The wine’s natural acidity and subtle oak notes cut through the caramel’s richness, while its own buttery undertones enhance the cake’s flavor. For something lighter, a Sauvignon Blanc from New Zealand, like Cloudy Bay, brings bright citrus notes that refresh your palate between bites. 🍷
Beer Pairings
If you prefer beer, opt for a Belgian-style witbier like Hoegaarden or Stella Artois—the citrusy, spicy notes from coriander and orange peel create a refreshing contrast to the caramel’s sweetness.
For a richer option, a Belgian Dubbel such as Rodena adds a malty depth that balances the cake’s buttery layers. Avoid heavy stouts or IPAs, as their bold flavors can overpower the delicate vanilla and caramel.
Coffee Pairing
For an after-dinner finish, serve this cake with a lightly roasted coffee like a Vietnamese-style drip or a medium-roast pour-over. The caramel’s sweetness enhances the coffee’s natural sugars, while the vanilla in the cake complements the coffee’s nutty notes.
Skip the espresso—its intensity can clash with the cake’s delicate flavors. A small cup of chicory coffee also works beautifully, adding a subtle earthiness that rounds out the dessert experience. ☕
Seasonal Adaptations
In warmer months, pair this cake with a sparkling rosé like Whispering Angel—its crisp acidity and berry notes create a refreshing contrast. For fall and winter, a Port wine or Moscato d’Asti adds a festive touch, with their natural sweetness harmonizing perfectly with the caramel.
The key is to choose a beverage that balances the cake’s richness without overpowering its delicate vanilla and buttery layers.
Nutrition facts
Frequently asked questions
Can I make this cake with a different flavor?
Swap the vanilla cake mix for chocolate, spice, or lemon flavors—just adjust the filling to match. For chocolate, use a rich chocolate ganache instead of caramel. For spice cakes, try a cinnamon or pumpkin spice caramel. The key is keeping the cake layers moist and the filling cohesive with the flavor profile.
How do I prevent the cake layers from cracking?
Cracking usually happens when layers cool too quickly or aren’t properly leveled. Let the cakes cool in their pans for 10 minutes before removing, then transfer to a wire rack. Use a serrated knife to level the tops perfectly before assembling. Also, don’t overmix the batter—just combine until no dry spots remain. The powdered sugar layer between cakes creates a smooth base that prevents cracks.
Can I make this cake without a box mix?
Yes! For homemade layers, mix 2 cups all-purpose flour, 1 cup sugar, 1 tsp baking powder, 1/2 tsp baking soda, and 1/2 tsp salt. Add 1/2 cup butter, 2 eggs, 1/2 cup milk, and 1 tbsp vanilla. Bake at 350°F for 25-30 minutes in greased pans. The caramel recipe remains the same—just ensure your homemade layers are fully cooled before assembly.
How far ahead can I make the caramel filling?
The caramel can be made 3 days ahead and stored in an airtight container in the fridge. Reheat gently in a saucepan over low heat, stirring constantly until smooth. If it thickens too much, add 1 tsp heavy cream at a time. For best results, bring it to room temperature before assembling the cake—cold caramel can make the layers soggy.
What’s the best way to store leftovers?
Wrap the cake tightly in plastic wrap and store at room temperature for 2 days. For longer storage, refrigerate for up to 5 days. To maintain freshness, place parchment paper between layers if slicing. Never freeze the fully assembled cake—it can make the caramel filling grainy. Instead, freeze individual layers (unfrosted) for up to 3 months and reassemble with fresh caramel when ready to serve.

- 6 Oz Chocolate Chip Cookie Recipe: Perfectly Balanced Crispy Edges and Chewy Hearts - September 25, 2026
- 6-Inch Coffee Cake Recipe: Vanilla Bean Swirls and Buttery Streusel Topping - September 25, 2026
- 1 Hour Soup Recipe: Velvety Richness Without the Wait - September 25, 2026