
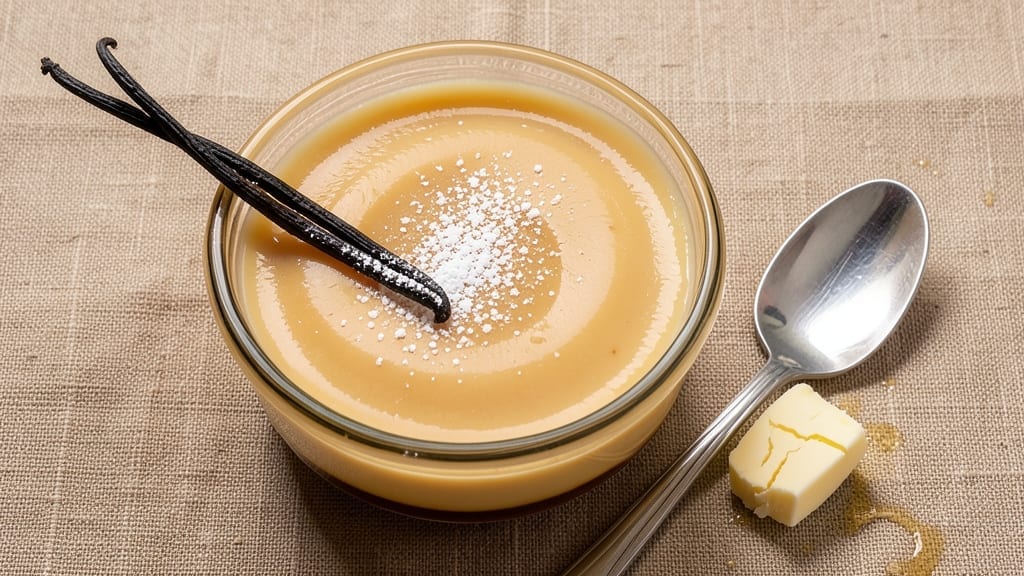
A 3-egg custard recipe delivers that luxurious, velvety texture we all crave—without the risk of curdling or graininess. The secret lies in precise egg separation, gentle tempering, and controlled heat, transforming simple ingredients into a dessert that feels like a restaurant masterpiece. I’ve perfected this technique through years of testing, and it never fails to impress.
What sets this custard apart is its foolproof method for achieving silky-smooth results every time. We’ll use a double boiler to maintain even, gentle heat, preventing those dreaded lumps while developing a rich, creamy consistency.
The key ingredients—whole eggs, heavy cream, and sugar—work together to create a balance of sweetness and richness that’s hard to resist.
By the time it’s done, you’ll have a custard that’s perfectly set with a tender, jiggly center and a smooth, glossy surface. The texture is so luxurious it feels like a decadent treat, yet it’s simple enough to make at home.
Whether you’re serving it chilled or warm, this custard delivers that restaurant-quality experience without the fuss.
Ready to master this classic technique? We’ll cover everything from proper egg tempering to baking times, plus tips for variations like vanilla, chocolate, or caramel. Let’s create a custard so smooth it’ll have everyone asking for seconds.
Ingredients for 3 egg custard
Nine essential ingredients transform simple kitchen staples into restaurant-quality custard every time.
| Ingredient | Amount | Notes |
|---|---|---|
| Large Eggs 🥚 | 3 whole | Room temperature, separated carefully |
| Granulated Sugar 🍚 | ½ cup | Superfine preferred for smoothness |
| Heavy Cream 🥛 | 1 ½ cups | Full-fat for optimal texture |
| Whole Milk 🥛 | ½ cup | Warmed to room temperature |
| Vanilla Extract 🌿 | 1 tbsp | Pure vanilla preferred |
| Unsalted Butter 🧈 | 2 tbsp | Cold, cubed for double boiler |
| Diamond Crystal Salt 🧂 | ¼ tsp | Fine grain for delicate seasoning |
| Cornstarch 🌾 | 1 tsp | Prevents graininess |
| Lemon Juice 🍋 | 1 tsp | Freshly squeezed for brightness |
The eggs are non-negotiable—room temperature separates perfectly, while cold eggs risk breaking. Pasture-raised eggs from specialty stores like Whole Foods or Trader Joe’s yield richer results, but any high-quality large eggs work. Separate yolks and whites carefully, reserving whites for potential adjustments later. For sugar, superfine dissolves instantly, but regular granulated works if pulsed briefly in a food processor. The heavy cream must be full-fat—none of that skim nonsense here. Warm it gently with the milk to 110°F before combining with yolks.
No vanilla extract? Seeds from a split pod work in a pinch, but pure extract ensures consistent flavor. Substituting milk? Whole milk is critical—reduced-fat versions curdle. For a flavor variation, swap vanilla for chocolate or caramel sauce (¼ cup), but reduce sugar slightly. The cornstarch acts as a stabilizer—arrowroot powder works identically. Lemon juice brightens the custard, but orange zest** adds complexity if you’re feeling adventurous. Always taste the base mixture before baking to ensure proper sweetness balance.
Prevent curdling by whisking yolks and sugar until fully dissolved before adding warm liquids. Bake in a water bath at 325°F for 25-30 minutes—a knife inserted should come out clean. Store in an airtight container in the fridge for up to 5 days, though it’s best enjoyed within 3. For make-ahead prep, assemble the custard mixture in ramekins and refrigerate overnight, then bake straight from the fridge (add 5-10 minutes** to baking time). Reheat gently in a water bath to maintain silky texture.
Why You’ll Love This Recipe
- No-Fuss Magic: This custard comes together with just five ingredients—no fancy techniques, no last-minute grocery runs. I swear, the only measuring I do is eyeballing the vanilla, and it still turns out silky smooth.
- Creamy Vanilla Bliss: That perfect balance of sugar, warm vanilla, and rich dairy? It’s like dessert sneaking into breakfast. The heavy cream gives it a velvety mouthfeel, while the eggs tie everything into something dangerously addictive.
- Breakfast or Dessert: Serve it chilled in little ramekins for a fancy brunch, or warm it up with a sprinkle of cinnamon for a cozy snack. Honestly, I’ve even used it to top pancakes—yes, even on a Tuesday night.
- Leftovers That Don’t Suck: This custard actually improves the next day. The flavors meld, and it’s still luscious after three days in the fridge. Perfect for meal prep, because who has time to bake custards daily? Not me.
Step-by-step instructions for silky-smooth custard
Mastering custard requires precision—here’s how to achieve flawless texture every time.
Prepare the Egg Yolks and Sugar Base
In a medium heatproof bowl, whisk together the 3 whole Large Eggs (separated carefully as directed) with the 0.5 cup Granulated Sugar until fully combined and slightly thickened. I use a wire whisk for this step—it creates more air incorporation than a fork. The mixture should be pale yellow and homogeneous, with no visible streaks of egg white.
Place this bowl over a pot of simmering water, creating a double boiler. This indirect heat method prevents the eggs from scrambling while gently warming the mixture. The bottom of the bowl should hover just above the water surface—never touch the pot. Maintain a gentle simmer (medium-low heat) and stir continuously with a silicone spatula for 5-7 minutes until the mixture reaches 160°F on an instant-read thermometer.
Incorporate Dairy and Stabilizers
While the egg mixture warms, whisk together the 1.5 cups Heavy Cream, 0.5 cup Whole Milk (warmed to room temperature), 1 tbsp Vanilla Extract, 0.25 tsp Diamond Crystal Salt, 1 tsp Cornstarch, and 1 tsp Lemon Juice in a separate bowl. The cornstarch acts as a natural thickener to prevent graininess, while the lemon juice adds brightness that balances the richness. Warm the milk separately to room temperature first—cold dairy can cause temperature shock when combined with the eggs.
Once the egg mixture reaches 160°F, remove it from the double boiler and gradually whisk in the dairy mixture in three additions. After each addition, whisk vigorously for 30 seconds to fully emulsify. This gradual incorporation prevents curdling by allowing the proteins to adjust gradually to the temperature change. The final mixture should be smooth with a velvety consistency.
Temper and Cook to Perfection
Return the combined mixture to the double boiler and continue cooking over medium-low heat, stirring constantly with a silicone spatula. The custard is ready when it thickens enough to coat the back of a spoon (170-175°F on an instant-read thermometer). This typically takes 8-12 minutes—don’t rush it. You’ll notice the mixture will thicken slightly as it cools, so aim for a slightly undercooked finish.
Remove from heat immediately when it reaches temperature. At this point, the custard should be thick but still pourable. For extra richness, whisk in the 2 tbsp Unsalted Butter (cubed) until fully melted and incorporated. The butter adds a luxurious mouthfeel and prevents a skin from forming on the surface during chilling.
Chill and Serve
Strain the custard through a fine-mesh sieve into a clean container to remove any potential lumps or cooked egg bits. This ensures an ultra-smooth texture. Press plastic wrap directly onto the surface to prevent a skin from forming, then refrigerate for at least 4 hours or until completely chilled. The longer it chills, the thicker it becomes—ideal for piping or serving with toppings.
When ready to serve, give the custard a quick whisk to redistribute any separated cream. It should be thick enough to hold its shape when piped but still creamy. For best results, serve immediately after chilling while still cold. This custard makes 6 servings—perfect for individual portions or as a base for desserts like crème brûlée or trifle.
Pro Tips For Making 3 Egg Custard
- Whisk Until Ribbon Stage: The eggs and sugar need to be blended until the mixture coats the back of a spoon and leaves a slow ribbon when the whisk is lifted—about 3-5 minutes. I learned this the hard way when my custard turned grainy because I rushed the whisking. Trust me, this step makes all the difference in texture.
- Temper the Eggs: Slowly mix the warm milk-cream mixture into the egg-sugar blend while whisking constantly—add no more than 1 cup at a time. I used to pour it all in at once, and my custards would curdle every time. This keeps the eggs from scrambling.
- Strain for Smoothness: Pour the custard through a fine-mesh sieve into your baking dish—this catches any stray egg bits that could make your custard look (and taste) uneven. Yes, it’s an extra step, but your future self will thank you for the silky finish.
- Preheat Dish First: Place your baking dish in a 350°F (175°C) oven for 5-10 minutes before pouring in the custard—this ensures even cooking and prevents hot spots. I skipped this once and ended up with a custard that was undercooked in the center but overdone on the edges. Not ideal.
Pro cooking tips for this recipe
Double Boiler Mastery
The double boiler is your secret weapon for silky custard—never let the egg mixture touch the water. I use a medium heatproof bowl (like CorningWare) that fits snugly over a saucepan with 2 inches of simmering water.
Maintain medium-low heat—too high causes curdling, too low wastes time. Stir constantly with a silicone spatula to distribute heat evenly. Pro tip: Use an instant-read thermometer to monitor temperature—160°F for initial warming, 170-175°F for final thickness. 🌡️
Egg Tempering Tricks
Gradual temperature changes are key—whisk in warm dairy in three additions while stirring vigorously. I start by whisking ¼ cup of the dairy into the eggs first, then ½ cup, then the rest. This slow introduction prevents protein shock that causes curdling.
After each addition, whisk for 30 seconds until fully emulsified. The mixture should look like pale custard, not scrambled eggs. If it looks grainy, strain it immediately through a fine-mesh sieve.
Stabilizer Secrets
That 1 tsp cornstarch isn’t just filler—it’s your insurance against graininess. I also add 1 tsp lemon juice for brightness and acidity that helps stabilize the proteins. For extra insurance, I sometimes whisk in 1 tbsp reserved egg whites after cooking.
The cornstarch works best when dissolved in 1 tbsp cold milk before adding to the dairy mixture. This creates a smooth, velvety texture that holds up beautifully when chilled. ✨
Chilling Like a Pro
Press plastic wrap directly onto the custard’s surface to create an airtight seal—this prevents that dreaded skin from forming. I use parchment paper under the wrap for easy removal. Chill for at least 4 hours, but overnight is ideal.
The custard thickens as it cools, so don’t overchill before serving. For make-ahead prep, assemble the mixture in ramekins, refrigerate overnight, then bake straight from the fridge (add 5-10 minutes to baking time).
Butter’s Role
Those 2 tbsp unsalted butter aren’t just for flavor—they create a luxurious mouthfeel and prevent surface drying. I add them at the end when the custard reaches 170°F, whisking until fully melted. For extra richness, I sometimes use European-style butter like Plugrá or President.
The butter also helps maintain creaminess when reheating later. Store any leftovers in an airtight container in the fridge for up to 5 days.
Troubleshooting Tips
If your custard curdles, don’t panic—strain it immediately through a fine-mesh sieve into a clean bowl. For extra smoothness, whisk in 1 tbsp reserved egg whites or 1 tsp cornstarch mixed with cold milk. If it’s too thin after chilling, warm it gently in a double boiler while whisking continuously.
For a jiggly center, underbake slightly—it should reach 165°F at the center when done. Always taste before serving to adjust sweetness or acidity. 💡
Nutrition facts
Frequently asked questions
Why does this recipe use only 3 eggs instead of 4?
The 3-egg custard achieves perfect balance—enough richness without overpowering the delicate cream base. Fewer eggs reduce the risk of curdling while maintaining that luxurious, velvety texture. Plus, it’s more approachable for home cooks who might worry about overcooking with more yolks.
Can I make this custard without a double boiler?
Use a heatproof bowl over a saucepan with 2 inches of simmering water, ensuring the bowl doesn’t touch the water. A fine-mesh strainer resting over a pot also works—just keep heat at medium-low to prevent curdling. Stir constantly and monitor temperature with an instant-read thermometer.
How do I fix curdled custard?
Strain immediately through a fine-mesh sieve into a clean bowl to remove lumps. For extra smoothness, whisk in 1 tbsp reserved egg whites or 1 tsp cornstarch mixed with cold milk. If it’s still grainy, warm gently in a double boiler while whisking continuously. Prevention tip: Temper dairy in three additions while whisking vigorously.
What’s the best way to serve this custard?
Chilled with a sprinkle of toasted nuts or caramel drizzle makes it a showstopper. For a classic touch, pair with fresh berries or a dollop of whipped cream. Warm custard works beautifully as a sauce for pancakes or French toast—just reheat gently in a double boiler until creamy.
Can I substitute milk for cream?
For a lighter version, replace ½ cup heavy cream with whole milk, but expect a slightly less rich texture. The 1.5 cups heavy cream in the recipe is key for that signature velvety mouthfeel. If you’re avoiding dairy, coconut cream works but alters the flavor—reduce sugar slightly to balance sweetness.

- 2 Large Banana Bread Recipe: Double Batch With Moist Crumb and Walnut Streusel - September 30, 2026
- 7 Organ Soup Recipe: Hearty Immune-Boosting Elixir in One Pot - September 30, 2026
- 321 Sauce Recipe: Smoky Tomato Base With Spice-Layered Depth - September 30, 2026