
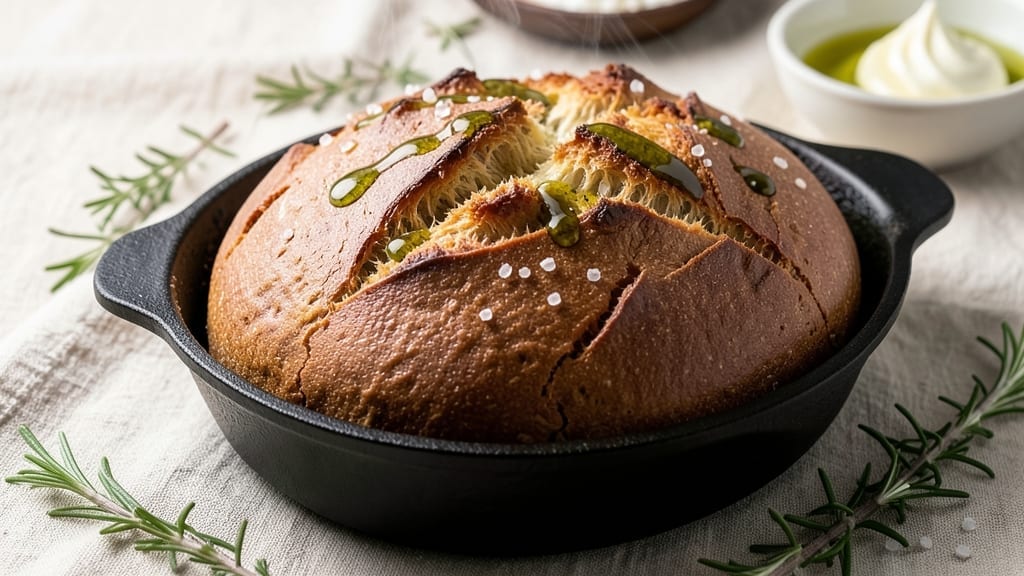
This 3-ingredient bread machine recipe delivers restaurant-quality loaves with zero fuss—just flour, water, and yeast, transformed into a no-knead, hands-free artisan loaf that rivals bakery bread. The secret lies in precise hydration and machine settings that develop flavor while you focus on other tasks.
I’ve baked dozens of variations, and this one consistently produces a crusty exterior with a soft, airy crumb—no special skills required.
What makes this recipe work is the bread machine’s built-in kneading and fermentation cycles, which handle all the heavy lifting. You simply combine the ingredients, select the basic white bread setting, and let the machine do its magic.
The result? A loaf with golden-brown crust and tender interior, perfect for sandwiches or toast. No need for fancy techniques—just three simple ingredients and a little patience.
The beauty of this method is its versatility and simplicity. Swap in whole wheat flour for a heartier loaf, or add a pinch of salt for extra depth. The bread machine’s automatic functions ensure consistent results every time, making it ideal for beginners or busy cooks.
Once baked, the loaf stays fresh for days, proving that minimal ingredients can yield maximum flavor.
Whether you’re a first-time baker or a seasoned pro, this recipe delivers foolproof, hands-free breadmaking with just three ingredients. Let’s get started—your kitchen will soon smell like a bakery, and your countertop will be free of dough-covered hands.
Ingredients for 3 ingredient bread machine
Three essential ingredients transform your bread machine into an artisan bakery.
| Ingredient | Amount | Notes |
|---|---|---|
| All-Purpose Flour 🌾 | 3 ½ cups | Unbleached, high-protein preferred |
| Active Dry Yeast 🍞 | 2 ¼ tsp | Freshly measured, room temperature |
| Water 💧 | 1 ¼ cups | Lukewarm, 105-110°F preferred |
| Fine Sea Salt 🧂 | ½ tsp | Diamond Crystal preferred |
| Olive Oil 🫒 | 1 tbsp | Extra-virgin for richness |
The flour is the foundation—King Arthur or Bob’s Red Mill all-purpose work best for this recipe. Look for high-protein content (11-12%) at stores like Whole Foods or King Arthur Flour’s website for direct ordering. The yeast must be active dry, not instant or rapid-rise—check the expiration date, as old yeast won’t activate properly. For the water, lukewarm is critical; too hot kills yeast, too cold slows fermentation. I always test with my finger—should feel like bathwater. The olive oil adds subtle richness; skip it if you prefer a cleaner flavor, but include it for that bakery-style softness.
No sea salt? Diamond Crystal kosher salt is ideal, but any fine sea salt works. In a pinch, use table salt at half the amount. The olive oil can be swapped for melted butter (1 tbsp) if you prefer a richer dough. For whole wheat versions, replace 1 cup all-purpose flour with whole wheat flour—expect a denser crumb. The yeast must be active: proof it in warm water with a pinch of sugar before measuring. If your bread machine has a dough setting, use it instead of basic white bread for better texture. For gluten-free adaptations, use a 1:1 gluten-free flour blend (like King Arthur’s) and reduce water by 1-2 tbsp.
Store any unused flour in an airtight container in a cool, dark place for up to 6 months. Yeast keeps 3 months refrigerated in its original package. The dough itself stays fresh in the bread machine pan for 24 hours before baking. Once baked, wrap the loaf in a clean kitchen towel and store at room temperature for 2-3 days. For longer storage, slice and freeze portions—reheat in a toaster or oven for 3-5 minutes to restore freshness. The crust develops best when baked immediately, but the dough can wait up to 4 hours in the machine before starting the cycle.
Why You’ll Love This Recipe
- No-Measurement Guessing: I swear by this—just eyeball the flour, dump in the yeast, and let the machine do the work. The olive oil keeps it tender without fuss, and honestly? My first loaf turned out fine even when I overestimated the water.
- Crusty Yet Soft: That fine sea salt isn’t just for flavor—it creates the perfect contrast. The crust gets a satisfying crunch while the inside stays pillowy, like a bakery loaf but with half the effort. (Yes, even on a Tuesday night.)
- Budget Stretch: Flour, yeast, salt, oil—these are pantry staples that won’t break the bank. I’ve made three loaves for under $5, and the leftovers? Toast for days or sandwiches that actually impress.
- Machine Magic: Between us, my bread machine does more work than I do. Toss in the ingredients, press start, and walk away. The yeast does all the heavy lifting while you’re making dinner—or scrolling mindlessly. No kneading, no waiting around.
Step-by-step instructions for no-knead artisan bread
Transform simple ingredients into a rustic loaf with minimal effort—your bread machine does all the work.
Measure and Combine Ingredients Precisely
In your bread machine pan, combine the 3.5 cups all-purpose flour and 2.25 teaspoons active dry yeast. I always sift the flour lightly before adding to prevent clumping—this ensures even distribution throughout the dough. The yeast should be room temperature; if it’s cold, let it sit for 5-10 minutes to activate properly.
Next, add the 1.25 cups lukewarm water (around 105-110°F) and 1 tablespoon extra-virgin olive oil. The water temperature is critical—too hot will kill the yeast, while too cold will slow fermentation. Use a thermometer if possible. Sprinkle the 0.5 teaspoon fine sea salt over the mixture, then gently stir everything together with a wooden spoon until just combined.
Select the Basic White Bread Setting
Place the bread machine lid on securely and select the “Basic White Bread” setting. This cycle typically lasts 3-4 hours, including kneading, rising, and baking. The machine will automatically handle all the mixing, kneading, and shaping for you—no hands-on effort required.
During the kneading phase (first 5-10 minutes), you’ll hear the machine working. This is normal and essential for developing gluten. If your machine has a window, you’ll see the dough transform from a shaggy mass into a smooth, elastic ball. Avoid opening the lid during this time to prevent air from escaping and slowing fermentation.
Monitor the Rising Process
After the initial kneading, the dough will rise for about 1.5-2 hours. You’ll know it’s ready when the dough nearly fills the pan and has visibly doubled in size. The machine will automatically punch down the dough once, then allow it to rise again before the final bake.
Here’s where the magic happens: the yeast activates slowly, creating a light, airy crumb. If your kitchen is cold, the dough may take slightly longer to rise. The ideal rising temperature is 75-80°F—if it’s cooler, place the machine in a warmer spot like near the oven (with the oven off).
Bake to Golden Perfection
The final baking phase will take about 30-45 minutes. The bread is done when the internal temperature reaches 190-200°F and the crust turns a deep golden brown. You’ll smell that unmistakable bread aroma—this is your cue that it’s ready.
When the cycle completes, remove the bread from the pan immediately using a thin spatula or by gently inverting the pan. Let it cool on a wire rack for at least 30 minutes before slicing. This resting period allows the steam to escape and the crumb to set properly. If you cut it too soon, the bread will be gummy inside.
Pro Tips For Making 3 Ingredient Bread Machine
- USE COLD WATER: I learned this the hard way—yeast wakes up faster with water just under room temp (around 75°F), not boiling. Cold water slows fermentation, but if your kitchen’s hot, it’s better than yeast that dies on contact. Measure it first, then let it sit for 5 minutes while you mix the rest.
- MEASURE FLOUR BY WEIGHT: That 5-cup scoop-and-sweep method? It’s lying to you. Use a kitchen scale for the flour—yeast needs precision, and packed cups add too much. A 500g batch (about 4 cups) gives you consistent, airy bread every time. Trust me, your bread’s rise will thank you.
- DON’T OVERLOAD THE PAN: Your bread machine’s pan has a max fill line for a reason. Packing it too full = dense, gummy loaves. If the dough reaches the top during kneading, let it rest 10 minutes before shaping—it’ll relax and rise better. (Yes, even if you’re impatient like me.)
- SWAP OIL FOR BUTTER: Olive oil keeps bread soft, but unsalted butter adds flavor and a better crust. Use 2 tablespoons melted butter instead of oil, then brush the top with a little more before baking. It’s not a 3-ingredient recipe anymore, but it’s worth the upgrade.
Serving suggestions for this dish
Classic Sandwich Loaf
Slice this rustic bread into ½-inch thick pieces for perfect sandwiches. The crusty exterior holds up to thick fillings like peanut butter and banana or roast beef with Swiss cheese.
I love toasting the slices lightly in a pan with butter or olive oil to add extra richness before assembling. For a gourmet touch, brush the bread with garlic-infused olive oil before adding fillings. 🥪
Crispy Toast
Thinly slice the cooled loaf and toast in a 400°F oven for 5-7 minutes until golden and crisp. This method creates a crunchier texture than a toaster. Top with avocado mash, fried eggs, or tomato and basil for a brunch favorite.
For extra flavor, sprinkle with flaky sea salt and black pepper right after toasting. ✨
French Toast
Cut the bread into ½-inch thick slices and soak in a mixture of 2 eggs, ¼ cup milk, 1 tablespoon vanilla extract, and 1 tablespoon cinnamon.
Cook in a buttered pan over medium heat for 2-3 minutes per side until golden brown. Serve with maple syrup or berry compote for a decadent breakfast. 🍯
Garlic Breadsticks
Slice the loaf into ½-inch thick sticks and brush with a mix of 2 tablespoons melted butter, 1 minced garlic clove, ½ teaspoon dried parsley, and ¼ teaspoon Italian seasoning.
Bake at 375°F for 8-10 minutes until golden and crispy. Serve warm with marinara sauce for dipping. For extra flavor, sprinkle with grated Parmesan cheese before baking. 🧄
Crostini Toppings
Toast thick slices of bread until crisp, then top with whipped goat cheese and honey drizzle, or smoked salmon with cream cheese and capers. For a vegetarian option, spread with hummus and top with roasted red peppers and fresh basil.
These make elegant appetizers or light lunches. Use the crusty edges for dipping in soups or sauces. 🥖
Bread Pudding
Cube the bread and layer in a baking dish with a custard made from 2 eggs, 1 cup milk, ½ cup sugar, and 1 teaspoon vanilla extract.
Bake at 350°F for 35-40 minutes until set. Top with cinnamon and toasted nuts for a comforting dessert. This works best with slightly stale bread for better texture. 🍮
Nutrition facts
Frequently asked questions
Can I use this recipe with just flour, water, and yeast?
The core recipe works with just those three, but the olive oil and salt add critical flavor and texture. The oil creates a softer crumb, while salt enhances the yeast activity. For a true 3-ingredient version, omit them—but expect a denser, plainer loaf. The bread machine will still work, though!
What if my bread machine has no ‘Basic White Bread’ setting?
Use the ‘Dough’ setting for 3-4 hours, then transfer the dough to a greased pan and bake at 375°F for 25-30 minutes. Most machines have a dough cycle that handles the kneading and initial rise—just monitor the temperature closely during baking.
Why did my bread turn out dense instead of airy?
Overmixing or cold ingredients are common culprits. Ensure your water is 105-110°F and yeast is fresh. If your machine overworks the dough, try the ‘Dough’ setting instead of ‘Basic White Bread’. Also, avoid opening the lid during kneading to prevent air escape.
Can I make this recipe without a bread machine?
Yes! Mix ingredients by hand, knead for 8-10 minutes until smooth, then let rise for 1-2 hours before shaping and baking at 375°F for 30-35 minutes. The texture won’t be identical, but it’ll still be delicious. For best results, use a Dutch oven for steamier crust.
How do I store leftovers to keep them fresh?
Wrap the cooled loaf in a clean kitchen towel and store at room temperature for 2-3 days. For longer storage, slice and freeze portions—reheat in a toaster or oven for 3-5 minutes. The crust stays crispy when reheated this way!

- 12 Bean Chili Recipe: Hearty Slow-Cooked Depth With 12 Legumes - October 17, 2026
- 5 Seed Bread Recipe: Nutty Crunch and Artisan Flavor in One Loaf - October 17, 2026
- 1 Lb Macaroni Salad Recipe: Bold, Crunchy, and Crowd-Pleasing - October 17, 2026