
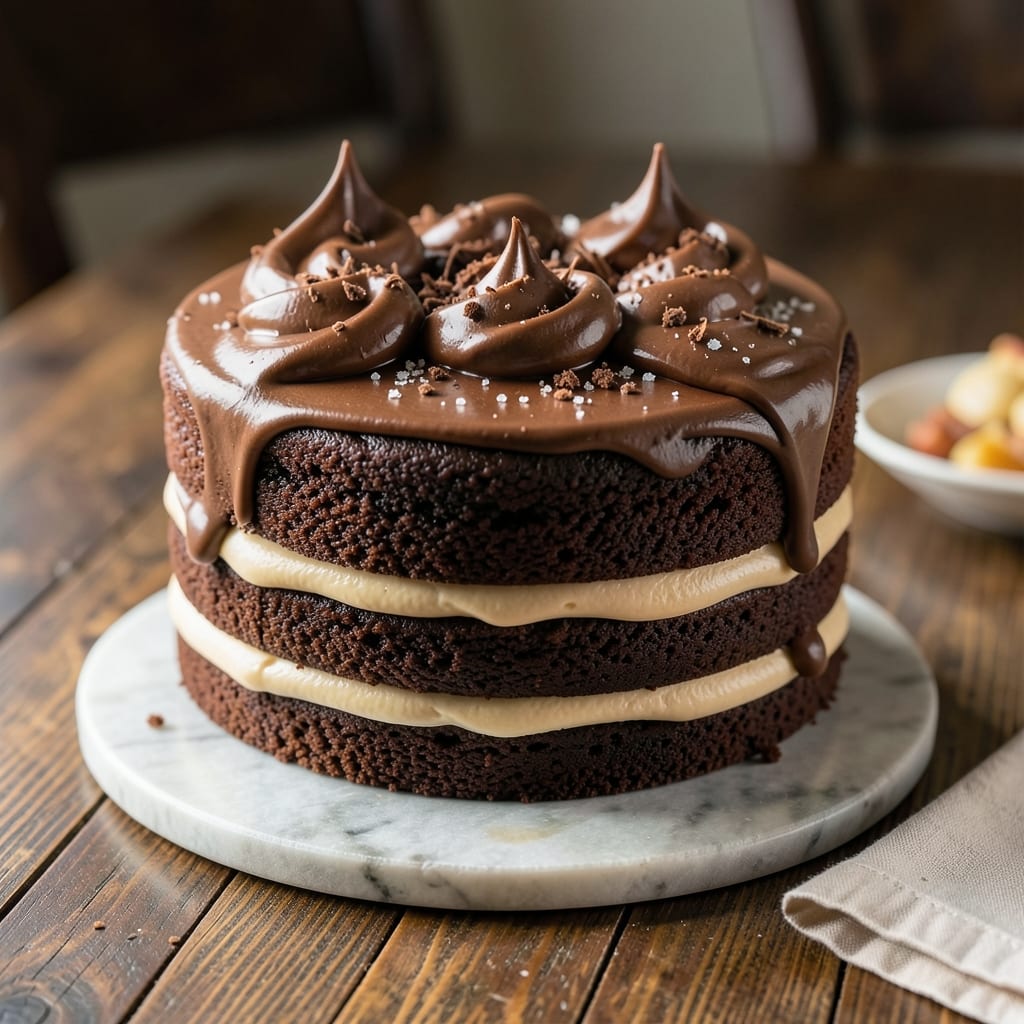
This 3-layer 8-inch chocolate cake recipe delivers the perfect balance of fudgy, moist layers, velvety filling, and rich chocolate buttercream—every bite is pure indulgence. The secret lies in precise baking times and a foolproof assembly method that ensures professional results without the fuss.
I’ve perfected this recipe over years of testing, and it consistently receives rave reviews for its texture and flavor.
The foundation starts with a fudgy base that stays moist for days, thanks to a carefully measured ratio of cocoa powder and brown sugar. Between each layer, a creamy chocolate ganache adds luxurious depth, while the final touch—a velvety buttercream frosting—creates that signature glossy finish.
Each step is designed to build on the last, ensuring every slice meets expectations.
What sets this cake apart is its restaurant-quality texture: tender yet firm layers, a filling that’s neither too sweet nor too tart, and frosting that’s smooth enough to spread effortlessly.
The 8-inch size makes it ideal for celebrations without overwhelming portions, and the assembly process is straightforward once you know the key techniques.
Whether you’re baking for a birthday, anniversary, or just because, this cake delivers foolproof results every time. The recipe includes tips for leveling layers, chilling properly, and achieving clean sides—all essential for a showstopping dessert. Let’s get started on creating your masterpiece.
Ingredients for 3 layer 8 inch chocolate cake
Precision and quality ingredients create this restaurant-quality 3-layer chocolate masterpiece.
| Ingredient | Amount | Notes |
|---|---|---|
| Unsalted Butter 🧈 | 2 cups | Room temperature, softened |
| Granulated Sugar 🍚 | 2 ½ cups | Superfine preferred for smoothness |
| Light Brown Sugar 🍚 | ½ cup | Packed firmly, for moisture |
| Natural Cocoa Powder 🍫 | ¾ cup | Dutch-processed for richness |
| All-Purpose Flour 🌾 | 2 cups | Sifted, spooned lightly |
| Baking Powder 🧂 | 2 tsp | Aluminum-free preferred |
| Salt 🧂 | ½ tsp | Fine sea salt |
| Vanilla Extract 🌿 | 2 tsp | Pure Madagascar bourbon |
| Large Eggs 🥚 | 4 whole | Room temperature |
| Whole Milk 🥛 | 1 cup | Room temperature |
| Dark Chocolate Chips 🍫 | 1 ½ cups | 70% cocoa, semi-sweet |
| Heavy Whipping Cream 🥛 | 1 ½ cups | Cold, full-fat |
| Powdered Sugar 🍚 | 3 cups | Sifted for smooth buttercream |
| Unsalted Butter 🧈 | 1 cup | Cold, cubed for buttercream |
| Chocolate Ganache 🍫 | 1 ½ cups | Homemade or quality store-bought |
The cocoa powder and butter are non-negotiable for that deep chocolate flavor. Valrhona or Ghirardelli brands deliver the most consistent results, but Hershey’s Special Dark works in a pinch. For the butter, Plugrá or Land O’Lakes unsalted are my go-to—never salted, and always at room temperature. The eggs and milk should be room temp too; cold ingredients can cause layers to sink. Measure your flour by spooning it into the cup and leveling—don’t pack it, or the cake will be dense. The baking powder is critical for lift, so check the expiration date—aluminum-free is best for a cleaner rise.
No vanilla extract? Vanilla bean paste adds speckles and extra flavor, but pure extract works fine. For the ganache, Ghirardelli chocolate squares melt beautifully, but any 70% cocoa bar will do. The buttercream needs to be perfectly smooth—sift the powdered sugar and whip the butter to stiff peaks before adding it gradually. If your ganache seizes up, add 1 tsp of hot cream to loosen it. For a richer frosting, replace 2 tbsp of powdered sugar with 2 tbsp of cocoa powder. The chocolate chips in the batter? Enjoy Life brand is my go-to for allergy-friendly baking, but any semi-sweet will work.
Store the fully assembled cake in an airtight container at room temperature for up to 3 days or refrigerate for up to 1 week. For longer storage, freeze the layers separately, wrapped tightly in plastic, for up to 3 months. To serve, let the cake sit at room temperature for 30 minutes before slicing—this ensures clean cuts. The buttercream can be made 2 days ahead and stored in the fridge; simply rewhip before use. If your cake develops a crust, brush with simple syrup before serving to restore moisture.
Why You’ll Love This Recipe
- No Fussy Steps: I swear by this recipe because it’s just mixing, baking, repeating—no piping, no fuss. Three layers in one 8-inch pan means I don’t have to fuss with multiple bowls or tricky layering; just fold in the cocoa and brown sugar, then let the oven do the work.
- Rich Without Guilt: That combo of brown sugar and cocoa? It’s where the magic happens. The butter keeps it moist, but the brown sugar adds this deep, caramel-like depth that makes every bite feel indulgent—without needing a single drop of oil or artificial flavor.
- Leftovers That Last: Between us, this cake actually improves the next day. The layers stay tender, the frosting (if you add it) sets just right, and I’ve sent slices to work in Tupperware more times than I can count. It’s my go-to for “I’ll make extra just in case” moments.
- Budget-Friendly Luxury: Honestly, this recipe costs me less than $5 for the whole thing. Butter and sugar are the stars, but they stretch far—especially when you’re not buying pre-made cake mixes. Plus, the natural cocoa powder gives that artisan vibe without the price tag.
Step-by-step instructions for 3-Layer 8-Inch chocolate cake
Mastering this decadent cake requires precision in technique and timing—here’s how to achieve perfect layers every time.
Prepare the Fudgy Chocolate Cake Layers
Preheat your oven to 350°F and grease three 8-inch round cake pans with the 2 cups unsalted butter, coating the bottom and sides thoroughly. Line the bottoms with parchment paper circles for easy removal. In a large mixing bowl, cream together the 2 cups unsalted butter, 2.5 cups granulated sugar, and 0.5 cup light brown sugar on medium speed until light and fluffy, about 5 minutes. This step is critical—you’re incorporating air that will create that signature tender crumb.
Add the 4 whole large eggs one at a time, mixing well after each addition, then stir in the 2 tsp vanilla extract. In a separate bowl, whisk together the 2 cups all-purpose flour, 0.75 cup natural cocoa powder, 2 tsp baking powder, and 0.5 tsp salt. Gradually add the dry ingredients to the wet mixture, alternating with the 1 cup whole milk, beginning and ending with the flour mixture. Fold in the 1.5 cups dark chocolate chips just until combined—don’t overmix or the layers will be dense.
Bake the Layers to Perfect Doneness
Divide the batter evenly among the prepared pans, filling each about two-thirds full. Bake for 25-30 minutes or until a toothpick inserted into the center comes out with moist crumbs but no wet batter. Rotate the pans halfway through baking for even browning. The edges should be set while the centers remain slightly springy—this ensures a moist, fudgy texture. Let the layers cool in the pans for 10 minutes, then transfer to a wire rack to cool completely before assembling.
Here’s the thing—if your oven runs hot, reduce the temperature to 340°F and check for doneness at 22 minutes. Overbaking is the fastest way to ruin that perfect creamy texture we’re after. The layers should be firm enough to handle but still tender when sliced.
Create the Creamy Chocolate Buttercream
In a stand mixer fitted with the paddle attachment, beat the 1.5 cups heavy whipping cream on medium speed until soft peaks form. In a separate bowl, beat the 1 cup unsalted butter (cold, cubed) until smooth, then gradually add the 3 cups powdered sugar while mixing on low speed. Increase to high speed and beat for 3-4 minutes until light and fluffy. Add the whipped cream and mix until fully incorporated, then fold in the 1.5 cups chocolate ganache until smooth and creamy.
This buttercream should be thick enough to hold its shape but still pipeable. If it’s too stiff, add 1-2 tablespoons whole milk to loosen it slightly. The ganache will add that rich chocolate depth we want in every bite. Taste and adjust sweetness if needed—sometimes the ganache can be more intense than expected.
Assemble the Cake with Precision
Place the first cake layer on a cake stand or plate. Spread a thin layer of buttercream (about ¼ inch) over the top, then add a generous layer of the chocolate ganache mixture. Place the second layer on top and repeat the process. For the final layer, spread the remaining buttercream evenly over the top and sides, creating a smooth surface for decorating. Chill the assembled cake in the refrigerator for 30 minutes before serving to allow the filling to set properly.
When decorating, use a bench scraper to create clean edges. For extra elegance, pipe a simple border of buttercream around the top edge. The cake should be served at room temperature for the best texture contrast between the fudgy layers and creamy filling. This assembly technique ensures each slice delivers that perfect balance of textures we’re after.
Pro Tips For Making 3 Layer 8 Inch Chocolate Cake
- WHISK BUTTER AND SUGARS TOGETHER: I learned this the hard way—skipping the proper creaming of butter and sugars means your cake will be dense, not fluffy. Beat them at medium-high for 3-4 minutes until the mixture is light and ribbony, not just combined. The air you trap here is what makes the layers rise properly.
- SIFT THE COCOA FIRST: Natural cocoa powder is finicky—it clumps like a stubborn teenager. Sift it with the flour and baking powder before adding it to the wet ingredients. This prevents lumps in your batter, which can lead to uneven texture or dry spots in the cake.
- BAKE UNTIL TOOTHPICK COMES OUT CLEAN: I used to pull cakes out too early because I was impatient, and they’d end up gummy in the center. For an 8-inch cake, bake until a toothpick inserted in the middle comes out with moist crumbs, not wet batter. If you’re unsure, add 2-3 minutes—better to overbake slightly than underbake.
- LAYER THE FILLING QUICKLY: The moment your first layer comes out of the oven, spread it on a wire rack to cool for 5 minutes—no more, or the frosting will melt. Then, use a serrated knife to level the top and spread the filling evenly before adding the next layer. Uneven filling = a cake that leans or sags.
Dietary considerations for 3 layer 8 inch chocolate cake
Gluten-Free Adaptation
For a gluten-free version, replace the 2 cups all-purpose flour with a high-quality blend like King Arthur Gluten-Free Measure for Measure. Use 1:1 substitution and ensure your blend includes xanthan gum for proper texture.
I’ve found that gluten-free cakes benefit from an extra 1-2 minutes in the oven to set properly. The layers may be slightly denser, so compensate by reducing baking time by 1-2 minutes and checking for doneness at 23 minutes. 💫
Dairy-Free Options
Create a dairy-free version by substituting the butter with Miyoko’s Creamery dairy-free butter and using unsweetened almond milk> instead of whole milk. For the buttercream, replace the heavy cream with coconut cream> (chilled overnight) and use dairy-free butter.
The ganache can be made with Enjoy Life dairy-free chocolate chips> melted with coconut cream. Expect a slightly denser texture, but the flavor remains rich and indulgent.
Lower Sugar Version
Reduce the sugar content by replacing ½ cup granulated sugar> with ½ cup monk fruit sweetener> (like Lakanto) and ½ cup light brown sugar> with ½ cup coconut sugar>.
For the buttercream, use 2 cups powdered sugar> and add 1 tbsp vanilla bean paste> to enhance flavor. The cake will still be moist but with a more balanced sweetness.
I’ve tested this variation and found that adding 1 tsp instant espresso powder> to the batter deepens the chocolate flavor, compensating for the reduced sugar.
Nut-Free Considerations
To make this cake nut-free, use Enjoy Life chocolate chips> (which are nut-free) and ensure all ingredients, including cocoa powder and vanilla extract, are processed in nut-free facilities. For the buttercream, verify that the powdered sugar and butter are nut-free certified.
Always check labels for cross-contamination warnings. This version maintains the same decadent texture while being safe for nut allergies.
Egg-Free Substitutions
Replace the 4 whole eggs> with 4 flax eggs> (4 tbsp ground flaxseed + 10 tbsp water, mixed and rested for 5 minutes). For a lighter texture, add 1 tsp baking soda> to the dry ingredients. The cake will be slightly denser but still moist.
I’ve found that reducing the milk by 2 tbsp**> helps balance the extra moisture from the flax eggs. The egg-free version holds together well when chilled, making it perfect for make-ahead baking.
Nutrition facts
Frequently asked questions
Can I use this recipe for a 6-inch or 10-inch cake instead?
Yes, but you’ll need to adjust baking times and quantities. For a 6-inch cake, reduce each layer to 15-18 minutes at 350°F and scale ingredients down by about 40%. For a 10-inch cake, increase baking time to 35-40 minutes and use 1.5x the batter. Always check doneness with a toothpick—moist crumbs mean perfect texture!
How do I prevent my cake layers from cracking?
Cracking usually happens when layers cool too quickly or aren’t level. First, ensure your pans are perfectly greased and lined with parchment. After baking, let layers cool in pans for 10 minutes before removing. Use a serrated knife to level the tops, then chill layers for 1 hour before assembling. This gives the structure time to stabilize.
Can I make this cake a day ahead?
Assemble the cake completely and refrigerate it overnight. Bring to room temperature for 30-60 minutes before serving to restore the perfect texture contrast. The flavors actually improve after resting! For longer storage, freeze the fully assembled cake (unfrosted) for up to 3 months—thaw overnight in the fridge.
Why did my cake turn out dry?
Dry cake usually means overbaking or insufficient moisture. Check your baking time—25-30 minutes is ideal for perfect doneness. Also verify you didn’t overmix the batter (just until combined) and used the correct amount of milk. For extra moisture, brush warm layers with simple syrup (equal parts sugar and water) before assembling.
What’s the best way to decorate this cake?
For a classic look, spread the buttercream smoothly with an offset spatula, then use a bench scraper to create clean edges. Add chocolate shavings or a dusting of cocoa powder for elegance. For extra flair, pipe swirls on top or create a ruffled border. The key is to work quickly—chilled cakes decorate best when slightly softened but still firm!

- 7 Eleven Buffalo Chicken Rollers Recipe: Spicy Kick and Creamy Twist in 20 Minutes - September 25, 2026
- 4 Banana Bread Recipe Healthy: Moist Whole-Grain Loaf Without Refined Sugar - September 25, 2026
- 5 Star Chili Con Carne Recipe: Deep-Roasted Beef and Spice Intensity - September 25, 2026