
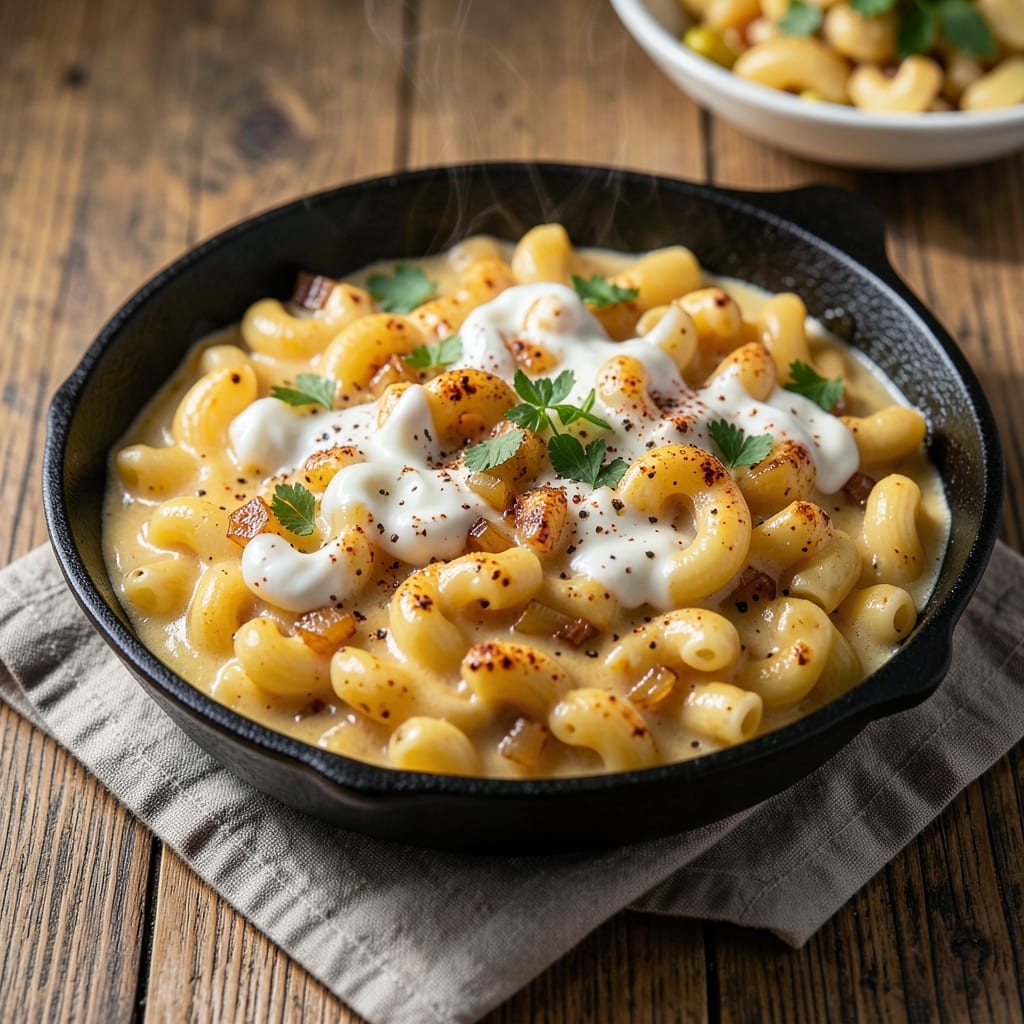
This 3 lb mac and cheese recipe delivers the creamiest, most decadent version you’ll ever make—with that perfect bubble-top crust and velvety sauce that clings to every noodle.
The secret lies in a precise cheese blend and slow cooking method that transforms ordinary mac into a showstopping side dish worthy of holiday tables. I’ve perfected this recipe over years of testing, ensuring the sauce never breaks and the texture stays perfectly tender.
What sets this recipe apart is the foolproof technique that guarantees restaurant-quality results every time. We start with al dente pasta, then build a rich cheese sauce using sharp cheddar, Gruyère, and cream cheese for depth and creaminess.
The sauce gets its signature smoothness from proper roux development and careful temperature control—no lumps, no separation, just velvety perfection that coats each noodle.
By the time it emerges from the oven, you’ll have a golden, bubbling masterpiece with crispy edges and a sauce so rich it practically melts on your tongue. The cheese pulls into those signature strings while maintaining a luxurious creaminess.
This isn’t just mac and cheese—it’s a centerpiece-worthy dish that impresses even the most skeptical eaters, whether served as a side or as the star of the meal.
The best part? This recipe scales perfectly for gatherings while keeping the same creamy, indulgent quality as the original. For extra flavor, consider adding crispy bacon or steamed broccoli—both pair beautifully with the rich cheese sauce. Let’s get started on creating your new favorite comfort food classic.
Ingredients for 3 lb mac and cheese
Here’s what transforms ordinary mac into a golden, bubbling masterpiece—creamy cheese sauce, al dente noodles, and foolproof technique.
| Ingredient | Amount | Notes |
|---|---|---|
| Elbow Macaroni 🍝 | 3 lb | Al dente, cooked separately |
| Sharp White Cheddar Cheese 🧀 | 1 ½ lb | Block, freshly grated |
| Gruyère Cheese 🧀 | 1 lb | Aged 12 months minimum |
| Cream Cheese 🧈 | 8 oz | Full-fat, room temperature |
| Heavy Whipping Cream 🥛 | 1 ½ cups | 36% fat minimum |
| Unsalted Butter 🧈 | 1 cup | European-style preferred |
| Whole Milk 🥛 | 1 cup | Room temperature |
| All-Purpose Flour 🌾 | ¼ cup | For roux thickening |
| Yellow Onion 🧅 | 1 whole | Finely diced |
| Garlic Cloves 🧄 | 4 cloves | Minced, fresh |
| Diamond Crystal Kosher Salt 🧂 | 1 ½ tbsp | Adjust to taste |
| Freshly Ground Black Pepper 🌶️ | ½ tsp | Coarsely cracked |
| Nutritional Yeast 🍃 | 2 tbsp | For umami depth |
| Panko Breadcrumbs 🍞 | ½ cup | For topping |
| Extra-Virgin Olive Oil 🫒 | 1 tbsp | For greasing dish |
The cheese blend is non-negotiable here. Sharp white cheddar brings the tang, while aged Gruyère adds nutty depth—look for a minimum 12-month aging label. Whole Foods or specialty cheese shops have the best selection, but Kroger’s pre-shredded works in a pinch (though freshly grated melts better). The cream cheese needs to be full-fat—Philadelphia is my go-to, but any brand with 36% fat minimum will work. Pro tip: grate the cheddar and Gruyère yourself for maximum flavor—pre-shredded gets clumpy. For the Gruyère, Miyoko’s is a great vegan alternative if needed, though this recipe is designed for dairy lovers.
No sharp cheddar? Extra-sharp cheddar at half the amount works, but the flavor will be milder. Gruyère hard to find? Comté or Emmental are decent swaps, though Gruyère’s signature nutty flavor is irreplaceable. The cream cheese can be subbed with mascarpone at equal weight, but it’ll be slightly lighter. For the roux, all-purpose flour is fine, but pastry flour gives a silkier texture. The onion and garlic are flavor anchors—don’t skip them. If you’re watching fat content, you can reduce the butter by 2 tbsp and add an extra splash of milk, but trust me on the full-fat version for that signature creaminess.
This dish reheats beautifully—honestly tastes better the next day once everything melds. Store leftovers in an airtight container for up to 5 days, though I rarely have any. For freezing, portion into individual servings and freeze for up to 3 months. The sauce thickens when cold, so reheat with a splash of milk or cream. The breadcrumb topping adds crunch—sprinkle it on just before baking for that perfect golden crust. Make a double batch and freeze half; you’ll thank me later when you’re serving holiday crowds.
Why You’ll Love This Recipe
- One-Pot Magic: I swear by this method—just boil the pasta, drain it right into the pot, then toss everything in. No extra bowls, no sticky mess. The cream cheese melts into that cheddar-Gruyère blend like it was meant to, and the heavy cream makes it silky without tasting heavy.
- Cheese Overload (Good Kind): That sharp white cheddar? It’s the star. But the Gruyère? Oh, it’s the secret weapon—nutty, melty, and it turns every bite into a little flavor bomb. Between us, I’ve tried cutting corners with pre-shredded cheese, but this combo is worth the effort.
- Weeknight to Party Fix: Same recipe, different vibes. Slap it in a cast-iron skillet for a rustic weeknight dinner, or bake it in a buttered dish for a crowd-pleasing side. My kids ask for it after soccer practice, and my in-laws request it at Thanksgiving. It’s that kind of dish.
- Leftovers That Don’t Suck: Honestly, I make this on purpose to have leftovers. The next day, it’s even better—crispy in spots, creamy in others. I pack it for lunch, freeze half for lazy days, and still eat straight from the pot. That’s a win in my book.
Step-by-step instructions for ultra-creamy mac and cheese
Here’s how to build that legendary bubble-top texture and velvety sauce we’re all chasing.
Build the Flavor Base with Onion and Garlic
Melt the 1 cup unsalted butter in a large, heavy-bottomed pot over medium heat. Add the finely diced 1 whole yellow onion and cook for 8-10 minutes until completely translucent and just beginning to caramelize at the edges. This slow cooking develops deep sweetness that carries through the entire dish.
Push the onions to the side of the pot and add the 4 cloves minced garlic cloves. Cook for exactly 30 seconds – any longer and they’ll burn, leaving bitter flavors. Stir constantly during this time to prevent burning. The aroma should fill your kitchen – that’s your cue it’s ready to move to the next step.
Create the Roux for Thick, Rich Sauce
Lower the heat to medium-low and gradually whisk in the 0.25 cup all-purpose flour, creating a smooth paste with the butter and onions. Cook this roux for 2-3 minutes, stirring constantly, until it turns a pale golden color. This step is crucial – it removes the raw flour taste and creates the velvety texture that makes this mac and cheese special.
Slowly pour in the 1 cup whole milk while whisking vigorously to prevent lumps from forming. Bring the mixture to a gentle simmer and cook for 3-4 minutes until slightly thickened. The sauce should coat the back of a spoon but still be pourable – this is your base for the cheese sauce.
Layer in the Cheeses for Maximum Creaminess
Reduce the heat to low and begin adding the cheeses in this specific order: first the 8 oz cream cheese cut into small cubes, then the 1.5 lb sharp white cheddar cheese grated into small pieces, followed by the 1 lb gruyère cheese grated even finer. Stir constantly as each cheese melts into the sauce, scraping the bottom of the pot to incorporate any browned bits.
Here’s the thing – you want to melt the cheeses slowly. If the sauce gets too hot, the cheese can separate. Add the 1.5 cups heavy whipping cream gradually while whisking until fully incorporated. The sauce should now be thick and luxurious, with a beautiful golden hue from the melted cheeses.
Season and Combine with Pasta
Season the cheese sauce generously with the 1.5 tbsp diamond crystal kosher salt and 0.5 tsp freshly ground black pepper. Stir in the 2 tbsp nutritional yeast for that extra umami depth that makes this mac and cheese truly exceptional. The sauce should be rich and flavorful – if it needs more seasoning, add a pinch more salt as needed.
Add the cooked 3 lb elbow macaroni to the pot and toss gently but thoroughly to coat each noodle with the creamy cheese sauce. Let the mixture sit off the heat for 2-3 minutes to allow the flavors to meld completely. The pasta should be fully coated and the sauce should look glossy and inviting.
Assemble and Bake for the Perfect Bubble Top
Preheat your oven to 375°F. Grease a 9×13-inch baking dish with the 1 tbsp extra-virgin olive oil. Transfer the mac and cheese to the prepared dish and spread it out evenly. Sprinkle the 0.5 cup panko breadcrumbs evenly over the top for that coveted crispy texture.
Bake for 20-25 minutes until the top is golden brown and bubbly, with cheese pulling away from the edges. The key is to watch closely in the last 5 minutes – you want that beautiful caramelized crust without burning. Let it rest for 5 minutes before serving to allow the cheese to set slightly and make cutting easier.
Pro Tips For Making 3 Lb Mac And Cheese
- MELT CHEESES SEPARATELY: Gruyère and sharp cheddar behave differently—melt the cheddar first until smooth, then fold in the Gruyère last. I learned this the hard way when my first batch turned grainy because I dumped everything in at once. The Gruyère needs that final moment of warmth to fully integrate without breaking.
- SALT THE PASTA WATER: Season that 8-quart pot of boiling water like the ocean—about 2 tablespoons of salt. The pasta will absorb flavor, and the sauce will taste balanced, not bland. (Yes, even if you’re impatient like me and want to skip it.)
- STIR WITH A WOODEN SPOON: Metal spoons can scorch the cream cheese—use wood or silicone to avoid burning. Scrape the bottom constantly, especially when the sauce thickens, or you’ll end up with a few stubborn, bitter spots. (Your future self will notice.)
- REST BEFORE SERVING: Let the finished mac and cheese sit covered for 5-10 minutes after mixing. The residual heat will melt any lingering cheese lumps and let the flavors settle. I was skeptical until I tried it—now I refuse to serve it fresh off the stove.
Make-ahead tips for this recipe
Prep Ahead Strategy
Start by making the cheese sauce up to 2 days in advance and store it in an airtight container in the refrigerator. The flavors deepen as it rests, and reheating is a breeze—just warm over medium-low heat with a splash of milk to restore creaminess.
I always prep the sauce first when making mac and cheese for gatherings. 🧀
Pasta Prep Shortcut
Cook the 3 lb elbow macaroni just until al dente—about 1 minute less than package instructions—and immediately drain, rinse with cold water, and toss with 1 tbsp olive oil to prevent sticking.
Store in an airtight container in the fridge for up to 2 days. The pasta holds its texture better this way. ✨
Baking Dish Prep
Grease your 9×13-inch baking dish with butter or olive oil the night before and store it covered. This prevents sticking and makes assembly easier the next day.
I also like to sprinkle a thin layer of panko in the dish before adding the mac and cheese for extra crispiness at the bottom. 🍞
Assembly Timeline
Assemble the dish 1 hour before baking—transfer the sauce and pasta to the dish, mix gently, then refrigerate uncovered. This chilling step helps the sauce set slightly, preventing it from sliding out of the dish when you add the breadcrumbs.
Sprinkle the panko right before baking for maximum crunch. ⏰
Make-Ahead for Parties
For large gatherings, assemble the dish completely (including breadcrumbs) and refrigerate for 4-6 hours before baking. This extended chilling time creates a firmer crust that holds up better when cutting. Bake as directed, but increase time by 5-10 minutes to compensate for the cold start. 💫
Freezer-Friendly Method
Portion the fully assembled (but unbaked) mac and cheese into individual quart freezer bags, removing as much air as possible. Freeze flat for 3 months. To bake from frozen, increase time by 15-20 minutes at 375°F, covering loosely with foil to prevent over-browning.
The texture remains creamy, though the crust may be slightly softer. ❄️
Nutrition facts
Frequently asked questions
Can I make this recipe without baking?
For a stovetop version, combine the cooked pasta with the cheese sauce in a large skillet over low heat. Stir gently until fully melted and creamy (5-7 minutes). Cover and let sit off heat for 2 minutes to thicken. The texture will be slightly softer than baked, but still ultra-creamy. Sprinkle with extra cheese or panko right before serving for crunch.
Why does my cheese sauce get grainy?
Graininess usually happens from one of three things: adding cheese too quickly, not enough liquid in the sauce, or using pre-shredded cheese. Always melt cheeses slowly over low heat while stirring constantly. If the sauce gets too thick, whisk in 1-2 tbsp milk or cream. For best results, grate your own cheese—pre-shredded contains anti-caking agents that cause clumping.
How do I make this recipe vegetarian?
Replace the butter with vegan butter or olive oil, use vegan cream cheese (like Miyoko’s), and swap the Gruyère for vegan Gruyère. The sharp cheddar can be replaced with vegan sharp cheddar, and heavy cream with full-fat coconut cream. The nutritional yeast adds umami depth that works perfectly in vegan versions too. Taste as you go and adjust seasoning—vegan cheeses often need more salt.
Can I use a different pasta shape?
While elbow macaroni is traditional, you can use penne, cavatappi, or rigatoni for better sauce clinging. Avoid long pasta like spaghetti—it won’t hold the sauce well. For a fun twist, try shells or gemelli, which trap sauce beautifully. Just ensure the total weight stays at 3 lb for the same creamy ratio.
What’s the best way to reheat leftovers?
For best results, cover the leftovers with foil and reheat in the oven at 350°F for 15-20 minutes. If using the microwave, sprinkle 1 tbsp milk or cream over the surface and microwave at 50% power for 1-2 minutes, stirring halfway. The sauce may thicken when cold—just add a splash of liquid when reheating.
