
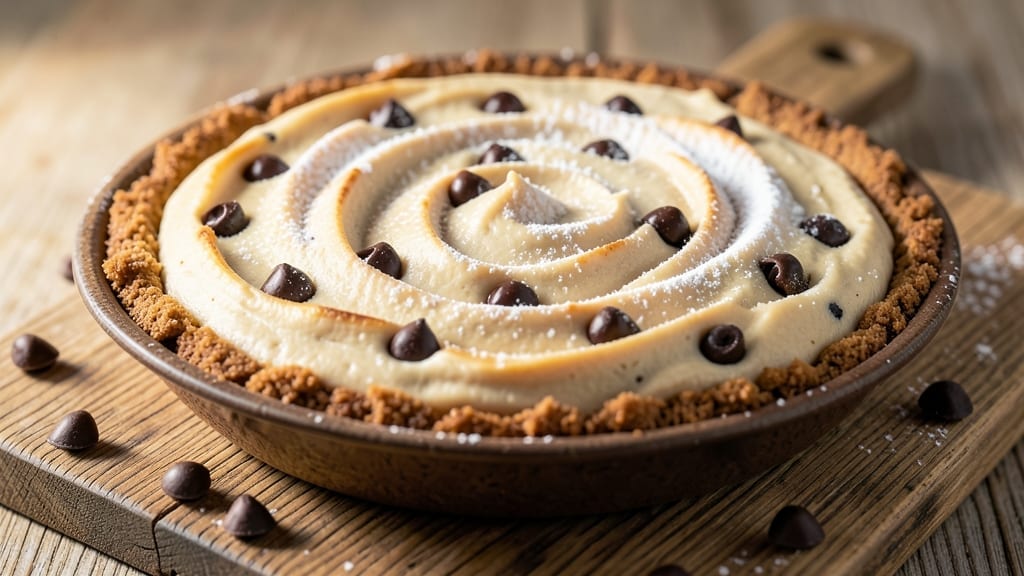
This 6-inch chocolate chip cheesecake recipe delivers the perfect balance of velvety smooth filling and irresistible crunchy chocolate bits in every bite. 🌟 The secret lies in a foolproof crust technique and a rich, creamy filling that bakes to a golden finish while maintaining that signature jiggle. I developed this recipe after years of testing—no cracks, no sinking, just pure, decadent dessert perfection.
The crust starts with a blend of graham crackers and melted butter, pressed firmly into the pan to create a sturdy base that won’t crumble.
The filling combines cream cheese, sour cream, and a touch of vanilla for that classic cheesecake flavor, then gets folded with melted chocolate chips for pockets of gooey goodness. Baking at 325°F ensures a gentle set without overcooking.
What you’ll end up with is a 6-inch masterpiece—smooth, rich, and topped with a glossy chocolate ganache that ties everything together. The texture is everything you’d expect: a creamy center with crispy chocolate edges that melt just slightly with each bite.
It’s the kind of dessert that feels like a restaurant-quality treat, but with a homemade touch.
Serve it chilled for the perfect slice, or add a dollop of whipped cream for extra indulgence. This recipe scales easily for larger pans if needed, but the 6-inch size makes it ideal for small gatherings or a single serving when you’re craving something special. Let’s get baking!
Ingredients for 6 inch chocolate chip cheesecake
Six essential ingredients for a foolproof 6-inch cheesecake with perfect texture and chocolatey richness.
| Ingredient | Amount | Notes |
|---|---|---|
| Graham Crackers 🍪 | 1 ½ cups | Crushed into fine crumbs |
| Unsalted Butter 🧈 | ½ cup | Melted, full-fat preferred |
| Granulated Sugar 🍚 | ¼ cup | For crust sweetness |
| Large Eggs 🥚 | 3 whole | Room temperature, separated |
| Cream Cheese 🧀 | 16 oz | Full-fat, room temperature |
| Sour Cream 🥛 | ½ cup | Full-fat for creaminess |
| Vanilla Extract 🌿 | 1 tbsp | Pure, high-quality |
| Semisweet Chocolate Chips 🍫 | 1 ½ cups | Melted, high-quality |
| All-Purpose Flour 🌾 | 1 tbsp | For filling stability |
| Salt 🧂 | ¼ tsp | Kosher or sea salt |
| Dark Chocolate 🍫 | 4 oz | 70% cocoa, chopped |
| Heavy Whipping Cream 🥛 | ¼ cup | For ganache, cold |
The graham crackers set the foundation—Honey Maid or Keebler work best for that buttery flavor. Look for freshly crushed crumbs in the baking aisle (pre-crushed is fine, but avoid stale packages). The cream cheese is non-negotiable: Philadelphia brand or a high-quality block version. Room temperature is key—it blends smoother and avoids lumps. For the chocolate chips, Ghirardelli or Nestlé Toll House are my go-tos, but any quality brand with at least 30% chocolate works. The dark chocolate for the ganache? 70% cocoa or higher gives that rich, bittersweet finish without overpowering.
No graham crackers? Digestive biscuits or vanilla wafers crushed to fine crumbs will work in a pinch. Running short on sour cream? Greek yogurt at half the amount adds tanginess. The vanilla extract can be swapped for vanilla bean paste if you’re feeling fancy—just reduce the amount to 1 teaspoon. For the chocolate chips, if you only have white chocolate, mix it with semisweet at a 1:2 ratio to balance flavors. The heavy whipping cream in the ganache can be replaced with coconut cream for a dairy-free option, though the texture will be slightly different. And if you’re out of flour, cornstarch works equally well for stabilizing the filling.
Prevent cracks by letting the cheesecake cool gradually—never open the oven door during baking. Once set, store it in the fridge for up to 5 days, covered tightly. For the ganache, keep the dark chocolate and cream separate until ready to use—microwave in 20-second bursts to melt gently. The cheesecake freezes beautifully for up to 3 months—wrap tightly in plastic and foil. Reheat slices in the microwave for 15 seconds to restore that creamy texture. And if you’re making ahead, assemble the crust and filling a day in advance—it develops deeper flavor overnight.
Why You’ll Love This Recipe
- No Crust Chaos: I’ll be real—crusts stress me out. This recipe skips the fuss entirely, letting the graham cracker crumbs and melted butter do all the work in a 6-inch pan. Five minutes of mixing, then straight into the oven while you sip coffee (or wine, no judgment).
- Rich Without the Hassle: That first bite? Cream cheese and eggs blend so smoothly, you’d swear it’s restaurant-quality. The chocolate chips melt just enough to create pockets of gooey heaven—no overmixing, no waiting for layers to set perfectly.
- Party in a Pan: Between us, this is my secret weapon for potlucks or last-minute gatherings. It serves 6-8, fits on any table, and people will ask for the recipe before dessert even hits the plate. (Spoiler: they’ll never guess it’s just a 6-inch pan.)
Step-by-step instructions for 6-Inch chocolate chip cheesecake
Here’s how to create a perfectly balanced cheesecake with a buttery crust and pockets of chocolate goodness.
👨🍳 Step 1: Prepare the Crust with Fine Texture
Preheat your oven to 325°F and position a rack in the lower third. Place a 6-inch springform pan on a baking sheet—this catches any spills during baking. In a food processor, pulse the 1.5 cups graham crackers until they become fine crumbs with no large pieces remaining. The texture should resemble sand.
Add the 0.5 cup melted unsalted butter and 0.25 cup granulated sugar to the processor and blend until the mixture is evenly moistened. Press this mixture firmly into the bottom of your prepared springform pan, creating an even layer. Use a glass to compact it thoroughly—this prevents cracking later. Bake the crust for 10 minutes to set it while you prepare the filling.
🍳 Step 2: Mix the Cheesecake Filling for Smooth Texture
While the crust bakes, reduce your oven temperature to 300°F. In a large mixing bowl, beat the 16 oz cream cheese and 0.5 cup sour cream together on medium speed until completely smooth and lump-free. This step is crucial—any lumps will remain in your finished cheesecake. Scrape down the sides of the bowl as needed.
Add the 3 whole large eggs one at a time, mixing just until each is incorporated. Then add the 1 tbsp vanilla extract, 1 tbsp all-purpose flour, and 0.25 tsp salt. Mix on low speed until just combined—overmixing incorporates air, which can cause cracks. Pour the filling over the pre-baked crust, spreading it evenly with a spatula.
🔥 Step 3: Bake the Cheesecake for Perfect Doneness
Place the cheesecake in the preheated 300°F oven and bake for 45-50 minutes. The center should be slightly jiggly when gently shaken—this indicates it’s perfectly set but still moist. The edges should be golden brown, but don’t worry if the center looks underdone. Remove from the oven and let it cool completely at room temperature, then refrigerate for at least 4 hours or overnight.
Here’s the thing—cooling slowly prevents cracks. I always let mine cool gradually on the counter before refrigerating. The contrast between hot oven and cold fridge creates stress that can cause the cheesecake to crack if rushed.
🥘 Step 4: Create the Chocolate Ganache and Swirl
While the cheesecake chills, prepare the chocolate topping. In a heatproof bowl, combine the 4 oz chopped dark chocolate and 0.25 cup heavy whipping cream. Place the bowl over a pot of simmering water (double boiler method) and stir until the chocolate melts completely and the mixture becomes smooth. Let it cool slightly until it reaches a pourable consistency.
Remove the cheesecake from the refrigerator and carefully pour the melted chocolate over the top. Using a knife, gently swirl the chocolate into the cheesecake filling, creating marbled patterns. For extra crunch, press the 1.5 cups semisweet chocolate chips into the top in a decorative pattern. Return to the refrigerator to set for at least 1 hour before serving.
⏰ Step 5: Serve with Confidence
Run a knife around the edge of the springform pan to loosen the cheesecake. Release the springform and slide the cheesecake onto a serving plate. The contrast of creamy cheesecake with the crunchy chocolate chips and smooth ganache makes every bite satisfying. Serve chilled with fresh berries or a dollop of whipped cream for an elegant presentation.
This cheesecake keeps well in the refrigerator for up to 5 days, though I find it’s best enjoyed within the first 3 days. The texture remains perfect—no soggy crust or grainy filling. The key to success is patience during cooling and baking at the correct temperatures.
Pro Tips For Making 6 Inch Chocolate Chip Cheesecake
- Preheat the Pan: Place your 6-inch springform pan in the oven while preheating—this guarantees the crust sets instantly when you pour in the filling. I learned this the hard way when my crust turned soggy because the pan was cold (yes, even if you’re impatient like me).
- Pulse Graham Crackers: Blend graham crackers into fine crumbs in a food processor—not a blender—until they resemble sand. Over-processing makes them oily, and under-processing leaves chunks that sink to the bottom of your crust.
- Room-Temp Cream Cheese: Let the cream cheese sit out for 2–3 hours before mixing—it blends smoother and avoids lumps. I was skeptical until I tried it; the batter is silkier, and the texture is actually lighter.
- Water Bath Timing: Wrap the pan in foil before adding water—this keeps the sides from steaming and cracking. Fill the bath halfway up the pan, and bake until the center jiggles just slightly (about 50–55 minutes at 325°F). Overbaking dries it out.
Serving suggestions for 6 inch chocolate chip cheesecake
Classic Presentation
Slice your cheesecake into 6 equal wedges using a sharp, hot knife—this ensures clean cuts. Arrange slices on a marble slab or slate board for an elegant touch. Garnish each piece with a few chopped toasted hazelnuts or a sprinkle of flaky sea salt to enhance the chocolate flavors.
Serve with a side of whipped cream or a scoop of vanilla ice cream for the ultimate indulgence. 🥮
Party Platter Style
For gatherings, create a visually stunning platter by arranging slices in a circular pattern on a wooden board. Add fresh raspberries or blackberries between slices to add color and acidity that cuts through the richness.
Drizzle with chocolate sauce and sprinkle with crushed peppermint candies for a festive touch. This presentation works beautifully for holidays or dessert parties.
Individual Portions
For a single serving, use a 6-inch round cake pan to create a mini cheesecake—this recipe scales perfectly. Serve in a chocolate-dipped glass or on a dessert plate with a dollop of whipped cream.
Top with a single chocolate chip and a mint leaf for a restaurant-worthy finish. This is perfect for romantic dinners or when you’re craving something special just for you.
Gift-Worthy Packaging
Wrap individual slices in parchment paper and tie with a ribbon for a thoughtful gift. Place in a gift box with a note or pair with a small bottle of chocolate syrup for dipping.
For a more elegant touch, use a clear plastic container with a lid to keep it fresh for gifting. This makes a fantastic hostess gift or treat for special occasions.
Dessert Course Pairings
Pair your cheesecake with a bold espresso or a glass of dessert wine like Port or Moscato to complement the chocolate flavors. For a lighter option, serve with sparkling water and lemon slices to cleanse the palate.
If you’re serving it as part of a larger dessert spread, include fruit tarts or macarons to balance the richness with contrasting textures.
Make-Ahead Serving
Assemble the cheesecake a day ahead and store it in the refrigerator. When ready to serve, let it sit at room temperature for 10-15 minutes so the slices are easier to cut.
This is especially helpful for busy hosts or when you want to enjoy it without last-minute stress. The flavors deepen overnight, making it even more delicious. 💫
Nutrition facts
Frequently asked questions
Why does my cheesecake crack even after following the recipe?
Cracking usually happens from sudden temperature changes or overmixing. Let the cheesecake cool gradually at room temperature before refrigerating—never place it straight from the oven into the fridge. Also, avoid opening the oven door during baking to prevent air currents. If cracks appear, cover them with extra chocolate ganache or whipped cream for a pretty finish!
Can I make this recipe without a springform pan?
Yes, but you’ll need to adapt. Use a 6-inch round cake pan with a removable bottom, or line a regular pan with parchment paper. Grease the sides well to prevent sticking. After baking, run a knife around the edges and carefully lift it out. The texture will be slightly different, but still delicious!
How do I adjust this for a 9-inch pan?
For a 9-inch pan, multiply all ingredients by 2.5x (about 2.5 times). Bake at 300°F for 50-60 minutes—the larger size needs extra time. The cooling time also increases to 6 hours or overnight. The texture will be the same, just in a larger portion!
Can I substitute cream cheese with something else?
For a lighter version, use Neufchâtel cheese (it’s lower in fat but still creamy). For a dairy-free option, try cashew cream** (soaked cashews blended with lemon juice) or dairy-free cream cheese. The texture will be slightly different, but still rich. Adjust sweetness if needed—Neufchâtel is milder than full-fat cream cheese.
How long can I store leftovers?
Store in an airtight container in the fridge for up to 5 days. For longer storage, freeze slices (wrapped tightly) for up to 3 months. Thaw overnight in the fridge—microwave reheating can make the texture grainy. The crust stays crispy, while the filling remains creamy when stored properly!
