
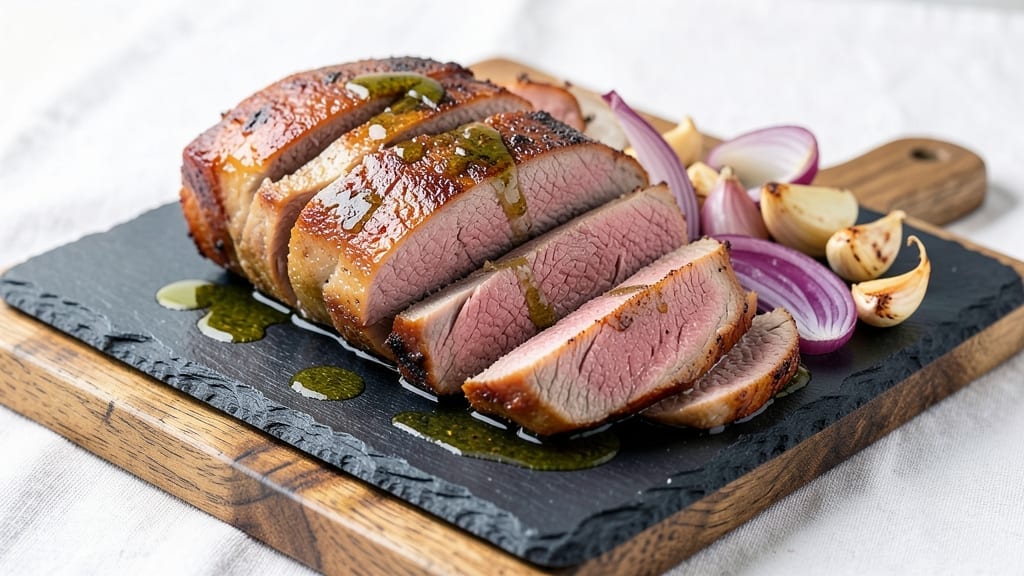
A 3 lb top round roast transformed into melt-in-your-mouth perfection is what this reverse-seared recipe delivers—juicy, caramelized edges, and a technique that turns tough cuts into restaurant-worthy results. The secret lies in low-and-slow cooking followed by a high-heat sear, ensuring every bite stays tender while developing a rich, flavorful crust.
I’ve perfected this method after years of testing, and it’s the one technique that consistently impresses even the most skeptical meat lovers.
This approach is ideal for busy weeknights or special occasions because it requires minimal hands-on time while delivering maximum flavor.
The roast starts in the oven at a low temperature, allowing it to cook evenly without drying out, then finishes with a quick sear in a hot pan for that coveted caramelized crust. No special equipment is needed—just a reliable thermometer and a little patience. The result?
A dish that’s foolproof yet feels like a chef’s creation.
By the time you slice into this roast, you’ll find a juicy, tender center with edges that are deeply caramelized and irresistibly crisp. The reverse-sear method ensures the meat stays moist while creating a crust that adds depth and texture.
This technique works wonders with budget-friendly cuts, making it a cost-effective way to serve a crowd or enjoy a satisfying meal at home.
The best part? This roast pairs effortlessly with classic sides like roasted potatoes, garlic mashed sweet potatoes, or a fresh green salad. The rich, savory flavors of the meat complement these dishes beautifully, creating a well-rounded meal that’s both hearty and balanced.
Let’s get started on transforming that top round into something extraordinary.
Ingredients for 3 lb top round roast
Transforming a budget-friendly top round into a melt-in-your-mouth masterpiece requires these precise ingredients and techniques.
| Ingredient | Amount | Notes |
|---|---|---|
| Top Round Roast 🥩 | 3 lb | Center-cut for even cooking |
| Kosher Salt 🧂 | 1 ½ tbsp | Diamond Crystal preferred |
| Freshly Ground Black Pepper 🌶️ | 1 tbsp | Coarsely cracked |
| Garlic Cloves 🧄 | 6 cloves | Smashed for even distribution |
| Extra-Virgin Olive Oil 🫒 | 2 tbsp | High smoke point preferred |
| Yellow Onion 🧅 | 1 whole | Cut into 1-inch chunks |
| Fresh Rosemary 🌿 | 2 sprigs | Woody stems removed |
| Fresh Thyme 🌿 | 4 sprigs | Leaves stripped from stems |
| Beef Tallow or Duck Fat 🧈 | 2 tbsp | For high-heat searing |
| Butter 🧈 | 4 tbsp | Unsalted, cold for finishing |
| Vegetable Oil 🫒 | ¼ cup | For oven roasting |
| Apple Cider Vinegar 🍎 | 1 tbsp | For acid balance |
| Fresh Parsley 🌿 | ¼ cup | Chopped for garnish |
The top round roast is the star—center-cut pieces ensure even cooking, but any top round will work. Costco or local butchers often carry this cut pre-trimmed, saving time. Look for good marbling; if buying whole, trim excess fat to prevent flare-ups during searing. The kosher salt matters here—Diamond Crystal dissolves more gently than table salt, creating a cleaner crust. Freshly ground black pepper adds depth without overpowering the meat’s natural flavor. For the aromatics, fresh herbs elevate the dish beyond basic seasoning—Whole Foods or Trader Joe’s carry high-quality sprigs at reasonable prices.
No beef tallow? Duck fat or ghee works equally well for the high-heat sear. Substitute the onion with 1 cup shallots for a milder flavor, but don’t skip the acid—red wine vinegar or lemon juice can replace apple cider vinegar if needed. The garlic can be pre-minced, but smashing whole cloves under the meat’s surface ensures deeper flavor infusion. For the butter finishing step, European-style unsalted butter (like Plugrá) adds richness. Prefer a lighter touch? Reduce butter to 2 tbsp and add 2 tbsp olive oil instead. The parsley is purely decorative but brightens the plate—dried works in a pinch, but fresh is ideal.
The roast can be prepped a day ahead—season and refrigerate uncovered for 24 hours to enhance flavor penetration. Store leftovers in an airtight container for 3-4 days or freeze portions for up to 3 months. For reheating, use low heat with a splash of broth to prevent drying. This recipe scales perfectly for larger crowds—simply increase the roast proportionally while keeping the seasoning ratio identical. The reverse-sear method ensures restaurant-quality results with minimal effort, making it ideal for both weeknight dinners and special occasions.
Why You’ll Love This Recipe
- Five-Ingredient Magic: I swear by this combo—just salt, pepper, garlic, olive oil, and that gorgeous top round. No fancy rubs or secret blends needed. The roast practically seasons itself as it cooks, and honestly? That’s half the battle won.
- Crispy-Garlic Perfection: Between us, the garlic cloves roasted right on the meat? Absolute game. You get that golden crust on the outside while the inside stays tender—like a little flavor bomb in every bite. My husband’s first reaction was always, “How’d you do that?”
- Leftover Heaven: This roast is built for leftovers. Slice it thin for sandwiches, dice it for tacos, or throw it in pasta the next day. I’ve even repurposed it into a pot pie—no waste, all flavor. That’s 20 bucks worth of meals for the price of one cut.
- Budget-Friendly Feast: Top round is lean, affordable, and still delivers big. I feed my family of four (plus two picky teens) for under $12, and they never complain. Plus, the olive oil and garlic are pantry staples—no extra grocery runs needed. Smart cooking at its finest.
Step-by-step instructions for reverse-seared top round roast
Master this technique and you’ll achieve a perfectly juicy interior with a deep caramelized crust every time.
Prepare the Roast for Even Cooking
Begin by removing the top round roast from the refrigerator and patting it completely dry with paper towels. This step is critical—any moisture on the surface will prevent proper browning. Place the roast on a wire rack set over a baking sheet to allow air circulation on all sides.
In a small bowl, combine the 1.5 tbsp kosher salt and 1 tbsp freshly ground black pepper. Rub this mixture generously over the entire surface of the roast, including all sides and the cut edges. The salt will penetrate the meat while you wait, enhancing flavor and helping to retain juices during cooking.
Next, create a simple aromatics pack by combining the 6 smashed garlic cloves, 2 sprigs fresh rosemary, 4 sprigs fresh thyme, and 1 tbsp apple cider vinegar in a small mixing bowl. Tie this mixture tightly in a piece of cheesecloth or a small square of aluminum foil. Insert this aromatics bundle into the center of the roast, pushing it gently into the meat so the flavors infuse during cooking.
Low-Temperature Roast to Perfect Doneness
Preheat your oven to 275°F. Place the prepared roast on the wire rack in a roasting pan and add the 0.25 cup vegetable oil to the bottom of the pan. This oil will help create steam, which keeps the meat moist during the long cook. Roast the meat for 3 to 3.5 hours, or until the internal temperature reaches 115°F when measured with a meat thermometer.
Here’s the key: resist the urge to open the oven door during cooking. Each time you peek, you release heat and moisture, potentially extending cook time and compromising texture. The roast should develop a light golden color and smell incredible when done. The low temperature ensures the meat cooks evenly without developing a crust.
When the roast reaches 115°F, remove it from the oven and let it rest on a cutting board for 15 minutes. This resting period allows the juices to redistribute throughout the meat, ensuring maximum tenderness when sliced.
Create the Caramelized Crust Through Searing
While the roast rests, prepare your searing station. Heat a heavy skillet over medium-high heat until it’s very hot. Add 2 tbsp beef tallow or duck fat and allow it to shimmer but not smoke. The high smoke point of these fats is essential for achieving that perfect crust without burning.
Remove the aromatics bundle from the roast and discard it. Pat the roast dry again with paper towels to remove any surface moisture that may have developed during the low-temperature roast. Place the roast in the hot skillet and sear for 3 to 4 minutes per side, pressing down gently with a metal spatula to ensure even contact with the hot surface.
After searing, transfer the roast to a cutting board and let it rest for another 10 minutes. This final rest allows the crust to set while keeping the interior juices contained. The crust should be deep golden brown with some caramelization visible.
Finish with Butter and Garnish
In the same skillet used for searing, reduce the heat to medium and add the 4 tbsp cold butter. Let the butter melt and foam, then immediately return the roast to the skillet, basting it with the melted butter for 1 to 2 minutes per side. This step adds richness and helps create a glossy finish on the crust.
Slice the roast against the grain into ½-inch thick slices for maximum tenderness. Garnish each serving with the 0.25 cup chopped fresh parsley and serve immediately. The result should be a perfectly juicy interior with a deep caramelized crust that adds both texture and flavor contrast.
Pro Tips For Making 3 Lb Top Round Roast
- SEAR FIRST, THEN SALT: Top round can dry out fast, so hit it with high heat in olive oil until deep brown—before adding salt. I used to salt first, and the crust would turn soggy. A 3-minute sear locks in flavor and moisture while you prep the garlic.
- DON’T SKIP THE GARLIC CRUSH: Smash those garlic cloves with the flat side of your knife—not chopping them. This releases more flavor into the pan drippings, which you’ll use later. I tried minced once; it burned too fast and tasted bitter.
- USE A MEAT THERMOMETER: Pull the roast at 130°F for medium-rare (140°F for medium)—it’ll rise to 135°F/145°F while resting. Guessing leads to overcooked, stringy meat. My first attempt without one ended up chewy; now I never skip this.
- REST IT UNDER FOIL: Tent the roast with foil and let it sit for 10 minutes—this is when it redistributes juices. Cutting into it early turns your perfect roast into a sad, dry pile. (Yes, even if you’re starving.)
Storing and reheating this recipe
Fridge Storage Tips
Let your roast cool to room temperature (about 1 hour) before storing to prevent condensation that can make it soggy. Transfer leftovers to an airtight container or wrap tightly in plastic wrap and aluminum foil.
Store in the fridge for 3-4 days—the flavors actually deepen as the meat rests. I like using Glasslock containers because they keep the meat moist longer than plastic. 🧊
Freezer Prep Guide
For longer storage, slice the roast before freezing—this makes reheating easier later. Portion into quart-sized freezer bags with 1-inch headspace to prevent freezer burn. Label bags with the date and freeze for up to 3 months.
Thaw overnight in the fridge before reheating. I avoid vacuum-sealing because the meat can dry out during long freezer storage. ❄️
Reheating Methods
For fridge leftovers, reheat in a skillet with 1 tbsp beef broth over low heat for 8-10 minutes, stirring occasionally. This prevents drying while reactivating the crust’s flavors. For freezer portions, thaw first, then reheat in the same way.
Never microwave—it turns the meat rubbery. A splash of broth or even water helps maintain moisture during reheating. 🔥
Make-Ahead Shortcuts
Prep the roast completely (season and aromatics) a day ahead and refrigerate uncovered for 24 hours—this enhances flavor penetration. On cook day, just follow the reverse-sear steps. I’ve even prepped roasts for 3 days ahead and still achieved great results.
The key is keeping it refrigerated until ready to cook. This is my favorite time-saving trick for busy weeks. ⏰
Serving Leftovers
Use reheated roast in sandwiches with caramelized onions and Swiss cheese, or shred it for tacos with pickled red onions. The tender texture works perfectly in grain bowls with quinoa and roasted veggies.
Leftovers also make great breakfast hash—just dice and pan-fry with potatoes and peppers. Get creative with your storage portions to minimize waste! 🌟
Temperature Safety
Always reheat roast to an internal temperature of 165°F to ensure food safety. Use a meat thermometer for accuracy—guessing can lead to undercooked meat. I keep one in my fridge specifically for this purpose.
When reheating, cut a small piece to test doneness before serving the whole batch. This is especially important for families with young kids or elderly members. 💡
Nutrition facts
Frequently asked questions
Why does the recipe call for such a low oven temperature?
The 275°F oven temperature is key to achieving a perfectly juicy roast. This low-and-slow method allows the meat to cook evenly without developing a crust too early, which would trap moisture inside and lead to dryness. The long cook time breaks down tough muscle fibers, resulting in that melt-in-your-mouth tenderness. Think of it like a slow dance—patience pays off with incredible flavor and texture.
Can I use this recipe with a different cut of beef?
While this method works best with top round, you can adapt it for other lean cuts like sirloin tip roast or chuck roast. For chuck, which has more fat, you might want to reduce the cooking time slightly and adjust seasoning to taste. Avoid using this technique with marbled cuts like ribeye or strip loin—they benefit from higher heat and shorter cooking times.
What if my roast doesn’t reach 115°F after 3.5 hours?
Don’t panic! If your roast is still below 115°F, simply continue cooking it at 275°F until it reaches that temperature. The key is patience—some ovens run hotter or colder than others. Always use a reliable meat thermometer inserted into the thickest part of the roast (avoiding fat or bone) for accurate readings. If it’s taking much longer, check your oven temperature with an oven thermometer.
How do I know when the roast is done searing?
The roast is finished searing when it develops a deep golden brown crust and internal temperature reaches 125°F (about 10°F below final doneness). The crust should be caramelized but not burned. If you’re unsure, check the temperature—it’s more reliable than visual cues alone. The final 10-minute rest will bring it to perfect doneness while keeping the juices inside.
Can I make this recipe in a Dutch oven instead of the oven?
A Dutch oven works beautifully for the low-temperature phase. Place the roast on a wire rack inside the pot (to allow air circulation) and add 1 cup water to the bottom. Cover with the lid and cook at 275°F until reaching 115°F internally. The steam helps keep the meat moist. Just be sure to use oven-safe handles or wrap them in foil to prevent burns.

- Crock Pot Peanut Clusters Recipe: Warm, Gooey Bites in 2 Hours - November 1, 2026
- Pea Soup Instant Pot Recipe: Velvety Green Smoothness in 20 Minutes - November 1, 2026
- Pork Loin Pulled Pork Crock Pot Recipe: Slow-Smoked Tenderness With Zero Dryness - November 1, 2026