
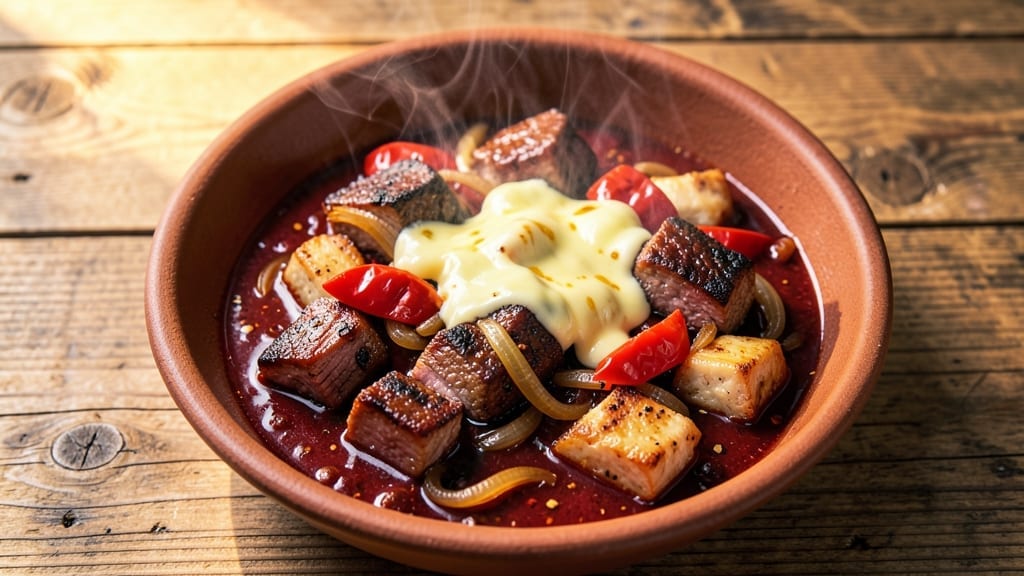
This 3-meat spicy chili recipe delivers restaurant-quality depth with a smoky, fiery kick that only improves overnight. The secret lies in slow-cooking three proteins—beef, pork, and chicken—until they melt into the broth, creating a texture that’s both hearty and velvety.
I’ve perfected the spice balance so the heat builds gradually, finishing with a satisfying warmth that lingers. What sets this chili apart is the layered approach: charring onions and garlic for smoky depth, blending chipotle powder for slow-release heat, and finishing with fresh cilantro for brightness.
The 3-meat combination ensures every spoonful delivers both richness and protein, while the long simmer develops flavors that taste even better the next day. This isn’t your average chili—it’s a bold, complex dish that stands up to cornbread, avocado, or a sprinkle of queso fresco.
The result is a chili with deep, caramelized edges on the meat and a sauce so rich it coats every bite.
The spices—cumin, smoked paprika, and cayenne—work together to create a heat that’s sharp but never overpowering, leaving room for the natural sweetness of the tomatoes and the savory depth of the broth.
This recipe is designed for weeknight dinners that feel like a celebration, with minimal prep and maximum flavor payoff.
Serve it with a side of crusty cornbread or fluffy rice to soak up every last drop of that smoky, spicy goodness. The chili’s versatility means it works for game day, family gatherings, or a cozy night in—just adjust the heat level to suit your crowd.
Once you taste this, you’ll never settle for a basic chili again.
Ingredients for 3 meat spicy chili
These bold ingredients create a chili so rich and smoky it tastes even better the next day.
| Ingredient | Amount | Notes |
|---|---|---|
| Chuck Roast 🥩 | 1 ½ lb | Cut into 1-inch cubes |
| Pork Shoulder 🐷 | 1 ½ lb | Cut into 1-inch cubes |
| Boneless Chicken Thighs 🍗 | 1 ½ lb | Skin-on preferred |
| Yellow Onions 🧅 | 2 whole | Chopped, charred |
| Garlic Cloves 🧄 | 6 cloves | Minced, charred |
| Canned Tomato Sauce 🍅 | 2 cups | San Marzano preferred |
| Chipotle Powder 🌶️ | 2 tbsp | For smoky heat |
| Ground Cumin 🌿 | 2 tsp | Toasted for depth |
| Smoked Paprika 🌶️ | 1 tbsp | For smoky flavor |
| Cayenne Pepper 🔥 | 1 tsp | Adjust for heat |
| Dried Oregano 🍃 | 1 tsp | Mexican preferred |
| Beef Broth 💧 | 3 cups | Low-sodium preferred |
| Fresh Cilantro 🌿 | ¼ cup | Chopped for garnish |
| Dark Brown Sugar 🍚 | 1 tbsp | Balances heat |
| Olive Oil 🫒 | 2 tbsp | For charring onions |
| Salt 🧂 | 1 ½ tsp | Kosher or sea salt |
| Black Pepper 🌶️ | 1 tsp | Freshly ground |
The meats are the heart of this chili. Chuck roast gives that classic beefy depth, while pork shoulder adds juiciness that holds up to long cooking. Chicken thighs (skin-on) keep it tender and flavorful. Costco or Walmart usually have these proteins pre-cut, saving you time. If you’re buying whole cuts, ask the butcher to cube them for you—it makes all the difference. Look for good marbling in the beef and pork, which means more flavor. The chicken should be plump and firm, not rubbery. For extra convenience, Trader Joe’s sells pre-cubed chuck roast that works perfectly here.
No chuck roast? Ground beef or stew beef works in a pinch, though the texture won’t be as tender. Pork shoulder can be swapped for pork ribs or ham hocks—just adjust cooking time. Chicken thighs can be breasts, but they’ll dry out faster. The chipotle powder is non-negotiable for that smoky heat, but if you can’t find it, smoked paprika plus a pinch of cayenne gets you close. For the tomatoes, San Marzano cans are worth the splurge—they’re sweeter and less acidic. If you’re using regular canned tomatoes, drain and rinse them well to cut down on excess liquid. The onions and garlic? Char them in a dry pan first—that smoky flavor is what makes this chili special.
This chili tastes even better the next day, so make it ahead if you can. Store it in the fridge for up to 5 days—the flavors meld beautifully over time. For freezing, portion it into 2-cup containers so you can thaw just what you need. It keeps for 3 months in the freezer. The cilantro wilts fast, so add it fresh when serving. If you’re prepping for a crowd, double the recipe—it reheats perfectly. Leftovers make amazing chili dogs or loaded baked potatoes, too.
Why You’ll Love This Recipe
- One-Pot Magic: I swear by this recipe because it’s actually one-pot—no chopping onions into oblivion or mincing garlic until my fingers hurt. Just dice the chuck roast, pork shoulder, and chicken thighs into bite-sized chunks (no fancy knife work), toss them in with the onions and garlic, and let the slow cooker or Dutch oven do the rest.
- Deep, Smoky Richness: Between us, this isn’t your basic chili. The chuck roast melts into tender shreds, the pork shoulder adds a buttery richness, and the chicken thighs stay juicy—all while that garlic and onion base builds layers of flavor that hit different. Honestly, the first time I made it, I nearly burned the kitchen waiting for it to cool down.
- Game for Any Gathering: This chili is my secret weapon for game nights, potlucks, or when my college-aged kids bring home friends. It’s hearty enough for a crowd but easy to double (or triple) without stress. Serve it with cornbread, over rice, or straight from the pot—no one judges.
- Budget-Friendly Leftovers: I buy these meats in bulk, and this recipe stretches them far—easily feeds six but tastes even better the next day. Between us, I’ve had it for breakfast (yes, with eggs), lunch, and dinner all in one week. The spices cost pennies, and the flavor? Still ridiculous.
Step-by-step instructions for 3-Meat spicy chili
Here’s how to build a chili so rich and spicy it’ll have your kitchen smelling amazing for hours.
Sear the Meats for Deep Flavor
Heat a large Dutch oven over medium-high heat and add 2 tablespoons olive oil. Working in batches, add the 1.5 lb chuck roast cut into 1-inch cubes and sear for 3-4 minutes per side until deeply browned. Transfer to a plate and repeat with the 1.5 lb pork shoulder and 1.5 lb boneless chicken thighs, skin-on if possible. This step is non-negotiable—browning the meat creates the Maillard reaction, which builds the chili’s deep, smoky foundation.
Once all the meats are browned, remove them from the pot and set aside. You’ll notice the pot has a dark, flavorful crust—this is the magic we’re after. Don’t wipe it clean; those browned bits will dissolve into the chili later, adding layers of flavor. Here’s the thing—if you skip this step, your chili will taste flat and one-dimensional. Trust the process.
Char the Aromatics for Smoky Depth
In the same Dutch oven, add the 2 whole yellow onions cut into chunks and cook over medium-high heat for 5-6 minutes, stirring occasionally, until they begin to char in spots. Add the 6 cloves garlic, minced, and cook for another 30 seconds until fragrant. The onions should be soft but still hold their shape, with a few blackened edges—this adds a smoky sweetness that balances the spice.
Real talk: If your onions burn before they soften, reduce the heat slightly. You want char, not ash. Once the aromatics are ready, sprinkle in the 2 tablespoons chipotle powder, 2 teaspoons ground cumin, 1 tablespoon smoked paprika, 1 teaspoon cayenne pepper, and 1 teaspoon dried oregano. Stir for 30 seconds to toast the spices and release their aromas—this step is what makes the chili taste complex, not just spicy.
Build the Chili Base
Pour in the 2 cups canned tomato sauce, scraping up any browned bits from the bottom of the pot. Add the 3 cups beef broth, 1 tablespoon dark brown sugar, 1.5 teaspoons salt, and 1 teaspoon black pepper. Stir well to combine, then return all the seared meats to the pot. Bring the mixture to a boil over high heat, then reduce the heat to low, cover, and let it simmer for 1 hour. This slow cook gives the meats time to tenderize and the flavors time to meld.
Here’s where it gets fun—the chili will start to thicken as it simmers. If it looks too thin after 1 hour, uncover it and simmer for another 15-20 minutes to reduce it to your desired consistency. You want a chili that coats the back of a spoon but isn’t gluey. Don’t rush this step; patience is key to a chili that tastes even better the next day.
Finish and Garnish
Once the chili has simmered for 1 hour and the meats are fork-tender, taste and adjust the seasoning. You might need a little more salt or cayenne to hit your preferred heat level. Stir in the 0.25 cup chopped fresh cilantro and let the chili sit off the heat for 5 minutes to allow the flavors to settle. The cilantro adds a bright, herbal note that cuts through the richness of the meats and spices.
Serve the chili hot, garnished with extra cilantro if you like. The flavors will continue to develop as it rests, so if you can, let it sit for 10-15 minutes before serving. This chili is perfect over rice, with cornbread, or even as a filling for tacos. The combination of tender meats, smoky spices, and tangy tomato sauce makes it a crowd-pleaser every time.
Pro Tips For Making 3 Meat Spicy Chili
- Brown the Meats Separately: Chuck and pork shoulder need a proper sear—don’t crowd the pan. Cut the chuck into 1.5-inch chunks and cook in batches over high heat until deeply browned. Chicken thighs can go in later with the onions; they don’t need the same crust but benefit from the rendered fat. I learned this the hard way—skipping this step means flavorless mush instead of rich, caramelized depth.
- Dice Onions Like Dice: Yellow onions should be cut into ¼-inch pieces—small enough to soften quickly but not so fine they turn to paste. If you’re in a rush, pulse them in a food processor, but don’t skip the final chop with a knife to even out the size. Uneven onions burn unevenly, and that’s when your chili starts tasting like sad, charred paper.
- Don’t Rush the Chicken: Chicken thighs go in last—after the beef and pork have broken down and the onions are translucent. They need just 5–7 minutes to cook through, not the 20+ you might think. Overcook them, and they’ll turn rubbery faster than you can say “spicy regret.” Pull them out early if they’re near done, then return them to warm through in the finished chili.
- Deglaze with Chili Liquor: After browning the meats, don’t just toss in water or broth—grab a bottle of chili liquor (like Cholula or Tabasco) or even a splash of hot sauce. It cuts through the fat, adds instant heat, and gives your chili a brighter, more complex flavor right from the start. Sounds weird, but it works: my chili went from “meh” to “bring it back” after this change.
Common mistakes when making great 3 meat spicy chili
Skipping the Sear
I can’t stress enough how critical the sear is for depth of flavor. If you skip browning the meats, your chili will taste flat and watery. The Maillard reaction from searing creates complex, savory notes that build the chili’s foundation.
Instead of rushing, take the extra 10-15 minutes to brown each batch—it’s worth it. 🔥
Overcrowding the Pot
Don’t add all the meat at once or your chili will steam instead of brown. Work in batches—2-3 lbs max at a time—to ensure each piece gets a proper crust.
Overcrowding also leads to uneven cooking, where some meats stay tough while others become mushy. Patience here prevents a sad, uneven texture.
Ignoring Charred Aromatics
The smoky depth from charred onions and garlic is what makes this chili special. If you cook them too gently, you’ll miss that caramelized sweetness that balances the heat.
Let them blacken slightly—just 20-30 seconds of charring transforms the flavor. Use a cast-iron skillet for best results; it retains heat better than stainless steel.
Rushing the Simmer
Chili needs time to develop—1 hour minimum is non-negotiable. If you rush it, the meats won’t tenderize properly, and the sauce will taste thin and underdeveloped.
Let it simmer uncovered for the last 15-20 minutes to thicken naturally. Skipping this step leads to a chili that’s more like a stew with no depth.
Underseasoning Early
Taste your chili before adding all the spices—especially salt. If you wait until the end, you might realize it’s bland and need to add extra salt, which can make the chili taste flat.
Start with half the salt and adjust gradually. The spices should complement, not overpower, the natural flavors of the meats and tomatoes.
Not Resting Before Serving
Letting the chili rest for 10-15 minutes after cooking allows the flavors to meld and the juices to redistribute. Skipping this step means serving a chili that’s still “cooking” in your bowl, leading to a less cohesive texture.
Trust me, the wait makes it worth it—every bite will be richer and more balanced. ✨
Nutrition facts
Frequently asked questions
Can I substitute any of the meats in this recipe?
Swap beef for ground lamb or Italian sausage (remove casing) for extra richness. Replace pork with bacon (chopped and cooked first) or ham hocks (simmered longer). For chicken, thighs work best—breasts dry out. Just adjust cooking time if using denser cuts like ham hocks.
How do I make this chili less spicy?
Reduce the cayenne pepper to ½ teaspoon and replace 1 teaspoon of chipotle powder with regular paprika. For extra mildness, stir in ½ cup sour cream or ½ cup tomato paste at the end. Always taste as you go—you can add more heat later if needed.
Can I make this chili in a slow cooker?
Yes! Brown the meats first, then transfer everything (except cilantro) to your slow cooker. Cook on low for 6-7 hours or high for 3-4 hours. The slow cooker method actually enhances the tenderness of the meats. Add cilantro fresh before serving to preserve its brightness.
What’s the best way to reheat leftovers?
Reheat gently in a pot over low heat with ¼ cup broth or water to prevent drying. For microwave reheating, cover with a damp paper towel and heat for 1-2 minutes at 50% power. Never reheat to a boil—this breaks down the meat texture. Stir occasionally for even heating.
How can I add more depth to the flavor?
Boost umami with 1 teaspoon fish sauce or ½ cup mushroom broth instead of beef broth. Add 1 tablespoon cocoa powder or ½ teaspoon liquid smoke for extra complexity. For smokiness, char ½ cup onion and 3 garlic cloves in a dry pan first and blend into the chili.

- 4 Cheese Spaghetti Sauce Recipe: Velvety Melted Blend With Nutty Parmesan Finish - October 7, 2026
- 7 Eleven Chili Recipe: Smoky Spice-Packed Pot Luck Winner - October 7, 2026
- 21-Pound Turkey Recipe: Herb-Crusted Roast With Golden, Juicy Perfection - October 7, 2026