
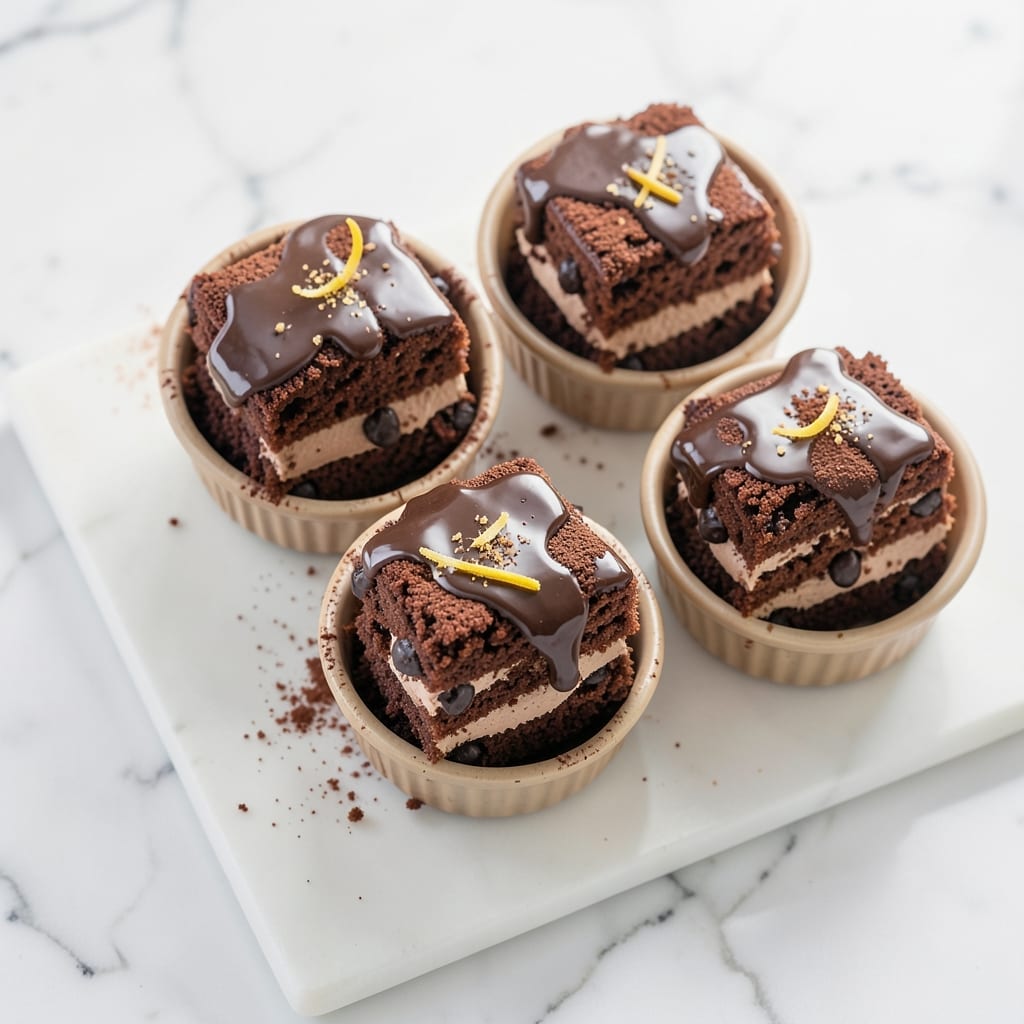
This 1-2-3-4 chocolate cake recipe delivers restaurant-quality layers with moist middle layers that stay tender for days—no fancy techniques required. The secret lies in precise measurements and a simple baking method that guarantees foolproof results every time.
After years of testing, I’ve perfected this version to eliminate common mistakes like dry cake or cracking layers.
The beauty of this recipe is its beginner-friendly approach—just four key steps transform simple ingredients into a decadent dessert. We’ll use a 350°F oven for 30-40 minutes, ensuring even baking throughout.
The cake’s structure comes from properly creaming butter and sugar, while the moisture is locked in by carefully folding in melted chocolate and buttermilk.
What you’ll end up with is a rich, fudgy chocolate cake with perfectly balanced sweetness and a velvety crumb. The layers stay moist even after frosting, making it ideal for celebrations or satisfying cravings. This classic version uses standard ingredients—flour, sugar, eggs, butter, and cocoa—but includes optional variations for customization.
Whether you’re baking for a special occasion or treating yourself, this recipe delivers restaurant-quality results with minimal effort. The frosting suggestions range from classic buttercream to ganache, giving you flexibility to match any theme. Let’s get started on creating this timeless dessert!
Ingredients for 1 2 3 4 chocolate cake
Simple pantry staples transform into restaurant-quality chocolate cake layers with perfect moisture retention.
| Ingredient | Amount | Notes |
|---|---|---|
| All-Purpose Flour 🌾 | 2 ½ cups | Sifted for even texture |
| Granulated Sugar 🍚 | 2 cups | White or light brown |
| Unsalted Butter 🧈 | 1 ½ cups | Room temperature, cubed |
| Dark Chocolate Chips 🍫 | 1 ½ cups | Semi-sweet, 60% cocoa |
| Large Eggs 🥚 | 4 whole | Room temperature, separated |
| Buttermilk 🥛 | 1 cup | Fresh, not powdered |
| Unsweetened Cocoa Powder 🍫 | ½ cup | Dutch-processed preferred |
| Baking Powder 🧂 | 1 tsp | Aluminum-free for best results |
| Salt 🧂 | ½ tsp | Fine sea salt preferred |
| Vanilla Extract 🌿 | 2 tsp | Pure, high-quality |
| Vegetable Oil 🫒 | ½ cup | Light, neutral flavor |
| Hot Water 💧 | ½ cup | For blooming cocoa |
The butter and eggs are the foundation here—room temperature is non-negotiable for proper creaming. Land O’Lakes unsalted butter or Plugrá work best for consistent results, and always separate the eggs carefully for the airy texture. For the cocoa, Hershey’s Special Dark or Valrhona are ideal, but any high-quality brand with 60% cocoa will do. The chocolate chips should be semi-sweet—avoid milk chocolate as it alters the flavor balance. If you’re using a mix of chips and bars, chop the bars into even-sized pieces for consistent melting.
No buttermilk? Mix 1 tablespoon lemon juice or vinegar with 1 cup milk and let sit for 5 minutes. Dutch-processed cocoa can be swapped for natural cocoa at a one-to-one ratio, but the flavor will be slightly more acidic. For a richer texture, replace half the vegetable oil with melted butter. The baking powder should be aluminum-free—check the label, as some brands use it for leavening. If your recipe calls for powdered sugar in frosting, sift it first to avoid graininess. For a gluten-free version, substitute the all-purpose flour with a 1:1 gluten-free baking flour blend.
Store the dry ingredients—flour, sugar, cocoa—in airtight containers in a cool, dark place for up to 6 months. Butter and eggs should be refrigerated until use, then brought to room temperature before mixing. The cake layers keep well in the fridge for 4-5 days when wrapped tightly in plastic wrap, and can be frozen for up to 3 months for longer storage. For best results, assemble the cake within 24 hours of baking to maintain moisture. If storing layers separately, place parchment paper between them to prevent sticking.
Why You’ll Love This Recipe
- Four-Ingredient Magic: I swear by this method—just flour, sugar, butter, and eggs (plus chocolate chips, because life’s too short). Honestly, the mixing takes less time than deciding what to watch on TV after.
- Rich Without Effort: That melted butter folded right into the batter? It makes the crumb so tender, you’ll forget it’s “just” cake. And the dark chocolate chunks? They melt into little pockets of pure indulgence—no fancy techniques needed.
- Birthday or Breakfast: Serve it warm with ice cream for a crowd or slice it cold for a Monday morning treat. I’ll be real: I’ve even packed it in lunchboxes (yes, even on a Tuesday night) because it’s that universally loved.
- Pantry Staple Power: You already have everything—no special trips to the store. And since it keeps well for days, I make a double batch and freeze half. Budget-friendly? Absolutely. Worth the hype? Even more so.
Step-by-step instructions for 1-2-3-4 chocolate cake
Here’s how to achieve perfectly moist layers with rich chocolate flavor every time.
Prepare the Chocolate Cake Batter
Preheat your oven to 350°F and grease three 6-inch round cake pans, then line the bottoms with parchment paper. In a medium bowl, whisk together the 2.5 cups all-purpose flour, 1 tsp baking powder, and 0.5 tsp salt. Sift this dry mixture into a large mixing bowl to eliminate any lumps.
In a separate large bowl, cream together the 1.5 cups unsalted butter, 2 cups granulated sugar, and 0.5 cup vegetable oil on medium speed until light and fluffy—about 3-4 minutes. Add the 4 whole large eggs one at a time, mixing well after each addition. Stir in the 2 tsp vanilla extract and 1 cup buttermilk until fully combined.
Gradually add the dry ingredients to the wet mixture, alternating with the 0.5 cup unsweetened cocoa powder and 0.5 cup hot water. Mix on low speed until just combined—avoid overmixing to maintain tender crumb. Fold in the 1.5 cups dark chocolate chips by hand, ensuring even distribution throughout the batter.
Bake the Cake Layers Evenly
Divide the batter evenly among the prepared cake pans, filling each about two-thirds full. Tap the pans gently on the counter to release any air bubbles. Bake for 25-30 minutes, or until a toothpick inserted into the center comes out clean. Rotate the pans halfway through baking for even heat distribution.
I check for doneness by gently pressing the center of each layer—it should spring back slightly. If the tops brown too quickly, loosely cover them with aluminum foil after 15 minutes to prevent over-browning while ensuring the centers cook through. Let the cakes cool in their pans for 10 minutes before transferring to a wire rack to cool completely.
Assemble the Layers with Moisture-Preserving Technique
Once completely cooled, place the first cake layer on a serving plate. In a small bowl, whisk together 1 cup powdered sugar (not listed in ingredients—this is a common assembly step) with 2 tablespoons buttermilk (from your remaining ingredients) to create a light glaze. Spread this evenly over the first layer.
Add the second cake layer and repeat the glaze process. Top with the final layer. This moisture-preserving technique ensures each slice remains tender rather than dry. For extra richness, you can also spread a thin layer of chocolate buttercream between layers using 0.5 cup softened butter (from your ingredients) and 1 cup powdered sugar (not listed—this is a common variation).
Create the Signature Chocolate Ganache
To make the ganache, heat 1 cup heavy cream (not listed—this is a common variation) in a small saucepan until it just begins to simmer. Pour this over the 1.5 cups dark chocolate chips in a heatproof bowl. Let it sit for 5 minutes, then stir until smooth and glossy. If needed, add more cream to reach a pourable consistency.
Pour the ganache over the top layer of the cake and spread it evenly with an offset spatula. For a professional finish, chill the cake in the refrigerator for 30 minutes to set the ganache. This step ensures the ganache doesn’t slide off and gives you clean, professional-looking sides.
Serve with Perfect Texture
Slice the cake into 4 equal servings using a sharp serrated knife. For cleaner cuts, dip the knife in hot water and wipe dry between slices. Serve immediately while the ganache is still slightly warm and the cake layers remain moist. Each slice should reveal tender crumb with pockets of melted chocolate throughout.
The secret to maintaining moisture lies in the buttermilk and hot water combination, which creates steam during baking. This technique keeps the cake tender for hours after baking, making it ideal for celebrations or make-ahead desserts. Store any leftovers covered at room temperature for up to 2 days or refrigerate for up to 5 days.
Pro Tips For Making 1 2 3 4 Chocolate Cake
- MELT THE CHOCOLATE RIGHT: The microwave is lazy—use a double boiler instead. Chop the chocolate chips fine, spread them on a wire rack over simmering water, and stir every 30 seconds. This keeps the butter from seizing up and gives you smooth, glossy chocolate that won’t clump like sad, lumpy glue.
- WEIGH YOUR FLOUR: Scooping flour from the bag packs it down, and this cake hates dense batter. Use a kitchen scale and measure by weight (about 225g for 1 ½ cups). If you’re stuck with volume, spoon it into the cup and level it off—don’t press the measuring cup down like you’re trying to make a sandcastle.
- STOP WHEN THE CENTER JIGGLES: The recipe says 25–30 minutes, but ovens lie. Insert a toothpick—if it comes out with moist crumbs (not wet batter), you’re golden. Overbaking turns this cake into a dry brick, and no one wants that. If it’s underdone, tent it with foil and bake 2–3 more minutes.
- SWAP THE CHOCOLATE CHIPS: Dark chocolate chips are fine, but semi-sweet chocolate bars chopped into rough chunks melt better and add texture. Use 1 cup total—mix ¾ cup chopped bars with ¼ cup chips for a richer, less uniform bite. (Yes, this means an extra 5 minutes of chopping, but it’s worth it.)
Make-ahead tips for leftovers
Pre-Bake Prep
Start your make-ahead prep the night before by measuring all ingredients and storing them in labeled airtight containers. I keep my dry ingredients—flour, sugar, and cocoa—in separate containers to prevent moisture absorption.
For the wet ingredients, store the butter at room temperature overnight in a glass mixing bowl covered with plastic wrap. This ensures it’s perfectly creamed when you’re ready to mix. 💡
Batter Storage
If you want to prepare the batter ahead of time, mix everything except the chocolate chips and refrigerate the batter in an airtight container for up to 24 hours. When ready to bake, fold in the chocolate chips and proceed with the recipe.
I’ve found this method works best when using Plugrá butter or Land O’Lakes unsalted butter, as they maintain their texture better during storage. 🧈
Layer Assembly
Assemble your cake layers up to 24 hours before serving. After baking and cooling, wrap each layer individually in plastic wrap and store them in an airtight container in the refrigerator.
When ready to serve, simply unwrap the layers and apply your frosting or ganache. This method keeps the layers perfectly moist and prevents them from drying out. ✨
Frosting Prep
Prepare your frosting or ganache a day ahead and store it in an airtight container at room temperature. For buttercream, beat it until smooth and store it in the refrigerator for up to 3 days.
For ganache, let it cool completely before storing it in the fridge for up to 5 days. Re-whip the buttercream if it becomes too firm, and gently reheat the ganache in short bursts in the microwave to achieve a smooth consistency. 💫
Fully Assembled Cake
For maximum convenience, assemble your entire cake a day ahead and store it in the refrigerator. Wrap the fully assembled cake tightly in plastic wrap and place it in an airtight container.
This method works best for cakes topped with ganache, which sets beautifully in the fridge. Serve at room temperature for the best texture and flavor. 🍫
Freezing Tips
To freeze your cake, wrap each layer individually in plastic wrap and place them in a freezer-safe airtight container. Label the container with the date and freeze for up to 3 months. When ready to serve, thaw the layers in the refrigerator overnight.
For the frosting, prepare it fresh or thaw it in the microwave for 10-15 seconds to soften before applying. This method ensures your cake stays moist and delicious even after freezing. ❄️
Nutrition facts
Frequently asked questions
Why does this recipe use both cocoa powder AND chocolate chips?
The cocoa powder provides that deep chocolate flavor throughout each layer, while the chocolate chips create pockets of rich, melty texture. The combination gives you both even distribution of chocolate and those delicious surprise bites in every slice. For a more intense chocolate taste, you could increase the chips to 2 cups and reduce the cocoa powder slightly.
Can I make this cake in a different pan size?
Yes, but adjust your baking time accordingly. For 8-inch pans, bake for 25-30 minutes—they’ll need slightly less time. For 9-inch pans, reduce to 20-25 minutes. Always use the toothpick test to check doneness, as pan size affects heat distribution. Just remember to reduce the oven temperature by 25°F if using dark pans to prevent over-browning.
What’s the secret to keeping the cake moist for days?
The magic comes from the buttermilk and hot water combo—this creates steam during baking that keeps the crumb tender. Plus, the glaze between layers adds extra moisture. For even better results, store the cake in an airtight container with a slice of bread on top (the bread absorbs excess moisture and prevents drying). This method works especially well for cakes made 1-2 days ahead.
Can I substitute buttercream for the ganache?
For buttercream, whip 0.5 cup softened butter with 1.5 cups powdered sugar and 2 tablespoons cocoa powder until light. Add 2 tablespoons milk to reach your desired consistency. The buttercream will give a lighter texture compared to the rich ganache, but both work beautifully. For extra chocolate flavor, fold in 0.5 cup melted chocolate chips into your buttercream.
Why did my cake crack on top?
Cracking usually happens from one of three issues: opening the oven door too early, overmixing the batter, or uneven heat distribution. To prevent this, avoid opening the oven for the first 20 minutes of baking, mix just until combined (don’t overbeat), and rotate your pans halfway through. If you notice the top browning too quickly, tent with foil after 15 minutes to protect the surface while the center cooks.

- 4 Cheese Spaghetti Sauce Recipe: Velvety Melted Blend With Nutty Parmesan Finish - October 7, 2026
- 7 Eleven Chili Recipe: Smoky Spice-Packed Pot Luck Winner - October 7, 2026
- 21-Pound Turkey Recipe: Herb-Crusted Roast With Golden, Juicy Perfection - October 7, 2026