
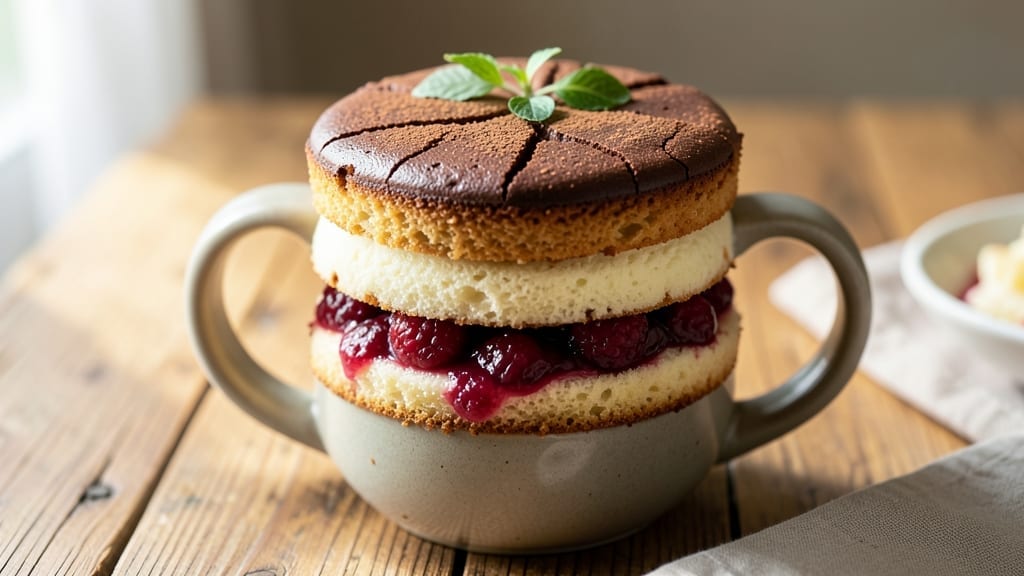
When you crave dessert but only have 60 seconds to satisfy it, these three foolproof mug cake recipes deliver restaurant-quality results without the mess. 💛 The beauty of mug cakes lies in their simplicity—just mix, microwave, and enjoy—but the magic happens in the variations, from rich chocolate to tangy red velvet, each designed for single-serving decadence.
What makes these recipes special is their versatility—no eggs or dairy needed, and each can be customized with mix-ins like chocolate chips, berries, or even a dollop of whipped cream.
Perfect for a quick treat, a last-minute dessert, or a fun baking project with kids, these mug cakes prove that convenience doesn’t mean sacrificing flavor.
The chocolate mug cake delivers deep, fudgy richness, the vanilla mug cake offers a light, buttery sweetness, and the red velvet mug cake brings a bold, tangy twist with cream cheese frosting.
Each recipe comes together in under 2 minutes of prep and 60 seconds in the microwave, making them ideal for satisfying cravings without the fuss.
Whether you’re hosting a party and need last-minute desserts or just want a guilt-free indulgence, these mug cakes are your answer. Let’s dive into the recipes—each one is designed to be your new go-to for single-serving dessert perfection.
Ingredients for 3 recipe mug cake
Three mug cakes, one microwave, endless possibilities—just these ingredients for decadent treats in 60 seconds.
| Ingredient | Amount | Notes |
|---|---|---|
| All-Purpose Flour 🌾 | ¼ cup | Sifted for light texture |
| Granulated Sugar 🍚 | ⅛ cup | White or light brown |
| Unsweetened Applesauce 🍎 | 0.06 cup | Egg replacement, unsweetened |
| Vanilla Extract 🌸 | 1 tsp | Pure, not imitation |
| Baking Powder 🍞 | ½ tsp | Aluminum-free preferred |
| Salt 🧂 | ¼ tsp | Fine sea salt preferred |
| Unsweetened Almond Milk 🥛 | 0.06 cup | Or any plant-based milk |
| Cocoa Powder 🍫 | 0.06 cup | Dutch-processed for smoothness |
| Espresso Powder ☕ | ½ tsp | Enhances chocolate flavor |
| Red Food Coloring 🎨 | ¼ tsp | Liquid or gel, for red velvet |
| White Vinegar 🍶 | ½ tsp | For tangy red velvet flavor |
| Cream Cheese Frosting 🧀 | ⅛ cup | Store-bought or homemade |
| Mini Chocolate Chips 🍫 | 0.06 cup | Optional mix-in |
| Fresh Blueberries 🫐 | 0.06 cup | Optional mix-in |
| Whipped Cream 🍦 | 0.06 cup | Optional garnish |
Flour is the backbone here, so grab the softest all-purpose you can find—King Arthur or Bob’s Red Mill are my go-tos. The cocoa powder makes all the difference in the chocolate version: Dutch-processed (like Hershey’s Special Dark) gives that velvety texture. For the red velvet, red food coloring is a must—liquid or gel works, but gel gives you more control. If you’re stocking up, Wilton gel colors are my favorite. The cream cheese frosting can be store-bought (like Philadelphia) or homemade—just whip softened cream cheese with powdered sugar and vanilla. Pro tip: microwave the cream cheese 10 seconds to soften before whipping.
No applesauce? Mashed banana or unsweetened applesauce from a tube works just as well—just adjust sweetness to taste. Vanilla extract is non-negotiable for the vanilla mug cake, but if you’re out, vanilla bean paste (like McCormick) is a great swap. For the red velvet, vinegar is key—apple cider vinegar adds depth if you’re feeling fancy. Chocolate chips and berries are optional but make it feel like a real treat. If you’re using frozen berries, thaw and drain them first—no one wants a soggy mug cake. And if you’re making all three at once, label your mugs—trust me on that one.
These keep for 3 days in the fridge if you’re planning ahead, but honestly? They’re best fresh out of the microwave. For leftovers, reheat 10-15 seconds to restore that gooey texture. The frosting adds 2 extra days of freshness if stored separately. Freeze the unfrosted cakes for up to 1 month—just microwave 20 seconds longer when reheating. And if you’re making these for kids (or a party), add sprinkles or crushed cookies for extra fun. The possibilities are endless, but the prep time? Still just 60 seconds.
Why You’ll Love This Recipe
- No Mixer Needed: I swear by this recipe—just stir three ingredients in a mug. The applesauce keeps it light and moist without extra effort, and the vanilla gives that cozy warmth in seconds. Honestly, it’s the kind of dessert that makes me feel like I’ve earned my lazy night.
- Sweet Spot Balance: That sugar-applesauce combo? It’s the secret. The applesauce softens the cake just right while the vanilla makes it taste like a bakery treat, not a microwave hack. (Yes, even on a Tuesday night.)
- Three Recipes, One Mug: Vanilla, chocolate, or even lemon—swap the flavorings and make all three in one sitting. I’ve done it for kids’ birthdays, book club snacks, and my own 10 PM cravings. The same base, endless possibilities.
- Zero Waste, Zero Guilt: Uses what you’ve got, no leftovers to stress over. The portions are perfect for one, so no sad half-eaten cake here. And between us? The applesauce stretches my baking budget without sacrificing taste.
Step-by-step instructions for 3 recipe mug cake
Here’s how to make three decadent mug cakes in minutes—each with its own unique flavor profile.
👨🍳 Step 1: Prepare Your Mixing Tools
Grab three microwave-safe mugs and measure out all your ingredients separately. I like to use a small bowl for the dry ingredients and another for the wet ones to keep things organized. Sift the 0.25 cup all-purpose flour and 0.5 tsp baking powder together in a bowl to remove any lumps—this ensures a light, airy texture in your cakes.
In another bowl, whisk together the 0.125 cup granulated sugar, 0.0625 cup unsweetened applesauce, 1 tsp vanilla extract, 0.0625 cup unsweetened almond milk, and 0.5 tsp white vinegar. This wet mixture should be smooth and well combined, with no visible streaks of flour. If you’re making red velvet, add the 0.25 tsp red food coloring and 0.5 tsp espresso powder to this wet mixture for that classic tangy flavor.
🍳 Step 2: Mix the Batter for Each Cake
For the chocolate mug cake, add 0.0625 cup cocoa powder to one mug. For the red velvet, add the prepared wet mixture with coloring and espresso powder to another mug. The third mug will be your vanilla cake—just add the plain wet mixture to it. Now, gradually sprinkle the dry ingredients over each mug, letting them fall into the center to avoid clumping.
Use a fork or small whisk to gently stir each mixture until just combined. You’re aiming for a smooth batter with no visible streaks of flour. Overmixing can make your cakes dense, so stir until the ingredients are barely incorporated. For the chocolate and red velvet versions, fold in 0.0625 cup mini chocolate chips or 0.0625 cup fresh blueberries if you’re adding mix-ins. This is where you can get creative—swap in berries, nuts, or even a sprinkle of cinnamon for different flavors.
🔥 Step 3: Microwave to Perfection
Place each mug in the microwave one at a time. Microwave the first mug on high for 60 seconds. You’ll know it’s done when the top springs up slightly and a toothpick inserted into the center comes out clean. If it’s not quite done, microwave for another 10-15 seconds. The cakes should be moist but not gummy—this is key for that perfect texture.
While the first cake is cooking, quickly mix the second mug’s batter and place it in the microwave. Repeat the process with the third mug. The beauty of mug cakes is that they cook in under a minute each, so you’ll have three delicious treats ready in no time. If you’re worried about uneven cooking, you can cover each mug loosely with a paper towel during the last 10 seconds of cooking to help them rise evenly.
🥘 Step 4: Top and Serve Immediately
Once all three cakes are done, let them sit for 10 seconds to cool slightly—this prevents the frosting from melting too quickly. Then, spread 0.125 cup cream cheese frosting evenly over each cake. I like to use a small offset spatula or even a butter knife for this. The frosting should be smooth and cover the entire surface of each cake.
For an extra touch, top each cake with a dollop of 0.0625 cup whipped cream or a few extra chocolate chips. Serve immediately while the cakes are warm and the frosting is still soft. These mug cakes are best enjoyed right away, so don’t wait—they’re the perfect single-serve dessert for satisfying that sweet tooth in seconds!
Pro Tips For Making 3 Recipe Mug Cake
- STIR UNTIL SMOOTH: Mix the batter until it’s completely free of flour streaks—even if it looks like overkill. I learned this the hard way when my first batch had dry spots that turned into a sad, dense center instead of a light, fluffy cake.
- MEASURE SUGAR RIGHT: Pack the granulated sugar into the measuring cup before leveling—it makes a real difference. Loose sugar means less sweetness and a denser texture, and nobody wants a dry mug cake when you’re craving something tender.
- DON’T OVERMIX: Stop stirring the second everything blends—overworking the batter introduces too much air, which collapses in the microwave and leaves you with a flat, gummy mess. Two quick swirls after adding vanilla is all you need.
- USE A MICROWAVE-SAFE MUG: A regular coffee mug can crack under the heat, and that’s a disaster waiting to happen. Grab a thick, microwave-safe ceramic mug—it heats evenly and keeps the cake from sticking to the sides like it’s glued there.
Make-ahead tips for 3 recipe mug cake
Prep Ahead Strategy
Measure and mix all dry ingredients in one bowl and wet ingredients in another the night before. Store them in airtight containers with labels—this cuts your morning prep time to just 2 minutes.
I keep the flour mixture in a sealed baggie and the wet ingredients in a small jar with a lid. This way, you only need to combine them when ready to bake. 💫
Freezer-Friendly Bases
Prepare the batter for each mug cake flavor and freeze it in individual portions. Use silicone muffin molds or small freezer bags, leaving 1 inch headspace for expansion. When cravings hit, thaw the batter at room temperature for 10 minutes, then microwave as directed.
This works especially well for the red velvet batter, which keeps its vibrant color even after freezing.
Frosting Prep
Make a batch of cream cheese frosting in advance and store it in an airtight container in the fridge for up to 5 days. I like to portion it into small containers with lids so I can grab exactly 0.125 cup per mug cake.
For extra convenience, keep whipped cream in a squeeze bottle—just a quick squeeze adds that restaurant-quality finish without extra effort. ❄️
Mix-Ins Ready
Pre-portion your mix-ins like chocolate chips, berries, or nuts into tiny containers or zip-top bags. This eliminates the guesswork when assembling your mug cakes. I keep mini chocolate chips in a 1-ounce portion cup and blueberries in a small ramekin—both are ready to fold in at a moment’s notice.
Store these in the fridge for up to 1 week or freeze for longer storage.
Mug Organization
Label three microwave-safe mugs with masking tape before prepping. Write the flavor and any mix-ins directly on the mugs so you can grab and go without confusion. I also keep a small bowl of flour nearby for quick dusting if needed.
This system ensures you can make all three mug cakes in under 3 minutes when the craving strikes. 🔥
Reheating Leftovers
If you bake ahead and store the mug cakes in the fridge, reheat them for 10-15 seconds in the microwave before adding fresh frosting. For a more even texture, cover the cake with a damp paper towel during reheating.
I find that adding a splash of almond milk (1 tsp) while reheating helps restore moisture if the cake has dried out slightly. This works for all three flavors equally. ✨
Nutrition facts
Frequently asked questions
Can I make these mug cakes without a microwave?
While microwaves are the fastest method, you can bake them in a 250°F (120°C) oven for 12-15 minutes in a greased ramekin. Use an oven thermometer to ensure accuracy—convection ovens may require 5-10 extra seconds per side. For even cooking, rotate the ramekin halfway through. The texture will be slightly denser than microwave versions.
How do I adjust these recipes for dietary restrictions?
For gluten-free versions, swap the all-purpose flour with a 1:1 gluten-free blend (like Bob’s Red Mill). Dairy-free? Use coconut milk instead of almond milk and omit the cream cheese frosting (try coconut whipped cream instead). Egg-free is already covered with applesauce! Always check labels on food coloring and chocolate chips for hidden allergens.
Why did my mug cake come out gummy instead of fluffy?
This usually happens from overmixing or undercooking. Stir the batter just until combined—lumps are fine! For microwave versions, check at 50 seconds and test with a toothpick. If it’s still gummy, add 5 more seconds and let it rest 30 seconds before serving. For oven-baked cakes, increase time by 2-3 minutes and check for doneness with a toothpick.
Can I make these mug cakes in advance?
Prepare the batter ahead and store it in the fridge for 24 hours or freeze for 1 month. For the best texture, microwave the batter directly from frozen for 90 seconds (add 15 seconds if your microwave is weak). Refrigerated batter needs 60 seconds as usual. The frosting should always be added fresh for the best texture.
What’s the best mug for mug cakes?
Use a 12-ounce microwave-safe ceramic mug with a handle for easy gripping. Avoid metal or glass—these can cause uneven cooking. The mug should be clean and dry to prevent sticking. For extra insurance, lightly grease with coconut oil or line with parchment paper strips. Dark-colored mugs may require 5-10 extra seconds of cooking time.

- 3 Layer Eggnog Cake Recipe: Spiced Rum-Infused Frosting and Boozy Swirls - October 6, 2026
- 1800 Ultimate Margarita Mix Recipe: Frozen or On-The-Rocks Versatility - October 6, 2026
- 3 Eggs and Cabbage Recipe: Savory Scramble With Crispy Edges - October 6, 2026