
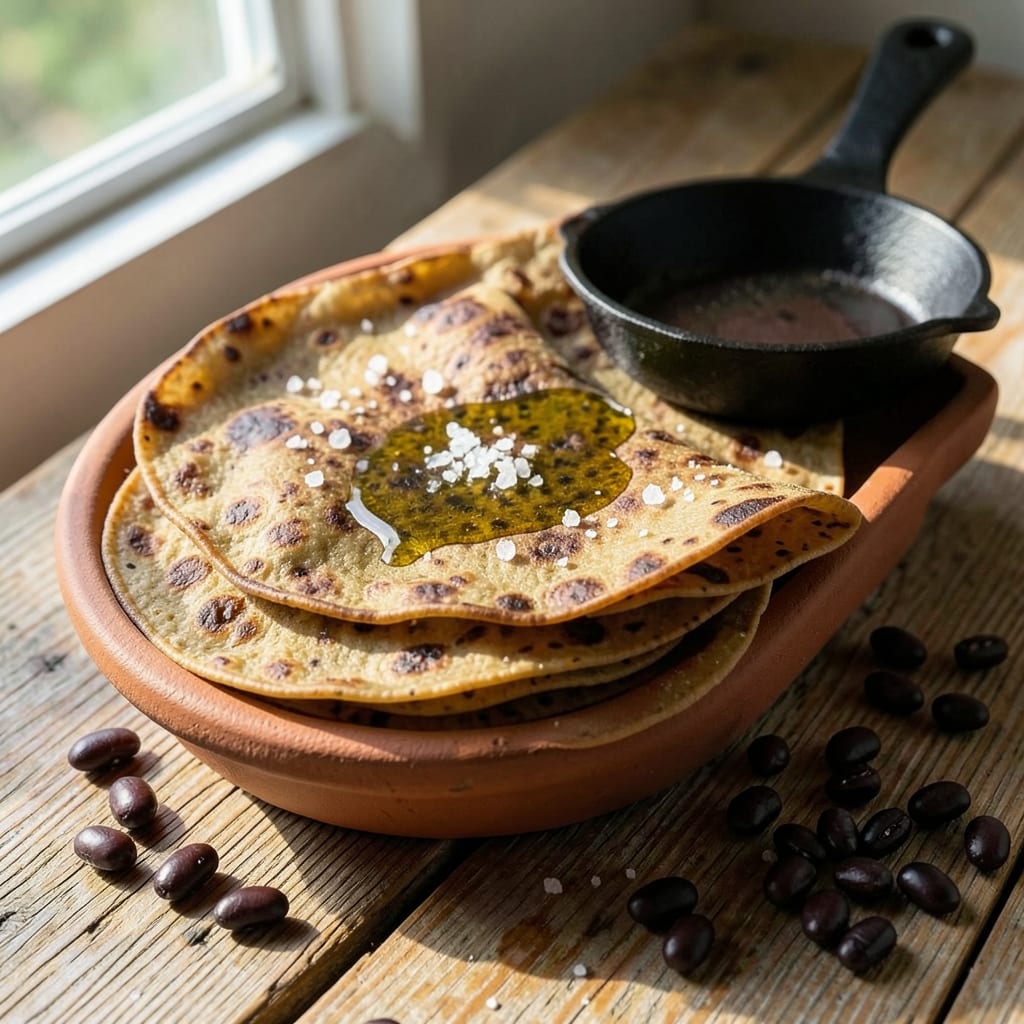
This 4-ingredient bean tortillas recipe delivers crispy, flexible wraps that rival store-bought—without the preservatives or cost. 🔥 The secret lies in blending canned beans with simple pantry staples, then cooking them in a dry skillet until golden and pliable.
I perfected this method after years of searching for a vegan tortilla that holds up to tacos, wraps, and even dipping—no fancy equipment required.
The beauty of these tortillas is their versatility and speed: 15 minutes from start to finish, with just mashed beans, flour, water, and a pinch of salt. The key to achieving that perfect crispy yet tender texture is cooking them low and slow in a dry pan, flipping only once.
They stay flexible enough to wrap fillings but sturdy enough to hold sauces without tearing—ideal for meal prep or spontaneous lunches.
What makes these tortillas truly special is their adaptability. Use them for breakfast burritos, taco nights, or even as a crispy base for nachos. The flavor is subtly earthy from the beans, with just enough neutral taste to complement any filling.
Once you try them, you’ll never buy store-bought again—they’re that good.
Best of all, they’re foolproof—no kneading, no resting, and no special skills needed. Whether you’re vegan, gluten-conscious, or just looking for a budget-friendly staple, these tortillas will become a weekly essential. Let’s get cooking!
Ingredients for 4 ingredient bean tortillas
Four ingredients, zero fuss—just pantry staples and a skillet for crispy, flexible tortillas.
| Ingredient | Amount | Notes |
|---|---|---|
| Canned Black Beans 🌿 | 15 oz | Drained and mashed smooth |
| All-Purpose Flour 🌾 | 1 ½ cups | Unbleached preferred for texture |
| Water 💧 | ½ cup | Room temperature |
| Sea Salt 🧂 | ½ tsp | Fine grain preferred |
Black beans are the secret weapon here. Canned black beans work perfectly (no need to soak), but make sure they’re not salted—those flavored varieties add weird aftertastes. Trader Joe’s or Whole Foods carry great organic options, but any store-brand canned beans will do. The key is mashing them smooth—no chunks—so your tortillas stay tender. If you’re using dried beans, soak them overnight and mash thoroughly. For texture, I always grab unbleached flour from the bulk section—it stays lighter than bleached versions.
No canned beans? Cooked lentils or chickpeas work in a pinch (about 1.5 cups drained), but they can make the tortillas denser. Swapping flour? Bread flour gives a chewier texture, while whole wheat flour makes them nuttier but slightly less crispy. The water should be room temp—cold water makes the dough tough. And if you’re gluten-free, white rice flour or a 1:1 gluten-free blend works (just add 1 tsp xanthan gum). The salt is non-negotiable—it’s what makes them crisp up properly in the pan.
These tortillas stay fresh for 3 days wrapped in a clean kitchen towel, but they’re best used fresh. For longer storage, freeze them between parchment paper for up to 3 months. To reheat, warm in a dry skillet for 30 seconds per side. Pro tip: stack them with parchment between each tortilla before freezing—they’ll stay crispy and separate. Make a double batch; you’ll want extras for tacos, wraps, or even crispy nacho chips.
Why You’ll Love This Recipe
- Pantry Magic: I’ll never buy store-bought tortillas again—just mash those canned beans with flour, water, and salt, then roll. No yeast, no waiting, no fancy skills. Honestly, I’ve made these while chatting on the phone.
- Earthy Crunch: That crispy edge when you fry them? Chef’s kiss. The black beans add this deep, nutty flavor that sticks with you, while the salt makes every bite feel intentional. Between us, they’re better than most flour-tortilla brands.
- Meal Prep MVP: Freeze half the batch and reheat in a dry pan—no soggy edges. I pack them for lunches, use them in breakfast burritos, or serve them at potlucks. They’re the quiet hero no one notices until they’re gone.
- Budget Flex: A can of beans and a bag of flour cost pennies. I’ve fed six people for under $5 with these, and they still taste like I slaved over them. (Yes, even on a Tuesday night.)
Step-by-step instructions for 4-Ingredient bean tortillas
Here’s how to make crispy, flexible wraps that rival store-bought—no fancy skills needed.
👨🍳 Step 1: Mash the Black Beans Thoroughly
Drain the 15 oz canned black beans completely, reserving ¼ cup of the liquid. Transfer the beans to a food processor and pulse until completely smooth—no lumps allowed. This is your base dough, so texture matters. I like to scrape down the sides with a rubber spatula to ensure even blending.
Add the reserved ¼ cup bean liquid back into the processor. This extra moisture helps create a flexible dough. If the mixture feels too dry, add 1 teaspoon water at a time until it reaches a thick, spreadable consistency. You want it to hold shape when pressed but still be workable—like playdough but for tortillas.
👨🍳 Step 2: Mix in Flour and Salt
Transfer the mashed beans to a medium bowl and gradually add the 1.5 cups all-purpose flour while stirring with a wooden spoon. You’ll need to work quickly—this dough comes together fast. Add the 0.5 teaspoon sea salt and the 0.5 cup room-temperature water all at once, mixing vigorously.
Here’s the thing—this dough should be slightly sticky but not wet. If it feels too dry, add 1 teaspoon water at a time. If it’s too sticky, sprinkle in 1 tablespoon flour until it forms a soft ball that doesn’t stick to your fingers. The goal is a dough that’s pliable but not gummy—you’ll know it’s right when you can press it into thin circles without tearing.
🍳 Step 3: Divide and Rest the Dough
Lightly flour a clean surface and turn out the dough. Using a bench scraper or sharp knife, divide it into 8 equal pieces (about 1.5 ounces each). Roll each piece into a ball and flatten slightly with your palm. This prevents cracking when you roll them out later.
Cover the dough balls with a damp towel or plastic wrap and let them rest for 10 minutes. This short rest relaxes the gluten, making them easier to roll out without tearing. I always set a timer—don’t skip this, or you’ll fight with stubborn dough. The kitchen will smell earthy and bean-y, which is totally normal and delicious.
🔥 Step 4: Roll Out and Cook to Crispy Perfection
Heat a dry skillet or griddle over medium-high heat. Roll one dough ball between your palms to flatten slightly, then use a rolling pin to press it into a 6-inch circle about ⅛-inch thick. I like to roll from the center outward, applying even pressure to maintain thickness.
Place the rolled tortilla in the hot skillet and cook for 1-2 minutes per side until golden brown spots appear and it releases easily from the pan. You’re aiming for crispy edges with a slightly softer center—this gives you that perfect balance of flexibility and crunch. If it browns too quickly, reduce heat slightly. Don’t press down with a spatula—let the heat work its magic.
⏰ Step 5: Stack and Serve Warm
Transfer the cooked tortillas to a clean kitchen towel to keep them warm. Repeat with remaining dough balls, working in batches to maintain heat in your pan. The tortillas will crisp up even more as they stack, developing that restaurant-quality texture.
Serve immediately with your favorite fillings—these tortillas hold up beautifully to everything from grilled meats to fresh salsas. The secret to their flexibility? The mashed beans create a natural binding agent that mimics traditional flour-and-water tortillas, but with extra protein and fiber. Store leftovers in an airtight container for up to 3 days, or freeze for 1 month—they reheat perfectly in a dry skillet.
Pro Tips For Making 4 Ingredient Bean Tortillas
- MASH BEANS THOROUGHLY: Skip the lazy approach of just smashing them with a fork—use the back of a spoon or a potato masher to break up the beans completely. You want them smooth but still with a bit of texture, not a paste. I learned this the hard way when my first batch turned out like gluey pancakes instead of pliable tortillas.
- SALT THE WATER FIRST: Toss the salt directly into the mixing water before adding the flour, not after. This guarantees even distribution, so you don’t end up with bland edges and salty centers. I used to add it later, and the flavor was always uneven—now my tortillas taste consistent every bite.
- REST THE DOUGH 20 MINUTES: Let the dough sit covered for at least 20 minutes before rolling. This relaxes the gluten just enough to prevent cracking when you stretch them. I was skeptical—”Why wait?”—but now my tortillas hold together like they’re supposed to, not falling apart when I flip them.
- USE A LITTLE LESS WATER: The recipe might call for a range, but start with the lower end and add sparingly. Too much water makes the dough sticky and hard to handle, while just enough keeps it workable and prevents soggy tortillas. I used to drown mine, and they’d either stick to the pan or turn out rubbery. Now I nail it every time.
Common mistakes when making this dish
Over-Mixing the Dough
I’ve seen so many beginners overwork this dough, thinking more mixing equals better texture—but that’s a fast track to tough, chewy tortillas. Once you’ve incorporated all the ingredients, mix just until combined.
The beans and flour create a delicate balance, and overmixing develops too much gluten, making the tortillas less flexible. Stop mixing when the dough forms a soft ball that doesn’t stick to your fingers. If it feels resistant, you’ve gone too far—start over with fresh dough. 💫
Skipping the Rest Time
That 10-minute rest might feel like a waste of time, but it’s non-negotiable for perfect results. Without it, the dough resists rolling and cracks easily. The rest allows the gluten to relax, making the tortillas smoother and more pliable.
Pro tip: Cover the dough with a damp towel to prevent drying out during the rest. If you’re in a rush, at least let it sit for 5 minutes—it’ll make a noticeable difference in texture.
Using the Wrong Heat Level
Too hot, and your tortillas burn before they crisp; too cool, and they turn out gummy. Medium-high heat is your sweet spot—hot enough to develop crispy edges in 1-2 minutes per side, but not so hot that they brown too quickly.
Watch for golden spots and the edges pulling away from the pan. If your tortilla browns too fast, reduce the heat slightly. A cast-iron skillet retains heat beautifully, but nonstick pans work too—just avoid nonstick sprays, which can make the tortillas soggy.
Not Pressing Evenly
Uneven thickness leads to uneven cooking—some parts crisp up while others stay doughy. Roll from the center outward, applying even pressure to maintain a ⅛-inch thickness throughout. If you’re struggling, use a rolling pin with a built-in guide or a 6-inch plate as a template.
Pressing too hard can tear the dough, so go gentle but firm. A well-rolled tortilla cooks consistently and holds its shape when filled.
Overcrowding the Pan
Cooking too many tortillas at once drops the pan’s temperature, leading to soggy, uneven results. Work in batches of 2-3 tortillas max, giving them space to crisp without steaming. A crowded pan traps moisture, which turns your crispy tortillas into sad, limp wraps.
Keep the heat steady between batches by letting the pan reheat for 30 seconds before adding the next round. Patience here pays off with perfect texture every time.
Ignoring the Bean Texture
The secret to these tortillas is smooth, lump-free beans. If your mashed beans have even tiny chunks, those spots won’t cook evenly and will stay chewy. Pulse them in a food processor until completely smooth—no lumps, no exceptions.
If you’re short on time, a potato masher works, but you’ll need to strain out any fibrous bits. The smoother the base, the better the final tortilla. Trust me, this step makes all the difference in flexibility and crispiness. 🔥
Nutrition facts
Frequently asked questions
Can I make these tortillas without a food processor?
Mash the beans with a fork or potato masher, then press the mixture through a fine-mesh strainer to remove any lumps. For extra smoothness, use the back of a spoon to work the beans against the strainer. The texture will be slightly less refined, but still perfectly usable for crispy tortillas. Just be extra careful when rolling to maintain even thickness.
How do I prevent the tortillas from cracking when rolling?
Keep your work surface lightly floured and avoid pressing too hard. Roll from the center outward using gentle but even pressure. If cracks appear, simply press them closed with your fingers or patch with a tiny bit of extra dough. The 10-minute rest before rolling is crucial—it relaxes the dough and makes it more pliable. If cracks persist, let the dough rest 5 extra minutes covered with a damp towel.
What’s the best way to store leftover bean tortillas?
For short-term storage, wrap them in a clean kitchen towel and place in an airtight container. They’ll stay fresh for 3 days at room temperature. For longer storage, freeze between parchment paper for up to 3 months. To reheat, warm in a dry skillet over medium heat for 20-30 seconds per side until crispy again. Never microwave—it makes them rubbery.
Can I use other types of beans instead of black beans?
Yes! Great Northern or pinto beans work well (mashed smooth), but avoid kidney beans—they’re too dense. For a nuttier flavor, try chickpeas (about 1.5 cups drained), but you may need to add 1 extra tablespoon water to the dough. The key is maintaining that smooth, spreadable consistency. Never use canned refried beans—they contain oil and spices that alter the texture dramatically.
Why are my tortillas too thick in the center?
This usually happens from uneven rolling or insufficient heat. Roll each tortilla to exactly ⅛-inch thickness using a rolling pin with guides or a 6-inch plate as a template. For cooking, ensure your pan is properly heated to medium-high heat—if it’s too cool, the center won’t crisp up. Work in small batches (2-3 tortillas max) to maintain consistent heat. If needed, increase heat slightly for the next batch.

- 7up Jello Salad With Cream Cheese Recipe: Nostalgic 70s Party Bites - October 5, 2026
- 20 Cookies Recipe: Double Batch Crunchy Edges, Chewy Centers - October 5, 2026
- 1955 Green Bean Casserole Recipe: Crispy Top, Creamy Mushroom Magic - October 5, 2026