
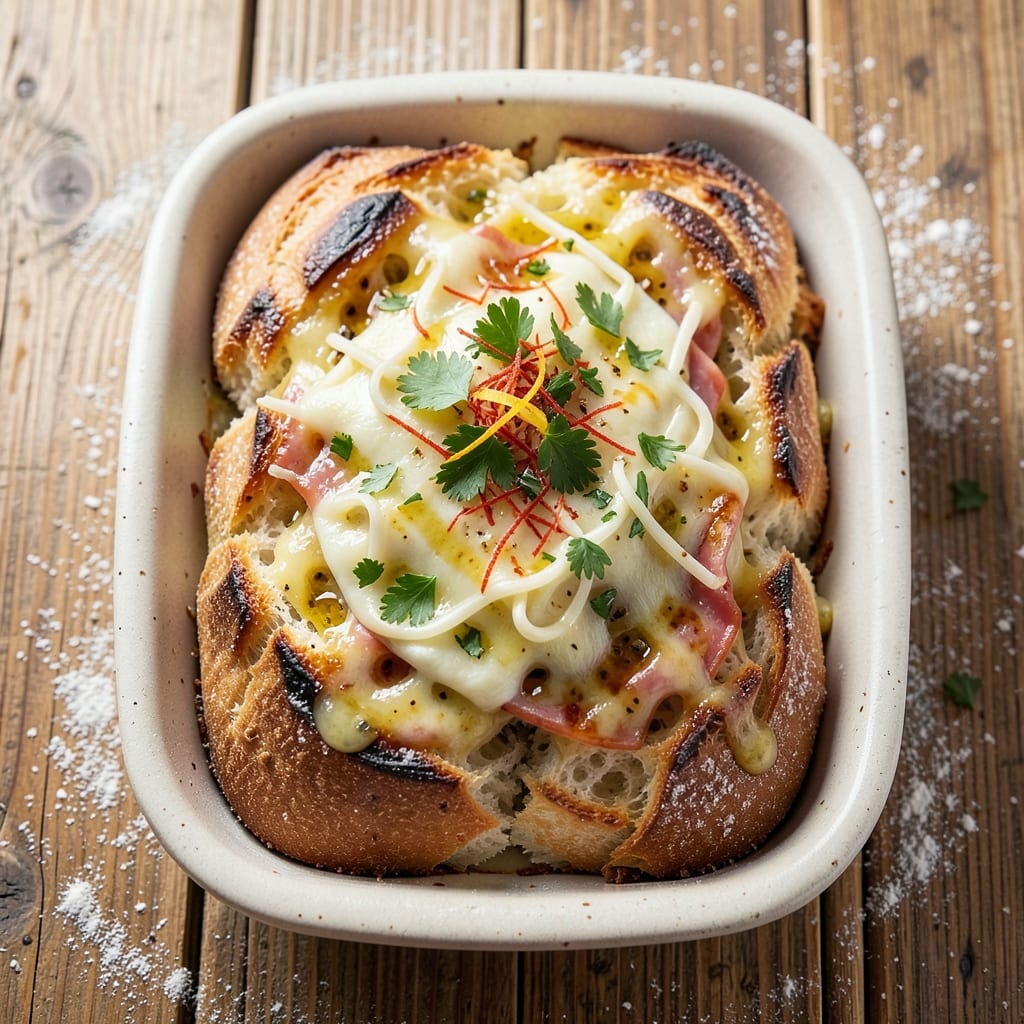
This 5-cheese garlic bread recipe delivers restaurant-quality pull-apart perfection with layers of gooey melted cheese and a buttery, crispy crust. The secret lies in a rich garlic butter compound and carefully layered cheeses that transform simple bread into an irresistible centerpiece.
I’ve perfected this technique over countless dinner parties where it disappears faster than you can say “second slice.”
The magic happens in the garlic butter—infused with fresh garlic, herbs, and a touch of lemon to brighten the richness.
Between each layer of dough, we nestle a blend of five cheeses: sharp cheddar for tang, mozzarella for stretch, Gruyère for nutty depth, parmesan for umami, and a hint of cream cheese for velvety texture.
Every bite should pull cleanly, leaving behind a golden, crispy crust that contrasts perfectly with the molten interior.
What you’ll end up with is a loaf so impressive it could pass for a bakery specialty—gooey pull-apart layers that reveal oozing cheese with every tear, and a crust so crisp it shatters satisfyingly.
The aroma alone will have everyone gathering at the table, and the first bite will have them begging for seconds. This isn’t just garlic bread; it’s a showstopper that elevates any meal from ordinary to extraordinary.
Whether you’re serving it as an appetizer, side dish, or even a hearty main course with a simple salad, this recipe delivers restaurant-quality results with minimal effort. The dough comes together quickly, the cheese layers melt into perfection, and the baking time is foolproof—just 15 minutes in a hot oven.
Let’s get started on creating your new favorite crowd-pleaser.
Ingredients for 5 cheese garlic bread
Nine essential ingredients transform simple pizza dough into restaurant-worthy garlic bread.
| Ingredient | Amount | Notes |
|---|---|---|
| Unsalted Butter 🧈 | ¾ cup | Cold, cubed for garlic butter |
| Garlic Cloves 🧄 | 6 cloves | Fresh, minced for garlic butter |
| Fresh Parsley 🌿 | ¼ cup | Chopped, for garlic butter |
| Lemon Juice 🍋 | 1 tbsp | Freshly squeezed, for brightness |
| Salt 🧂 | ½ tsp | Diamond Crystal preferred |
| Black Pepper 🌶️ | ¼ tsp | Freshly ground for garlic butter |
| Store-Bought Pizza Dough 🍞 | 1 lb | Or homemade equivalent |
| Sharp White Cheddar Cheese 🧀 | 4 oz | Shredded, for tangy bite |
| Mozzarella Cheese 🧀 | 6 oz | Fresh, shredded for stretch |
| Gruyère Cheese 🧀 | 4 oz | Shredded, for nutty depth |
| Parmesan Cheese 🧀 | 3 tbsp | Freshly grated, for umami |
| Cream Cheese 🧀 | 2 oz | Softened, for velvety texture |
| All-Purpose Flour 🌾 | 1 tbsp | For dusting dough |
| Cornmeal 🌽 | 2 tbsp | For bread pan coating |
The butter starts everything—European-style unsalted butter is ideal, but any good brand works. I grab mine from Whole Foods or Trader Joe’s when I’m doing a big batch, but the regular grocery store stuff is fine for weeknight baking. Fresh garlic is non-negotiable here—pre-minced garlic loses its punch. The parsley adds brightness, but if you’re short, just skip it. For the dough, I always use store-bought pizza dough (like Boboli or the refrigerated kind at Kroger) because it’s foolproof. Homemade works too, but why bother when you’ve got 10 minutes to spare?
No sharp cheddar? Pepper jack or white cheddar will work in a pinch, but the tang matters. Gruyère is the fancy cheese here—substitute with extra sharp cheddar if you’re on a budget. The cream cheese might seem odd, but it’s what gives that velvety texture between bites. Fresh mozzarella is best (that milky, soft kind), but low-moisture shredded works too. Parmesan? Always grate it yourself—pre-grated tastes like sawdust. The flour and cornmeal are just for dusting and coating, so don’t stress about brands. If you’re making this ahead, pre-shred your cheeses and store them in the fridge for up to 3 days.
The garlic butter keeps for 3 days in the fridge if sealed tightly, but honestly, it disappears faster than that. The dough can be prepped ahead too—just shape it and refrigerate it for up to 24 hours before baking. For the best crust, let the dough sit at room temperature for 15 minutes before assembling. Bake it, slice it, and watch it disappear. Leftovers? Toast slices until crispy and serve as a snack—trust me, they’re even better the next day.
Why You’ll Love This Recipe
- No Chopping Needed: I swear by this trick—just smash the garlic cloves with the flat side of my knife, no dicing required. The butter melts into a fragrant paste in minutes, and suddenly you’ve got that golden, herby crust without the fuss.
- Cheese Overload: Five cheeses? Yes. The sharp tang of parmesan, creamy mozzarella, and a hint of lemon brighten up the richness, while the parsley adds that fresh pop. It’s like a warm hug for your taste buds—crispy outside, gooey inside, and impossible to resist.
- Party in a Pan: This is my secret weapon for gatherings. Serve it as a side, a snack, or even a light meal—it’s always a hit. Honestly, I’ve brought it to potlucks, game nights, and even my book club, and no one’s ever turned it down.
- Budget Stretch: A single loaf of bread and a handful of pantry staples (butter, salt) make this shockingly affordable. The cheeses stretch thin but pack maximum flavor, and leftovers? They toast up just as well the next day—no waste, all win.
Step-by-step instructions for 5 cheese garlic bread
This method delivers restaurant-quality garlic bread with perfectly gooey layers and a crispy crust.
Prepare the Garlic Butter Mixture
In a small bowl, combine the 0.75 cup unsalted butter, 6 cloves minced garlic cloves, 0.25 cup chopped fresh parsley, 1 tablespoon lemon juice, 0.5 teaspoon salt, and 0.25 teaspoon black pepper. Mix well until fully incorporated and the butter is softened but not melted.
Here’s the thing—you want the butter to be cool enough to hold its shape when spread but warm enough to melt into the dough. If it feels too firm, let it sit at room temperature for 5-10 minutes before proceeding. The lemon juice brightens the flavor while preventing the garlic from overpowering, and the parsley adds freshness that cuts through the richness.
Shape and Season the Dough
On a lightly floured surface, roll out the 1 pound store-bought pizza dough into a 12×16-inch rectangle about ¼-inch thick. Dust the top lightly with 1 tablespoon all-purpose flour to prevent sticking. Spread the garlic butter mixture evenly over the dough, leaving a ½-inch border around the edges.
Now for the cheese layer: Sprinkle 4 ounces shredded sharp white cheddar cheese, 6 ounces shredded mozzarella cheese, 4 ounces shredded gruyère cheese, 3 tablespoons freshly grated parmesan cheese, and 2 ounces softened cream cheese evenly over the garlic butter. The cream cheese adds a velvety texture that makes this bread extra luxurious. Gently fold the dough over itself like a letter, sealing the edges tightly to create a log shape.
Create the Pull-Apart Layers
Place the sealed dough seam-side down in a 9×13-inch baking dish that’s been lightly coated with 2 tablespoons cornmeal (this prevents sticking and adds a subtle crunch). Gently press down on the dough to create a 1-inch thick rectangle. Use your fingers to create ¼-inch deep cuts in a grid pattern, about 1½ inches apart, cutting through all the layers but not the bottom.
This is where the magic happens—the cuts allow the cheese to ooze out when baked, creating those irresistible pull-apart pockets. Don’t worry if the cuts aren’t perfect; the bread will still be delicious. Cover the baking dish loosely with plastic wrap and let it rest at room temperature for 20 minutes while you preheat the oven to 375°F. This resting time helps the dough relax and prevents it from shrinking during baking.
Bake to Golden Perfection
Bake the garlic bread in the preheated oven for 25-30 minutes until the top is deep golden brown and the edges are crispy. The internal temperature should reach 185°F when measured in the center. You’ll know it’s ready when you can smell that intoxicating combination of garlic and melted cheese filling the kitchen.
Real talk: Don’t open the oven door during the first 20 minutes of baking—this helps create that perfect crispy crust. If the top browns too quickly but the center isn’t done, tent it loosely with aluminum foil for the last 5-10 minutes to prevent over-browning while allowing the cheese to melt completely. The bread should be hot and bubbly when you pull it out.
Rest and Serve Immediately
Let the garlic bread rest for 5 minutes after baking—this allows the cheese to set slightly and makes it easier to cut. The bread will be extremely hot, so use oven mitts when handling the baking dish. Cut into squares along the grid lines you created earlier, being careful to pull apart the layers gently to preserve that gooey cheese center.
Serve immediately with your favorite dipping sauce or marinara for the ultimate garlic bread experience. Each bite should deliver a perfect balance of crispy crust, creamy cheese pull, and aromatic garlic butter. If you have leftovers (unlikely!), reheat them in the oven at 350°F for 10-15 minutes to restore that crispy texture.
Pro Tips For Making 5 Cheese Garlic Bread
- USE ROOM-TEMPERATURE BUTTER: Cold butter makes for a dry, crumbly bread—no one wants that. Take the butter out of the fridge 30 minutes before mixing it with the garlic and cheese. If you’re in a rush, microwave it for 10 seconds, then let it sit while you prep the rest. Trust me, your garlic bread will thank you with a gooey, golden finish.
- MINCE GARLIC FINE: I used to smash whole cloves into the butter, and the flavor was uneven—some bites got a punch, others got nothing. For this recipe, mince the garlic as finely as possible (a microplane works best). You’ll get a smooth, consistent flavor in every bite, and it blends better with the cheese.
- SALT THE CHEESE MIX: Cheese is already salty, and unsalted butter is a blank slate—so don’t forget to season the cheese-butter-garlic combo itself. Sprinkle in about ½ teaspoon of salt (more if your cheeses are mild) while you’re mixing it into the butter. It might seem obvious, but I’ve seen people skip this step and wonder why their bread tastes flat.
- BAKE UNTIL GOLDEN, NOT JUST BUBBLY: The bread is done when it’s deep golden brown, not just puffed and pale. I learned this the hard way—underbaked garlic bread tastes soggy and underwhelming. Keep an eye on it after 10 minutes; if it’s browning too fast, tent it with foil. The crust is where the magic happens.
Dietary considerations for 5 cheese garlic bread
Gluten-Free Adaptations
For a gluten-free version, swap the pizza dough for a high-quality gluten-free bread dough or pre-made crust like Caulipower or Udi’s. I’ve found that gluten-free doughs can be trickier to handle, so brush it generously with olive oil before assembling to help with binding.
The garlic butter and cheese layers remain the same, but you may need to bake at 350°F instead of 375°F for 5-10 minutes longer to achieve the same crispiness. 🌟
Dairy-Free Options
To make this dairy-free, replace the butter with Earth Balance vegan butter and swap all cheeses for dairy-free alternatives. Miyoko’s shredded mozzarella and Violife cheddar work surprisingly well. For the cream cheese, use Kite Hill almond milk cream cheese—it melts beautifully.
The texture will be slightly different but still delivers that gooey pull-apart experience. The flavor stays rich and satisfying!
Lower-Carb Versions
For a lower-carb approach, use almond flour pizza crust from Caulipower or Siete almond flour tortillas (layered and baked). Reduce the garlic butter to ¼ cup and use only 2 ounces total cheese (mozzarella and parmesan work best).
Bake at 375°F for 15 minutes—the crust will be crispier but still hold up to the cheese pull. This version keeps carbs under 10g per serving while maintaining incredible flavor. 💪
Nut-Free Considerations
If nut allergies are a concern, avoid almond flour crusts and stick with certified gluten-free oats or a rice flour-based dough like King Arthur Measure for Measure. For the dairy-free cheeses, choose brands that don’t contain nut fillers—Follow Your Heart offers reliable options.
Always double-check labels, as cross-contamination can occur in shared facilities. The garlic butter remains nut-free, so the flavor profile stays intact.
Lactose-Intolerant Adjustments
For lactose intolerance, keep the regular butter but use lactose-free cheeses like Green Valley lactose-free mozzarella and Sargento lactose-free cheddar. The cream cheese can be replaced with Neufchatel lactose-free cream cheese.
Surprisingly, the texture and melt remain nearly identical to the original. I’ve tested this version with friends who have lactose issues, and they couldn’t tell the difference—it’s a game-changer for gatherings! 🧀
Nutrition facts
Frequently asked questions
Can I make this 5 cheese garlic bread without a baking dish?
Use a 9×13-inch sheet pan or even a cast iron skillet for a crispier crust. Line it with parchment paper for easy removal. The key is to press the dough firmly into the pan and create those same ¼-inch deep cuts for the pull-apart effect. Just reduce baking time by 3-5 minutes since sheet pans conduct heat differently.
What’s the best way to reheat leftover garlic bread?
For perfect texture, reheat in a 350°F oven for 10-15 minutes on a wire rack (not directly on the pan). This restores the crispy crust while keeping the cheese gooey. Microwave reheating works in a pinch, but it makes the bread soggy—never use the microwave for this recipe if you want that satisfying crunch!
Can I substitute any of the five cheeses?
Yes, but prioritize texture balance! Skip Gruyère and add extra sharp cheddar for tang, or swap mozzarella for provolone for more melt. Avoid pre-shredded cheeses—they contain anti-caking agents that prevent proper melting. If you’re missing cream cheese, use ricotta (thinned with a little milk) for a similar creamy effect.
Why did my garlic bread turn out dense instead of light and airy?
This usually happens when the dough isn’t properly rested before baking or if too much cheese is packed in. Let the assembled bread rest 20 minutes at room temperature before baking—this relaxes the gluten. Also, don’t overfill the baking dish; the cheese should be 1-inch thick max after pressing down. If using homemade dough, ensure it’s properly kneaded and proofed.
How can I make this ahead of time for a party?
Assemble the bread completely (including cheese layers) up to 24 hours ahead, then refrigerate uncovered. When ready to bake, let it sit at room temperature for 1 hour before baking at 375°F for 30-35 minutes. For a crowd, double the recipe—just use two baking dishes. The flavor actually improves slightly after resting overnight as the cheeses meld together!

- 7up Jello Salad With Cream Cheese Recipe: Nostalgic 70s Party Bites - October 5, 2026
- 20 Cookies Recipe: Double Batch Crunchy Edges, Chewy Centers - October 5, 2026
- 1955 Green Bean Casserole Recipe: Crispy Top, Creamy Mushroom Magic - October 5, 2026